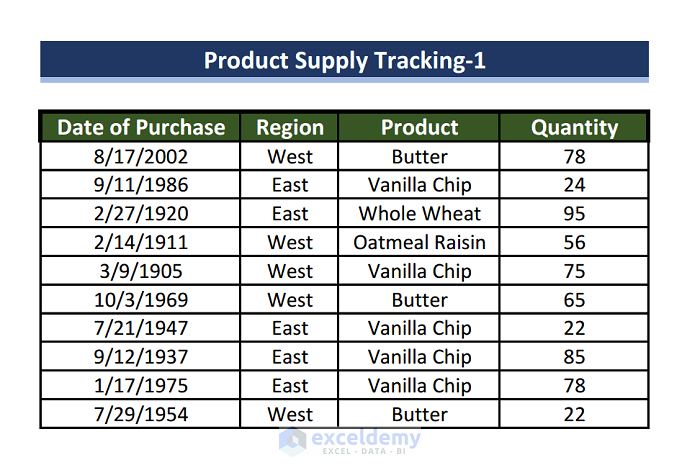
For the demonstration purpose, we are going to convert the below PDF file to an Excel worksheet to keep the major formatting intact. In the PDF we have the Date of Purchase, Region, Product, and Quantity as the table header.
Method 1 – Using Power Query
Steps
- Open an empty Excel worksheet.
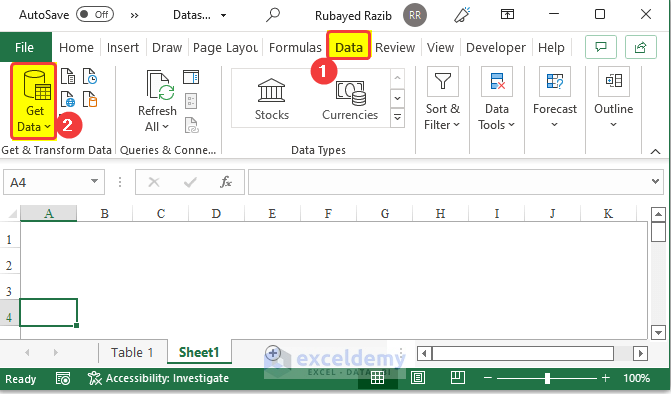
- Click on Get Data from the Data tab.
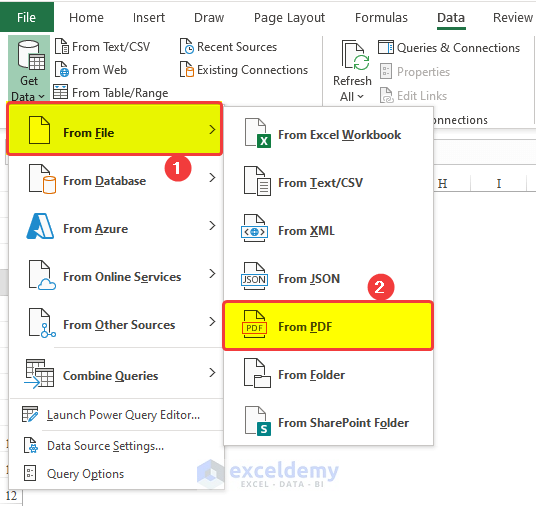
- In the Get Data dialog, select From File and then choose From PDF (as shown in the image).
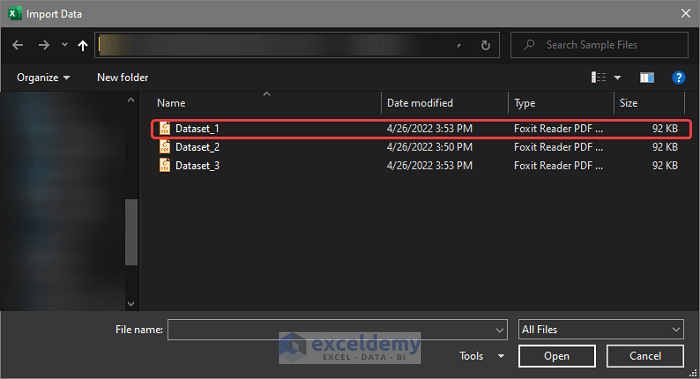
- Navigate to the location of the PDF file on your computer and select it.
- Click Open.
- All tables within the PDF file will be loaded into a new window.
- The Title and Main Table will appear separately as tables in the preview window.
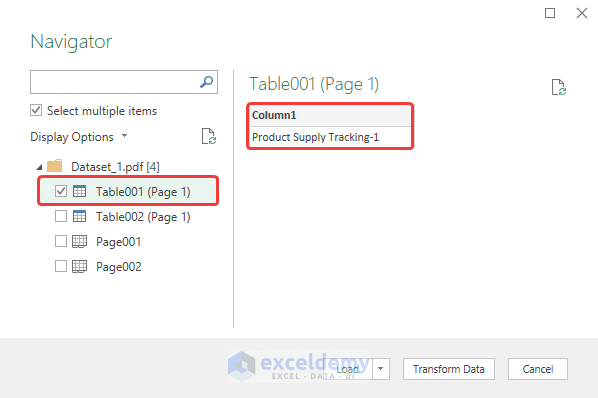
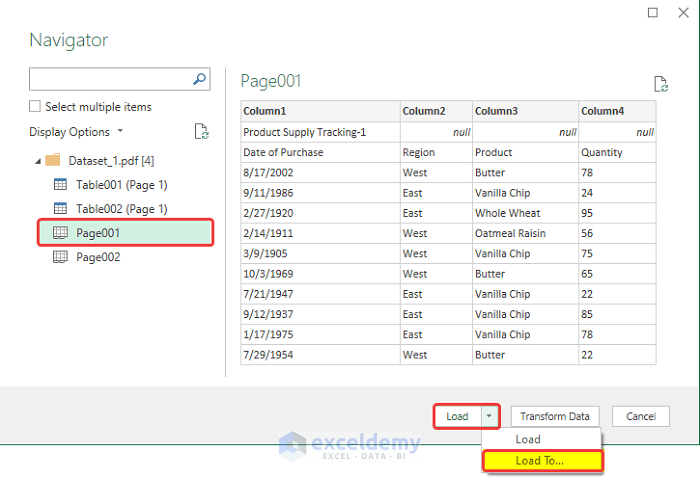
- Select Page001 to include the entire first page of the article (which contains the complete dataset).
- Click Load and then Load To.
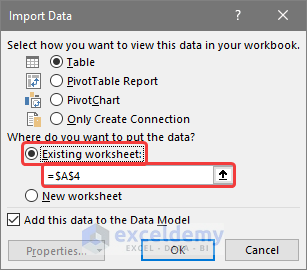
- The Power Query window will close, and a new window named Import Data will appear.
- In the Import Data window, choose Existing Worksheet and specify the location for the loaded data (e.g., cell $A$4).
- Click OK.
- The data table will now be loaded into the specified location as a table in the Excel worksheet.
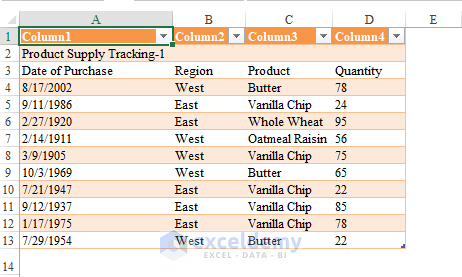
- To convert the table back to a range, select the table and go to Table Design. From there, choose Convert to Range in the Tools group.
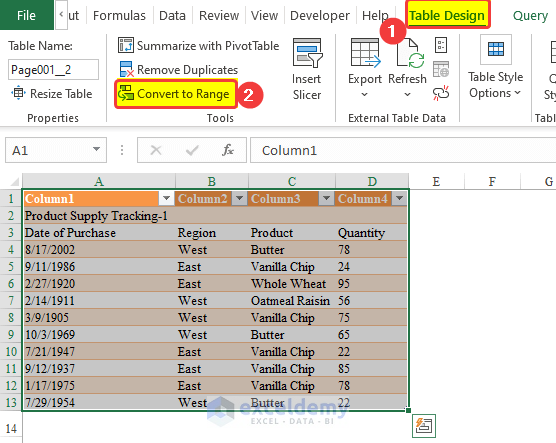
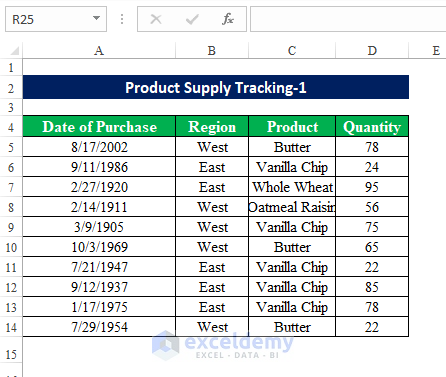
- Although some adjustments (such as color and cell width) may be needed due to Excel’s different cell widths, the basic data or text will remain the same.
- Refer to the image below, which shows the PDF file data in an Excel worksheet after minor formatting.
Read More: How to Convert PDF to Excel without Software
Method 2 – Using Adobe Acrobat Conversion Tool
Steps
We are going to use the following PDF file to demonstrate how we can export PDFs into the Excel worksheet.

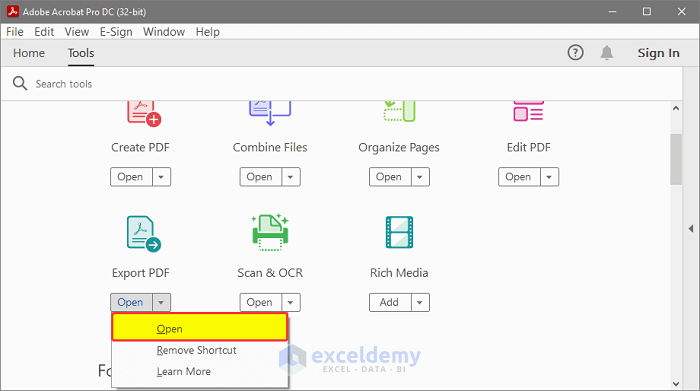
- Open Adobe Acrobat Reader.
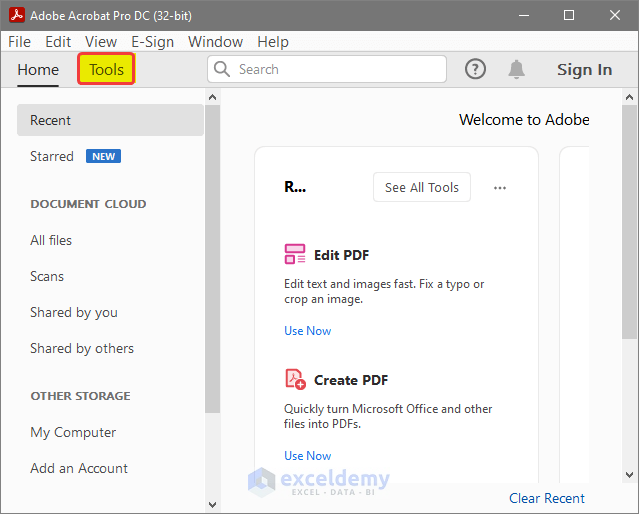
- From the Homepage, click on Tools.
- In the options menu, select Export PDF.
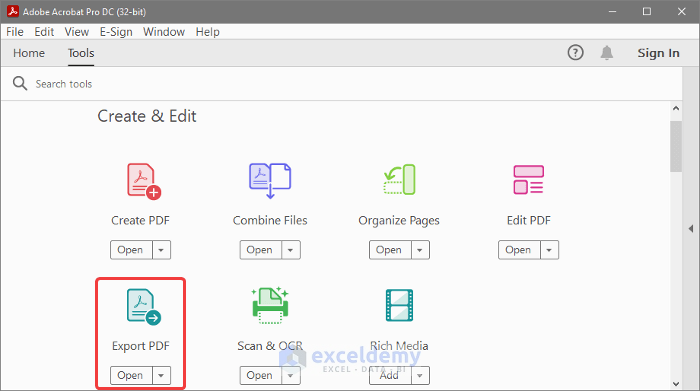
- Click the dropdown menu next to Open and choose Open.
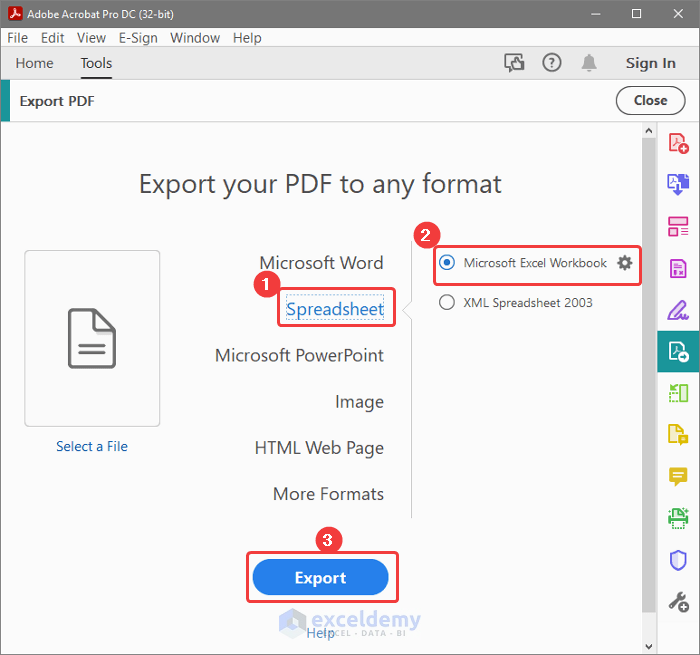
- A new menu will appear. Select the desired output format for your PDF file (e.g., Spreadsheet).
- From the right side, choose the specific spreadsheet type (Microsoft Excel Workbook).
- Click on the Export button.
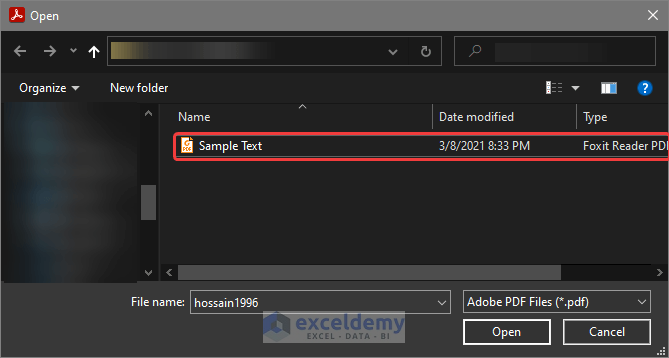
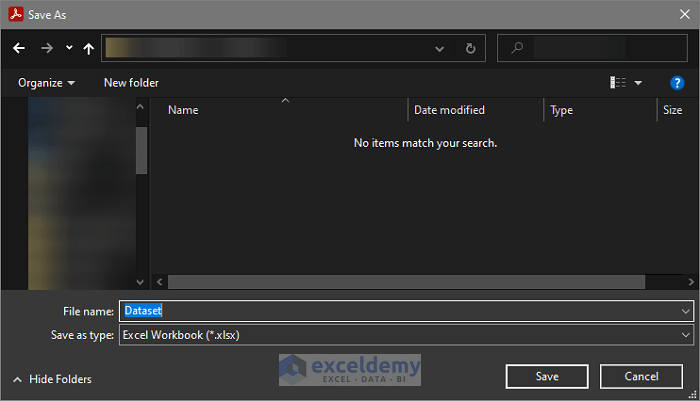
- Adobe Acrobat will open a file browse window. Select the PDF file you want to convert to Excel.
- Choose the destination folder where you want to save the converted Excel sheet.
- If you’ve previously converted PDF files, the previous location will be shown in the Save in Recent Folder section.
- Optionally, tick the Open file after export box to open the file immediately after conversion.
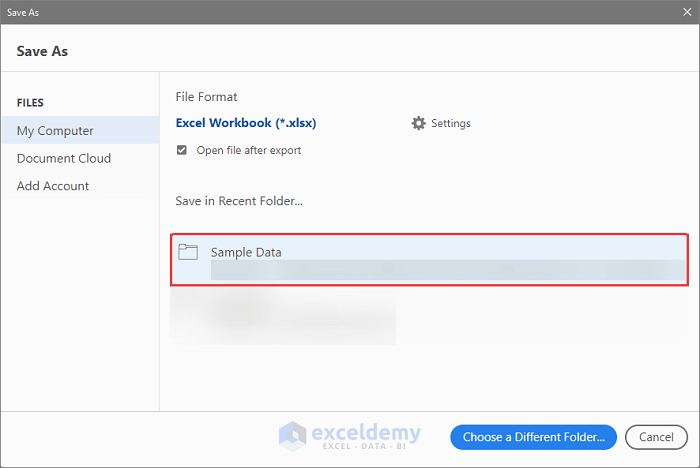
- Click Save.
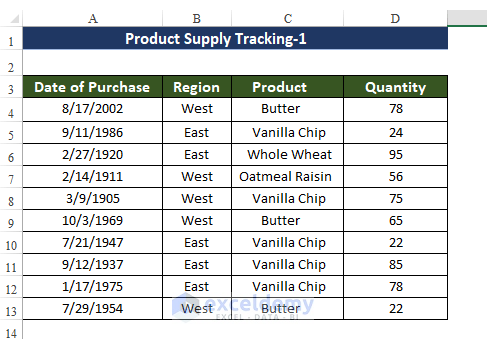
- Your PDF file is now exported and converted to an Excel worksheet.
- Now you will see your PDF file exported or converted to an Excel worksheet.
Read More: How to Convert PDF to Excel Table
Download Practice Workbook
You can download the practice workbooks from here:
Related Articles
- How to Extract Data from PDF to Excel
- How to Extract Data from Multiple PDF Files to Excel
- How to Export Data from Fillable PDF to Excel
- How to Link PDF Form to Excel Database
- How to Export PDF Comments into an Excel Spreadsheet
- How to Extract Specific Data from PDF to Excel Using VBA
<< Go Back to Import PDF to Excel | Importing Data in Excel | Learn Excel
Get FREE Advanced Excel Exercises with Solutions!

