Having a Tracker Template for incoming orders from customers can help in many ways. We can easily make it in Excel with all the required data to keep track of the orders.
STEP 1 – Headline Entry
- Enter the required Headline fields for your data.

STEP 2 – Input Customer Orders and Apply Data Validation
- Input the orders carefully.
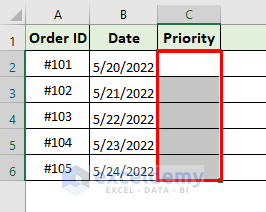
- The following image illustrates the respective Order IDs and Order Dates.
- Under the Priority header, select the range C2:C6 for Data Validation.
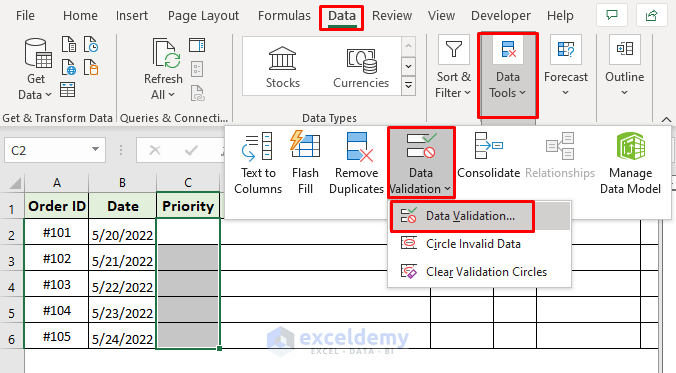
- Go to Data ➤ Data Tools ➤ Data Validation.
- Select Data Validation.
- The Data Validation dialog box will pop out.
- Choose List in the Allow field.
- Type High,Low,Medium in the Source box.
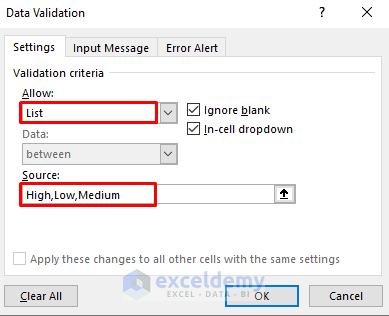
- Press OK.
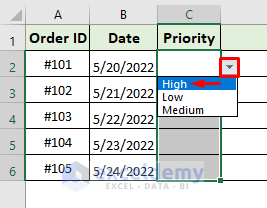
- Select any cell in the range C2:C6. It’ll return a drop-down icon.
STEP 3 – Complete Order Details
- Type the Customer Names.
- Apply Data Validation for Products.

- Repeat the Data Validation process for the Size and Order Status fields.

- Complete the Order Status.

- Input the Payment Status (Paid) and Bill.

STEP 4: Create a Dynamic Bill Total
- Select cell I7.
- Type the formula:
=SUM(I2:I6)- Press Enter to return the summation.
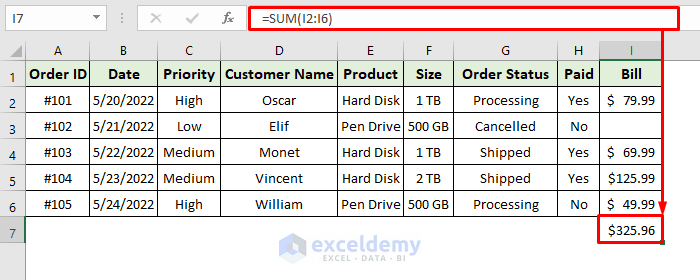
NOTE: The SUM function calculates the total of I2:I6.
STEP 5 – Generate Dynamic Order Summary
- Select cell B10 and type the formula:
=COUNTIF(C2:C6,"High")- Press Enter and it’ll return the total count for High Priority orders.
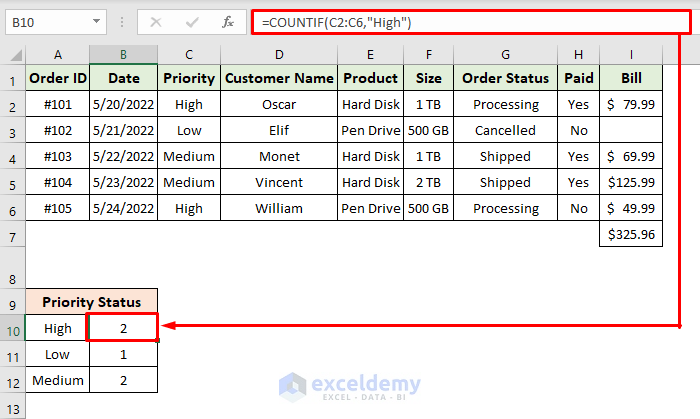
NOTE: Replace High with Low and Medium in the COUNTIF function argument to find the Low priority and High priority orders respectively.
- Choose E10 to find the count for Order Status.
- Type the formula:
=COUNTIF(G2:G6,"Processing")- Press Enter to return the result.
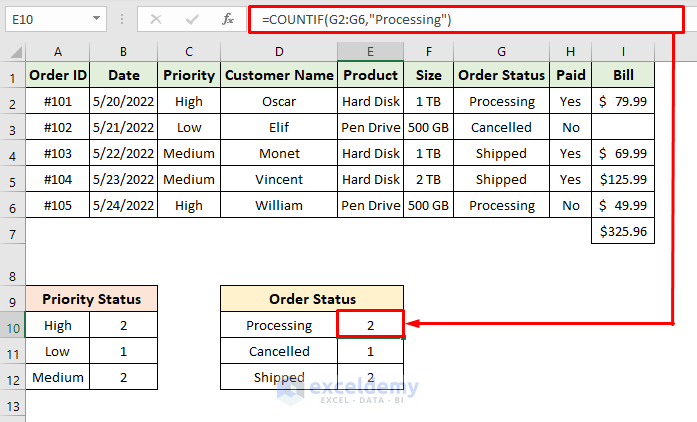
NOTE: Replace Processing with Cancelled and Shipped in the COUNTIF function argument to find the Cancelled and Shipped orders respectively.
- Choose H10 to find the total Payment Status.
- Type the formula:
=COUNTIF(H2:H6,"Yes")- You’ll get the count for the Paid orders after pressing Enter.
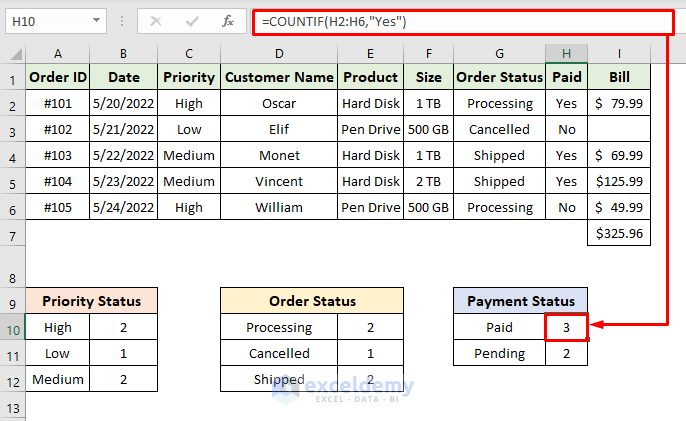
NOTE: Replace Yes with No to find the orders that haven’t completed the payment yet.
Step 6 – Final Output of Customer Orders in Excel
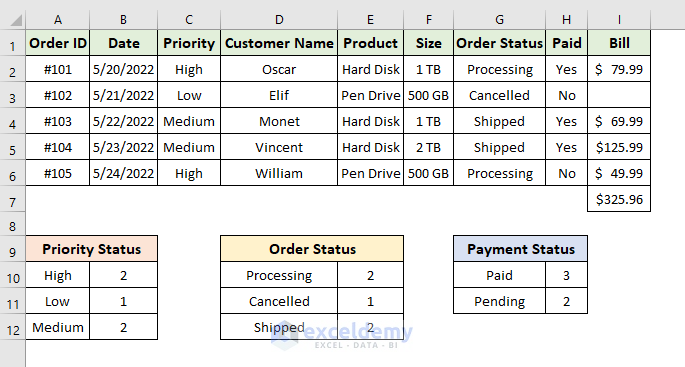
The following image illustrates the final output of the Customer Orders tracker in Excel.
Read More: How to Keep Track of Customer Payments in Excel
Sorting and Filtering Customer Orders in Excel
You can perform the Sort operation on the order entries or even Filter them.
STEPS:
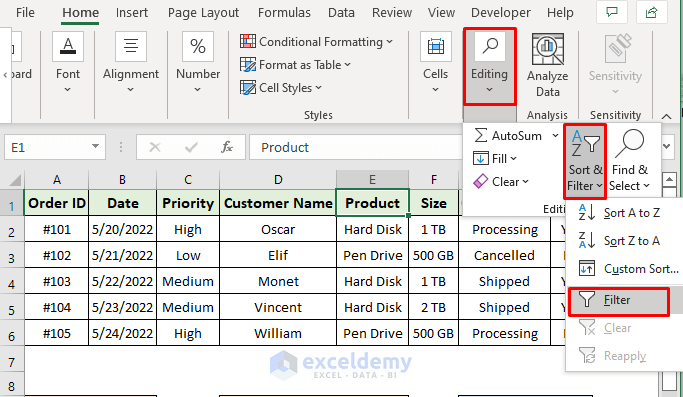
- Select the Product header or any other headers as required.
- Select Home ➤ Editing ➤ Sort & Filter ➤ Filter.
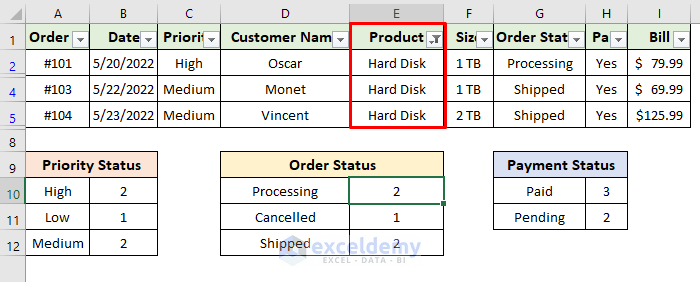
- Select the drop-down icon beside the Product header and check for Hard Disk.
- This will return the list with Hard Disk orders only.
Read More: How to Keep Track of Invoices and Payments in Excel
Download Template
Download the following workbook to practice by yourself.
Related Articles
- How to Create a Daily Task Sheet in Excel
- How to Create a Progress Tracker in Excel
- How to Create a Task Tracker in Excel
- How to Create Real Time Tracker in Excel
- How to Keep Track of Clients in Excel
- How to Make a Sales Tracker in Excel
<< Go Back to Create a Tracker in Excel | Tracker in Excel | Excel Templates
Get FREE Advanced Excel Exercises with Solutions!

