Method 1 – Using Macro to Change Goal Seek for Multiple Cells
Use ALT+F11 or go to the Developer tab and select Visual Basic to open Microsoft Visual Basic window. A
Click on Insert and then select Module or right-click on any Worksheet to select the Module option.
Step 1: Paste the following macro in the Module.
Sub GoalSeekMultipleCells()
For p = 5 To 13
Cells(p, "F").GoalSeek Goal:=0.5, ChangingCell:=Cells(p, "E")
Next p
End Sub
- Starts the macro procedure by declaring the Sub name. You can assign any name to the code.
- Executes the VBA FOR function for a specific number of rows (i.e., rows 5 to 13) to assign the “Set Value” column (i.e., Column F), “Set Value” (i.e., 0.5), and about to change cells (i.e., Column E).
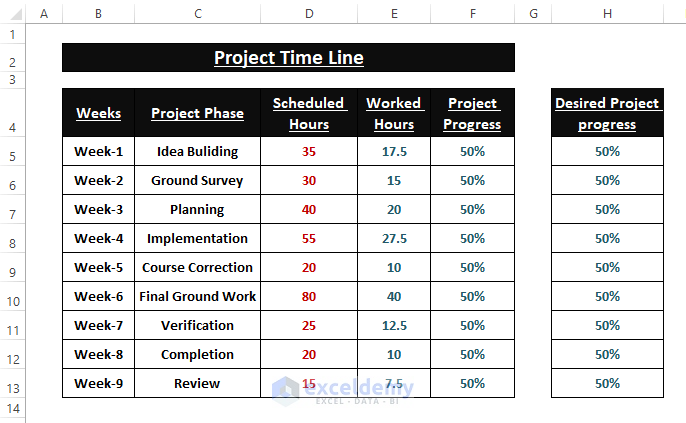
Step 2: Press F5 to run the macro. In the Worksheet, all Phases, Project Progress is set to 50% and Goal Seek calculates the required Worked Hours as desired.
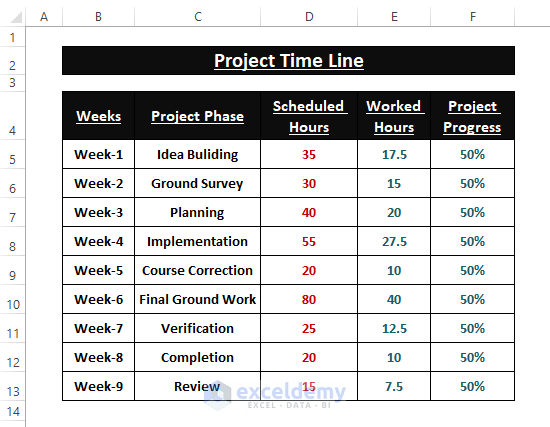
Read More: How to Use Goal Seek to Find an Input Value
Method 2 – Macro of Goal Seek with Reset Option
Step 1: Paste the following macro in the Module.
For Command Button Seek Goal:
Private Sub CommandButton1_Click()
Dim m As Integer
For m = 5 To 13
Cells(m, "F").GoalSeek Goal:=Cells(5, "H"), ChangingCell:=Cells(m, "E")
Next m
End Sub
For Command Button Reset Values:
Private Sub CommandButton2_Click()
 Range("E5:E13").Select
 Selection.ClearContents
End Sub
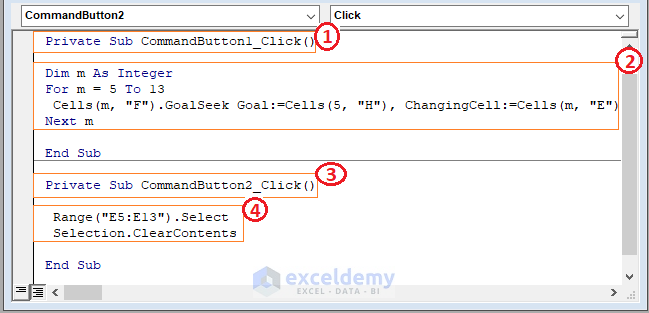
- Starts the macro code, declaring the VBA Macro Code’s Sub name for Command Button 1 (i.e., Goal Seek).
- Declares the variable, also assigns the desired “Set Value” range (i.e., Column F), “Set Value” (i.e., H5), and change values (i.e., Column E). Executes the VBA FOR loop.
- Declares the Sub name for Command Button 2 (i.e., Reset Values).
- Clears the range (i.e., E5:E13) to prepare the cells for further calculation.
Step 2:
Click on the Seek Goal button to apply the H5 value in Column F.
Goal Seek returns the required values in the E column (i.e., rows 5 to 13).
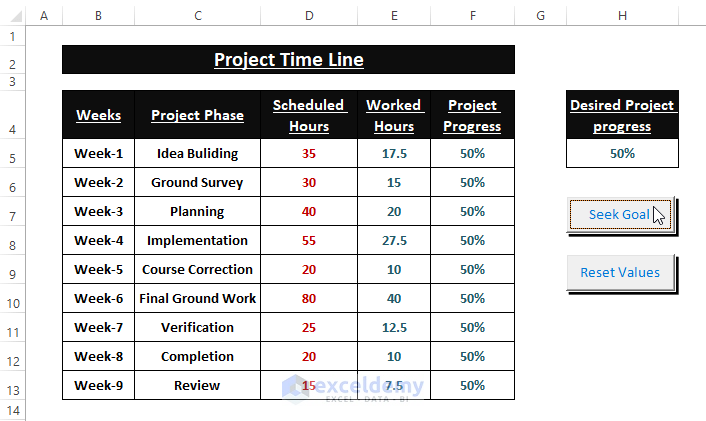
Step 3:
Click on the Reset Values Command Button to reset previously calculated values.
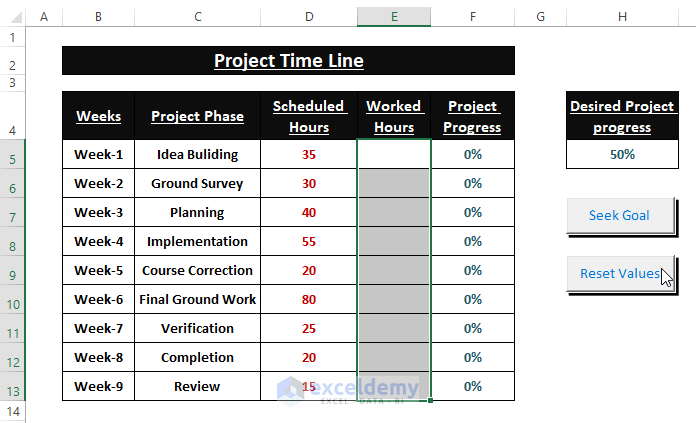
You can repeat the calculations or further modify the macro or Command Buttons as required.
Method 3 – Using Macro Input Box to Assign Values for Goal Seek Calculation
Step 1: Enter the following macro in a Module.
Sub GoalSeekwithPrompt()
Dim InputRng As Range, SetVal As Range, OutputRng As Range
Dim p As Long
With Application
Set InputRng = .InputBox(Title:="Select a Desired Range", _
prompt:="Select desired range containing ""Set Value"" in cells", Default:=Range("F5:F13").Address, Type:=8)
Set SetVal = .InputBox(Title:="Select a Desired Range", _
prompt:="Select desired range containing ""Set Value"" change into", Default:=Range("H5:H13").Address, Type:=8)
Set OutputRng = .InputBox(Title:="Select a Desired Range", _
prompt:="Select desired range you want the values to be changed", Default:=Range("E5:E13").Address, Type:=8)
End With
For p = 1 To InputRng.Rows.Count
InputRng.Cells(p).GoalSeek Goal:=SetVal.Cells(p).Value, ChangingCell:=OutputRng.Cells(p)
Next p
End Sub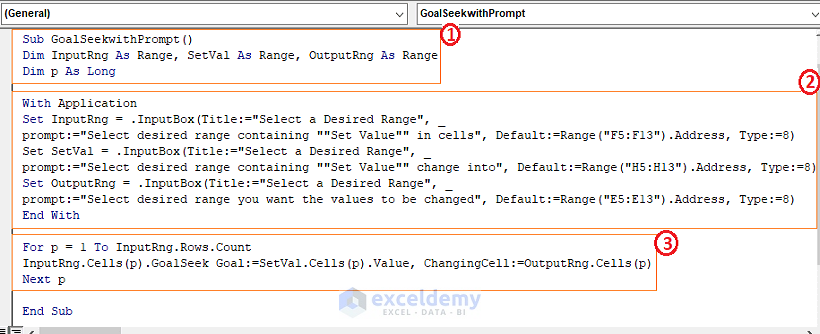
- Sets the Sub name and assigns variable types.
- Executes the Object using VBA WITH, and assigns variables using the VBA InputBox function.
- Execute the VBA FOR loop for rows (i.e., 5 to 13). It also assigns the Set Value range, Set Value, and about to Change Values.
Step 2:
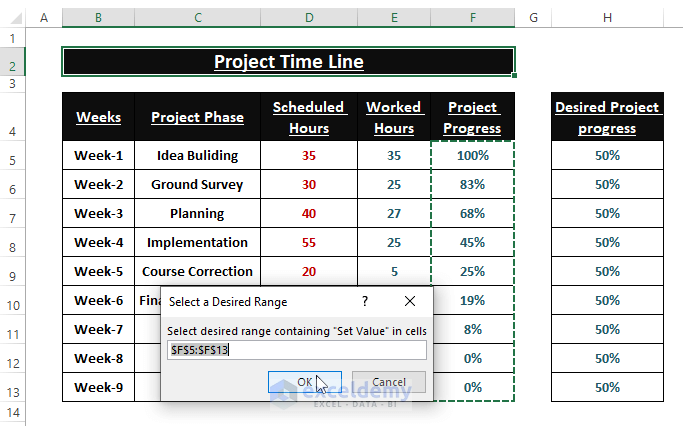
- To run the macro press F5.
- The macro opens an Input Box named Select a Desired Range.
- Assign the outcome range F5:F13.
- Click OK.
Step 3:
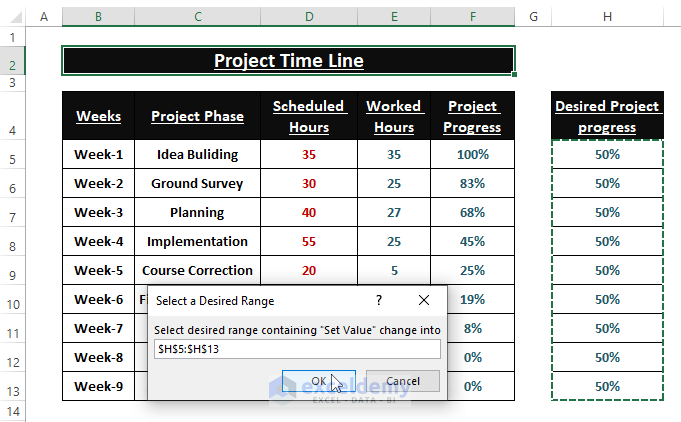
- Assign a Set Value range H5:H13.
- Click OK.
Step 4:
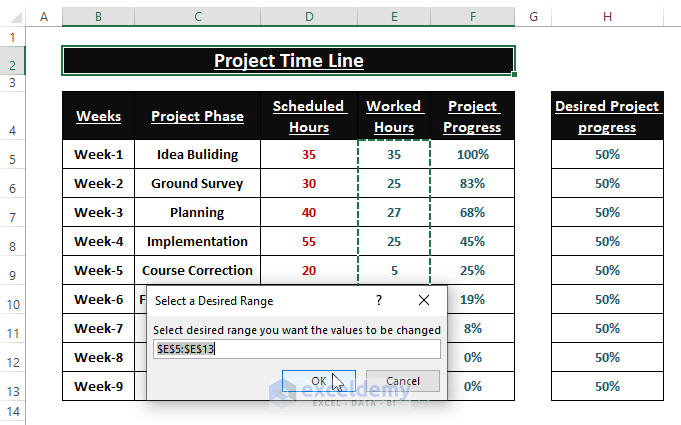
- Enter the Change Value range E5:E13.
- Click on OK.
The macro will return the below results.
Download Excel Workbook
Related Articles
- How to Automate Goal Seek in Excel
- How to Do What-If Analysis Using Goal Seek in Excel
- How to Do Reverse What-If Analysis in Excel
<< Go Back to Goal Seek in Excel | What-If Analysis in Excel | Learn Excel
Get FREE Advanced Excel Exercises with Solutions!

