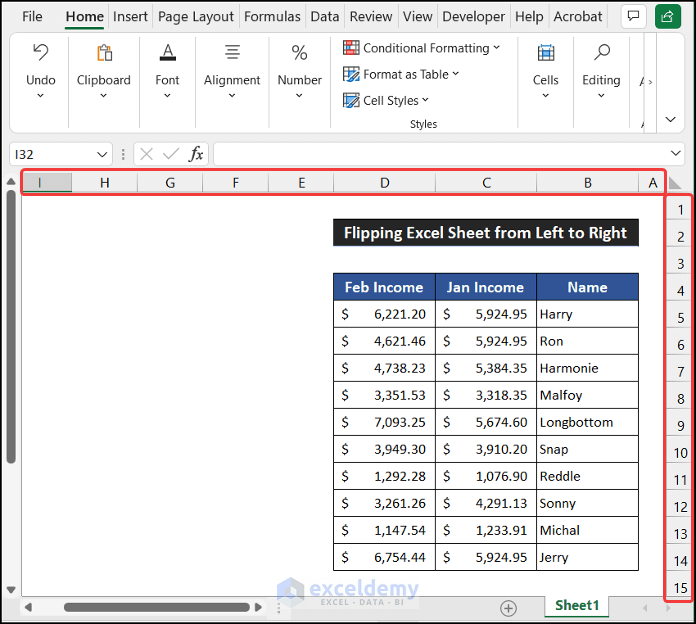
The sample Excel worksheet shows us the datasheet in the direction of right to left.
Method 1 – Changing Default Direction
Steps:
- Select File > Options.

- In the Excel Options dialog box, choose the Advanced option.
- Scroll down to get to the Display section.
- Change the Default direction option from Right-to-left to Left-to-right.
- Click OK.

- You may notice that the direction of the current sheet doesn’t change.

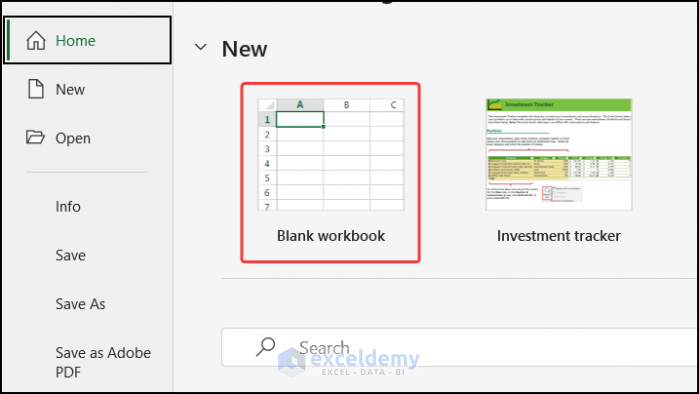
- Click on File.
- Select the Blank Workbook option.
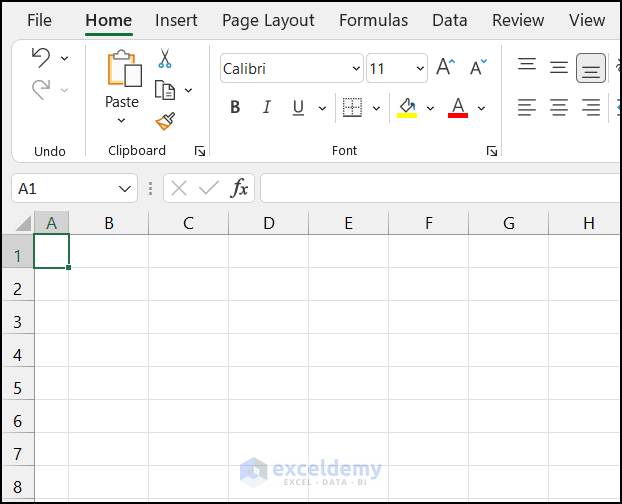
- The new workbook will have a left to right direction.
Things You Should Know
Changing the Default direction of the sheet from the Display section will not flip the active sheet direction. It will show the new direction when you open a new workbook.
Method 2 – Changing Display Options for Worksheet
Steps:
- Select File > Options.

- In the Excel Options dialog box, choose the Advanced option.
- Scroll down to get to the Display options for this worksheet section.
- You may notice that the Show sheet right-to-left option is checked.

- Uncheck the Show sheet right-to-left option.
- Click OK.

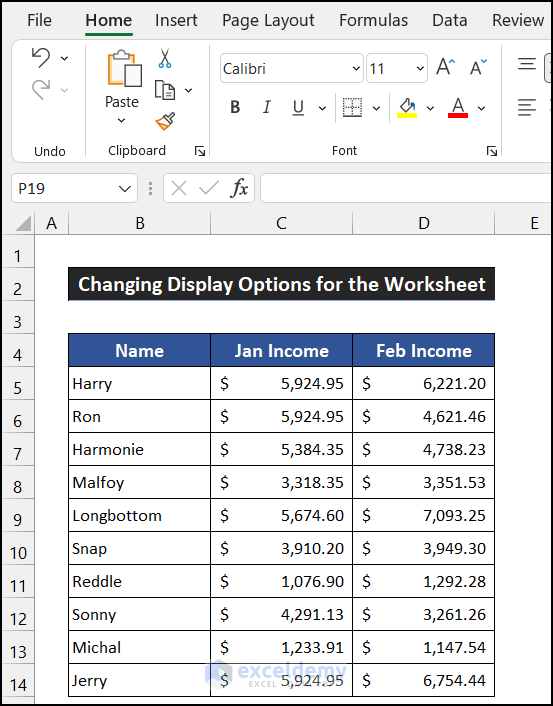
- This will flip the direction of your active sheet.
Method 3 – Customizing Ribbon
Steps:
- Select File > Options.

- In the Excel Options dialog box, select the Customize Ribbon
- A window titled Customize the Ribbon will show up.
- You need to add the command inside the Page Layout tab.
- Select the Page Layout tab.
- Choose the New Group option.
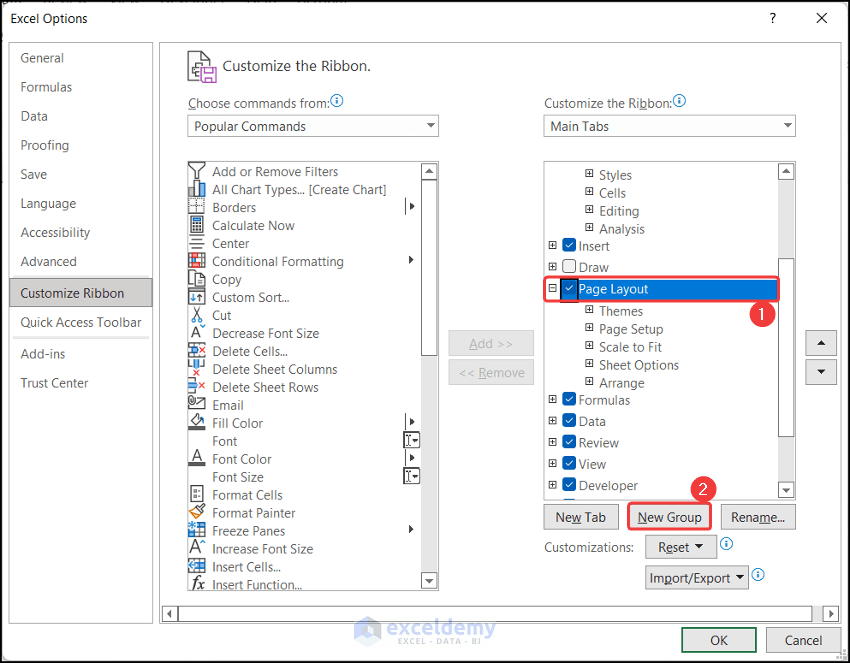
- This will create a new tab inside the Page Layout tab. If you want, you can rename this group by clicking on the Rename option.

- In this example, we set the group name as Flip.
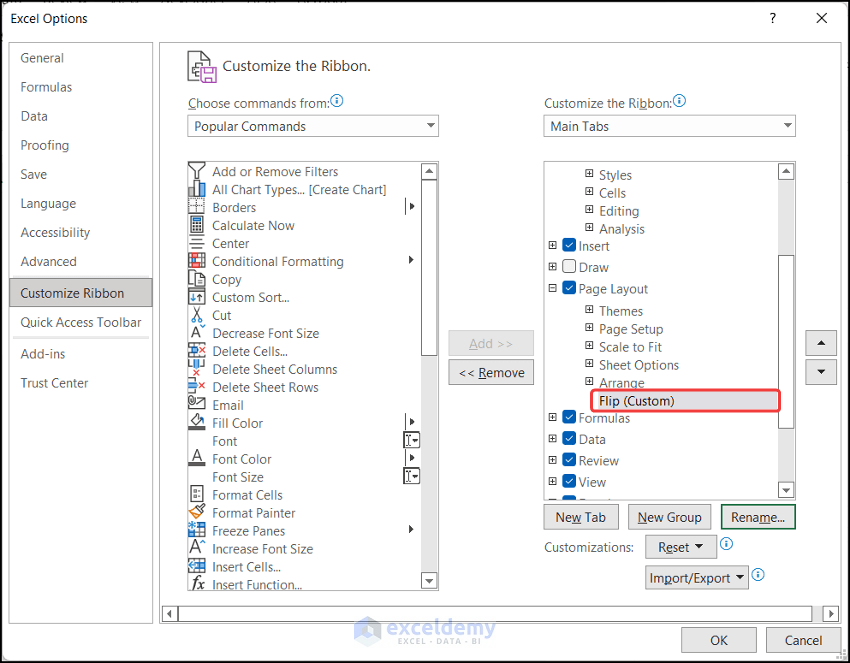
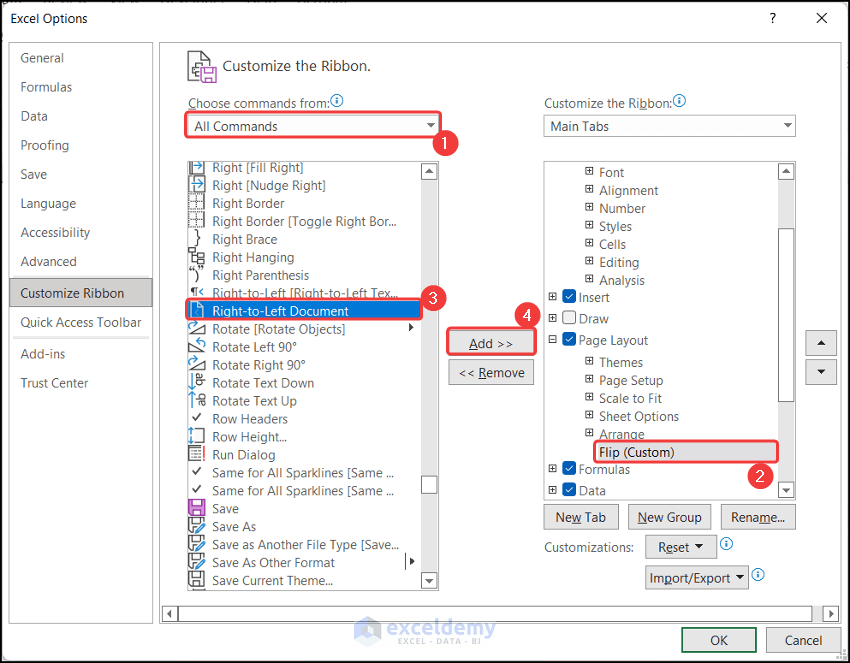
- Change the Choose commands from field option from Popular Commands to All Commands.
- All available Excel commands will show up below.
- Scroll down to get the Right-to-Left Document command.
- Select the command and click Add.
- You will see the command assigned in our new group.
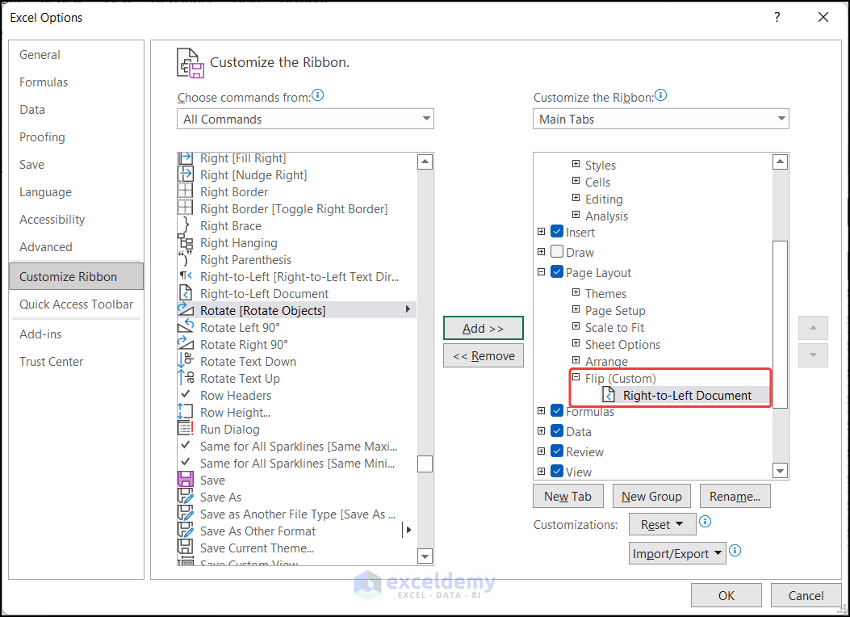
- Place the Flip group at the top of all groups in this tab to find it easily.

- Click OK.
- You will see the Flip group inside the Page Layout tab.
- In the Page Layout tab, select the Sheet Right-to-Left command from the Flip group.
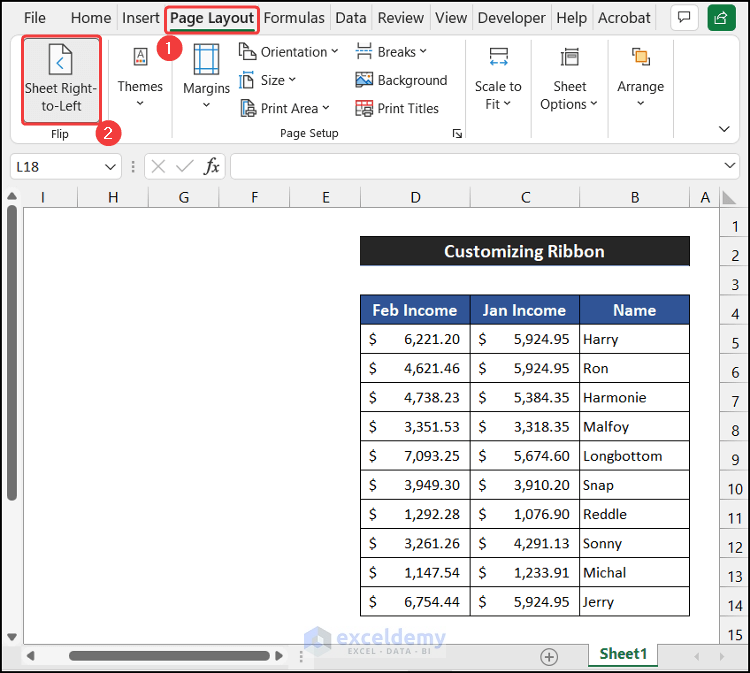
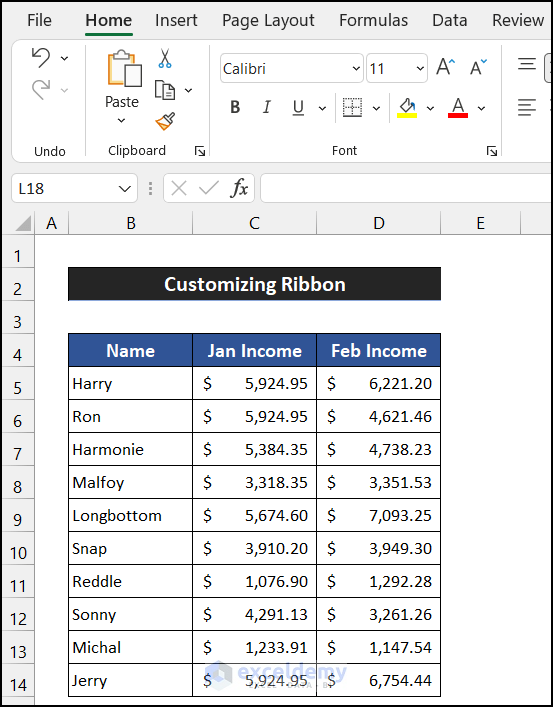
- The sheet will flip the direction from left to right.
Method 4 – Customizing Quick Access Toolbar
Steps:
- Select File > Options.

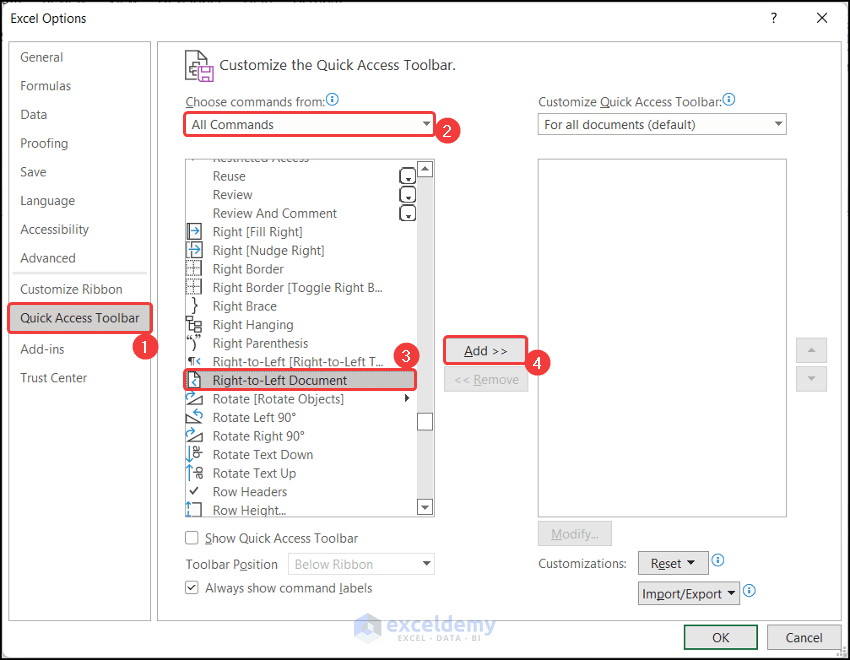
- In the Excel Options dialog box, choose the Advanced, select the Quick Access Toolbar option
- The Customize the Quick Access Toolbar window will show up.
- Change the Choose commands from field option from Popular Commands to All Commands.
- All available Excel commands will show up below.
- Scroll down to get the Right-to-Left Document command.
- Select the command and click Add.
- Check the Show Quick Access Toolbar option.
- You can choose where to place the toolbar. Here, we chose the Below Ribbon option.
- Click OK.
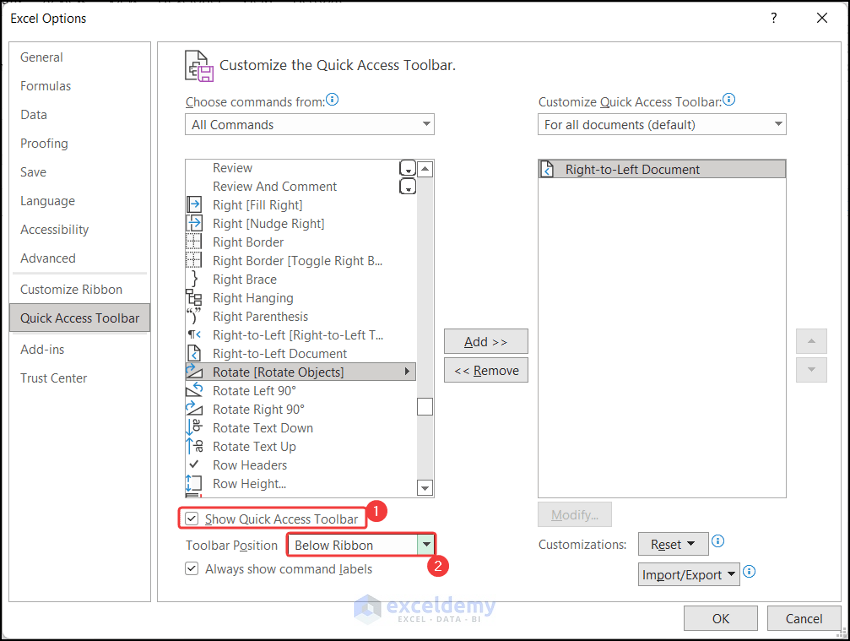
- You will get the Quick Access Toolbar below the Excel ribbon with the Sheet Right-to-Left command.
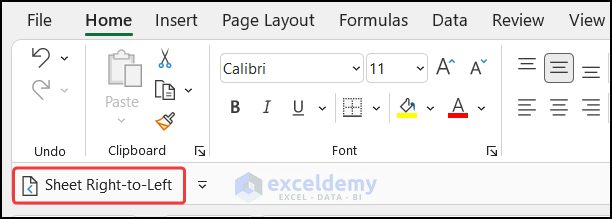
- Click on the Sheet Right-to-Left command.
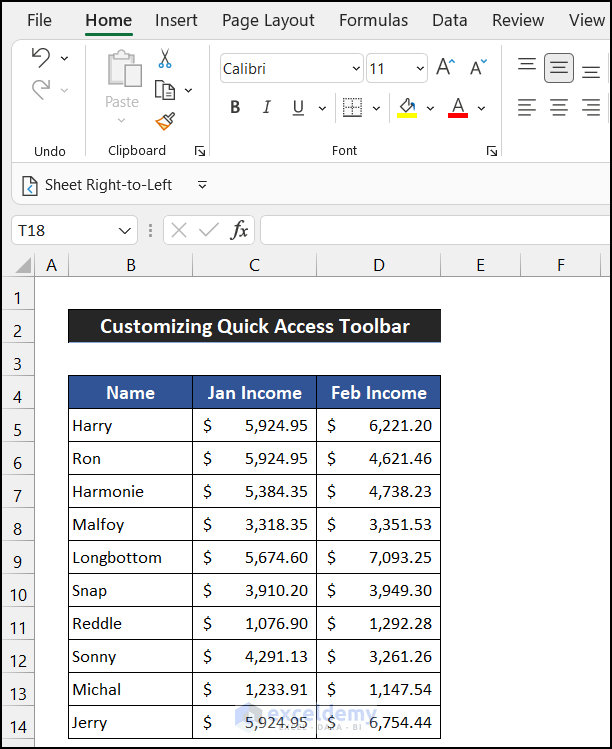
- You will notice the Excel sheet will flip from the left to right direction.
Download Practice Workbook
Related Articles
<< Go Back to Worksheets | Learn Excel
Get FREE Advanced Excel Exercises with Solutions!

