This article is part of a series: Excel VBA & Macros – A Step by Step Complete Guide
Download Practice Workbook
4 Basic Examples to Use VBA Conditional Statements in Excel
When you apply a condition to achieve a specific result, you need Conditional Statements. For example, if you want to buy a smartphone, you might create a list of potential phones based on your needs and then categorize them by price. In this case, the price range is the condition, and by applying this condition in VBA, you can easily classify your products.
Example 1 – Applying VBA Conditional IF Statement in Excel
If-Then is one of the most important control structures in VBA. With this construct, VBA applications can decide which statements to execute. The basic syntax of the If-Then structure is:
If condition Then statements [Else elsestatements]
If a condition is true, a group of statements will be executed. If you include the Else clause, another group of statements will be executed if the condition is not true.
Steps:
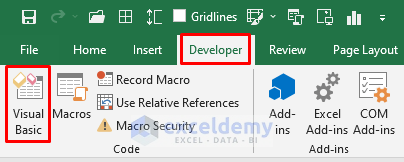
- Go to the Developer Tab and select Visual Basic.
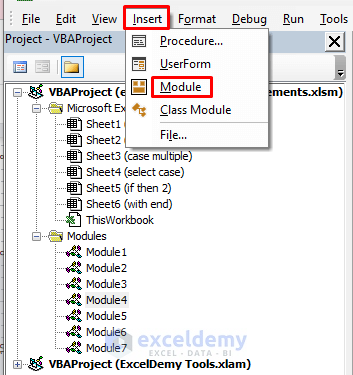
- The VBA editor will open. Select Insert >> Module to open a VBA Module.
- Enter the following code in the VBA Module.
Sub Example_If()
   If Range("B5").Value = "Z" Then
    Range("C5").Value = "Zoo"
   End If
End Sub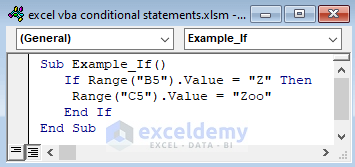
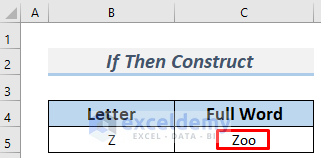
If you enter Z in B5 and run the Macro, it will return Zoo in C5.
- Go back to your sheet, enter Z in B5 and run the Macro named Example_If (it is the name of our current Macro).
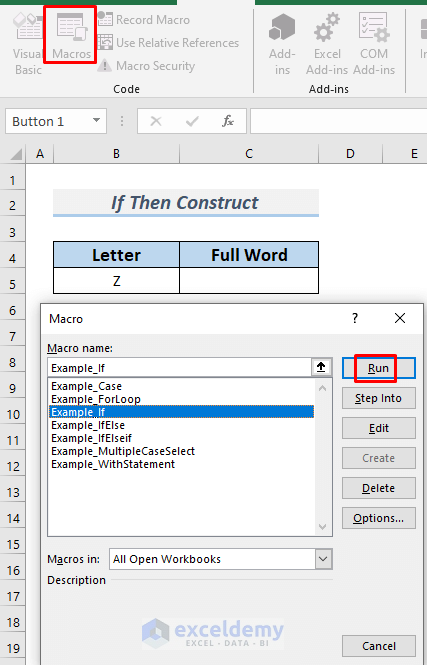
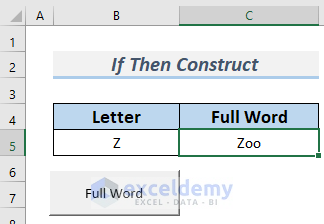
- You will see Zoo in cell C5.
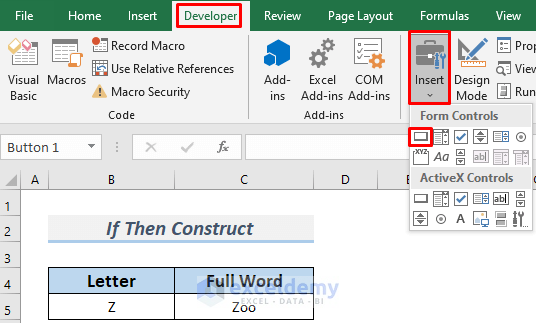
- Select Developer >> Insert >> Button.
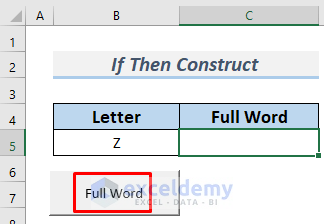
- Draw the button anywhere on the Excel sheet and give it a name. Here I named the button ‘Full Word’.
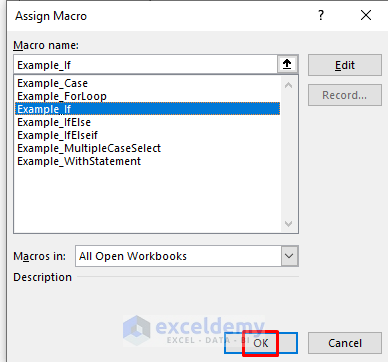
- Right click on the button and select Assign Macro.
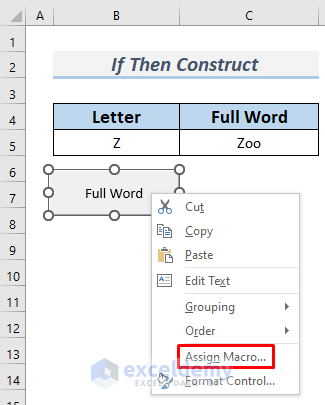
- Select the Macro Example_If and click OK.
- Enter Z in B5 and click on the button.
- You will see ‘Zoo’ in C5.
Below is an example of how to use the Nested IF Statement. This example will also illustrate how to operate the ELSEIF Statement.
- Enter the following code in the VBA Module.
Sub Example_IfElseif()
   Dim mn_letter As String
   Dim mn_FullWord As String
   mn_letter = Range("B5").Value
   If mn_letter = "Z" Then
      mn_FullWord = "Zoo"
   ElseIf mn_letter = "E" Then
      mn_FullWord = "Excel"
   ElseIf mn_letter = "F" Then
      mn_FullWord = "Football"
   End If
   Range("C5").Value = mn_FullWord
End Sub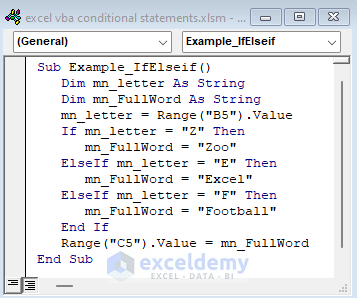
You can see that the Macro above uses ElseIf Statements. When you enter Z in B5 and run it, it will return Zoo. If you enter E, it will return Excel. The Macro uses Range.Value property to return these values.
- Go back to your sheet and assign this Macro to a new button.
- Enter E or any other letter that is mentioned in the Macro and click on the button. You will see Excel for E.
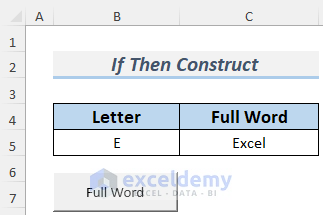
The ELSEIF Statement helps you to apply new conditions in VBA.
Read More: How to Use Do Until Loop in Excel VBA (with 2 Examples)
Example 2 – Using FOR Loop as Conditional Statement
Steps:
- Open the VBA Module.
- Enter the following code in the module.
Sub Example_ForLoop()
   mnTotal = 0
   For mn_Num = 1 To 10
      mnTotal = mnTotal + (mn_Num ^ 2)
   Next mn_Num
   MsgBox mnTotal
End Sub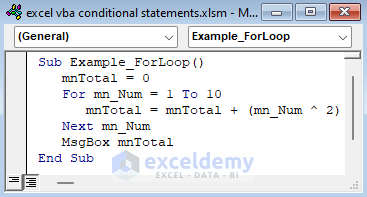
The macro will return the sum of the squared numbers from 1 to 10.
Code Explanation (Line by Line)
- Sub SumOfSquaredNumber(): This statement starts the macro Sub Procedure.
- Total = 0: Total is a variable. We assign value 0 in this variable with this statement.
- For Num = 1 To 10: Num is also a variable and it is assigned now value 1. Excel checks Num’s assigned value (now, 1) with Num’s limiting value (here, 10). If Num’s assigned value is less than or equal to Num’s limiting value, the statement between For and Next will execute.
- Total = Total + (Num ^ 2): Num variable’s value (right now 1) will be squared here at first. Excel sums the square value of Num (1) and the value of Total (0). The result of the sum will be assigned to Total again. Total variable now holds: 1 (0+1=1).
- Next Num: This statement increases the value of the Num variable by 1. So Num’s value is now 1+1=2. Excel checks again Num’s assigned value (2) with Num’s limiting value (10). As the assigned value is less than the limiting value, the statement Total = Total + (Num ^ 2) executes again.
- Total = Total + (Num ^ 2): This statement executes again. Num variable’s value (right now 2) will be squared here at first. Excel sums the square value of Num (4) and the value of Total (1). The result of the sum will be assigned to Total again. Total variable now holds 5 (4+1=5).
- Next Num: This statement increases the value of the Num variable by 1. So Num’s value is now 2+1=3. Excel checks again Num’s assigned value (3) with Num’s limiting value (10). As the assigned value is less than the limiting value, the statement Total = Total + (Num ^ 2) executes again.
- Total = Total + (Num ^ 2): This statement executes again. Num variable’s value (right now 3) will be squared here at first. Excel sums the square value of Num (9) and the value of Total (5). The result of the sum will be assigned to Total again. Total variable now holds 14 (9+5=14).
- In this way, the statement Total = Total + (Num ^ 2) will be executed until Num’s value is equal to 10.
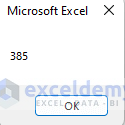
- MsgBox Total: This statement shows a pop-up dialog box with the value of Total (385).
- End Sub: This statement ends the macro subprocedure.
- Run the Macro.
- A message box shows the result.
Read More: How to Use For Each Loop in Excel VBA (3 Suitable Examples)
Example 3 – Implementing WITH END Structure as Conditional Statement
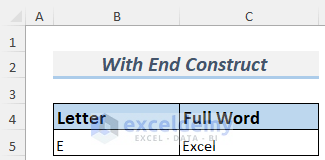
This example will show you how to apply VBA WITH END Structure as a Conditional Statement. Follow the steps below to middle-align the cell contents of an Excel sheet.
Steps:
- Open the VBA Module.
- Enter the following code in the module.
Sub Example_WithStatement()
   With Selection
     .HorizontalAlignment = xlCenter
     .VerticalAlignment = xlCenter
     .WrapText = False
     .Orientation = xlHorizontal
   End With
End Sub
The macro will return the sum of the squared numbers from 1 to 10.
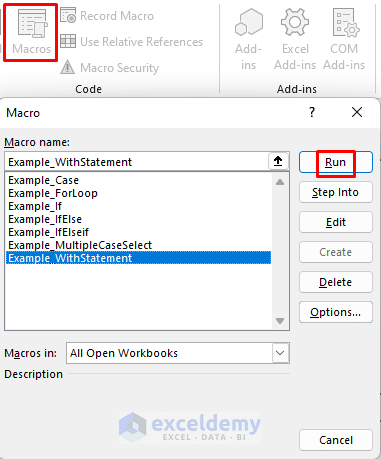
- Go back to your sheet and run the Macro named Example_WithStatement.
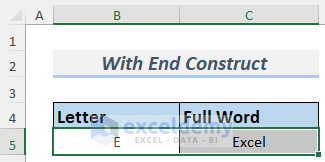
- You will see the cell contents are now middle-aligned.
Example 4 – Using SELECT CASE Structure as VBA Conditional Statement
Steps:
- Follow the steps of Method 1 to open the VBA Module.
- Enter the following code in the module.
Sub Example_Case()
Dim mn_letter As String
Dim mn_FullWord As String
mn_letter = Range("B5").Value
Select Case mn_letter
   Case "Z"
      mn_FullWord = "Zoo"
   Case "E"
      mn_FullWord = "Excel"
   Case "F"
      mn_FullWord = "Football"
   End Select
   Range("C5").Value = mn_FullWord
End Sub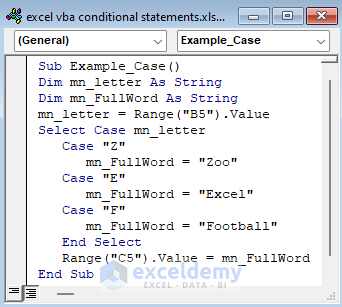
The Macro will work the same as the second Macro we created in Method 1.
Read More: How to Use Do While Loop in Excel VBA (3 Examples)
Applying Excel VBA Conditional Statements for Multiple Conditions
Steps:
- Open a VBA Module.
- Enter the following code in the VBA Module.
Sub Example_IfElse()
   For Each mn_price In Range("C5:C10")
      If mn_price > 500 Then
         mn_price.Offset(0, 1).Value = "Overpriced"
      ElseIf mn_price > 200 And mn_price <= 500 Then
         mn_price.Offset(0, 1).Value = "Medium Price"
      Else
         mn_price.Offset(0, 1).Value = "Lower Priced"
      End If
   Next mn_price
End Sub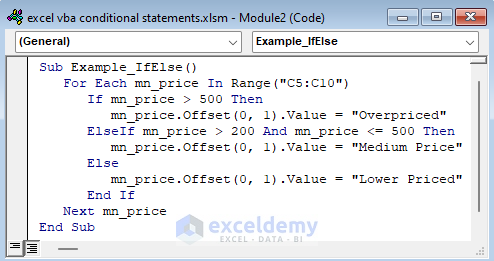
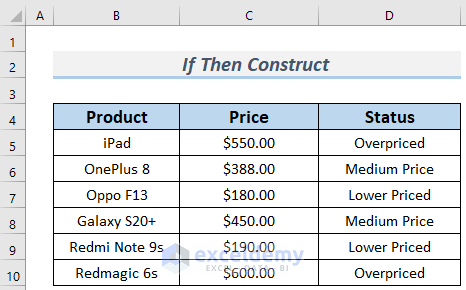
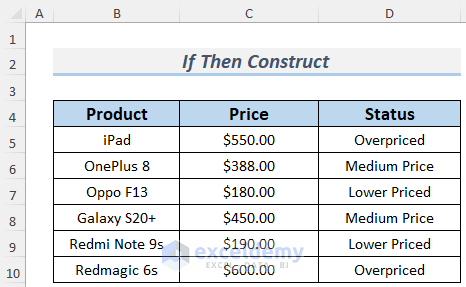
The Macro will return “Overpriced” if the price exceeds 500 dollars, “Medium Price” if the price is between 200 bucks to 500 bucks, and “Lower Priced” otherwise.
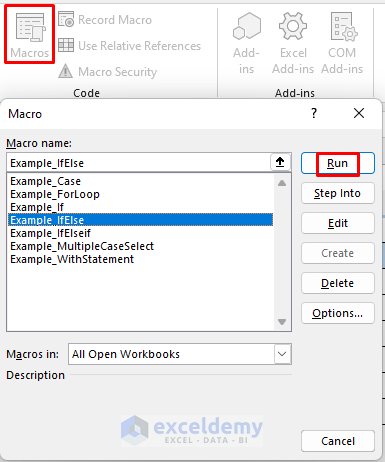
- Go back to your sheet and run the Macro named Example_IfElse.
- You will see your smartphones are classified by their price.
You can also achieve the same result using the SELECT CASE Structure too. Enter the following code.
Sub Example_MultipleCaseSelect()
   For Each mn_price In Range("C5:C10")
      Select Case mn_price
      Case Is > 500
         mn_price.Offset(0, 1).Value = "Overpriced"
      Case Is > 200 And mn_price <= 500
         mn_price.Offset(0, 1).Value = "Medium Price"
      Case Is <= 200
         mn_price.Offset(0, 1).Value = "Lower Priced"
      End Select
   Next mn_price
End Sub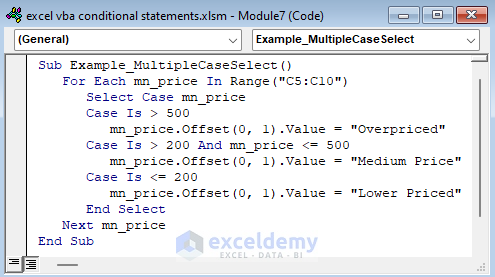
Read More: How to Use For Next Loop in Excel VBA (with 5 Examples)
Get FREE Advanced Excel Exercises with Solutions!

