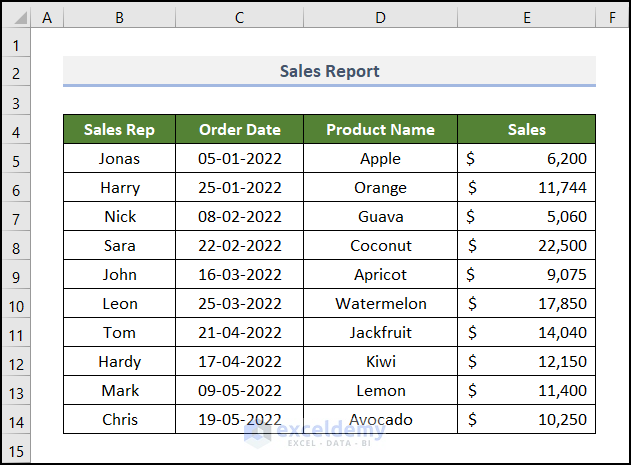
Let’s use a Sales Report of a particular grocery store to demonstrate how you can fix the date filter. This dataset contains the Sales Rep, Order Date, Product Name, and their corresponding Sales amount in columns B, C, D, and E, respectively. We’ve applied a Filter to the Order Date column, making it a Date Filter.
Reason 1 – Group Dates in AutoFilter Menu Is Disabled
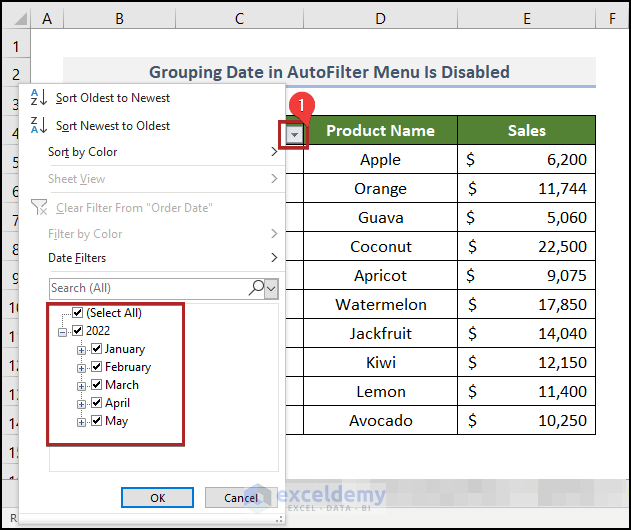
In the following image, we can see a down arrow symbol beside the heading Order Date. It’s the Filter button.
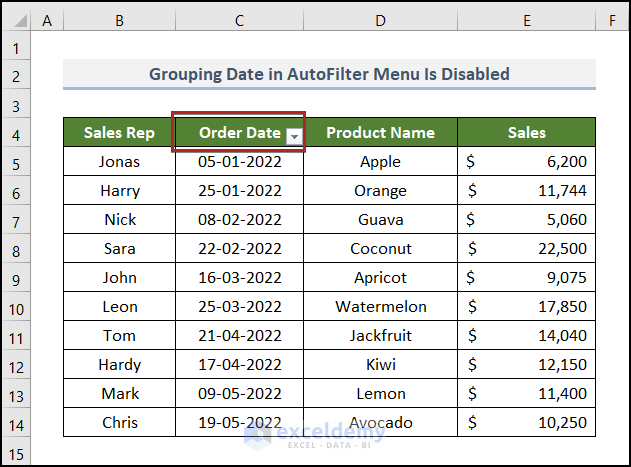
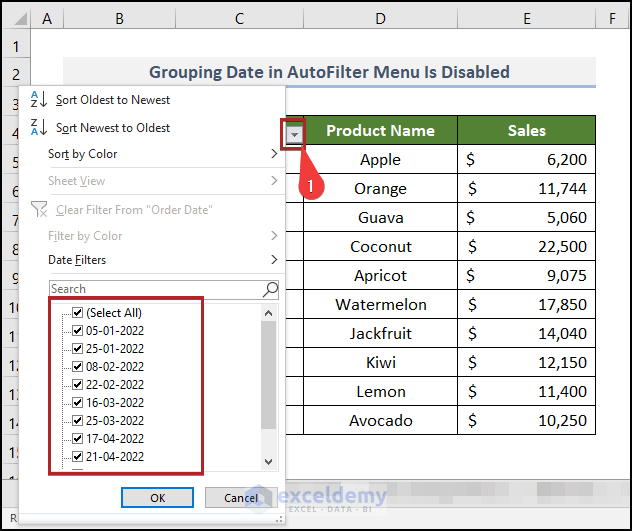
- Click on the Filter button on cell C4. You can see all the dates in different categories.
- Normally, we see them classified as months and years. But Excel isn’t showing them.
Steps:
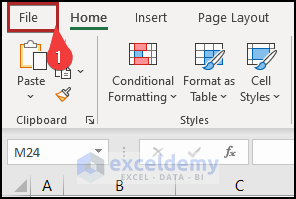
- Go to the File tab.
- Select Options at the end.
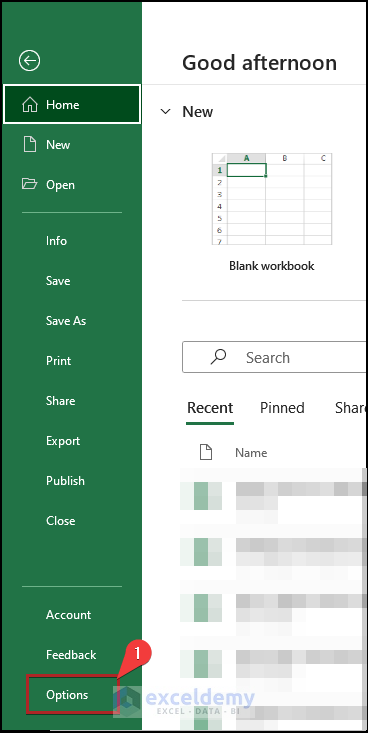
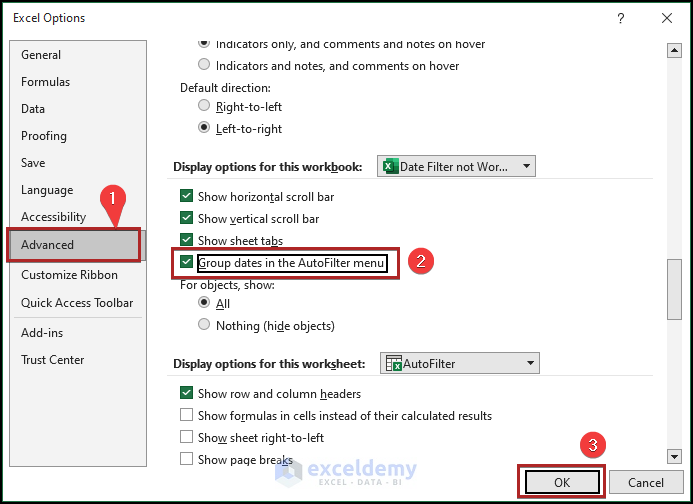
- The Excel Options window appears before us.
- Move to the Advanced tab.
- Check the box Group dates in the AutoFilter menu.
- Click OK.
- Click on the Filter button on cell C4 and see that the Filter is showing the dates in the right formation.
Reason 2 – Dates That Are Formatted as Text
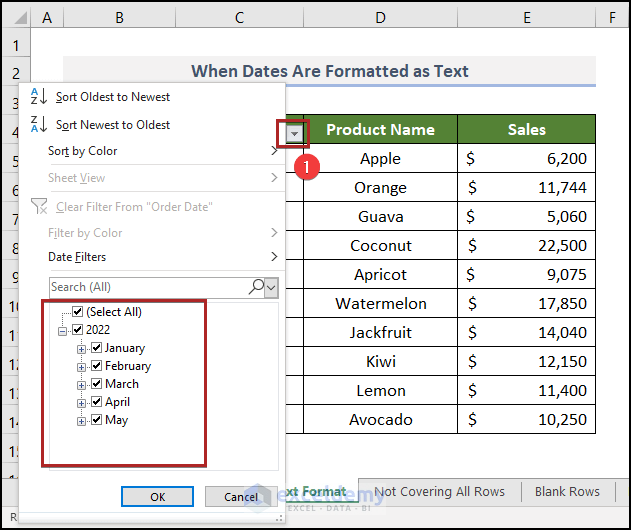
In the same dataset, open the Date Filter on cell C4 again.
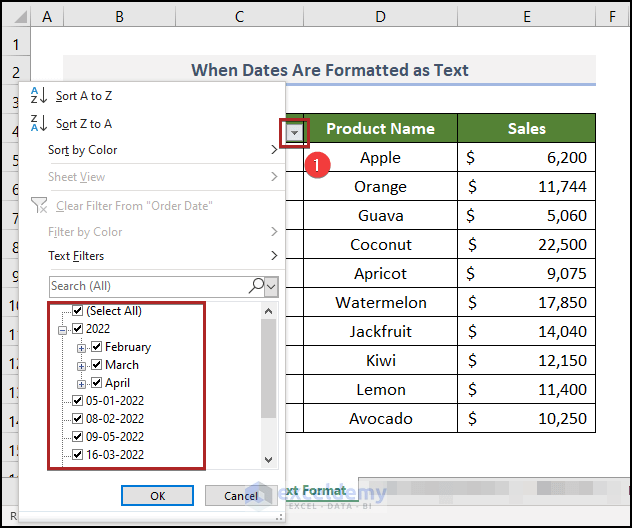
We can see some dates are grouped by months and years. But some aren’t like that. Why is it happening? The reason behind this is that some dates are showing as dates, but they are actually in Text format. To verify this:
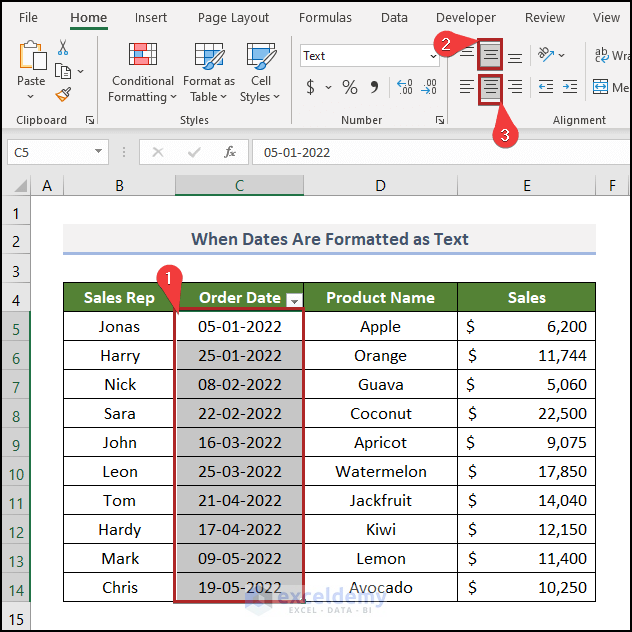
- Select all the dates in the C5:C14 range.
- Click on the Middle Align and Center icons on the Alignment group of commands.
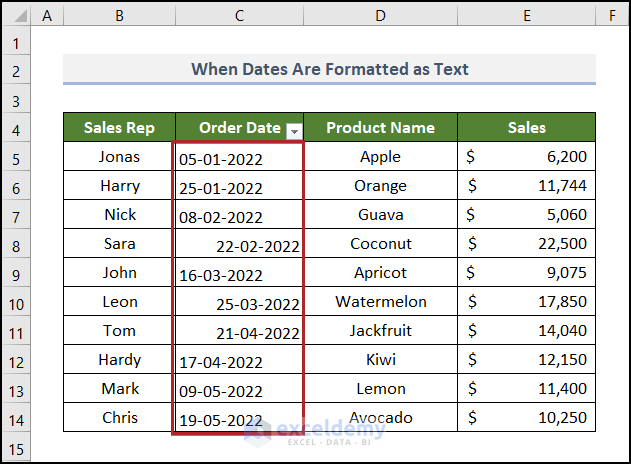
- We can see some dates are aligned to the left, and some are aligned to the right. The left-aligned dates are actually text. It’s a base characteristic of Text values.
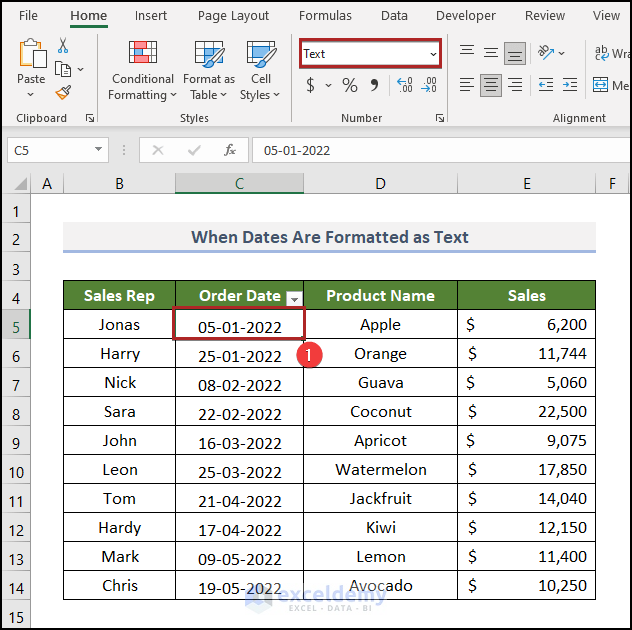
We can check Text values in another way.
- Click on the cell. In this case, we selected cell C5.
- In the Number Format box of the Number group of commands, we can see that it’s in Text format.
Steps:
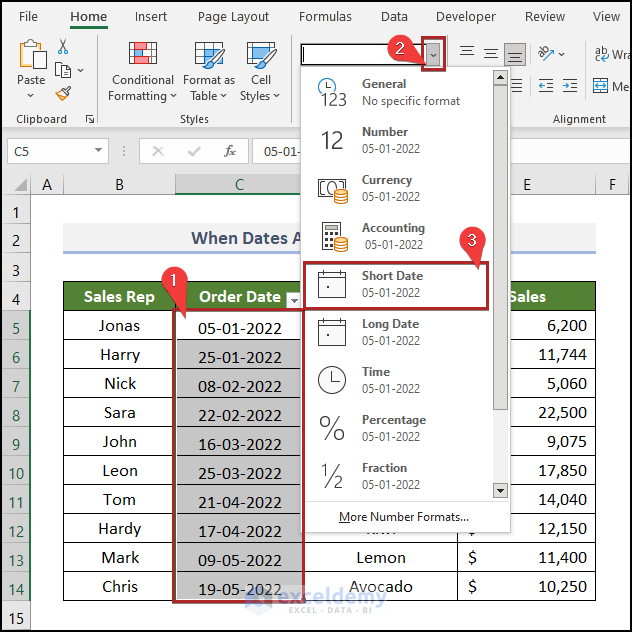
- Select all cells in the C5:C14 range.
- Click on the drop-down icon of the Number Format box on the Number group.
- Select Short Date from the list.
- Click on the Filter button and you’ll see it showing the right result.
Reason 3 – Filter Is Not Covering All Rows
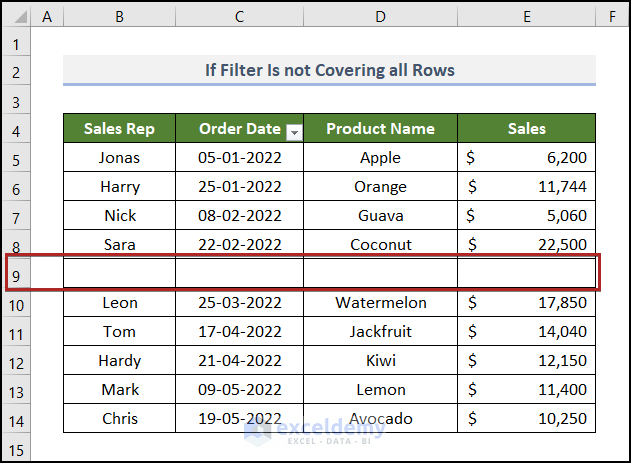
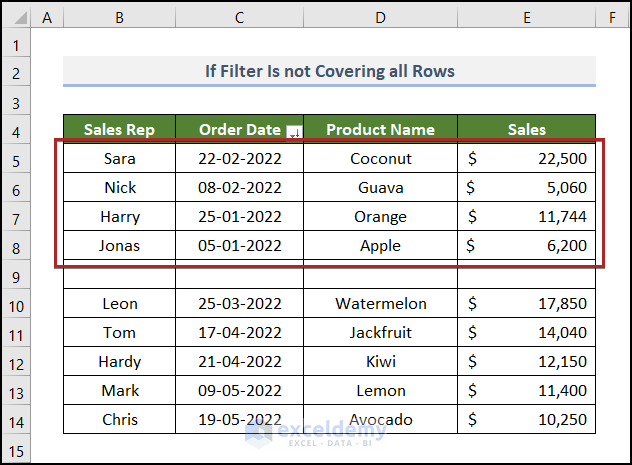
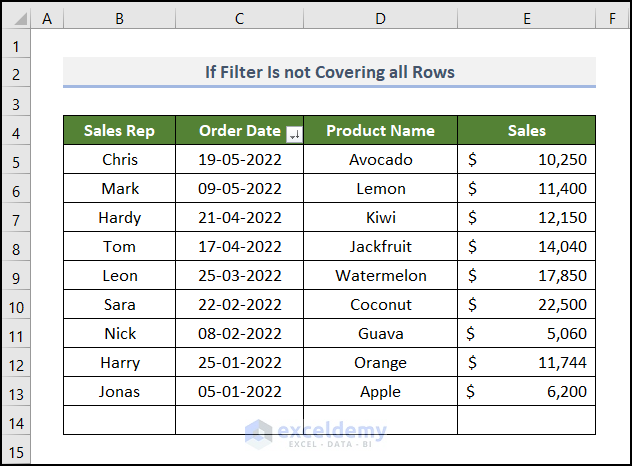
You’ll find that the Date Filter is not working well if the Filter does not cover all rows. In this case, we have a blank row in the dataset and it’s Row 9.
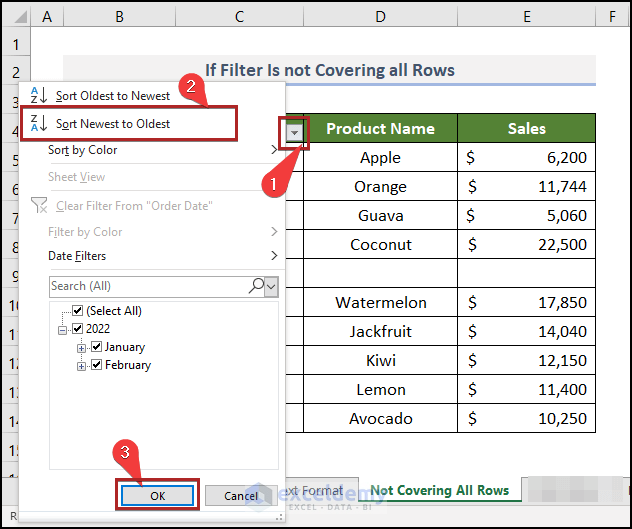
- Click on the Filter button on cell C4.
- Select Sort Newest to Oldest from the options.
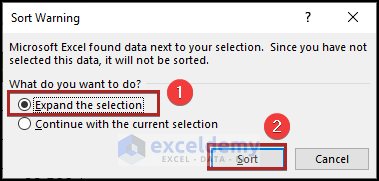
- A Sort Warning dialog box will pop up.
- Choose to Expand the selection.
- Click on the Sort button.
- The data above the blank row gets sorted. Nothing changed in the lower part.
Steps:
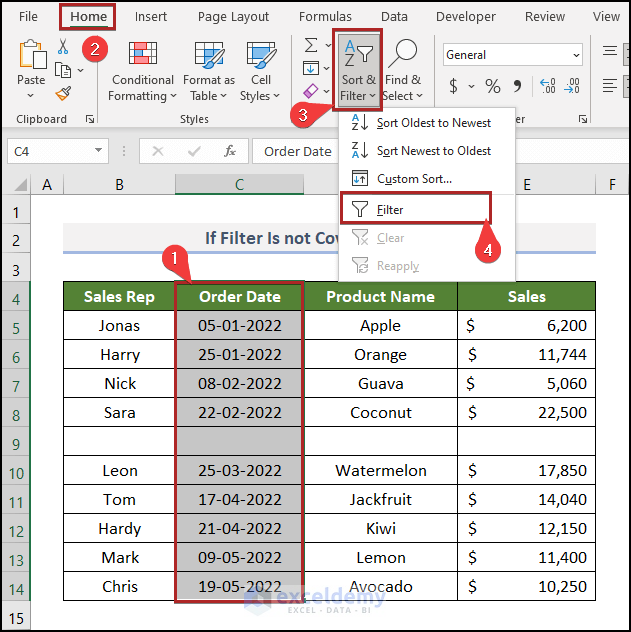
- Select cells in the C4:C14 range.
- Go to the Home tab.
- Click on Sort & Filter drop-down on the Editing group.
- Select Filter from the options.
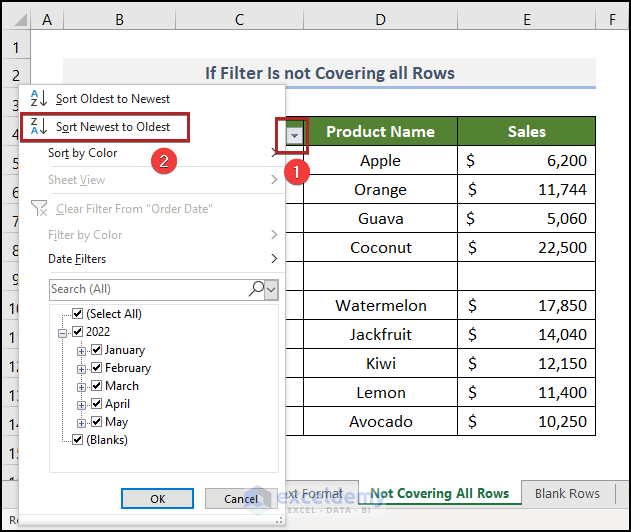
- Ppen the Filter and select Sort Newest to Oldest.
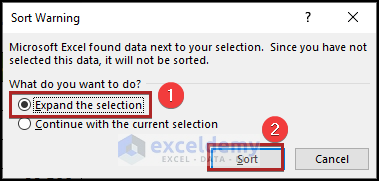
- Expand the selection in the Sort Warning box.
- All the rows are being sorted now.
Reason 4 – Blank Rows in the Dataset
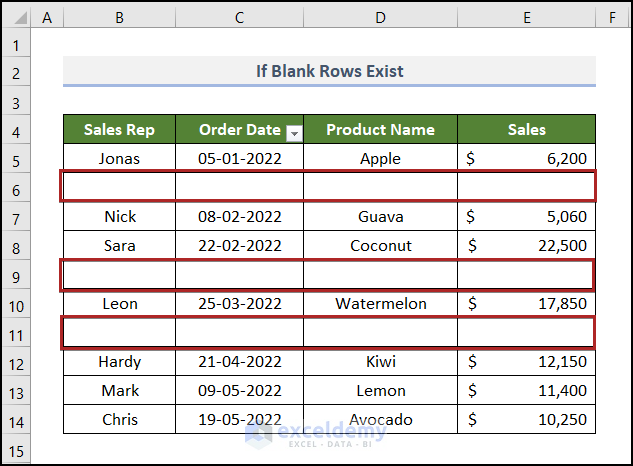
There are several blank rows in the dataset.
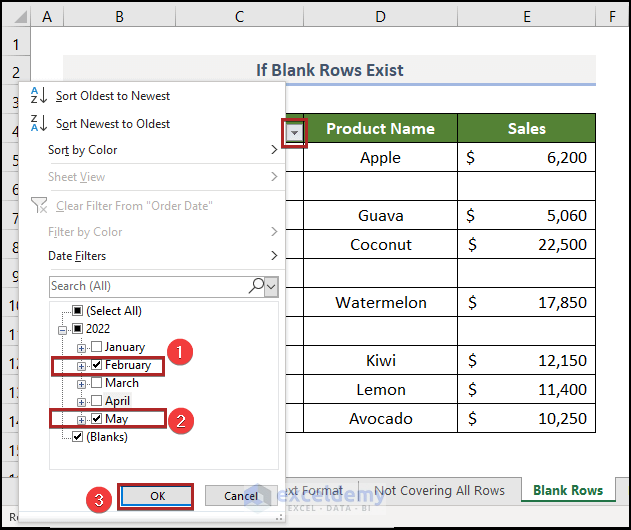
- Click on the Filter Button.
- Select February and May.
- Click OK.
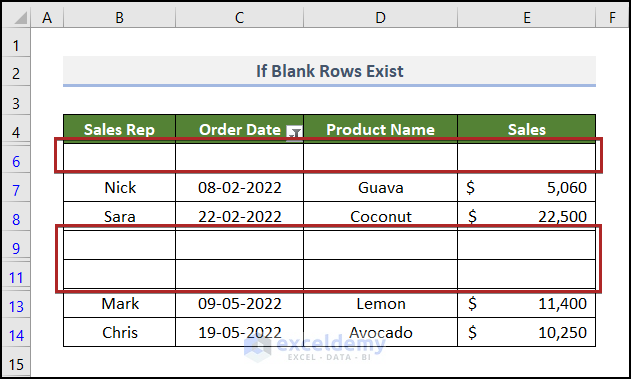
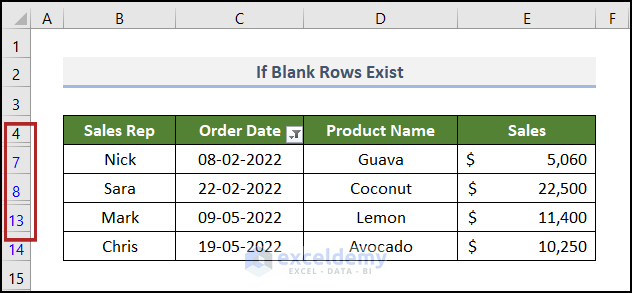
- The result is like the following.
Steps:
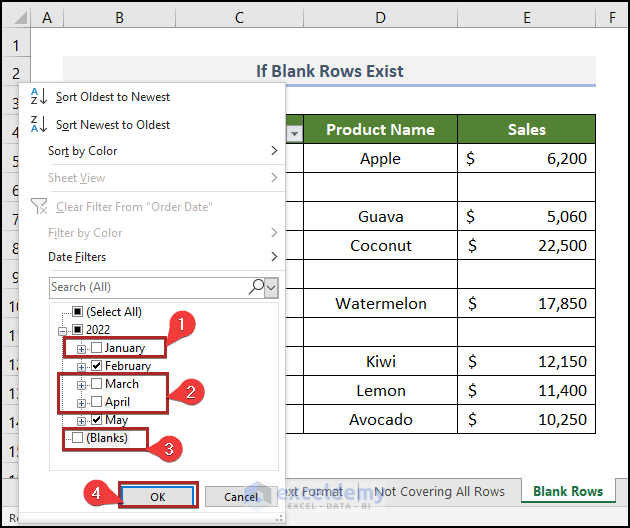
- In the Filter option, deselect January, March, April, (Blanks) to see just the data for February and May.
- Click OK.
- This solves the issue.
Reason 5 – Presence of Merged Cells
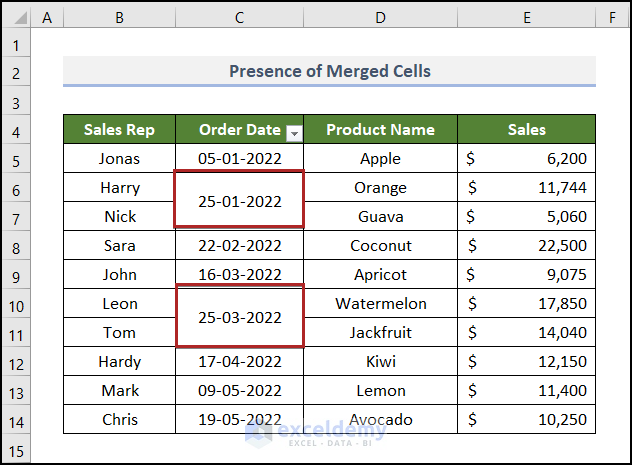
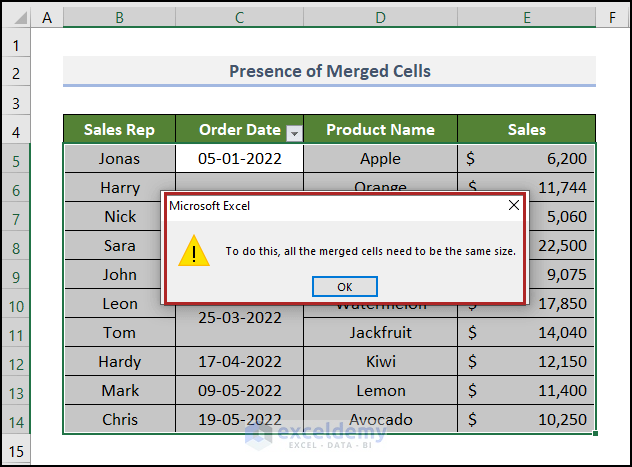
Merged cells in the Order Date column can prevent filtering.
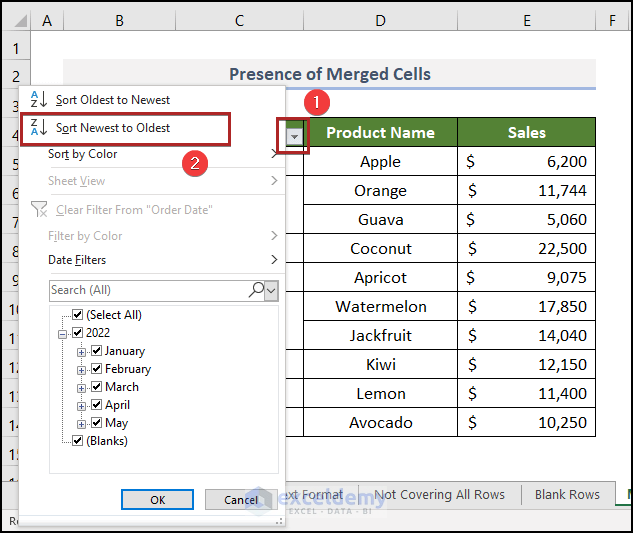
- Try to sort them like before.
- Excel will show a MsgBox with the message To do this, all the merged cells need to be the same size.
Steps:
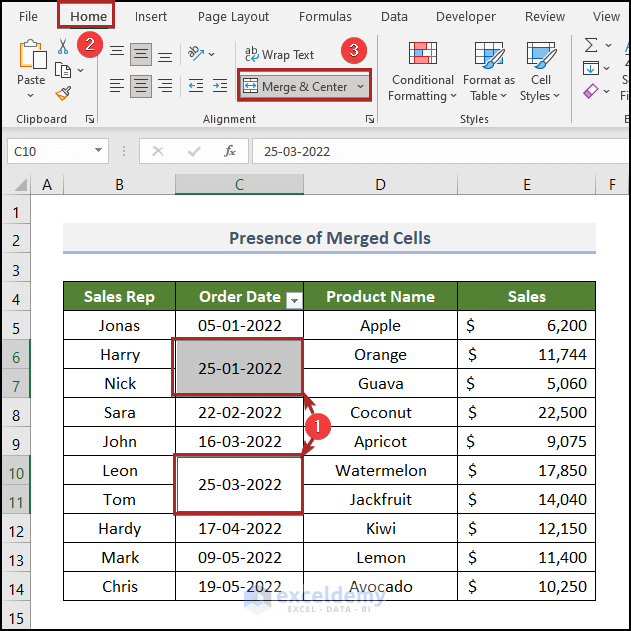
- Select the merged cells C6 and C10.
- Go to the Home tab.
- Click on Merge & Center to unmerge the cells.
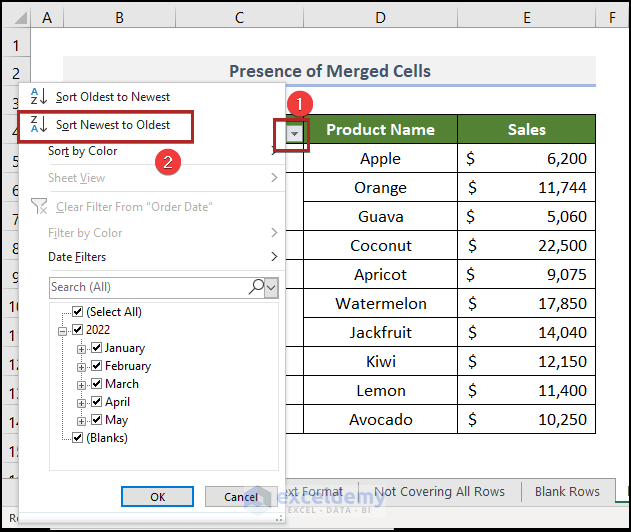
- Apply the Filter on the cells.
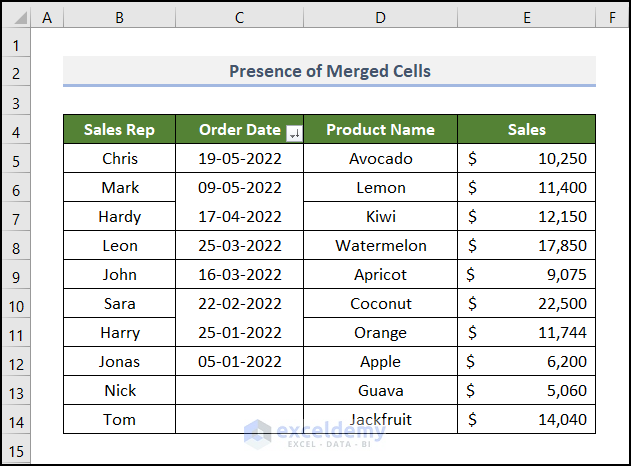
- Sort them like before.
- This solves the issue.
Reason 6 – Worksheet Is Protected
We can see a Filter button beside the Order Date heading. But, it doesn’t respond when clicked on.
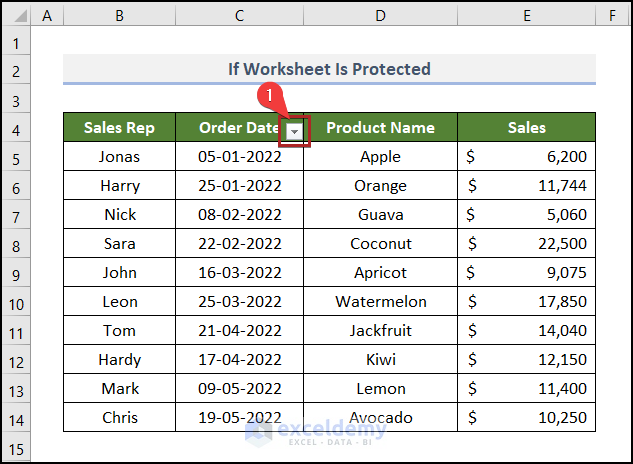
The sheet is in Protected View. So, we have to unprotect it.
Steps:
- Go to the Home tab.
- In the Cells group of commands, click on the Format drop-down.
- Select the Unprotect Sheet command from the options.
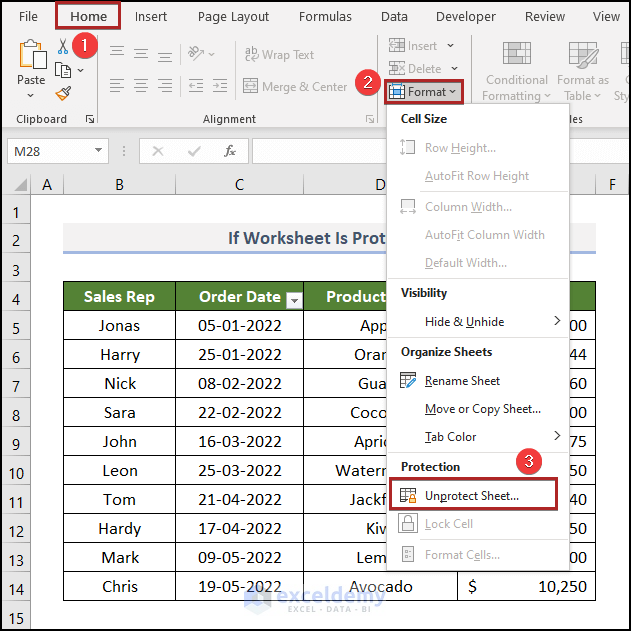
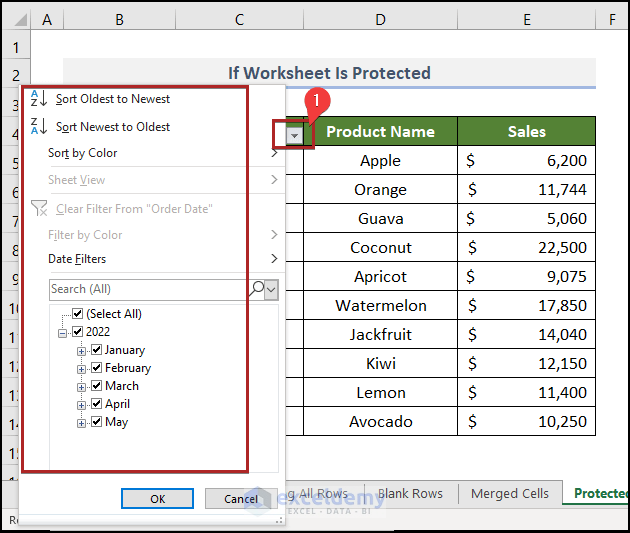
- The Date Filter is now working smoothly in the Excel sheet.
Download the Practice Workbook
<< Go Back to Date Filter | Filter in Excel | Learn Excel
Get FREE Advanced Excel Exercises with Solutions!

