Step 1- Set the Headings
- Set the headings for the database. Here, ID, Name, Cell No, and Zone.

Step 2- Enter the 1st Record
- Enter the 1st record:

Step 3- Adjust Formatting
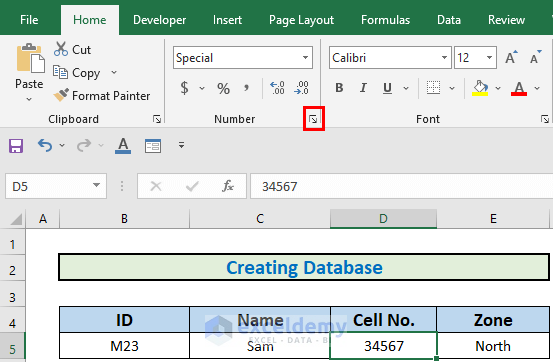
- Select D5.
- Select the icon shown in the image.
- In the Format Cells box, select Custom
- Change the type, as shown below.
- Click OK.
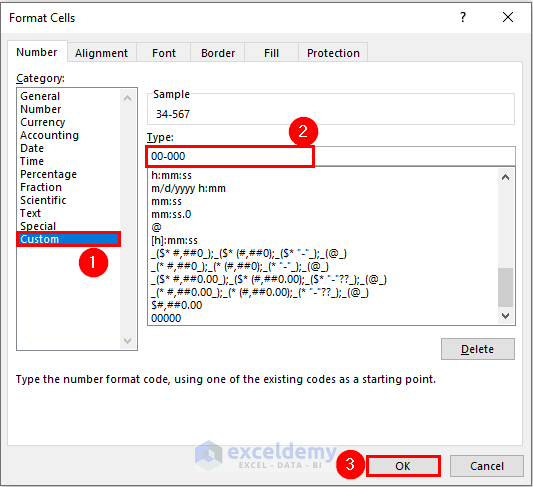
Excel will change the format.

Step 4 – Create Table
- Press CTRL+T.
- In Create Table, click OK.
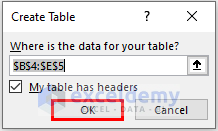
Excel will create a table.

Step 5 – Modify the Quick Access Toolbar
- Right-click.
- Select Customize the Ribbon.
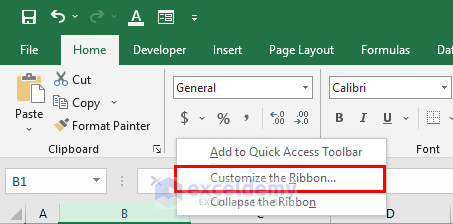
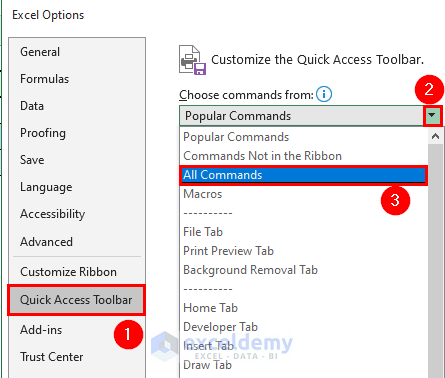
- In the Excel Options window, select Quick Access Toolbar.
- In the drop-down shown below, select All Commands.
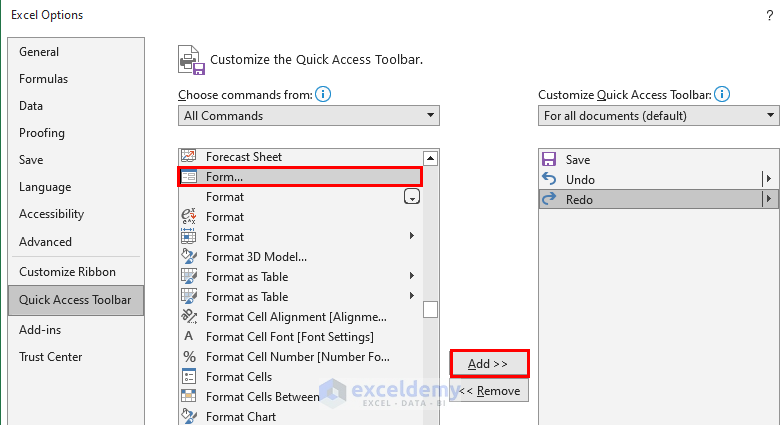
- Select Form.
- Click Add >>.
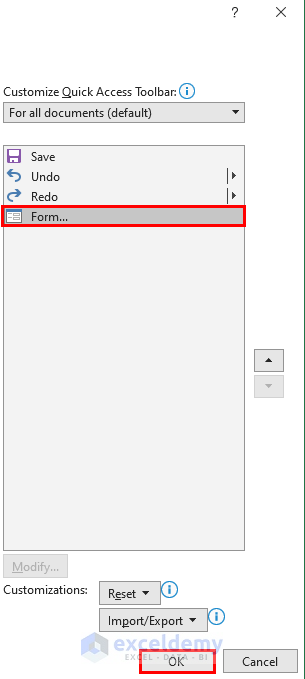
- Excel will add the Form.
- Click OK.
Step 6 -Enter New Records
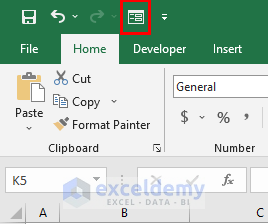
- Select Form in Quick Access Toolbar.
- Select New.
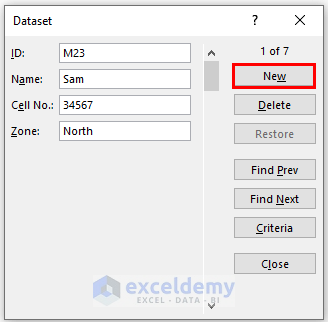
- Enter details.
- Select New.
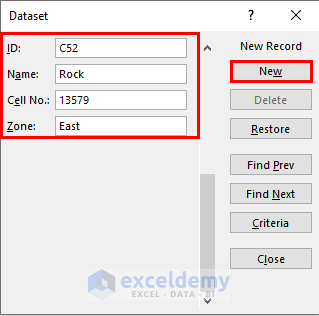
Excel will add the new record.
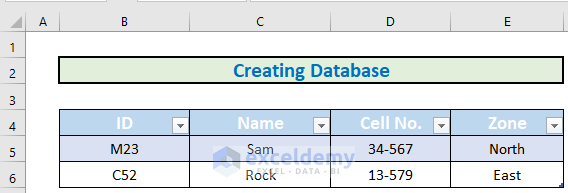
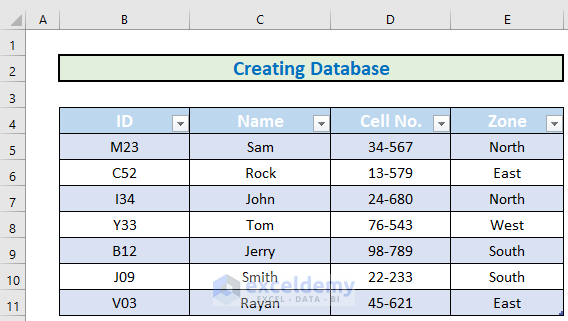
- Complete the table following this method.
Read More: How to Create a Database with Form in Excel
Things to Remember
- Excel is not a database software.
- You can use Microsoft Access to create a database.
Download the workbook and practice.
Related Articles
- How to Create a Database in Excel with Pictures
- How to Create a Simple Database in Excel VBA
- How to Create a Database That Updates Automatically in Excel
- How to Create a Searchable Database in Excel
<< Go Back To Database in Excel | Learn Excel
Get FREE Advanced Excel Exercises with Solutions!

