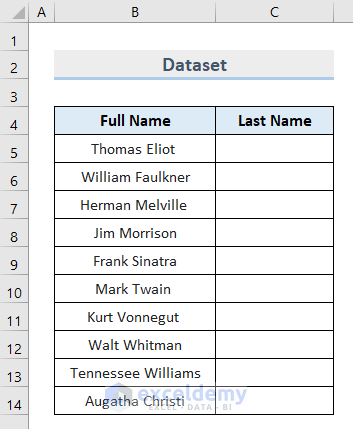
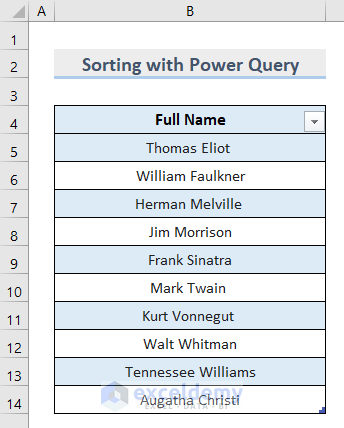
The sample dataset contains 10 Full Names.
Method 1 – Using the Find & Replace Feature in Excel to Extract and Sort by Last Name
- Copy column B by pressing Ctrl + C and paste it in column C by pressing Ctrl + V.
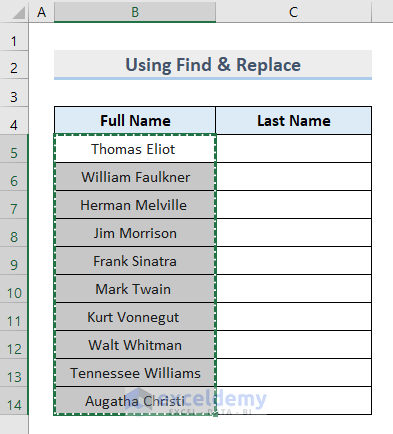
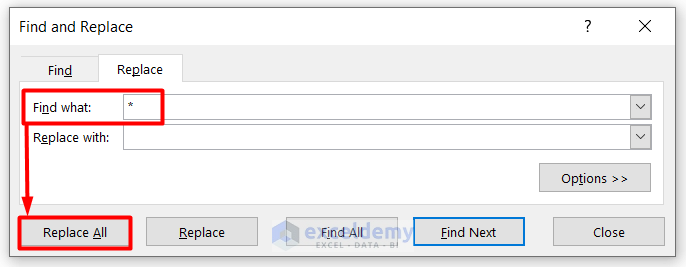
- Select column C and press Ctrl+H to open the Find and Replace dialog box.
- Enter an Asterisk (*) followed by a space in Find what.
- Keep Replace with blank.
- Click Replace All > Close.
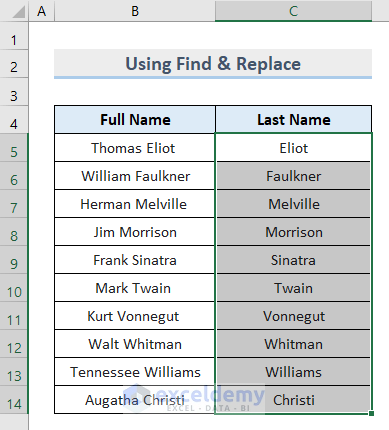
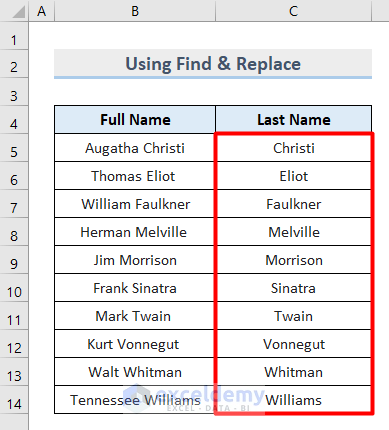
You will extract the last names in C5:C14.
- Select both columns B and C and go to the Data tab.
- Select Sort in Sort & Filter.

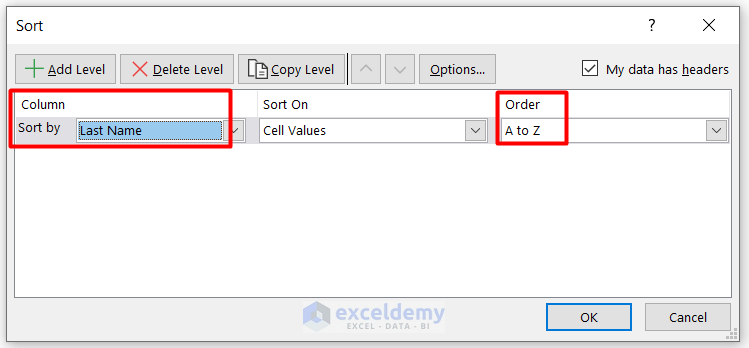
- Choose Last Name in Sort by and A to Z in Order.
- Click OK.
This is the output.
Read More: How to Sort Duplicates in Excel
Method 2 – Applying the Text to Columns Option to Sort by Last Name in Excel
- Go to the Data tab and click Text to Columns in Data Tools.

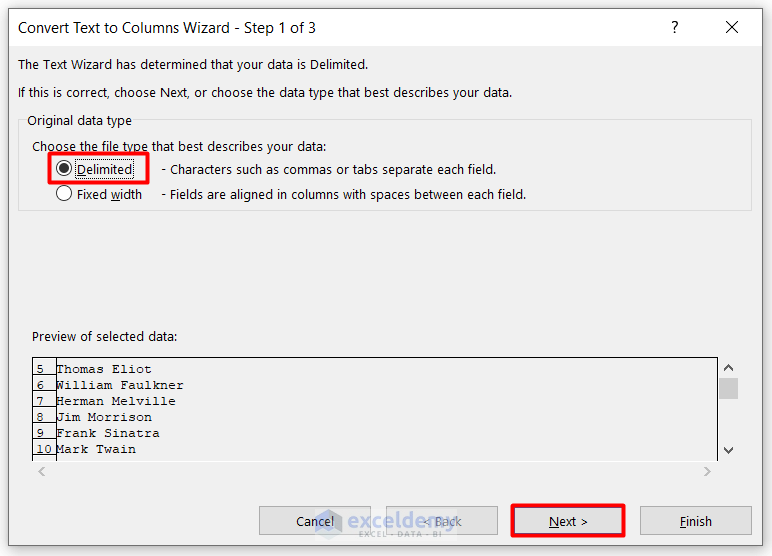
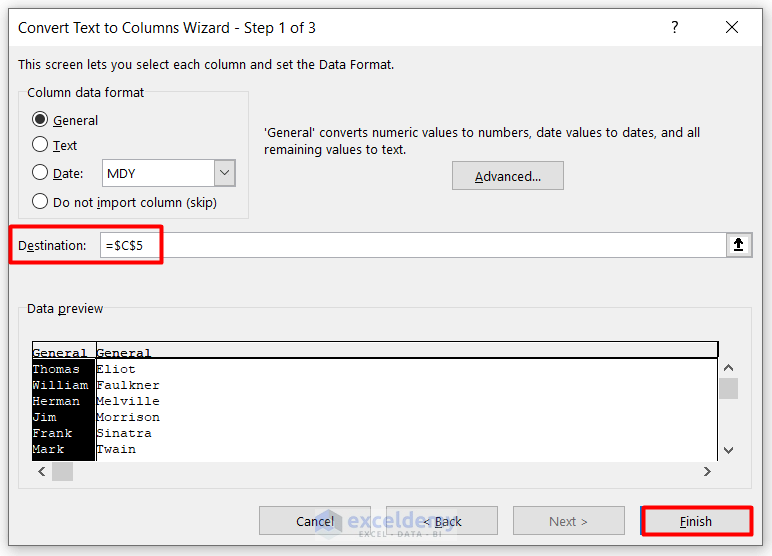
- In the Convert Text to Column Wizard dialog box, select Delimited and click Next.
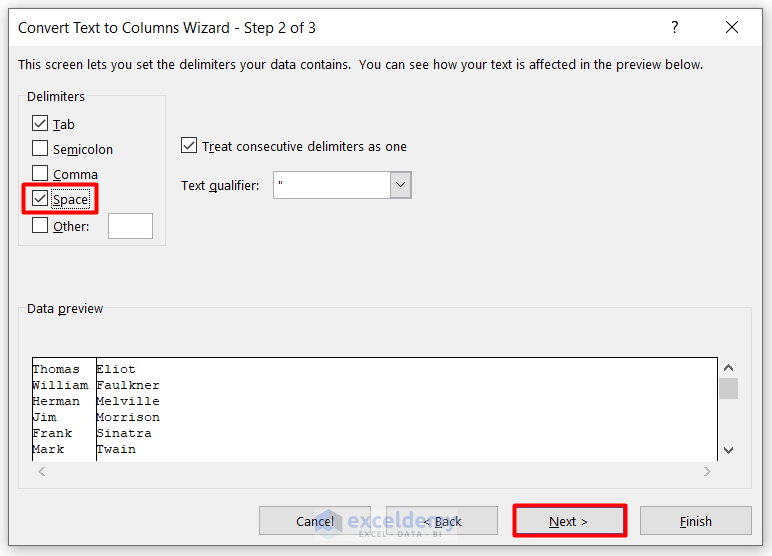
- Select Space as the Delimiter and click Next.
- Choose your workbook in Destination and click Finish.
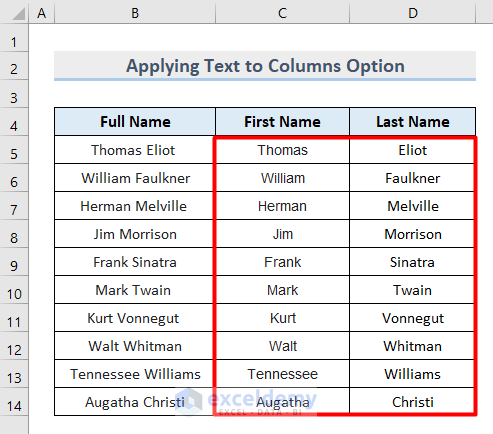
This is the output.
Read More: How to Sort by Name in Excel
Method 3 – Sort by Last Name Using an Excel Formula
- Select C5 and enter the formula.
=RIGHT(B5,LEN(B5)-FIND(" ",B5))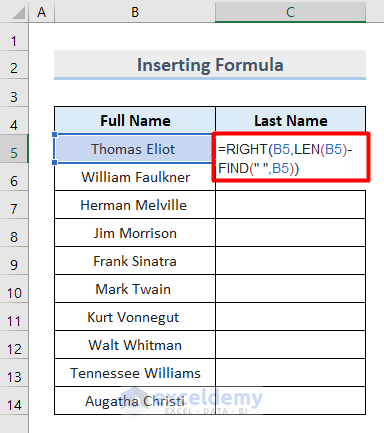
- Press Enter.
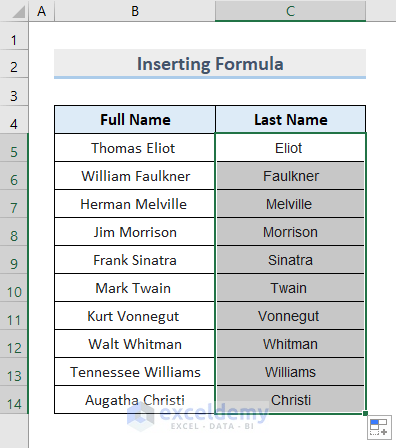
- The Last Name is displayed in the cell.

- Drag down the Fill Handle to see the result in the rest of the cells.
- If there is a middle name or a title before the name, use the formula:
=RIGHT(A2,LEN(A2)-FIND("@",SUBSTITUTE(A2,"","@",LEN(A2)-LEN(SUBSTITUTE(A2," ","")))))It finds the position of the last space character and uses it to extract the last name.
Read More: How to Sort Merged Cells in Excel
Method 4 – Sort by Last Name Using the Excel Flash Fill Option
- Enter the last name in B5 into C5.
- Place the cursor at the bottom-right part of the cell.
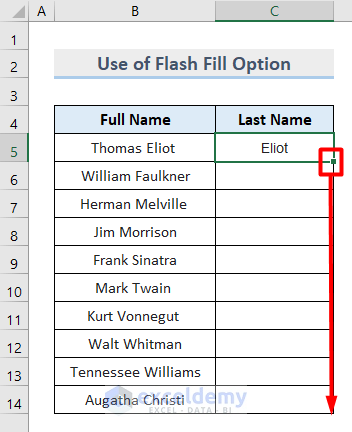
- It changes to a plus icon.
- Select AutoFill and choose Flash Fill.
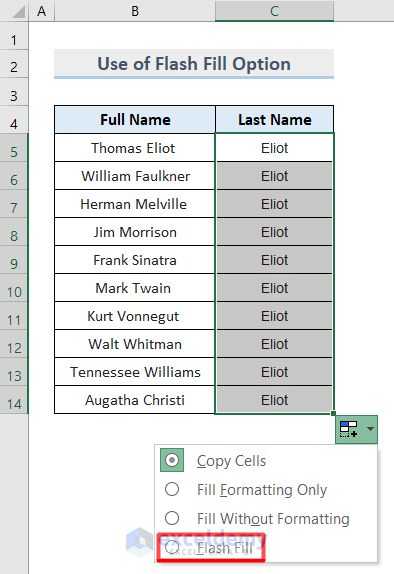
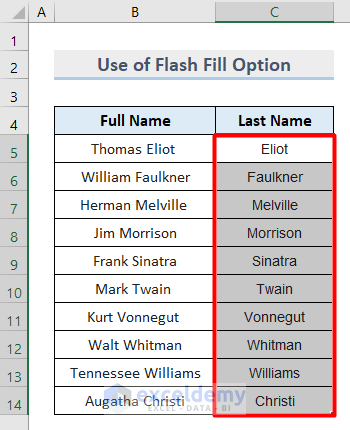
The last names appear in column C.
Read More: How to Sort Unique List in Excel
Method 5 – Extract and Sort by Last Name Dynamically using the Power Query
- Select the dataset with First Names and press Ctrl + T.
- Check My table has headers in the Create Table window and click OK.
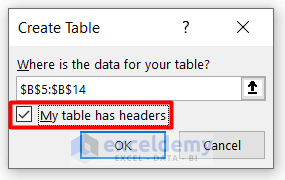
This is the output.
- Go to the Data tab and select From Table/Range in Get & Transform Data.

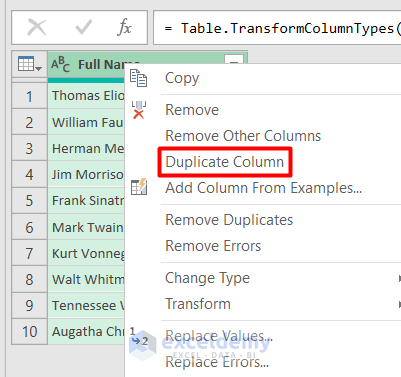
- In the Power Query Editor window, right-click the first column and select Duplicate Column.
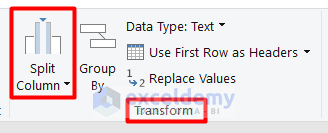
- Click Split Column in Transform.
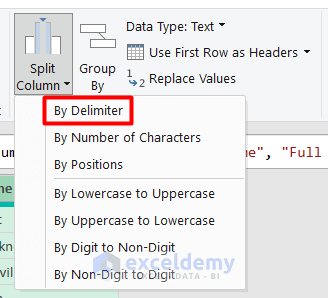
- Choose By Delimiter.
- In the Split Column by Delimiter window, keep the selections as shown below and click OK.
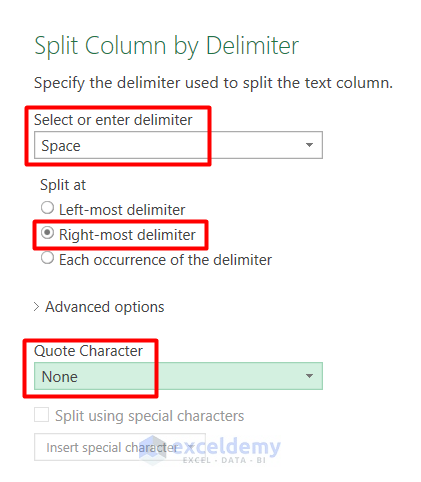
The last names will be displayed in a new column:
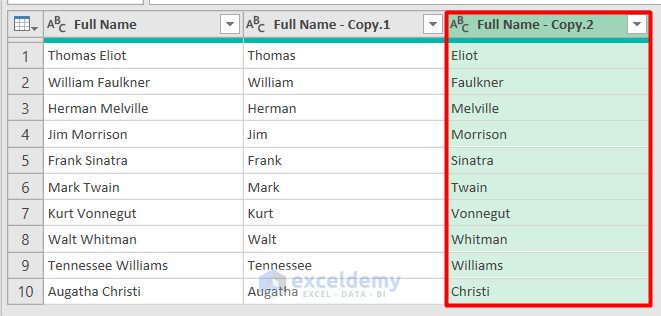
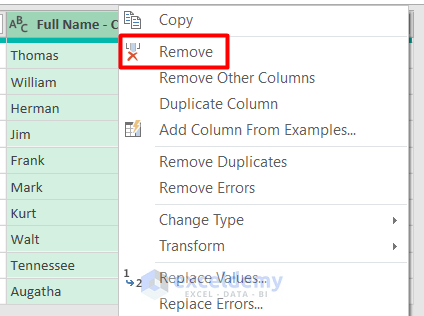
- Right-click the second column header and click Remove.
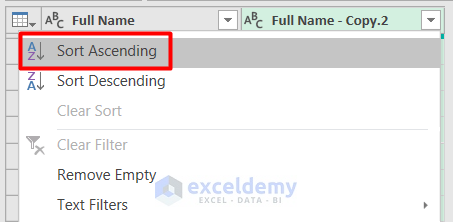
- Click the header arrow in the Full Name- Copy.2 column and select Sort Ascending.
- Go to the Home tab and select Close & Load To.

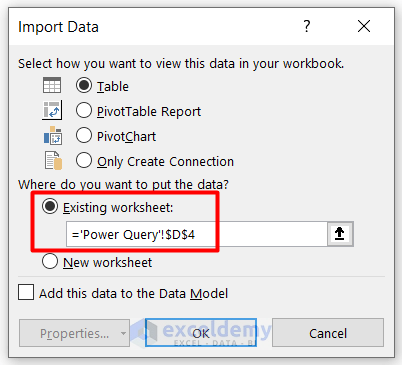
- Select a location in the Import Data dialog box and click OK.
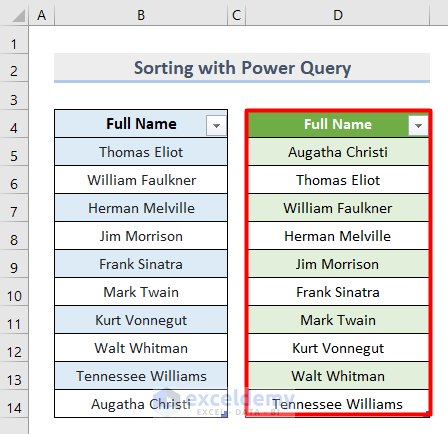
You will get the names sorted by the last names beside the original dataset.
Read More: How to Sort Merged Cells of Different Sizes in Excel
Download Practice Workbook
Download the sample workbook.
Further Readings
- How to Sort in Excel by Number of Characters
- How to Put Numbers in Numerical Order in Excel
- How to Arrange Numbers in Ascending Order in Excel Using Formula
- How to Sort Numbers in Excel
<< Go Back to Sort in Excel | Learn Excel
Get FREE Advanced Excel Exercises with Solutions!

