Here are two simple ways to navigate worksheet tabs in Excel:
- To move to the adjacent sheet tabs, press Ctrl+PgDn to move to the next sheet, and press Ctrl+PgUp to move to the previous sheet.
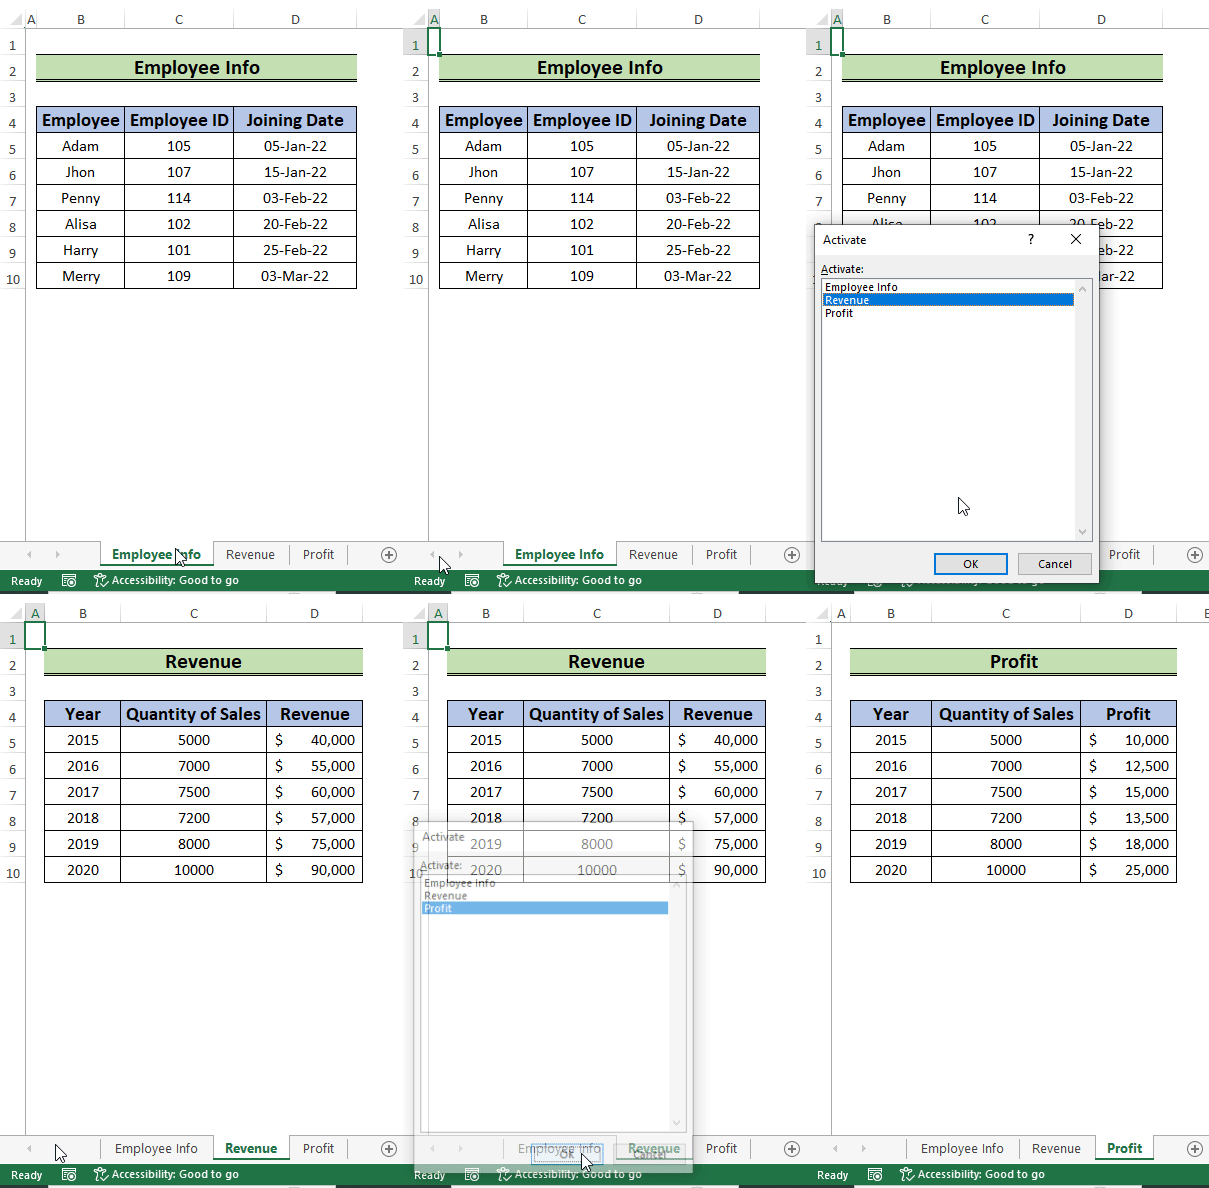
- To move to any particular sheet, irrespective of the tab position, go to the bottom left corner of the sheet > right-click on it to open the Activate dialog box > choose any particular sheet that you want to move to > press OK.
Tab navigation in Excel enables users to easily switch between different worksheets or tabs within a workbook. Each sheet is represented by a tab located at the bottom of the Excel window.
Consider a workbook that consists of three worksheets: “Employee Info,” “Revenue,” and “Profit,”. In this tutorial, we will use this workbook to demonstrate various techniques to navigate between worksheet tabs. For example, in the gif below, we move from one sheet to another using the tab navigation button from the Activate dialog box.
Method 1 – Clicking on Sheet Name
This method is widely used for tab navigation in Excel. You can switch between sheets by simply left-clicking on the sheet names.
Steps:
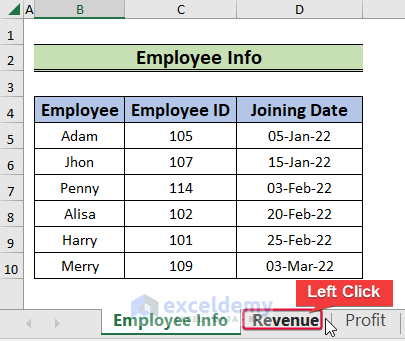
- Place the cursor on the name of the desired worksheet.
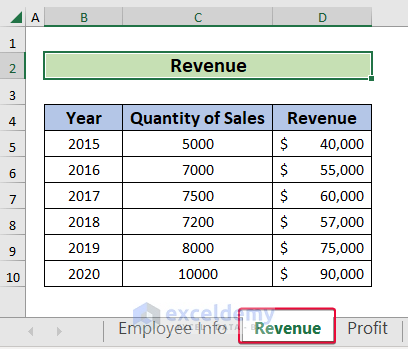
In this case, we will place the cursor on the “Revenue” tab. - Left-click on it.
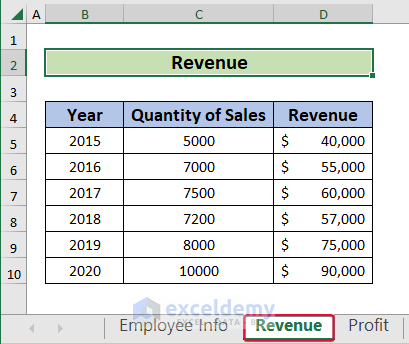
As a result, the “Revenue” sheet will be the active sheet.
Method 2 – Using Keyboard Shortcut
This approach is efficient for navigating to adjacent (previous or next) sheets in Excel.
Steps:
- Press Ctrl + PgDn on the Employee Info tab to move to the right.
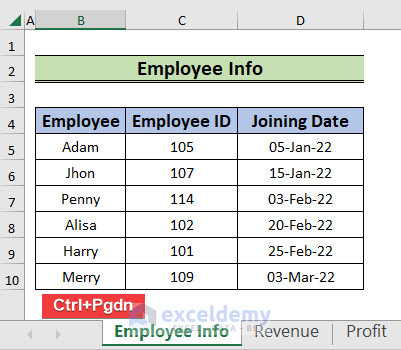 As a result, we will move from the “Employee Info” to the “Revenue” sheet.
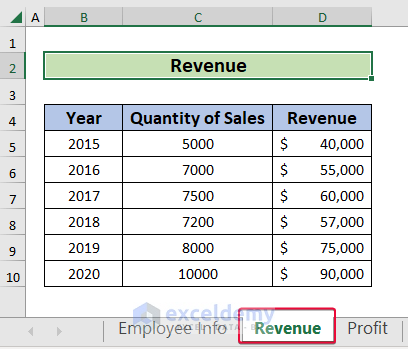
- Press Ctrl + PgUp on the “Revenue” tab.
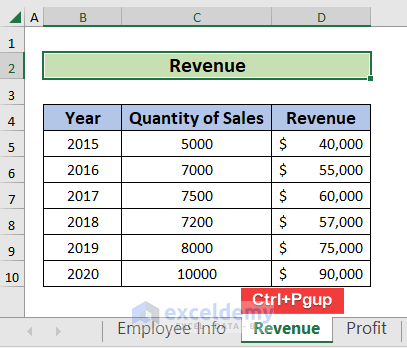
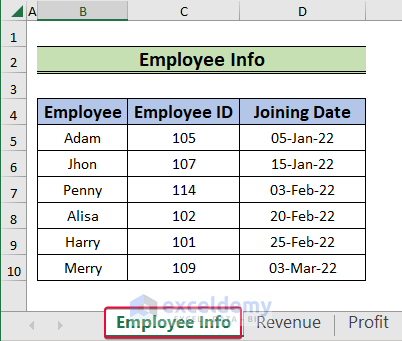
Consequently, it will take you to the “Employee Info” sheet.
Method 3 – Using Activate Dialog Box
As you access the Activate dialog box, a list of the sheet names will be displayed. Then simply select any sheet to navigate between sheets.
Steps:
- Go to the bottom left corner of the sheet.
- Right-click on it.

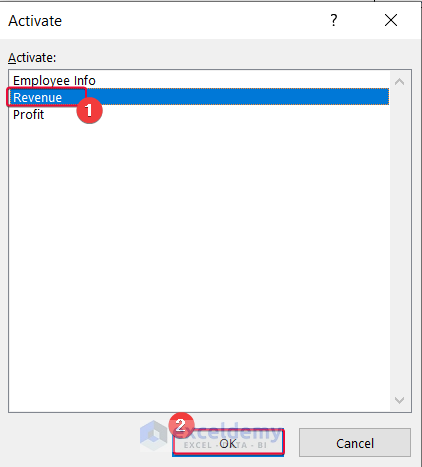
The Activate dialog box will appear with a list of the existing sheets of the workbook.
- Select your preferred sheet from the list and press OK.
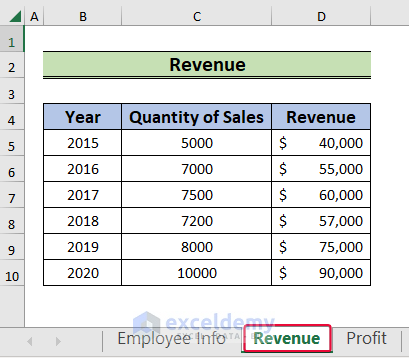
Excel will take us to our desired sheet.
Method 4 – Applying Hyperlink to Navigate Tabs
We can establish a connection between two sheets by linking the cell value of one sheet to the corresponding link of another sheet. By clicking on the cell value, Excel will navigate to the linked sheet.
Steps:
- Right-click on the desired sheet name where we will place the hyperlink. In this case, cell F5.
- Select Link from the context menu.
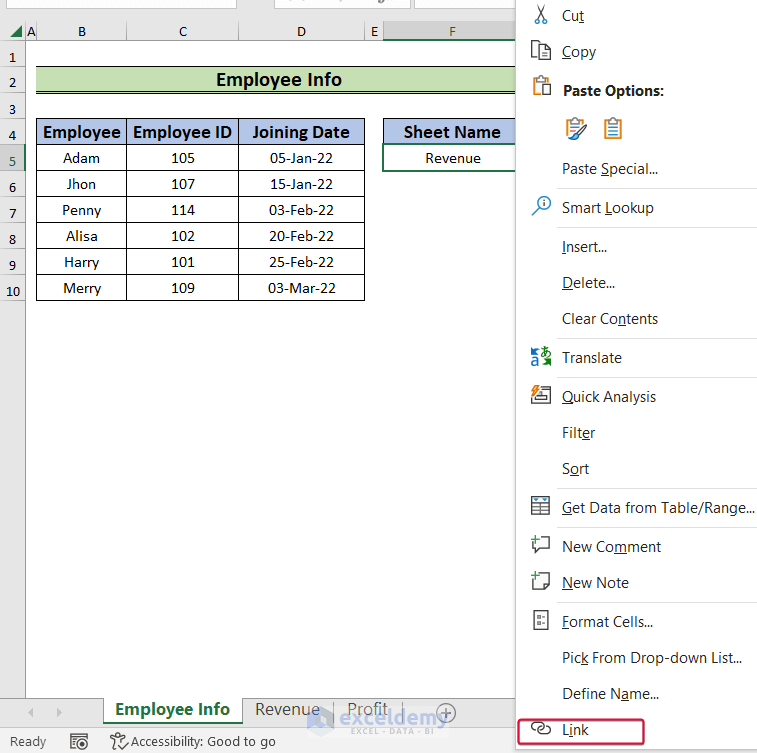
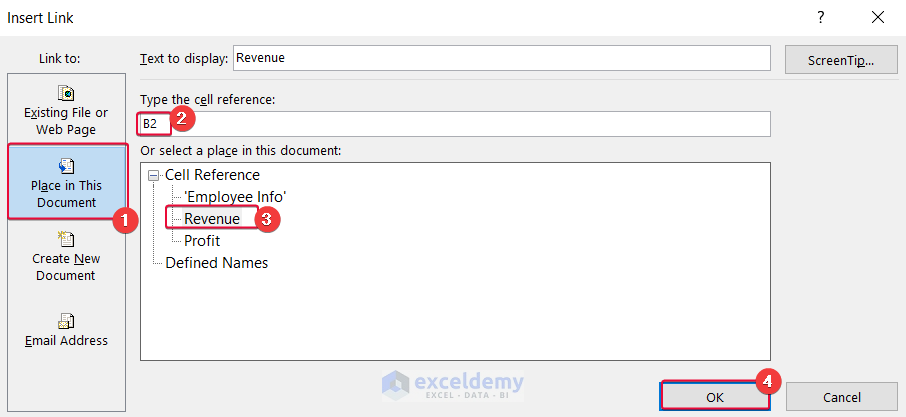
This will open the Insert Link dialog box.
In the Insert Link dialog box:
- Go to Place in This Document.
- Enter your desired cell (in this case, cell B2) in the Type the cell reference box.
- Click on the desired sheet (in this case, the “Revenue” sheet) that you want to link to.
- Click on OK.
As a result, the two sheets will be linked together.
- Click on the value in your specified cell.
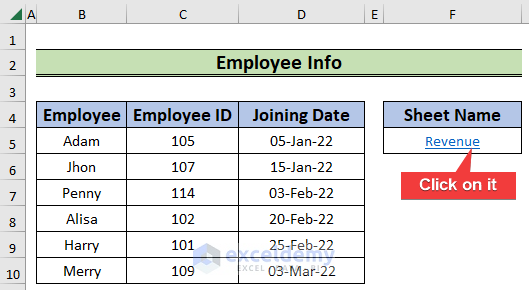
Excel will take us to the “Revenue” sheet.
Method 5 – Using Navigation Pane
The Navigation Pane in Excel is useful for finding and accessing various objects such as worksheets, tables, charts, images, etc.
Steps:
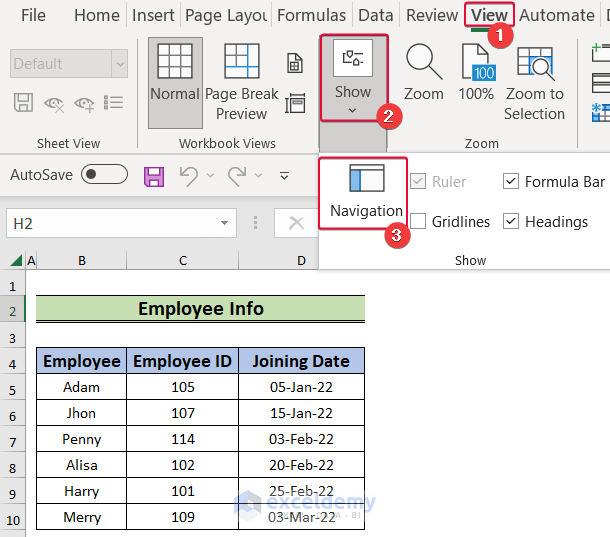
- Go to the View tab.
- Select the Navigation command under the Show option.
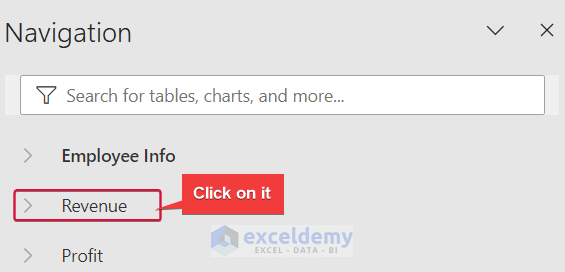
The list of the prevailing worksheets will appear on the right side of the active sheet.
- Click on the sheet where you want to go.
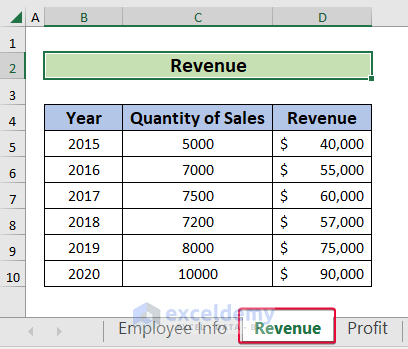
Excel will move to that sheet.
Method 6 – Using Name Box
We can use the Name Box to specify the name of either a cell or a cell range. In this method, we will assign a name to a single cell on each sheet within the Name Box. Then, we will utilize the Name Box to facilitate tab navigation in Excel.
Steps:
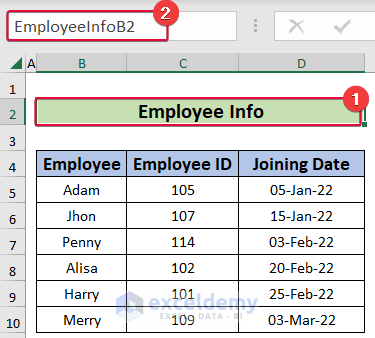
- Select the desired cell (in this case, cell B2) in the Employee Info sheet.
- Go to the Name Box and define the name as EmployeeInfoB2.
- Press Enter.
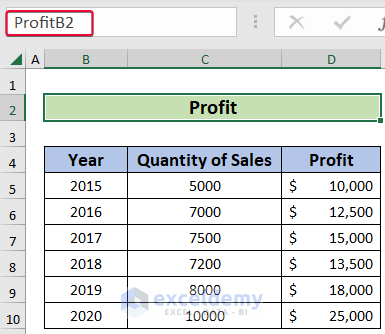
- Select cell B2 in the “Revenue” sheet and name it RevenueB2.

- Name cell B2 in the “Profit” sheet as ProfitB2 in the Name Box.
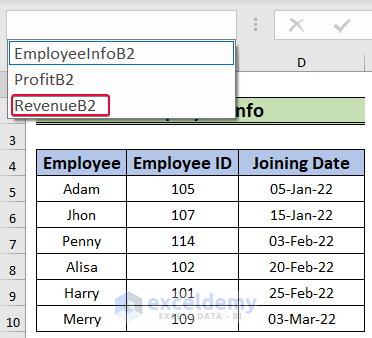
- Go to the Name Box in the Employee Info sheet and click on the drop-down sign.
We see the names defined in the drop-down list.
- Click on RevenueB2.
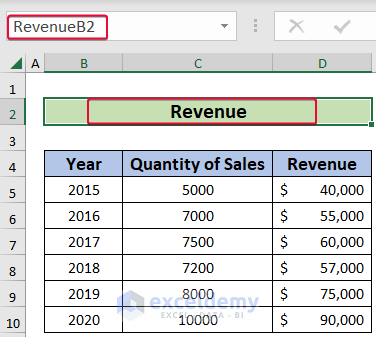
Excel will take us to cell B2 in the “Revenue” sheet.
Method 7 – Using Go To Dialog Box
The Go To dialog box in Excel is also able to navigate between worksheet tabs. It will ask for the cell reference of the desired sheet, and take us directly to that specific sheet.
Steps:
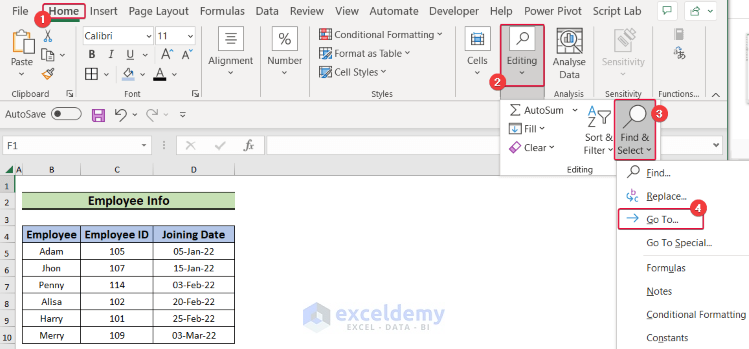
- Go to the Home tab.
- Select Find & Select from the Editing group.
- From the drop-down list, choose Go To.
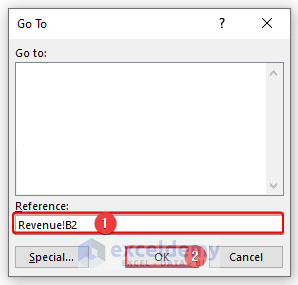
As a result, a prompt will appear on the screen.
- In the Reference field, type “Revenue!B2.”
- Click OK.
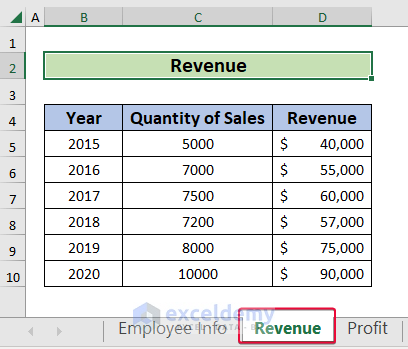
We will end up in cell B2 in the “Revenue” sheet.
Note: In the Reference field, make sure to add a ”!” symbol after the Sheet name
Method 8 – Using Dedicated Navigation Button
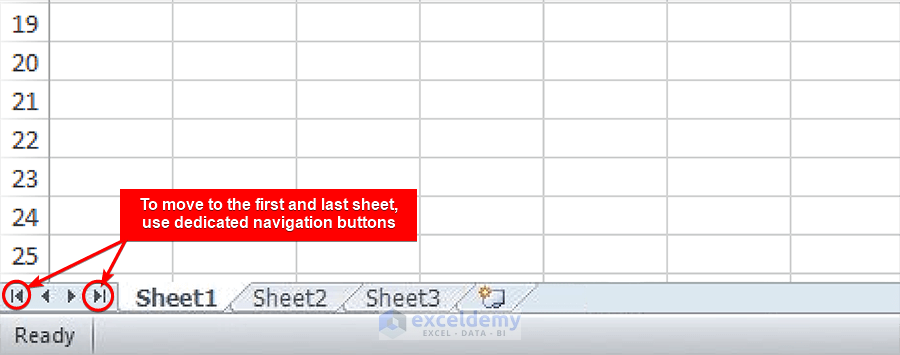
If your workbook contains numerous worksheet tabs, you may find it difficult to swiftly navigate to either the first or final sheet within the workbook.
In previous versions of Excel such as Excel 2010, this task was easy due to the presence of dedicated buttons for scrolling to the first or last sheet in the workbook. From Excel 2013 onwards, the dedicated buttons for navigating to the first or last sheet are no longer available.
If you still use Excel 2010 or lower versions, you can use these buttons to navigate to the first and last worksheet tabs in your workbook.
Download Practice Worksheet
Frequently Asked Questions
Can I customize the appearance of sheet tabs for better organization?
Yes. Right-click on a sheet tab, select “Tab Color,” and choose from a variety of colors.
What’s the significance of naming tabs in Excel?
Renaming tabs with descriptive titles improves navigation clarity. Right-click on a sheet tab, select “Rename,” and enter a meaningful name. This practice is especially helpful in complex workbooks.
How do I navigate between open workbooks using Excel’s ribbon interface?
In the “View” tab, within the “Window” group, use the “SwitchWindows” dropdown to navigate between open workbooks. This feature is useful when dealing with multiple Excel files.
How do I protect certain sheets in Excel to prevent accidental changes during navigation?
Right-click on a sheet tab, select “Protect Sheet,“ and set a password if needed. This ensures that only authorized users can make changes to protected sheets, adding a layer of security to your workbook.
Related Articles
- How to Perform Cell Navigation in Excel
- How to Create Navigation Buttons in Excel
- [Fixed] Excel Navigation Arrow Keys Not Working
- How to Navigate Large Excel Spreadsheets
- How to Use Navigation Keys in Excel
<< Go Back to Navigation in Excel | Learn Excel
Get FREE Advanced Excel Exercises with Solutions!
