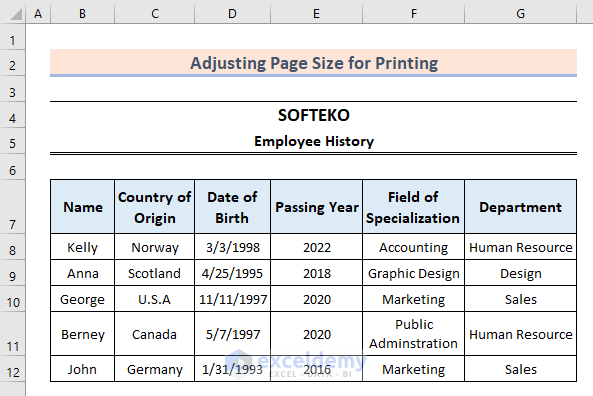
A common problem when printing from Excel is that the page size or printing area does not look the way we want. This article will present 6 quick tricks to adjust the page size for printing in Excel. For illustration, we’ll use the following dataset containing employee information.
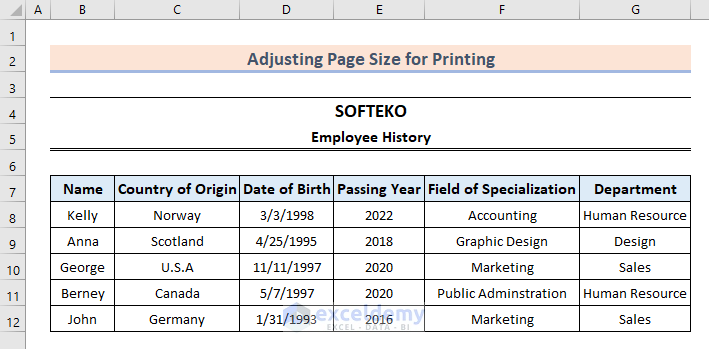
Let’s see what the print preview before any adjustments looks like.
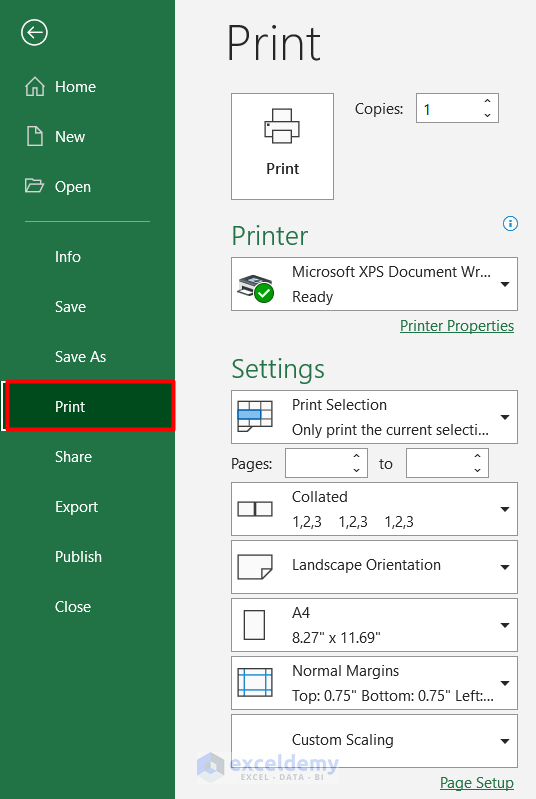
- Select the File tab in the Excel ribbon.

- Select Print from the options to see the Print Preview.
The page we want to print is not well aligned and needs adjustment.
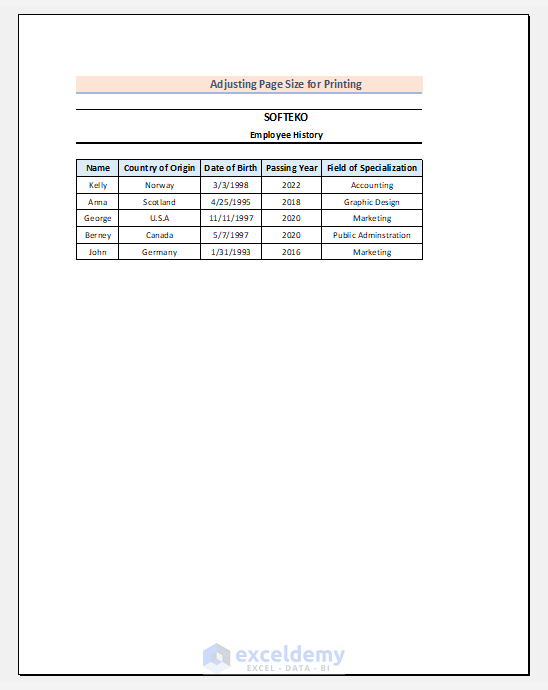
Let’s apply some tricks to adjust the page size for printing.
Method 1 – Using Wrap Text
The first option we have is to adjust the column and row widths by compressing the texts of certain cells where necessary.
Steps;
- Select cell C7.
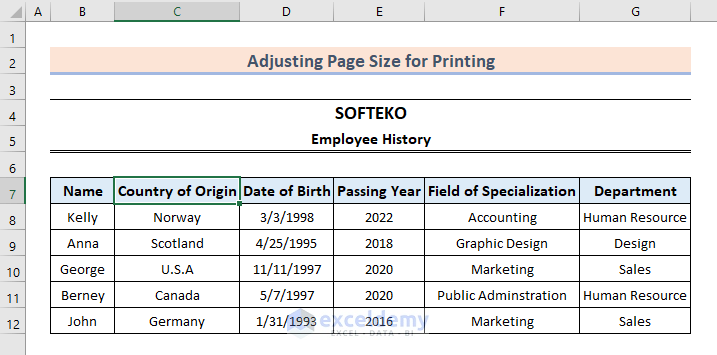
- Select Wrap Text from the Alignment section in the Home tab.

The text of cell C7 has been split across two lines, compressing the column width.
- Apply the Wrap Text tool to other cells where required.
Method 2 – Adjusting the Page Margin
We can also set up the page margin to adjust the printing output in Excel.
Steps;
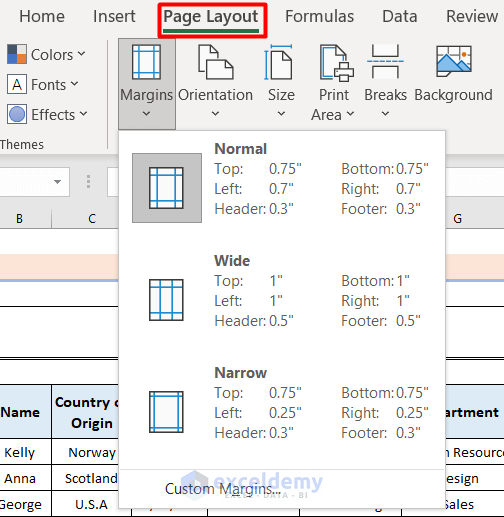
- Go to the Page Layout tab in the Excel ribbon and select Margins.
- Choose any of the margin options from the drop-down list.
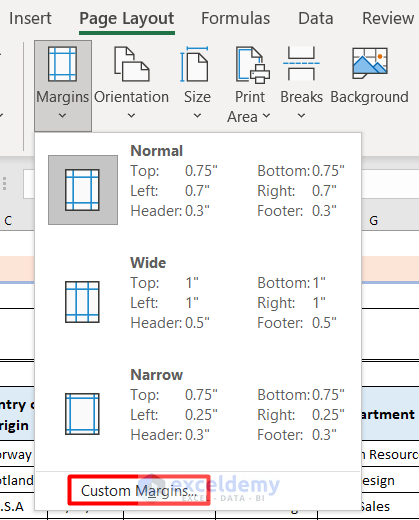
- If you need to make more adjustments to the margin than provided by the default options, select the Custom Margins option.
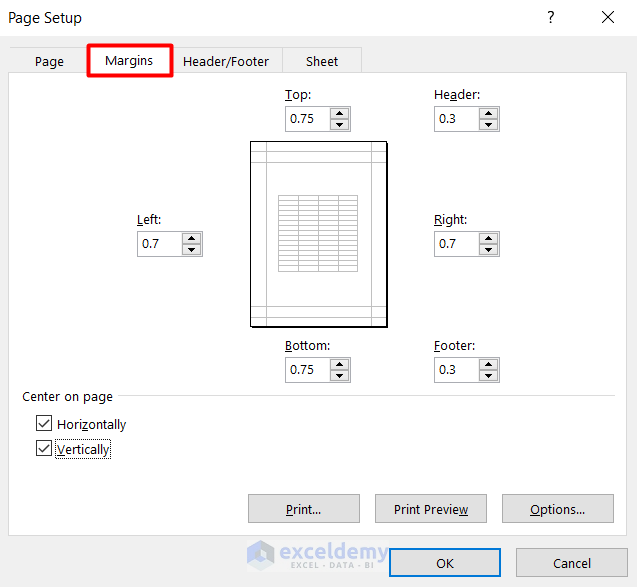
The Page Setup window will appear.
- Select the Margins tab and adjust the page margins more precisely.
- Click OK.
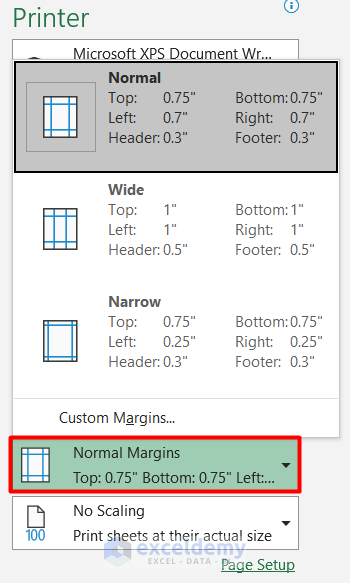
The Margin option can also be accessed from the Settings section of the Print Preview.
Method 3 – Changing the Page Orientation
There are several ways to change the page orientation.
Steps;
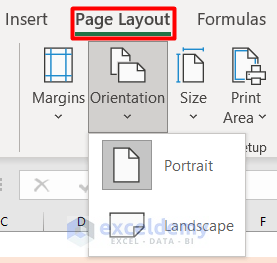
- Go to the Page Layout tab and select Orientation.
Portrait and Landscape options are offered.
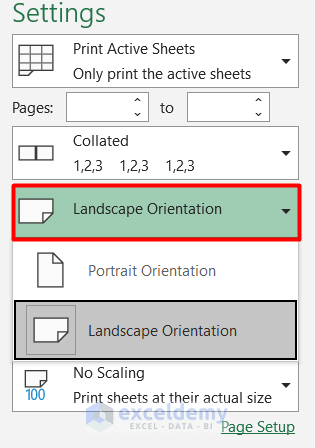
This option can also be found in the Settings option of the Print Preview.
- Alternatively, to change the orientation of the Excel page, go to the Page Layout tab and click on the Arrow icon marked in the image below:

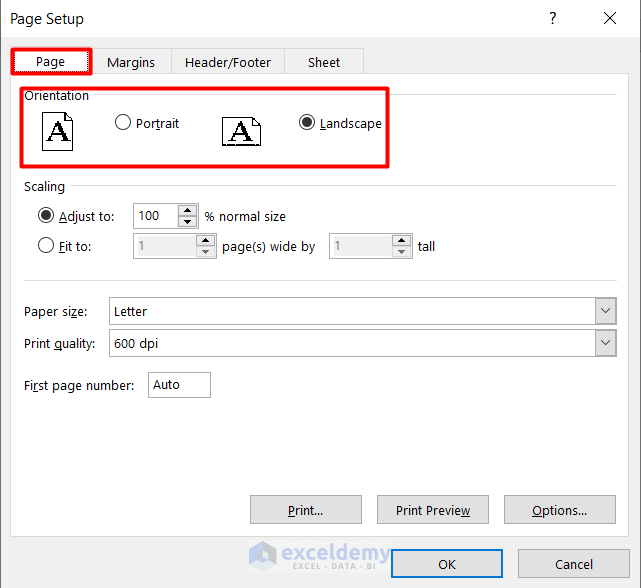
The Page Setup window will open.
- Change the page orientation to Landscape.
- Click OK.
Method 4 – Defining the Page Size
One of the common mistakes when printing worksheets is not defining the page size.
Steps:
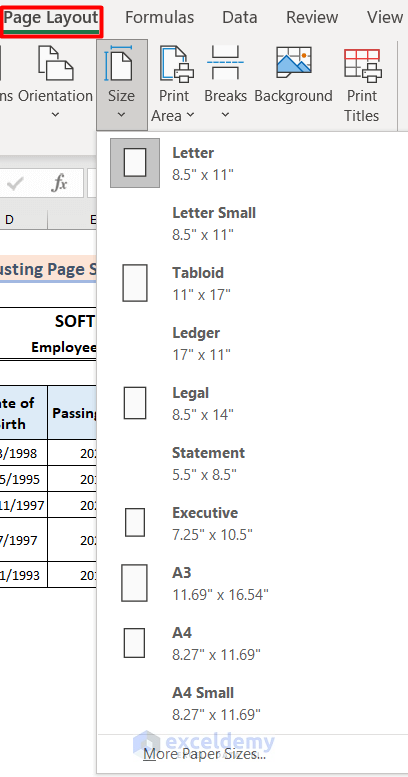
- Go to the Page Layout tab and select Size.
- Choose any of the page sizes from the drop-down.
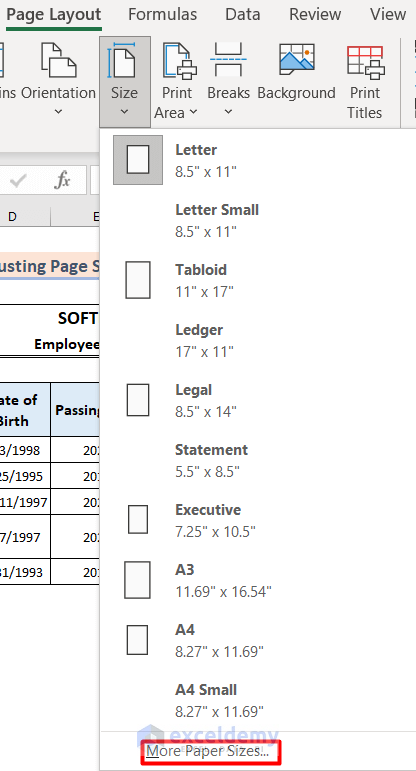
- To explore more options, select More Paper Sizes.
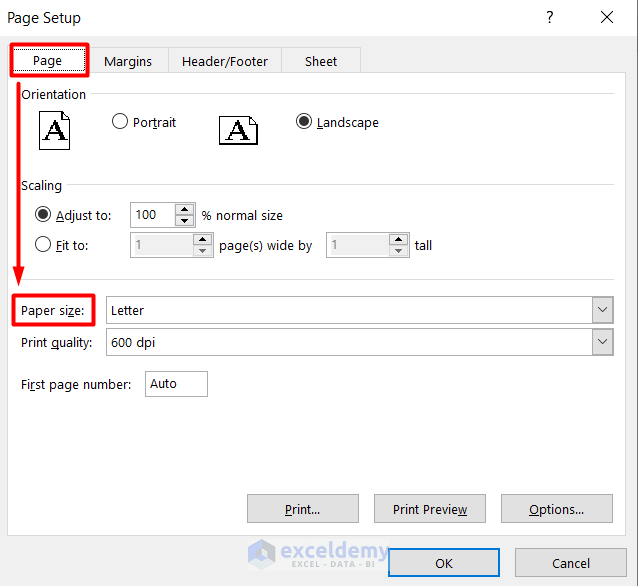
- Change the Paper Size in the Page Setup window and click OK.
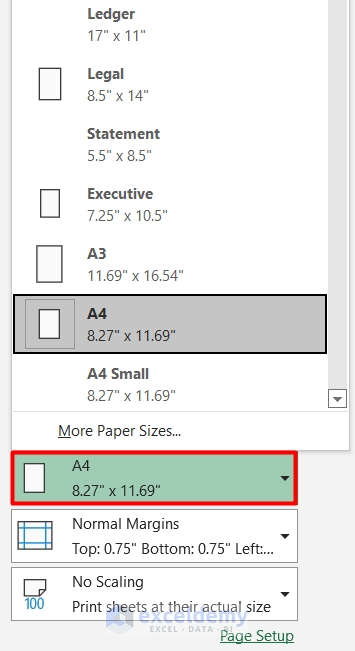
- The page size can also be adjusted from the Settings section in Print Preview.
Method 5 – Scaling the Page
Scaling is an essential step to adjust page size in Excel for printing.
Steps;
- Select the Page Layout tab in the Excel ribbon.
- Change the page scale from the Scale to Fit section.

- Click the Arrow button in the Scale to Fit section to access the Page Scaling options.
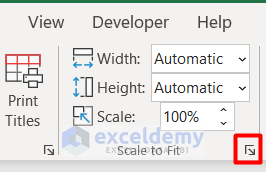
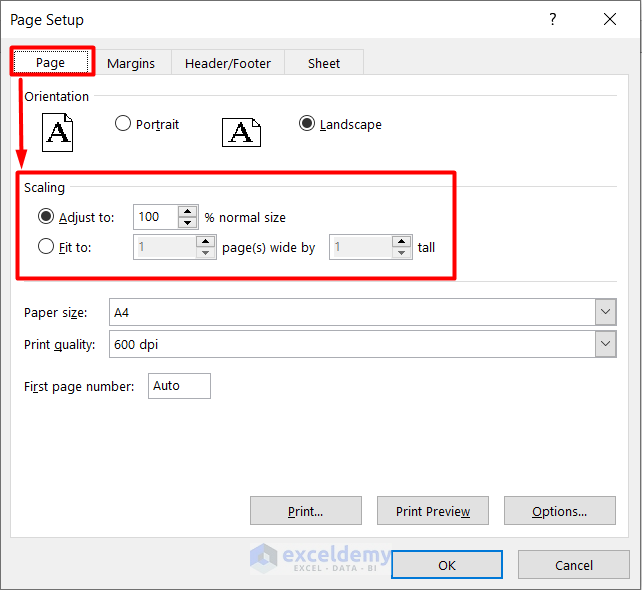
- Change the Scaling in the Page section of the new Page Setup window.
- Click OK.
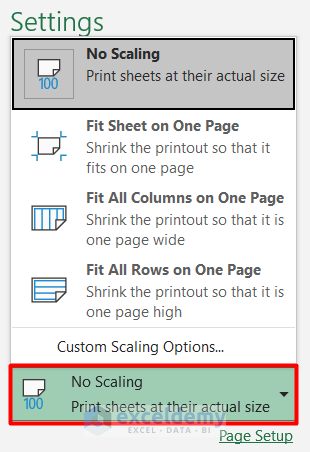
- The page scale can also be adjusted in the Settings section of Print Preview.
Method 6 – Selecting the Print Area
This final trick involves properly selecting the print area. Particularly when working with a large dataset or multiple worksheets, proper selection of the print area is essential.
Steps;
- Select the whole dataset, or the specific part to be printed.
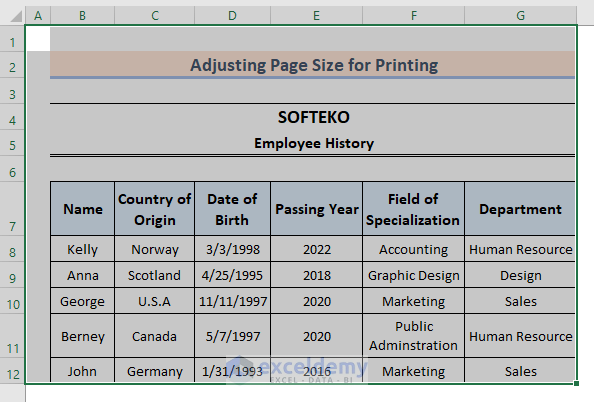
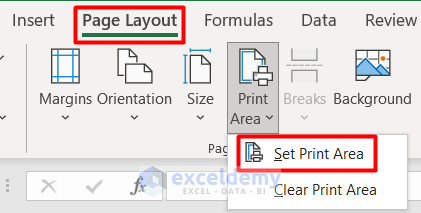
- Go to the Page Layout tab and click on Print Area from the Page Setup section.
- Choose Set Print Area from the Context Menu.
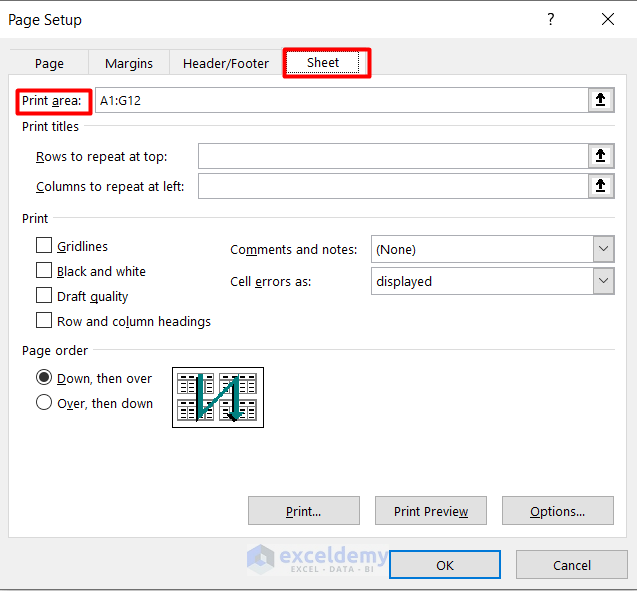
- The Page Setup window can also be opened by clicking the right bottom arrow and selecting Sheet.
- Insert the range of cells in the Print Area box and click OK.
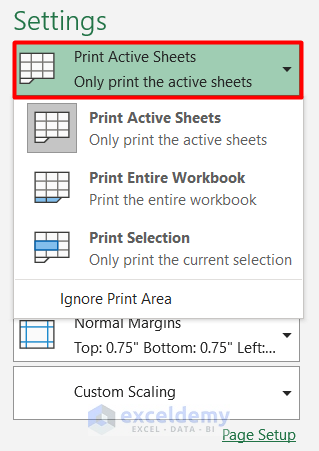
- The print area can also be set in the Settings section of Print Preview.
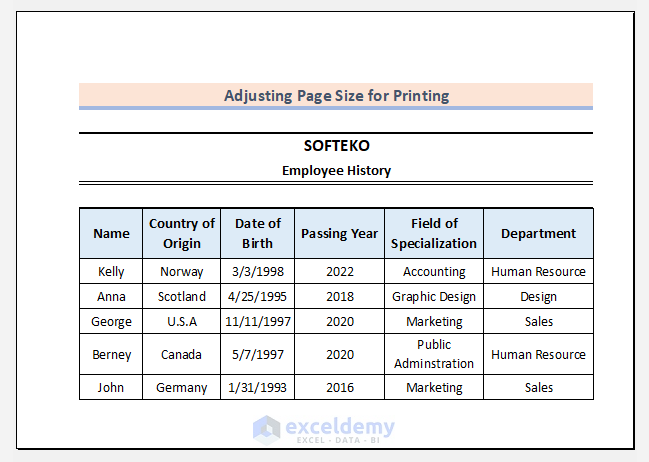
After all the above adjustments, the page size looks like the image below and is ready to print now.
Quick Shortcuts for Printing in Excel
Here are some quick shortcuts to simplify the job of adjusting page size:
- Press Ctrl + P to directly open the Print window.
- Go to the Settings section and select Page Setup in the Print Preview.
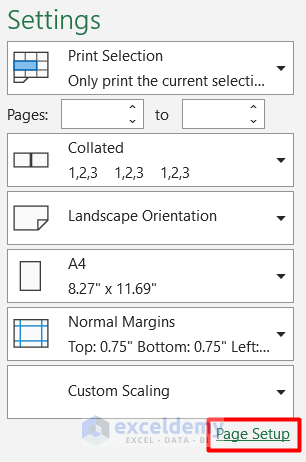
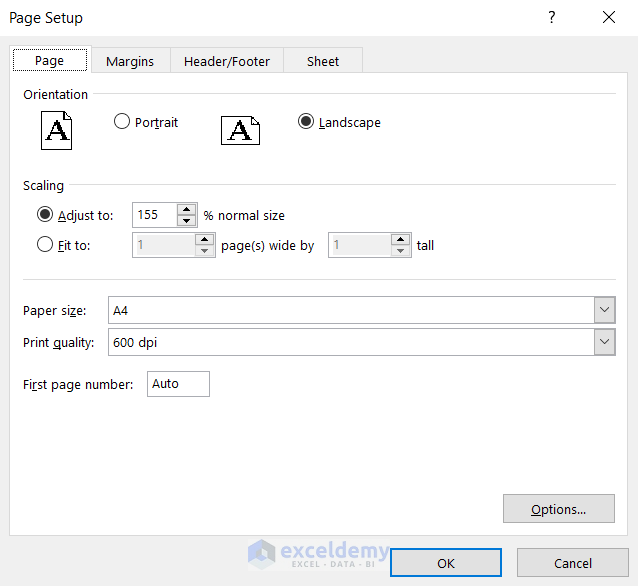
This will open the Page Setup window where all the adjustments can be made at once.
Download Workbook
Related Articles
- How to Change Page Orientation in Excel
- How to Change Orientation of Worksheet to Landscape in Excel
- How to Save Excel as PDF Landscape
- How to Save Excel as PDF Fit to Page
- How to Make Excel Look Like a Page
<< Go Back to Page Setup in Excel | Print in Excel | Learn Excel
Get FREE Advanced Excel Exercises with Solutions!

