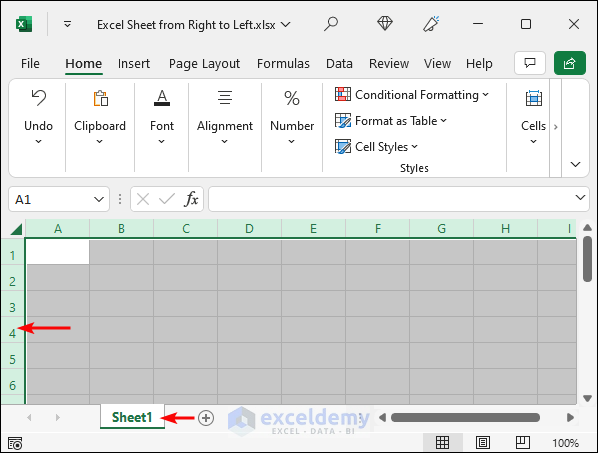
The Excel sheet direction is by default from left to right. It shows the row numbers and sheet tabs on the left. The column numbers also start from the left.
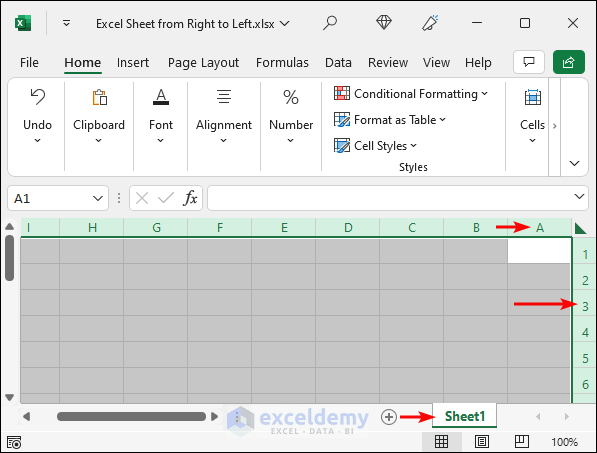
If you change the sheet direction, it will look as follows. Here the row numbers and sheet tabs are on the right. The column numbers also start from the right.
Method 1 – Using Excel Options
Steps:
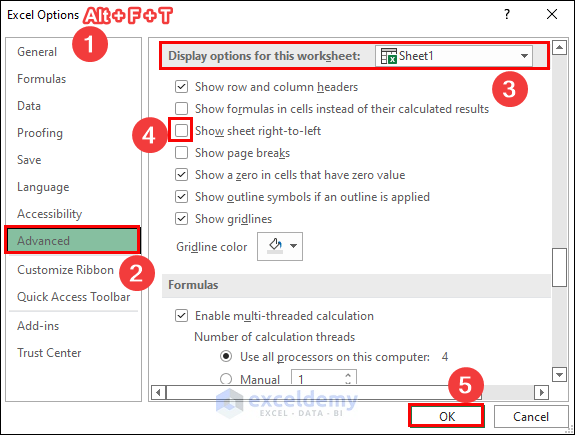
- Press Alt + F + T to open the Excel Options.
- Select the Advanced tab.
- Go to the Display options for this worksheet section.
- Uncheck the Show sheet right-to-left checkbox.
- Click on the OK button.
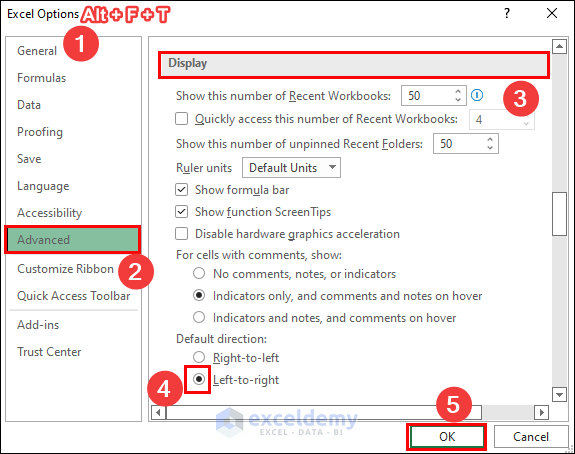
- This may not work for new workbooks if the default sheet direction is set to Right-to-left. Go to the Display section to fix that.
- Mark the radio button for Left-to-right to reset the Default Direction.
- Click OK.
Method 2 – Add the Right-to-Left Document Command to the Quick Access Toolbar
Steps:
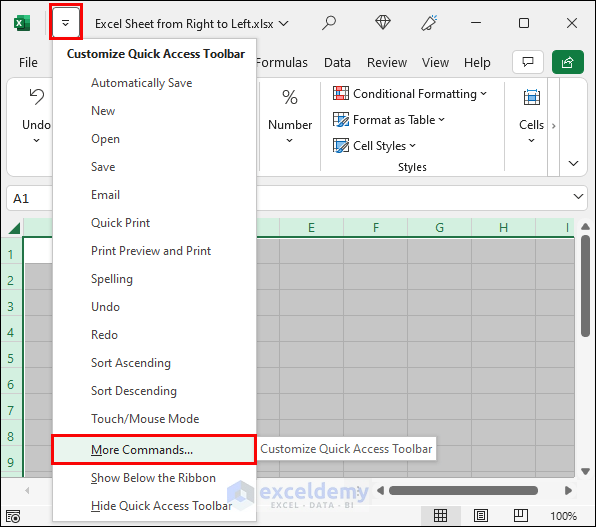
- Click on the Quick Access Toolbar menu as shown below.
- Select More Commands. This will take you to the Quick Access Toolbar tab on the Excel Options window.
- Alternatively, you can use the Alt + F + T shortcut.
- Choose All Commands from the dropdown list.
- Scroll down and select Right-to-Left Document.
- Click on the Add button.
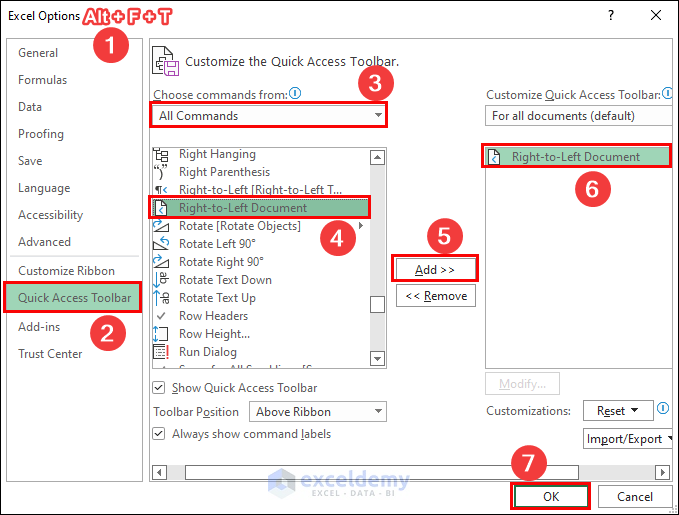
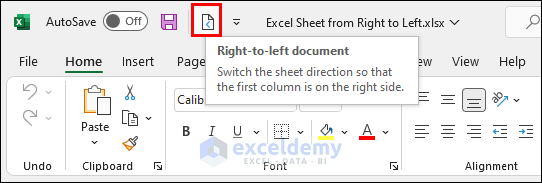
- The command will be available in the Quick Access Toolbar. You can change the sheet direction with a single click.
Method 3 – Customize the Ribbon to Add the Right-to-Left Document
Steps:
- You can see the command included in the Sheet Options group in the Page Layout tab from Excel Options.
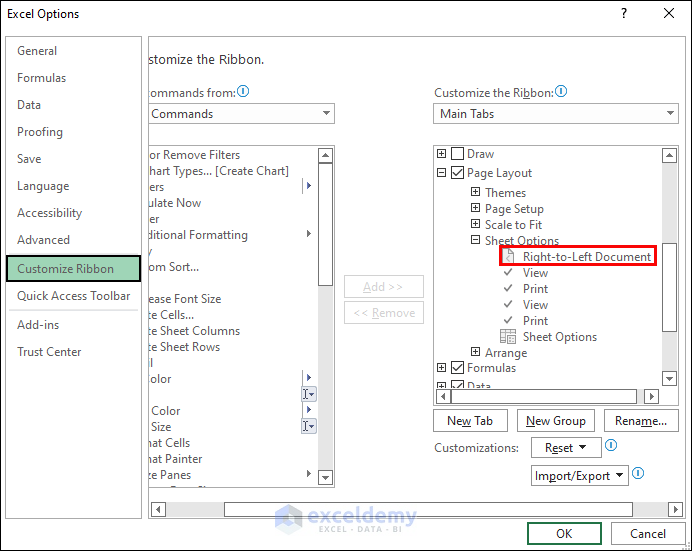
- Yet, it is not visible in the Ribbon.

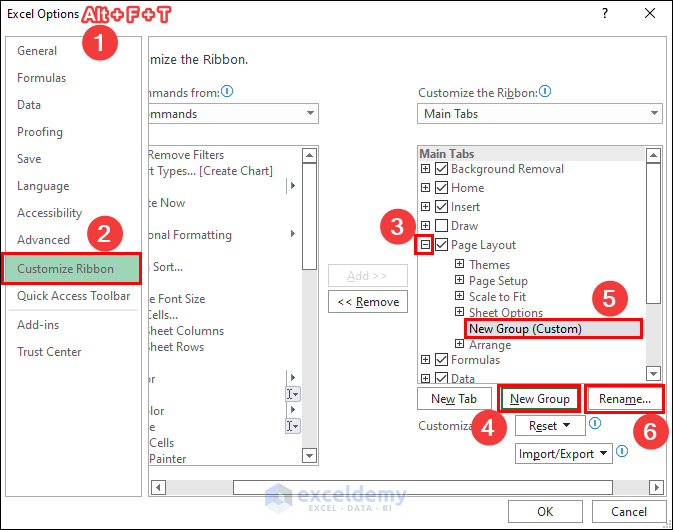
- Use the Alt + F + T shortcut to Excel Options. You can also select File >> Options to do that.
- Select the Customize Ribbon tab.
- Expand the Page Layout tab and select the Sheet Options group.
- Click on the New Group button below. A custom group will be created.
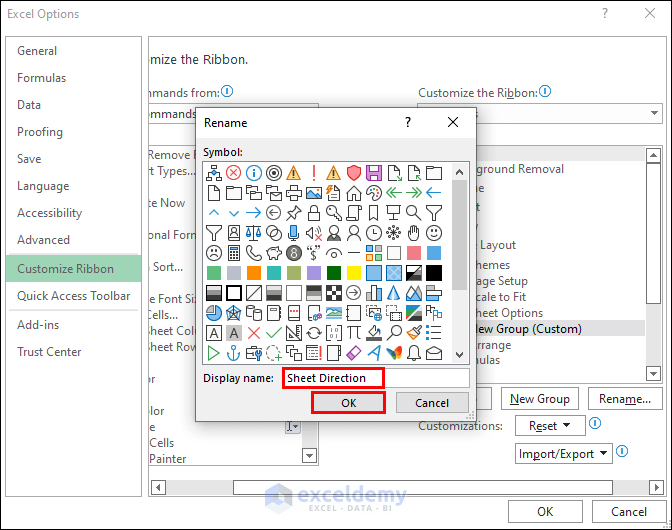
- Select the group and click on Rename.
- Type a name and click OK.
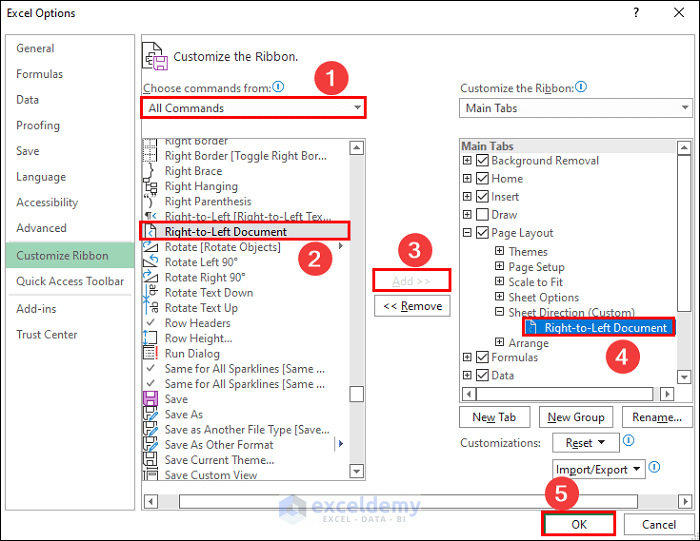
- Choose All Commands using the dropdown.
- Select the Right-to-Left Document command and then click on the Add button.
- Click OK.
- You can access the command from the Page Layout tab.

Method 4 – Using the Group Policy Editor
Steps:
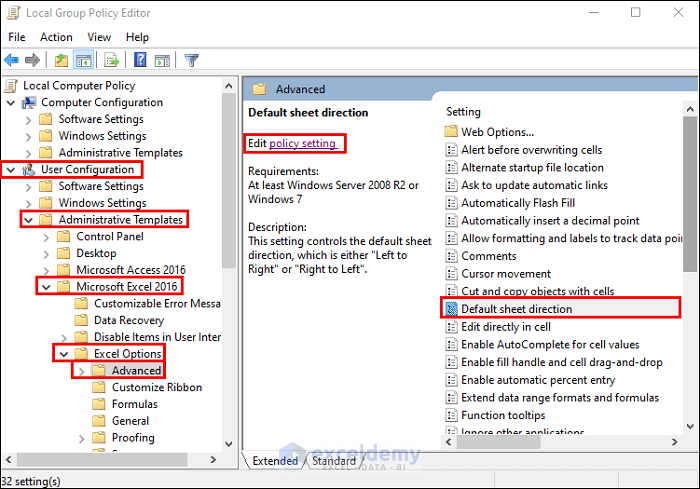
- Type gpedit.msc on your Windows search bar and press ENTER.
- Go to the following path: User Configuration >> Administrative Templates >> Microsoft Excel >> Excel Options >> Advanced.
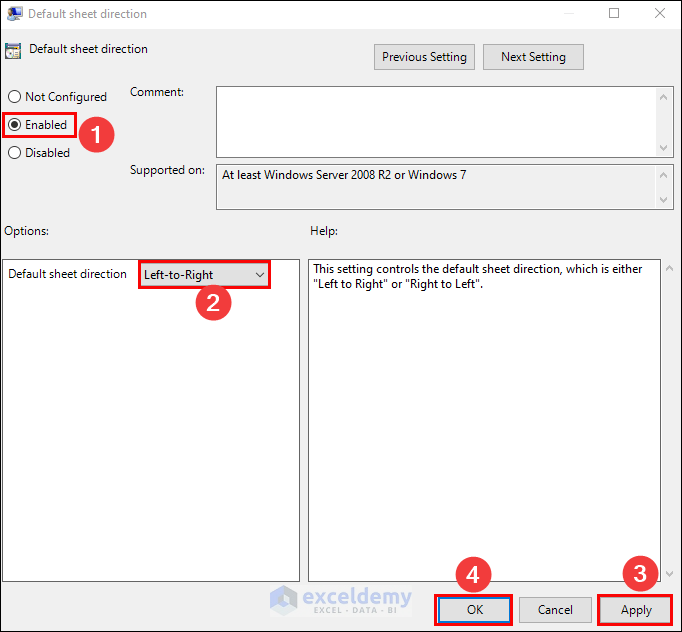
- Double-click on the Default sheet direction setting.
- Mark the radio button for Enabled.
- Change the default sheet direction from Right-to-Left to Left-to-Right.
- Select Apply and then OK.
Related Articles
<< Go Back to Worksheets | Learn Excel
Get FREE Advanced Excel Exercises with Solutions!

