Download the Practice Workbook
2 Easy Steps to Change the Page Number in Excel
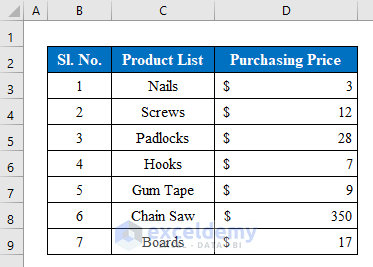
We have a dataset of some Product List and their Purchasing Price. We are going to add page numbers and change the page numbers in our workbook
Step 1 – Insert the Page Number in Excel
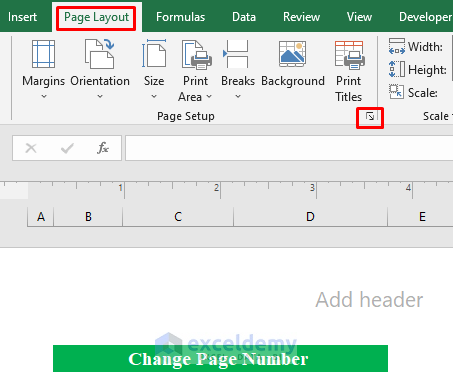
- Open your workbook and click the “Page Setup” icon from the “Page Layout” option.
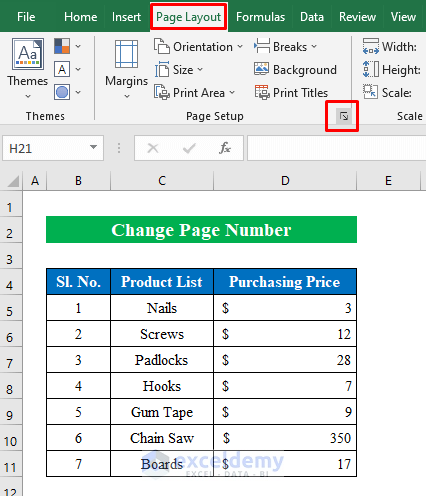
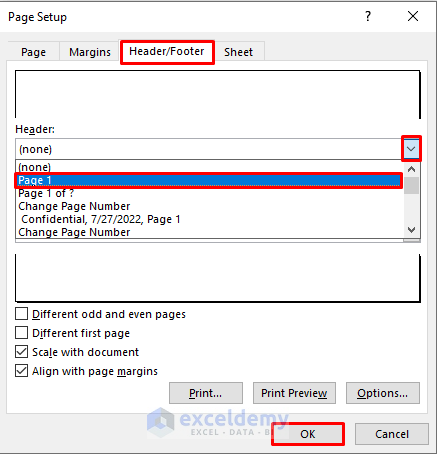
- A new window will pop-up named “Page Setup”.
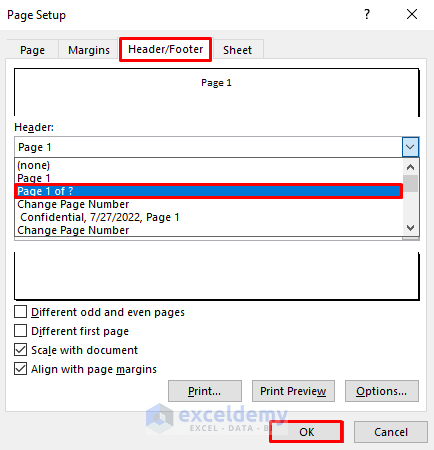
- Select “Header/Footer” and choose “Page 1” from the drop-down list of “Header”.
- Hit the OK button to continue.
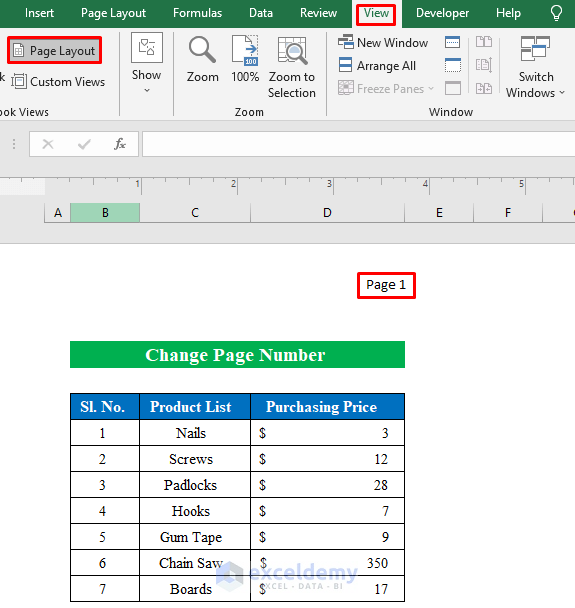
- You won’t be able to see the page number in normal view. Press the “Page Layout” from the view option to see the page number.
- Open the “Page Setup” window and choose “Header and Footer”.
- Click “Page 1 of ?” from the drop-down list and click OK to continue.
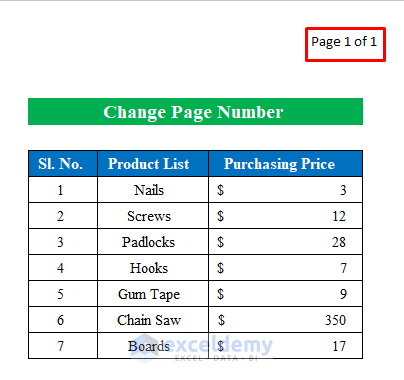
- You will see the header will display the page number of total pages.
Read More: How to Insert Page Number Using VBA in Excel (3 Macros)
Similar Readings
- How to Show Page Number in Excel Background (2 Ways)
- How to Insert Sequential Page Numbers Across Worksheets
Step 2 – Use the Page Setup Feature to Change the Page Number
- Click the “Page Setup” anchor icon from the “Page Layout” option.
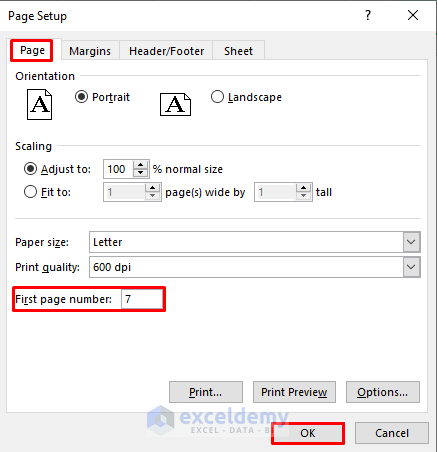
- A new dialog box will appear named “Page Setup”.
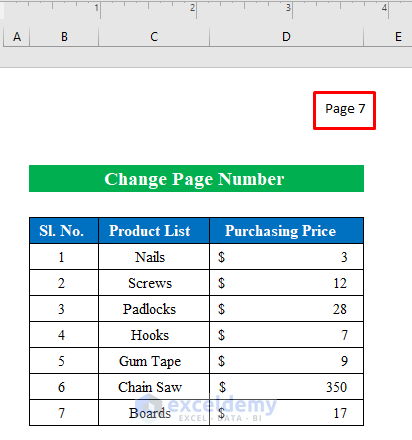
- Change the “First Page Number” from the “Page” option. We have put “7” as we wanted to start the page numbers from “7”. You can put a number of your choice.
- Hit OK.
Read More: How to Insert Page Number in Excel Cell Not in Header
Final Output
Things to Remember
- You can change only the first page number of a workbook. The rest will be automatically incremented from that value.
- You can press Alt + P + S + P to open the “Page Setup” window.
Related Articles
- How to Use Formula for Page Number in Excel (6 Quick Ways)
- Start Page Numbers at Different Number in Excel
- How to Remove Page Number from Page Break Preview in Excel


