Method 1 – Using the ‘Save As’ Command to Convert Excel to CSV
Steps:
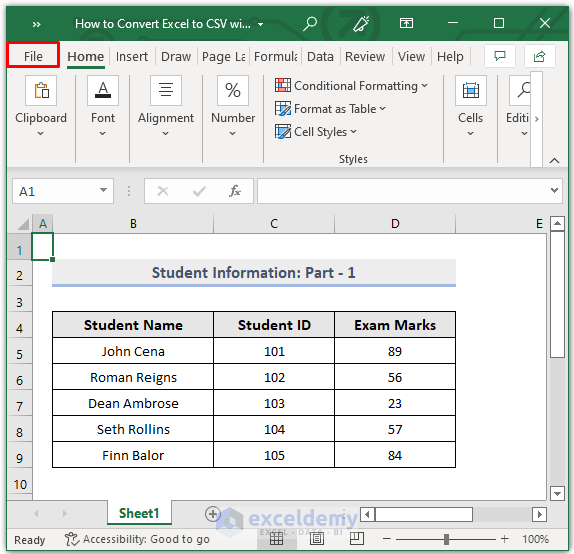
- Go to the File tab.
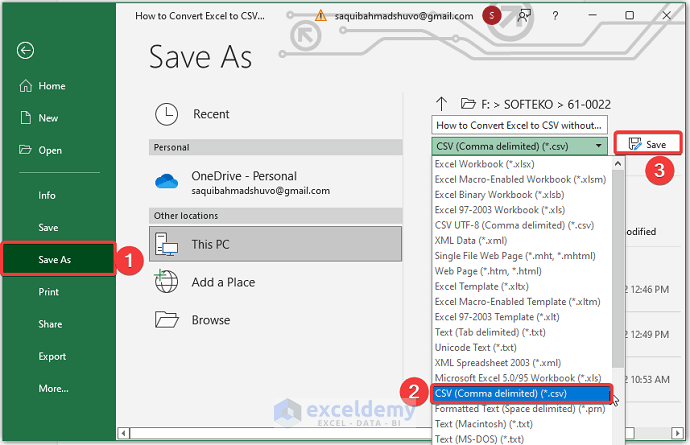
- Select Save As and click on CSV(Comma delimited).
- Click on the Save button. The CSV file will be saved in the folder where the previous xlsx file is saved. To save the new CSV format file in another location, click on the Browse option and specify a folder where you want to save it.
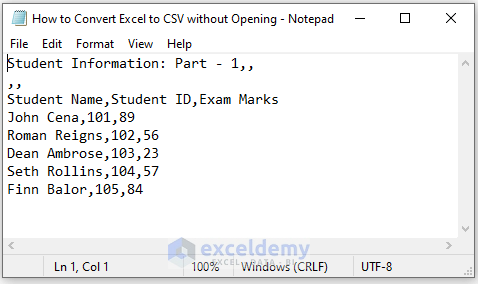
- The CSV file is in the following picture.

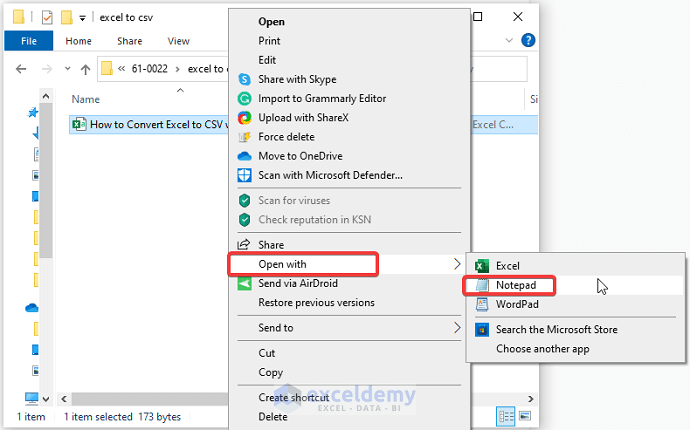
- You will be able to convert Excel to CSV. To open the file, right-click on it and select the Open with option. Select Notepad.
You have converted the Excel file into a CSV file.
Read More: How to Convert Multiple Excel Files to CSV
Method 2 – Converting Excel to CSV as ‘CSV UTF-8’ Format
Steps:
- Go to the File tab.

- Select Save As and click on CSV UTF-8 (Comma delimited).
- Click on the Save button. The CSV file will be saved in the folder where the previous xlsx file is saved. To save the new CSV format file in another location, click on the Browse option and specify a folder where you want to save it.
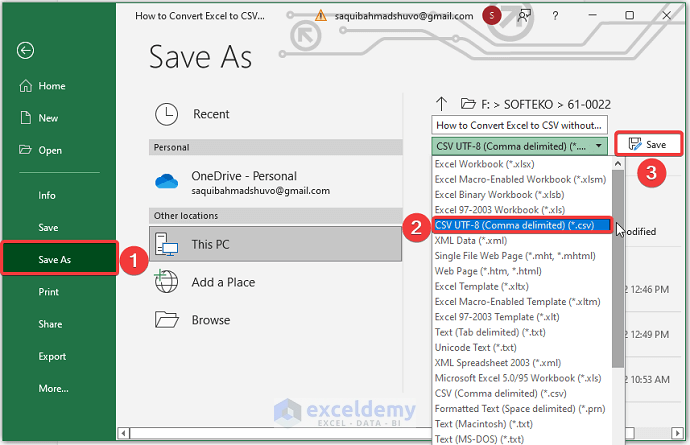
The CSV file is in the following picture.

- You will be able to convert Excel to CSV. To open the file, right-click on it and select Open with. Select Notepad.

You have converted the Excel file into a CSV file.

Read More: How to Save Excel File as CSV with Commas
Method 3 – Embedding VBA Code to Convert Excel to CSV
Steps:
- Press Alt+F11 to open the VBA editor.
- Select Insert > Module.

- Enter the following code:
Sub convert_Excel_to_csv()
Dim ws1 As Worksheet
Dim path_1 As String
Application.ScreenUpdating = False
path_1 = ActiveWorkbook.path & "" & Left(ActiveWorkbook.Name, InStr(ActiveWorkbook.Name, ".") - 1)
For Each ws1 In Worksheets
ws1.Copy
ActiveWorkbook.SaveAs Filename:=path_1 & "" & ws1.Name & ".csv", FileFormat:=xlCSV, CreateBackup:=False
ActiveWorkbook.Close False
Next
 Application.ScreenUpdating = True
End Sub- Close the Visual Basic window.
- Press ALT+F8.
- When the Macro dialogue box opens, select convert_Excel_to_csv in the Macro name. Click on Run.

The CSV file is in the following picture.

- You will be able to convert Excel to CSV. To open the file, right-click on it and select the Open with option. Select Notepad.

You have converted the Excel file into a CSV file.

Read More: Set Comma Instead of Semicolon as Delimiter in Excel CSV
Method 4 – Converting Excel to CSV without Opening Using an Online Converter
Steps:
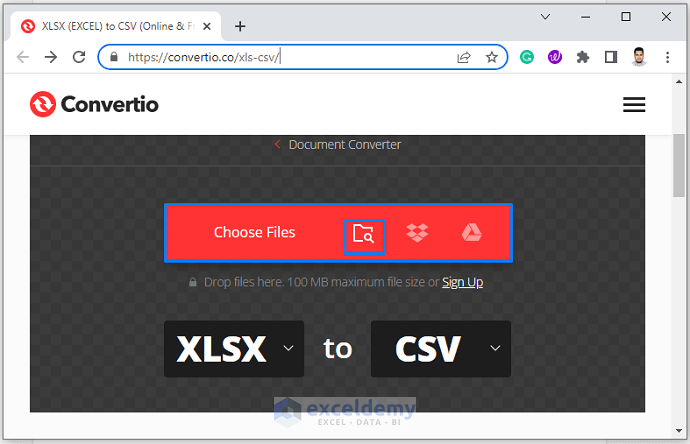
- Go to https://convertio.co/xls-csv/ and click on Choose Files.
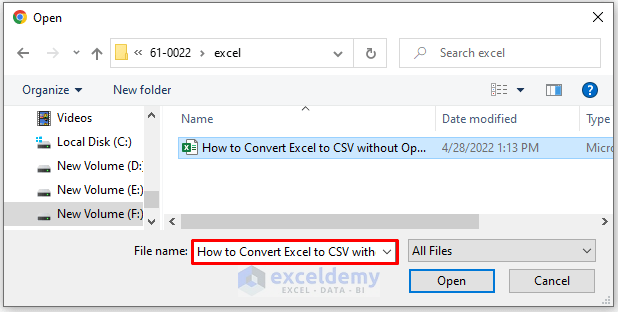
- Select the file from your computer that you would like to convert Excel to CSV and click Open.
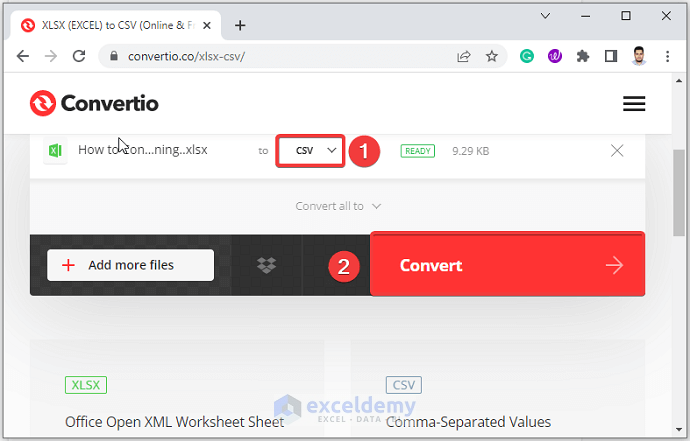
- Select CSV as a conversion option and click Convert.
- You will be able to convert Excel to CSV.
- Click on Download to download the file.
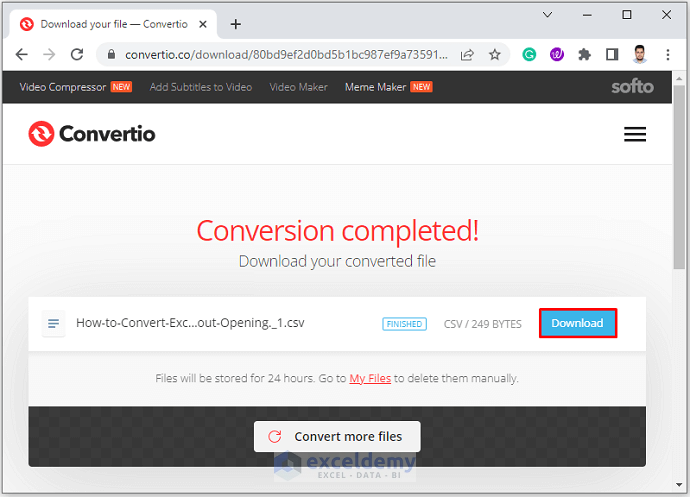
The CSV file is in the following picture.

- You will be able to convert Excel to CSV. To open the file, right-click on it and select the Open with option. Select Notepad.

You have converted the Excel file into a CSV file.

Read More: Save Excel as CSV with Double Quotes
Download the Practice Workbook
Related Articles
- How to Create CSV File from Excel
- How to Make a CSV File in Excel for Contacts
- How to Convert Excel File to Text File with Comma Delimited
- Convert Excel to Comma Delimited CSV File
- [Fixed!] Excel Not Saving CSV with Commas
- How to Convert Excel Files to CSV Automatically
<< Go Back to Export Excel to CSV | Export Data from Excel | Learn Excel
Get FREE Advanced Excel Exercises with Solutions!


THREE OF these require opening excel?
is this the most MORONIC article ever!
Hello,
Thanks for your feedback! While it’s true that three of the methods involve opening Excel, we included them to cater to users who may already have Excel open or prefer built-in Excel tools. The aim was to offer a variety of approaches for different user needs. However, if you’re strictly looking for methods that avoid opening Excel, the PowerShell and third-party tool methods are the best fit. We appreciate your thoughts and will keep this in mind for future articles.
Regards
ExcelDemy