Method 1 – Use the Paste Special Feature to Copy from Word to Excel into Multiple Cells
Steps:
- Select the entire dataset in Microsoft Word.
- Go to the Home tab from the ribbon.
- Click on Copy.
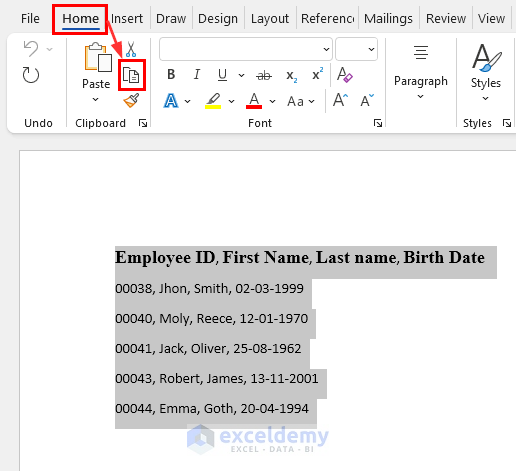
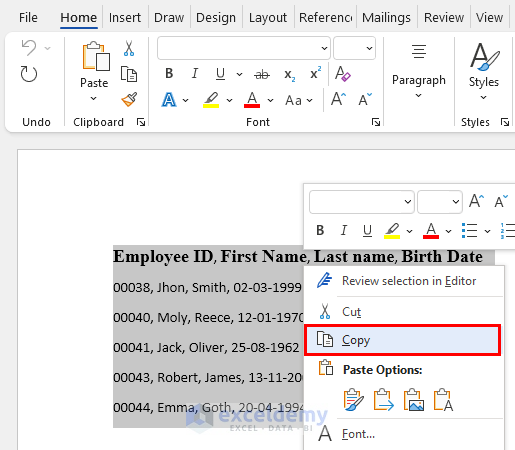
- You can also right-click on your selected data and then click on Copy. Alternatively, you can use the keyboard shortcut Ctrl + C to copy data.
- Go to your Excel file and select the cell where you want to copy the data.
- Right-click on your mouse and select Paste Special.

- This will bring up the Paste Special dialog box showing the Source of the copying data.
- Choose the Paste option and select the Text type.
- Click on OK.
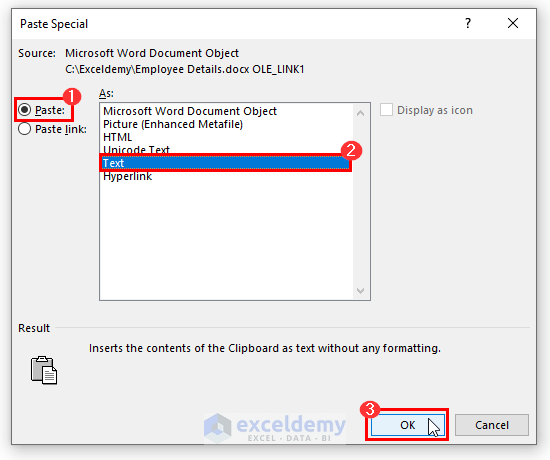
- You can see that the data is copied into multiple cells.
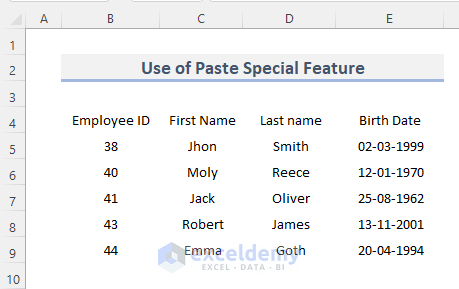
- To make the data more organized, we can give it a border.
- Go to the Home tab from the ribbon in Excel.
- From the Font category, select All Borders from the Borders drop-down menu.
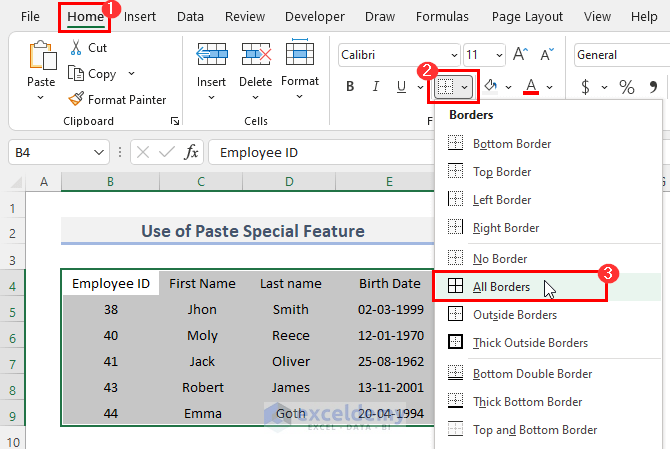
- You can see the result with borders.

Read More: How to Convert Word to Excel with Columns
Method 2 – Use the Text to Columns Tool to Duplicate Text into Several Cells from Word to Excel
Steps:
- Open Microsoft Word and select all of the data.
- Copy the data with Ctrl + C.
- Open the Excel file and select the cell where you wish to transfer the data from your Excel file.
- Go to the Home tab on your Excel file and, from the Clipboard category, click on the Paste drop-down menu and select the second option.
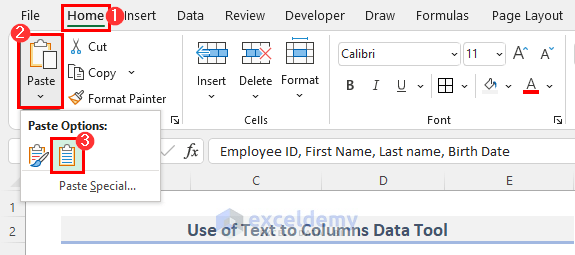
- You can also right-click on the selected cell, then choose the second option. Alternatively, you can use the keyboard shortcut Ctrl + V.

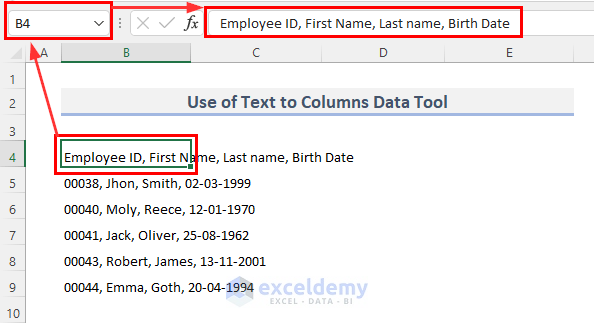
- This will paste all the copied data if you look at the picture below. This will not be copied in the right order, though.
- In the picture below, we can see that the B4 cell contains Employee ID, First Name, Last Name, and Birth Date. But, we want them in multiple cells.
- Select the pasted data cells and go to the Data tab from the ribbon.
- From the Data Tools group, click on Text to Columns.
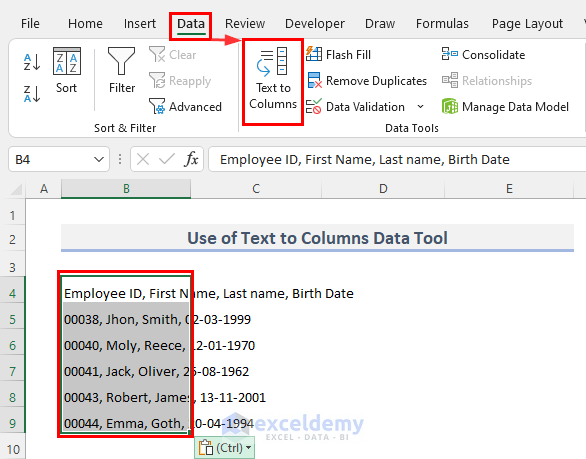
- This will open the Convert Text to Columns Wizard window.
- To complete Step 1 from the wizard, choose Delimited from Choose the file type that best describes your data.
- Click on Next.

- In Step 2, check the Comma box on the Delimiters section.
- Click on Next.
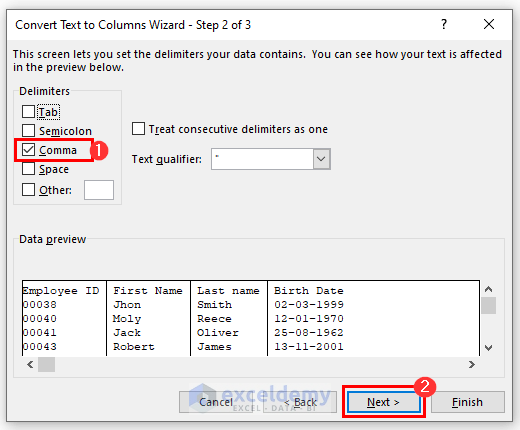
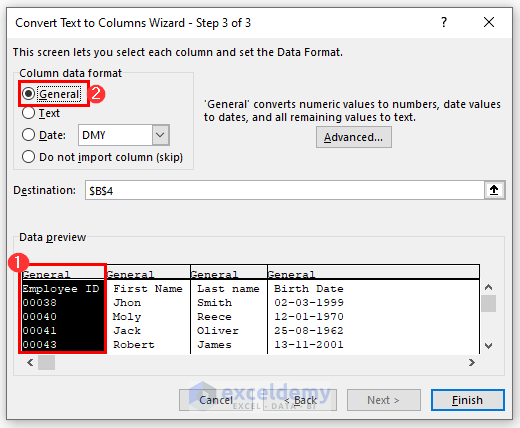
- In the 3rd step, select the Data Format from Data Preview for each column.
- Select the Employee ID from Data Preview and select General for this data under Column data format.
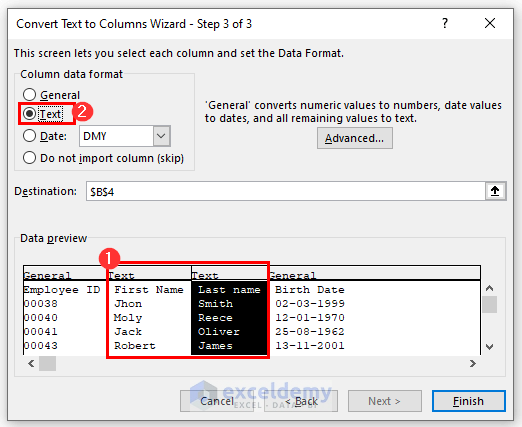
- Choose Text for First Name and Last Name data.
- Select the Birth Date as the Date and click on Finish.
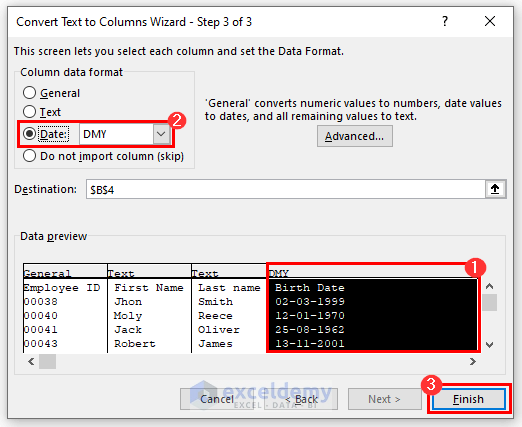
- You can see all the data is now separated and copied into multiple cells.
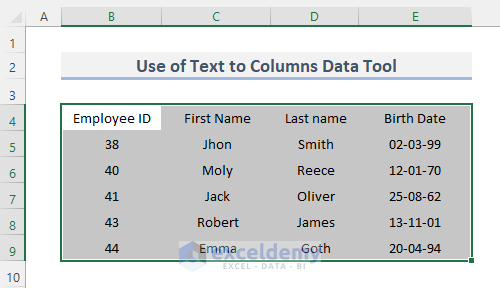
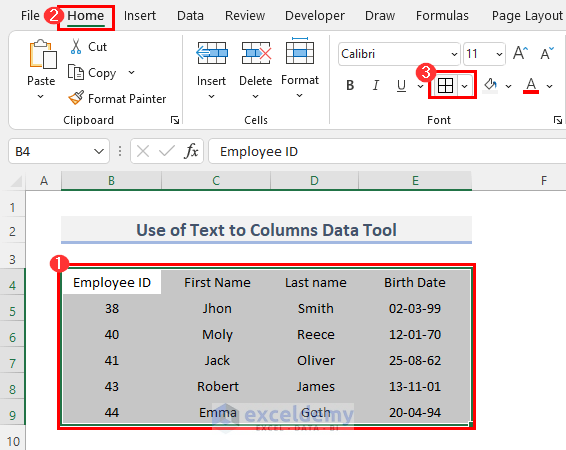
- Similarly to the previous method, we can also add a border to the data to make it more orderly. Go to the Home tab on the Excel ribbon and pick All Borders from the Font category.
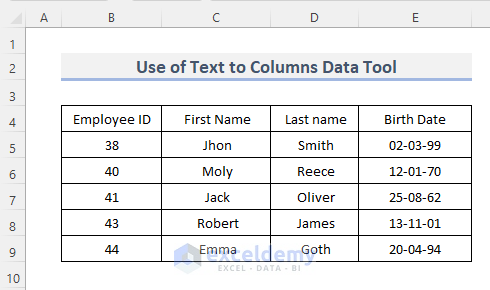
- You can see the result in the image below.
Read More: How to Import Data from Word to Excel
Method 3 – Apply Copy and Paste Tools for Getting a Table from Word to Excel
Steps:
- Open Microsoft Word and select the entire table that you want to copy.
- Use the Ctrl + C keyboard shortcut to copy the data.
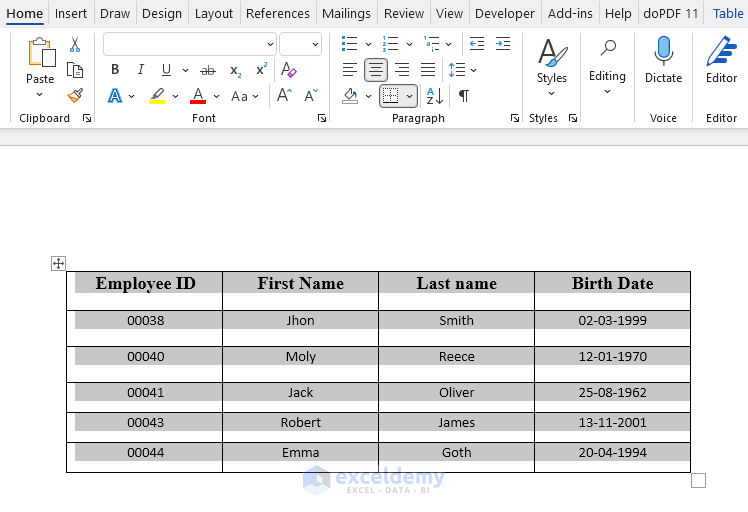
- Open the Excel file and choose the cell where you want the data to be transferred.
- Go to the Home tab and click on Paste in the Clipboard category.

- You can also right-click on the cell and select the first option from Paste Options. Alternatively, press Ctrl + V on your keyboard.

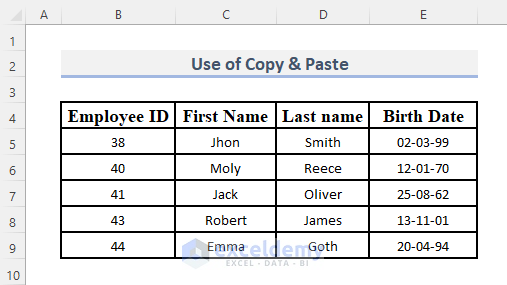
- You can see that the table was copied from Word to Excel while keeping the format.
Read More: How to Convert Word Table to Excel Spreadsheet
Download the Practice Workbook
Related Articles
<< Go Back to Import Word to Excel | Importing Data in Excel | Learn Excel
Get FREE Advanced Excel Exercises with Solutions!

