Method 1 – Set the Print Area in the Page Layout Tab
Steps:
- Select the area to print.
- Click the Page Layout tab.
- Select Set Print Area.
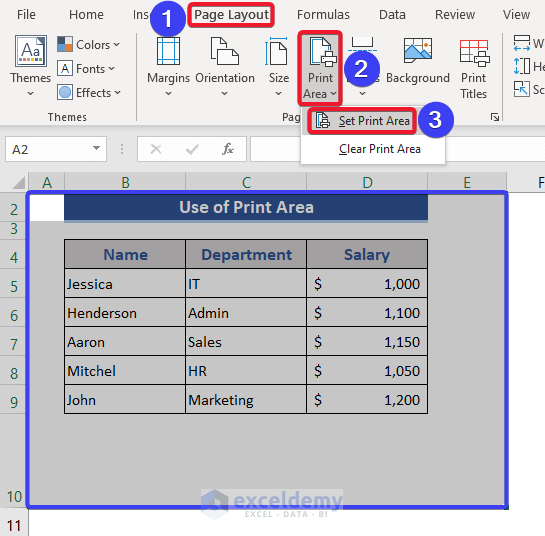
This is the output.

Method 2 – Use the Print Selection Option
Steps:
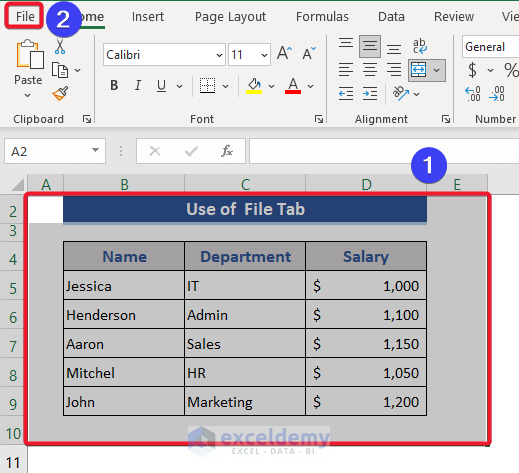
- Select the print area.
- Go to the File tab.
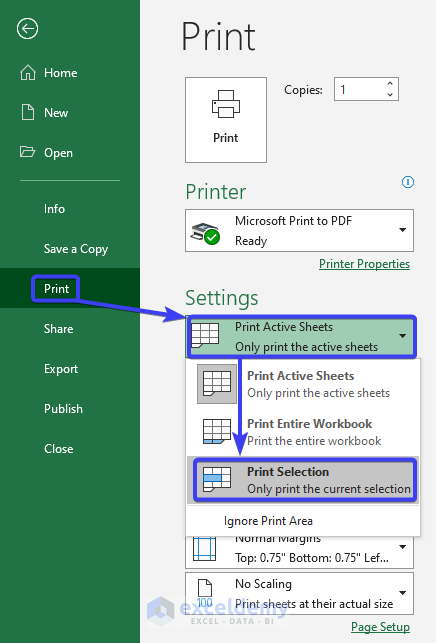
- Click Print.
- Go to Settings.
- Choose Print Selection.
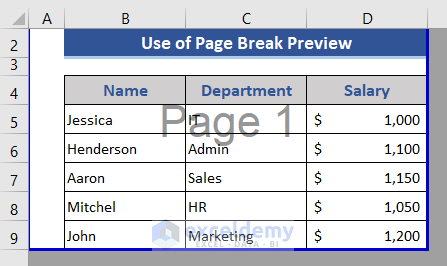
Method 3 – Use the Page Break Preview Option
Steps:
- Go to the View tab.
- Click Page Break Preview.
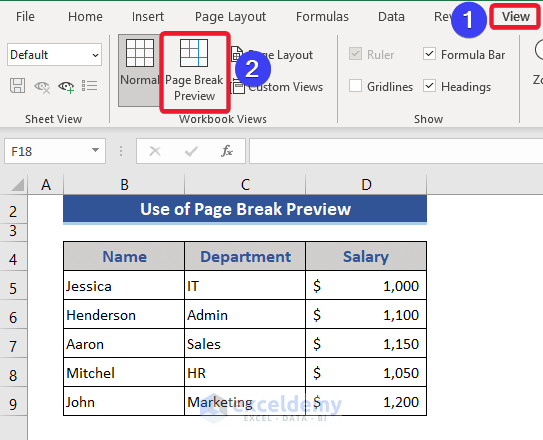
This is the output.
Read More: [Fixed!] Print Preview in Excel Doesn’t Match Document
Method 4 – Using a Keyboard Shortcut
Steps:
- Press Alt+P.
- Shortcuts will be displayed.
- Press R.
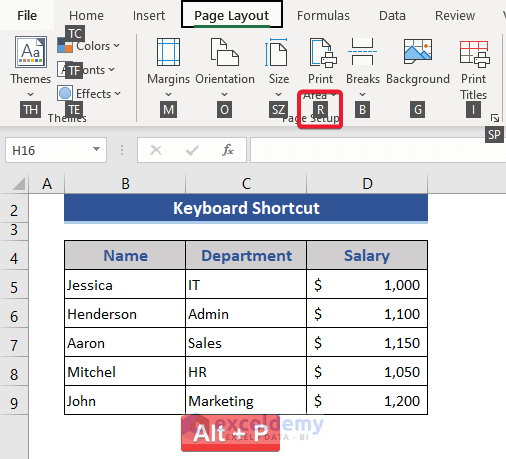
The Print Area option is displayed.
Download Practice Workbook
Download the practice workbook.
Related Articles
<< Go Back to Print Preview in Excel | Print in Excel | Learn Excel
Get FREE Advanced Excel Exercises with Solutions!


Thank you so much. During my bad day, this is the only problem, i have solved with ur explanation.
Dear Anusha Uppuganti,
You are most welcome. We are so glad that our article explanation helped you.
Regards
ExcelDemy