Method 1 – Changing Sheet Properties to Delete Infinite Rows
Steps:
- Go to the Developer tab in the Ribbon. Click Properties under the Control section. The Properties dialog box will appear.

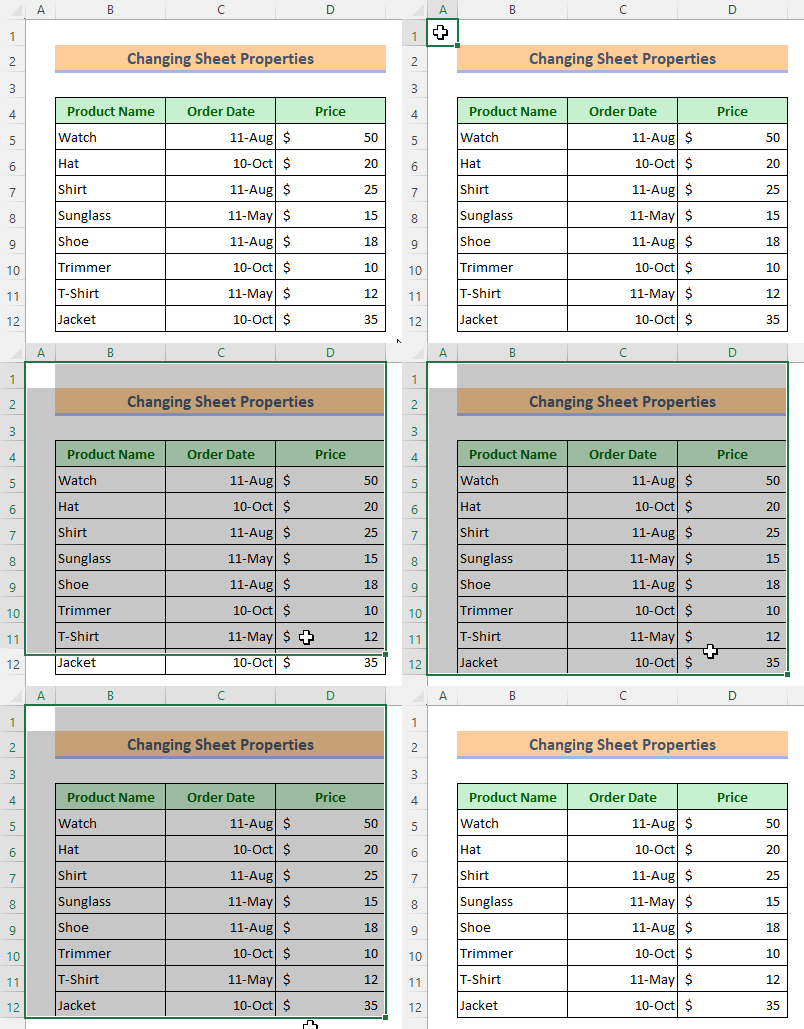
- Go to the Scroll Area in the box and write our desired range in the adjacent cell. The Excel sheet has active data from A1 to E12. Write $A$1:$D$12 in the cell and press Enter.
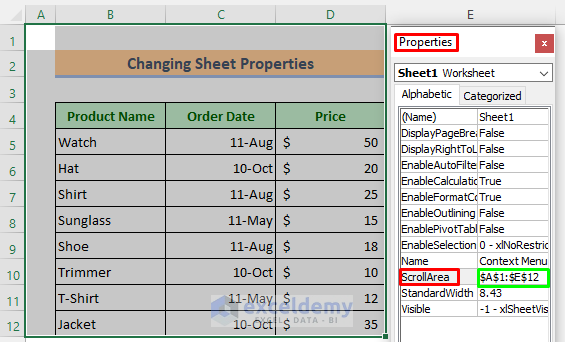
- You probably can’t select cells past this $A$1:$D$12 range.
Method 2 – Apply Find & Select Tool to Erase Infinite Rows in Excel
Step 1: Use the Home Tab to Select Special Criteria
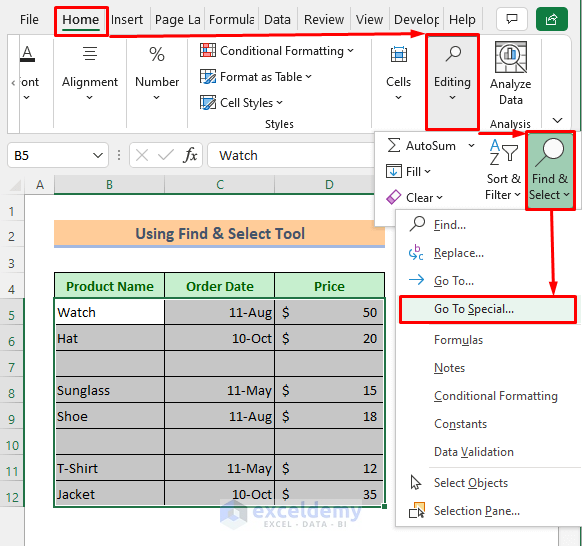
- Select data range from the dataset.
- Click: Home > Editing > Find & Select > Go To Special.
A dialog box named “Go To Special” will open up then.
Step 2: Finding Out Blank Rows
- Mark on Blanks option.
- Press OK.
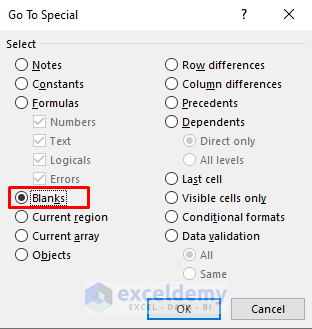
The blank rows are now highlighted in the dataset.
Step 3: Deleting Blank Rows In Excel
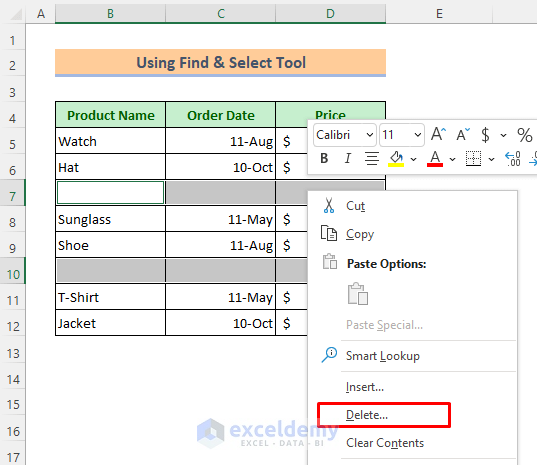
- Right-click your mouse and click Delete from the context menu.
We’ll get a new dialog box then.
Step 4: Shifting All the Rows up to Fill up the Blank Space
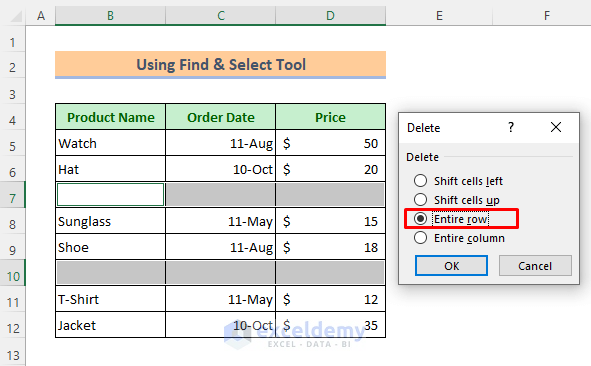
- Mark on the Entire row option and press OK.
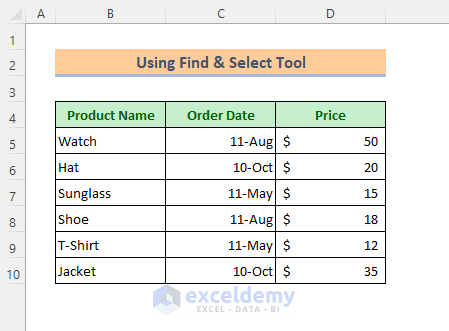
- Observe that the blank infinite rows are gone.
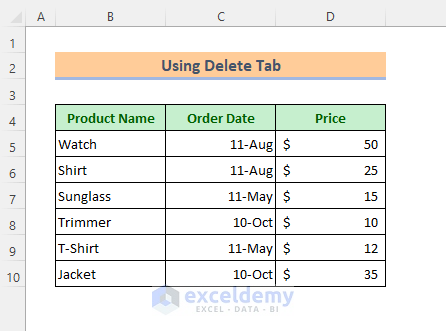
Method 3 – Use Delete Tab to Delete Infinite Rows in Excel
Steps:
- Select the rows that you want to remove.
- Click: Home > Cells > Delete > Delete Sheet Rows.
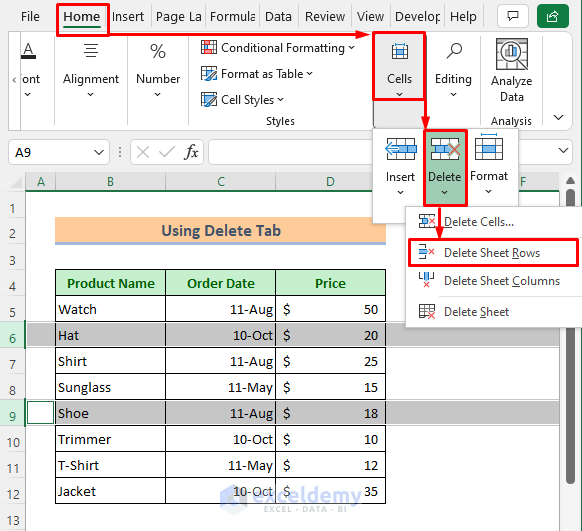
- The rows are no more now.
Method 4 – Insert Filter Option to Remove Infinite Rows in Excel
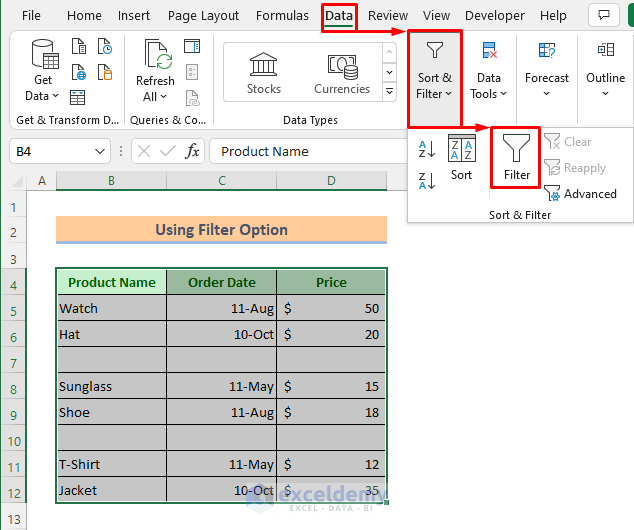
Step 1: Triggering Filter Menu
- Including your title select the data range.
- Click: Data > Sort & Filter > Filter
You will get the filter icon in every title box of your dataset.
Step 2: Selecting Blank Cells
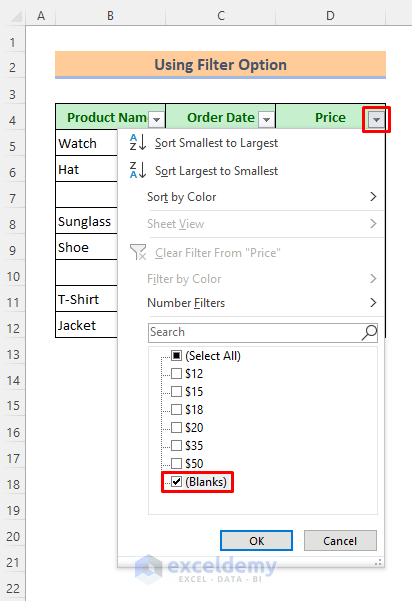
- Click any filter icon and then the filtering options will open up.
- Unmark everything without the (Blanks) option.
- Hit the OK tab.
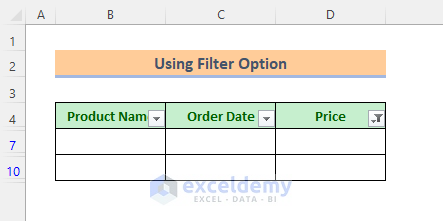
You will spot that it is showing only the blank rows now.
Step 3: Deleting Blank Rows
- Blank infinite rows and right-click your mouse.
- Press Delete Row from the context menu.
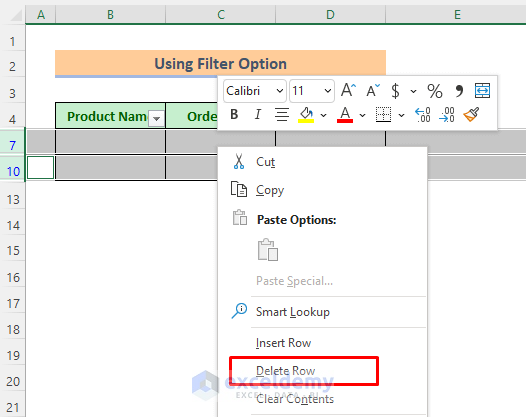
Those blank rows are deleted. We’ll try to get back our other rows.
Step 4: Reselecting the Data
- Click the filter icon again.
- Give a mark on the (Select All) option.
- Press OK.
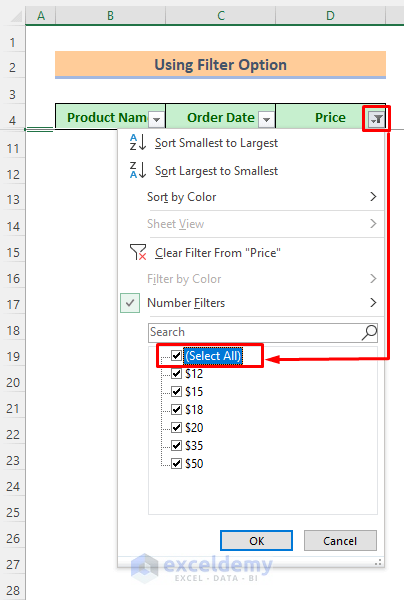
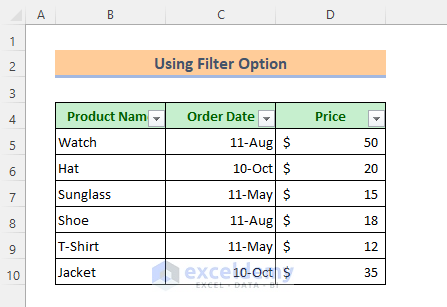
Here are our other filled rows that are back now.
Method 5 – Embed Excel VBA to Limit Scroll Area
Step 1: Triggering VBA Window
- Right-click your mouse on the sheet title.
- Select View Code from the context menu.
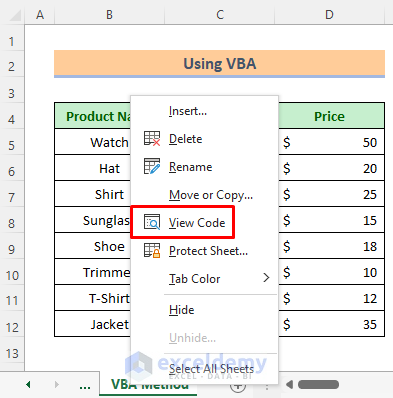
A VBA window will open up.
Step 2: Inserting the code
- Type the codes given below.
Sub All_WC_SCROLL LIMIT()

Dim ws As Worksheet

For Each ws In Application.ActiveWorkbook.Worksheets
      ws.ScrollArea = ws.UsedRange.Address
Next

End Sub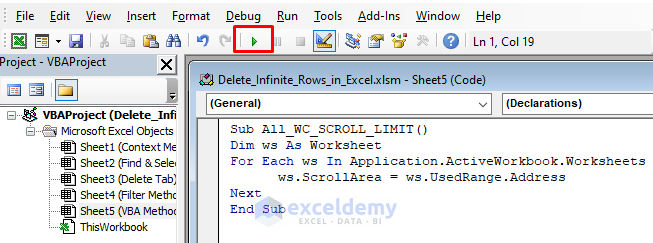
- Press the Play icon to run the codes.
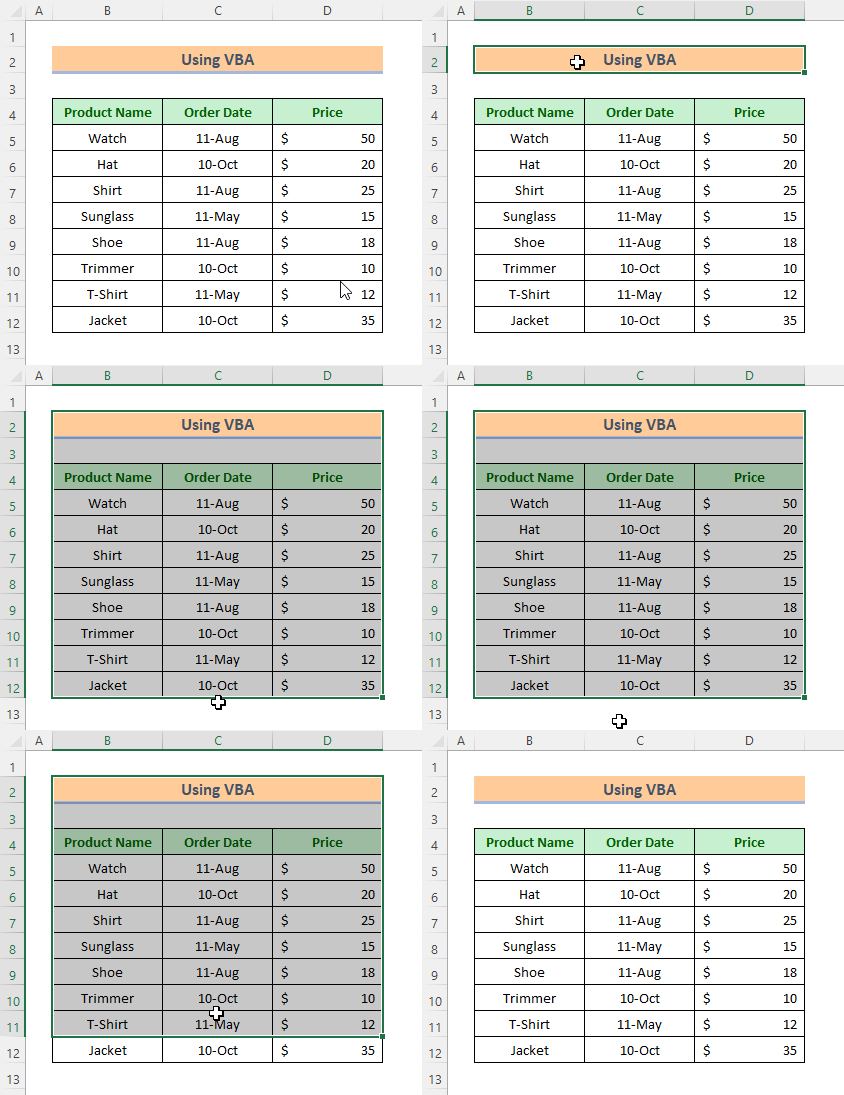
- Notice the result below; you will not be able to go beyond the used cell limit.
Download Practice Book
You can download the free Excel template from here and practice on your own.
Related Articles
- How to Delete Hidden Rows in Excel?
- How to Delete Unused Rows in Excel?
- How to Find and Delete Rows in Excel
- How to Delete Multiple Rows in Excel Using Formula?
- How to Delete Multiple Rows in Excel with Condition?
- How to Delete Rows in Excel That Go on Forever?
- How to Remove Rows Containing Identical Transactions in Excel?
<< Go Back to Delete Rows | Rows in Excel | Learn Excel
Get FREE Advanced Excel Exercises with Solutions!


