Embedding an Excel file is one of several ways to insert Excel data into a PowerPoint presentation. A copy of the Excel file is attached to the PowerPoint, but sometimes not all of the embedded data id displayed. In this article, we’ll demonstrate this problem and its solution.
Embedded vs Other Inserted Excel Files in PowerPoint: What Are the Differences?
- When an Excel file is embedded, it will not update automatically when the source Excel file is modified. However when an Excel file is linked, the PowerPoint will update any modifications automatically.
- In the case of embedding, we cannot edit the Excel file from within PowerPoint. With linking, we can edit the Excel file by clicking on it.
- When we send a PowerPoint file that contains an embedded Excel file, there is no need to attach the original Excel file. In the case of linking however, we must include the source Excel file with the PowerPoint file.
How to Solve When Embedded Excel in PowerPoint Is Not Showing All Data
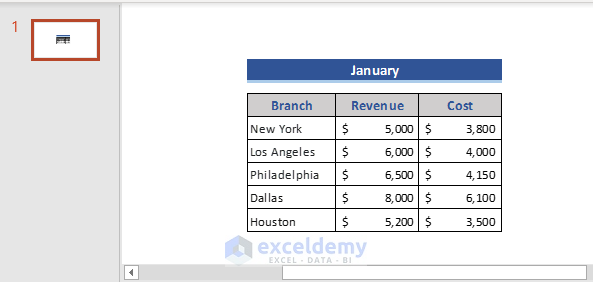
Let’s embed the Excel dataset below into a PowerPoint.
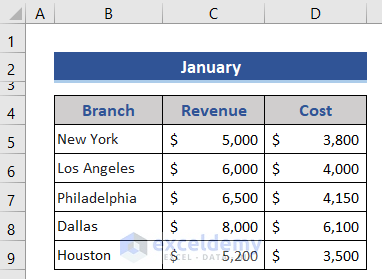
Steps:
- Open a PowerPoint file.
- Go to the Insert tab.
- Choose the Object option from the Text field.
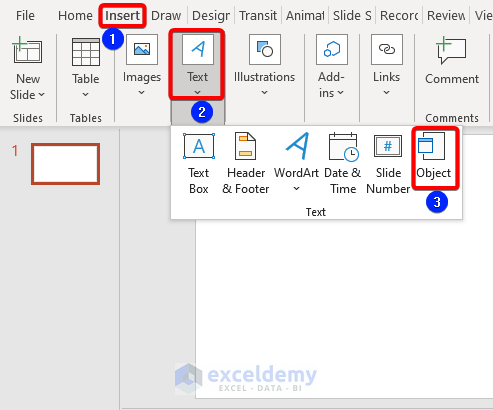
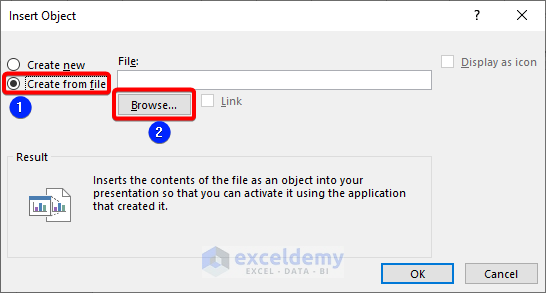
The Insert Object window appears.
- Choose the Create from file option.
- Click on the Browse option.
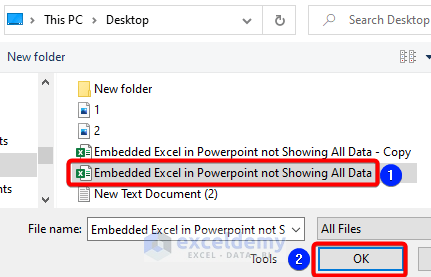
- Select the desired Excel file from File Explorer.
- Click OK twice.
Our dataset is displayed correctly in the PowerPoint.
However, if we embed Excel data that is too big to fit the PowerPoint slide, the data will only be partially displayed. For example, suppose we want to embed the dataset below:

If we embed the Excel file using the process above, some of the data will be cut off on the PowerPoint slide.

Solution:
- Go to the Excel sheet.
- Select the whole dataset and copy it by pressing Ctrl+C.

- Go to the PowerPoint window.
- Click on the down arrow of the Paste option from the Home tab.
- Choose Embed (E) from the Paste Options section.

Now in the PowerPoint, the entire dataset will be displayed.
Read More: [Fixed!] Problems with Embedded Excel Files in PowerPoint
How to Insert an Excel File into PowerPoint as an Icon: Alternative to Embedding Files
Alternatively, we can insert an Excel file into a PowerPoint and present it as an Excel icon rather than trying to fit in all the actual data.
Steps:
- Open the PowerPoint file.
- From the Insert tab, choose Object from the Text group.
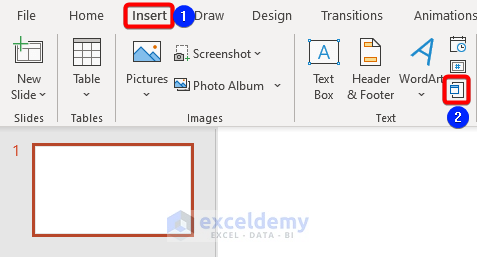
The Insert Object window appears.
- Choose the desired Excel file from File Explorer by pressing the Browse button.
- Check Display as icon.
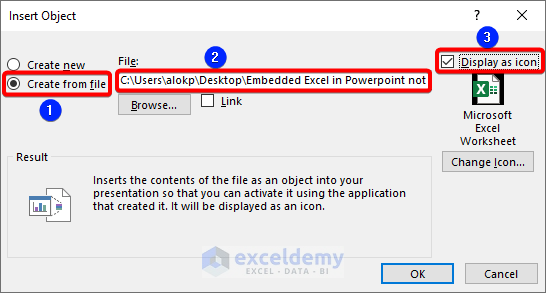
- Click OK.
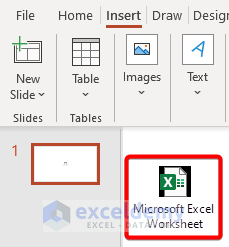
An icon representing the Excel file is displayed. If we click on the icon, the Excel file will open.
Read More: How to Link Excel Sheets to PowerPoint
How to Embed an Excel Chart into PowerPoint
Here, we’ll create a chart in Excel, then embed it in PowerPoint.
Steps:
- Select the dataset.
- Go to the Insert tab.
- Select a chart from the Chart group.
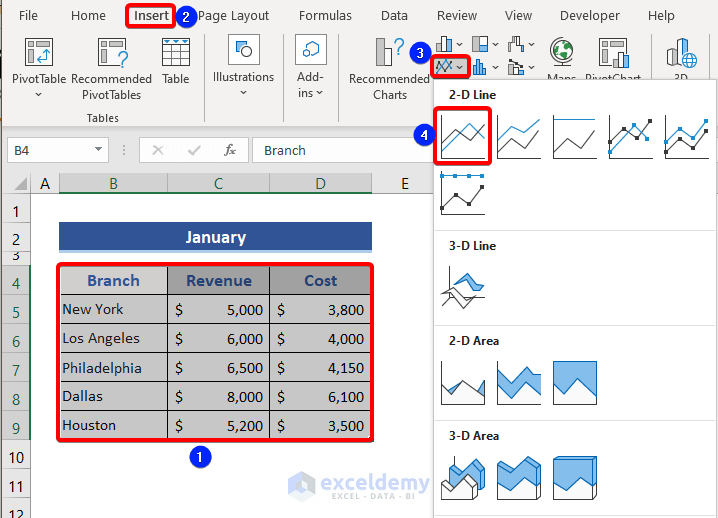
A chart is generated.
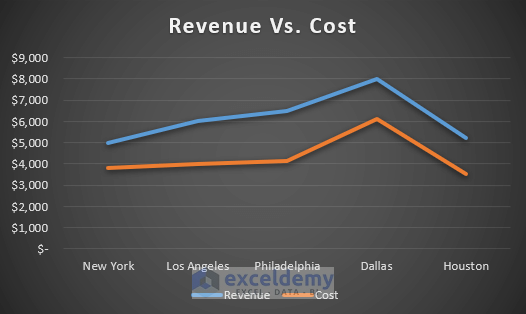
Now let’s embed this chart in PowerPoint.
- Select the chart and copy it by pressing Ctrl +C.
- Go to the PowerPoint window.
- Choose Paste Special from the Paste dropdown list.
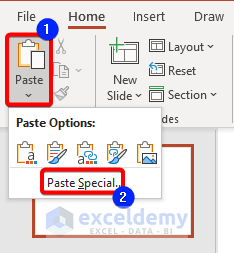
The Paste Special window appears.
- Check the Paste option.
- Choose the type as in the image below:
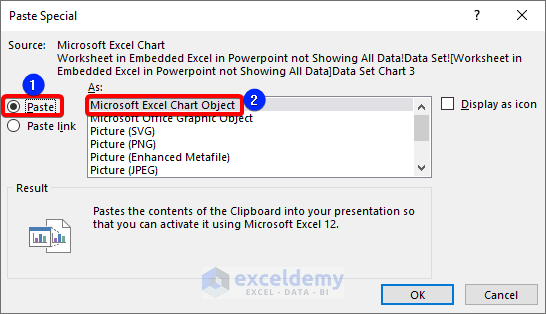
- Click OK.
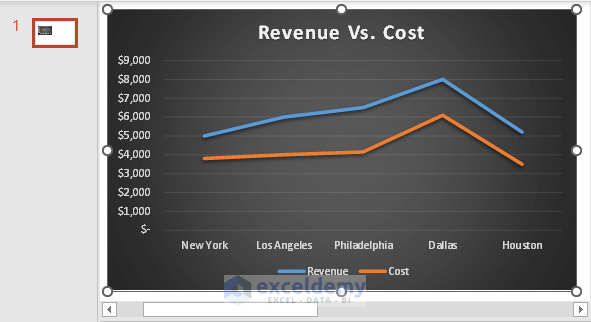
The chart is embedded in PowerPoint.
Related Articles
- How to Link Powerpoint to Excel for Dynamic Data Updates
- How to Embed an Excel File in PowerPoint
- How to Open Existing PowerPoint File from Excel VBA
<< Go Back to Excel to PowerPoint | Export Data from Excel | Learn Excel
Get FREE Advanced Excel Exercises with Solutions!

