We have some salespersons along with their Sales amount and Sales Commission. The Commission is 10%. We’ll use it to demonstrate how to AutoFill rows.
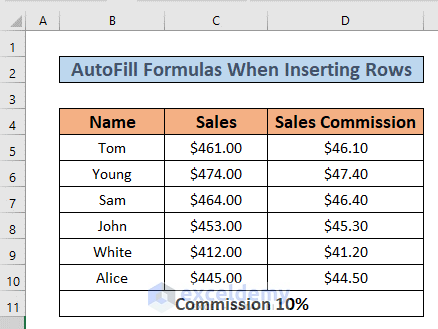
Method 1 – Creating a Table in Excel to AutoFill Formula When Inserting Rows
Steps:
- Select the range B4:D10.
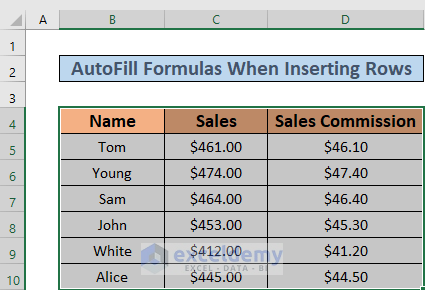
- Press Ctrl + T. A Create Table dialog box will pop up. Tick the My table has headers box and click OK.
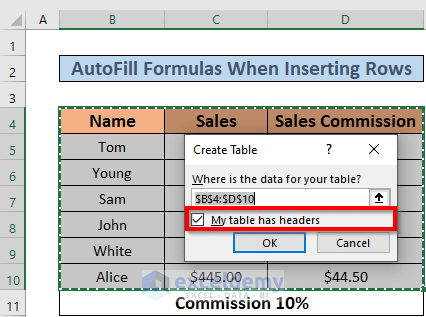
- Excel will create a table.
- Select a row and right-click your mouse to bring the Context Bar. Select Insert to insert a row. We will select the 8th row here.
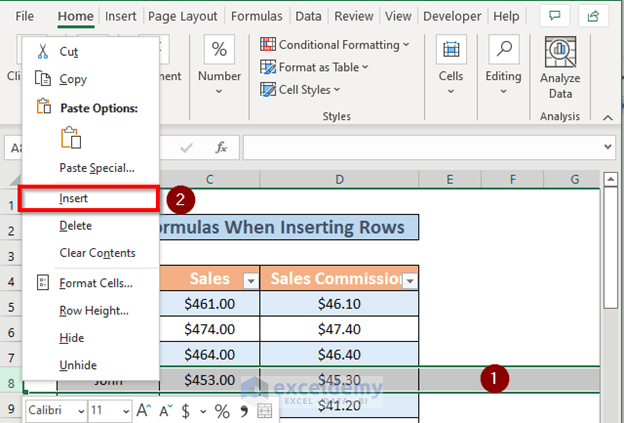
- Excel has inserted a new row above the one selected earlier and has AutoFilled the formula, too.
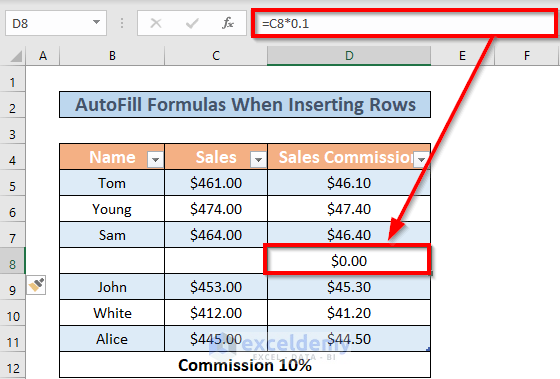
- Complete the row.
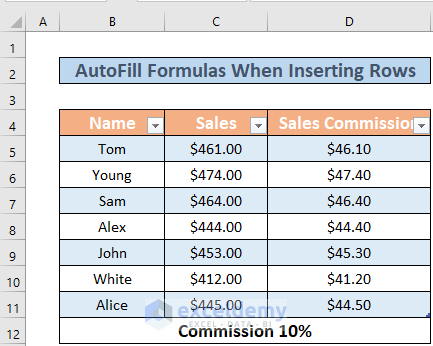
Read More: How to Fill Down to Last Row with Data in Excel
Method 2 – Applying a Keyboard Shortcut in Excel to AutoFill Formula When Inserting Rows
Steps:
- Select a row. We chose the 8th row.
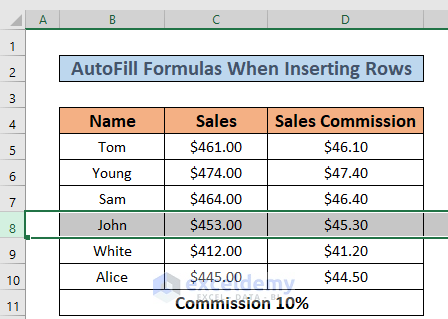
- Press ALT + I.
- Press R.
- Excel will insert a new row above the selected one.
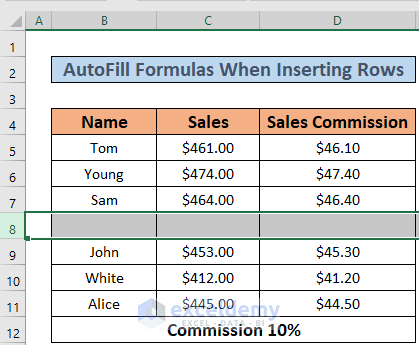
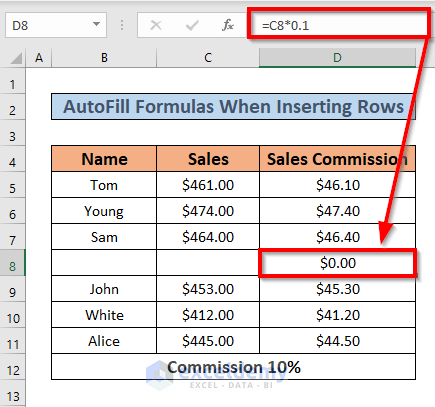
- Select D8 and press CTRL + D.
- You will see that Excel has AutoFilled the formula.
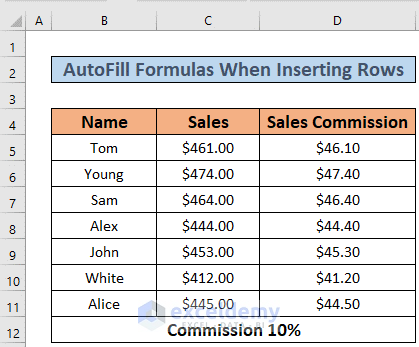
- Complete the row.
Read More: How to Fill Column in Excel with Same Value
Method 3 – Using VBA in Excel to AutoFill Formula When Inserting Rows
Steps:
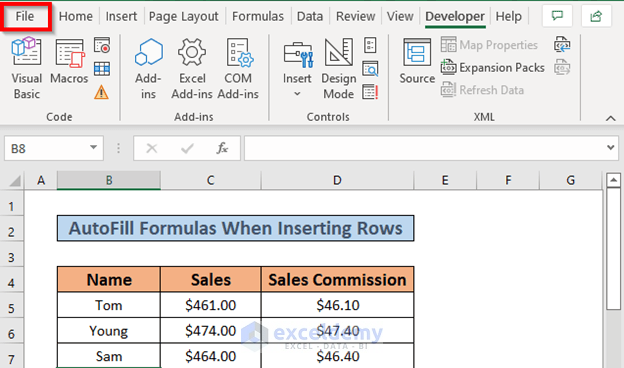
- Go to Developer tab and select Visual Basic.
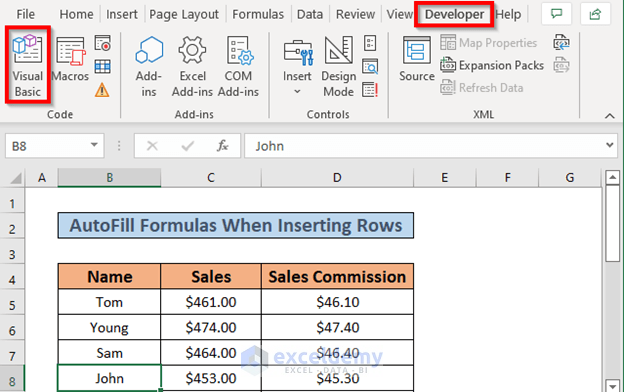
- The Microsoft Visual Basic for Applications window pops up. Select Worksheet in the dropdown list.

- In the Declarations dropdown list, select BeforeDoubleClick.

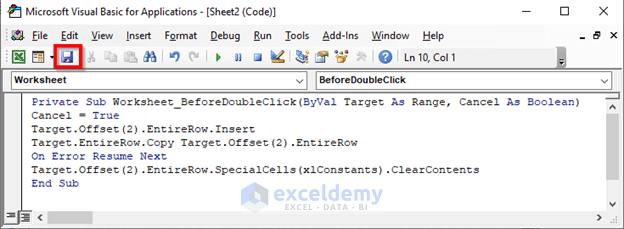
- Insert the following code into the window:
Private Sub Worksheet_BeforeDoubleClick(ByVal Target As Range, Cancel As Boolean)
Cancel = True
Target.Offset(2).EntireRow.Insert
Target.EntireRow.Copy Target.Offset(2).EntireRow
On Error Resume Next
Target.Offset(2).EntireRow.SpecialCells(xlConstants).ClearContents
End Sub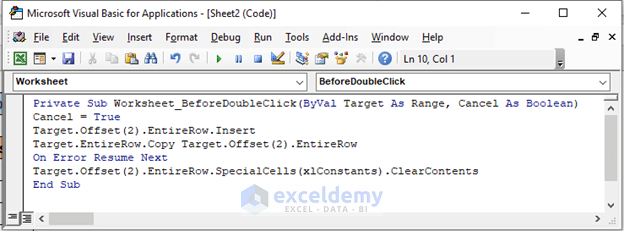
We have created a Private Sub Procedure with a BeforeDoubleClick event with Target as Range and Cancel as Boolean. I have used the EntireRow.Insert property and Offset method. The Offset (2) determines that Excel will insert a new row after one row of the cell that is going to be selected.
We also used the Copy method to copy the formula from the previous cell. Also used the Range.SpecialCells method and ClearContents method.
- Save the code.
- Close the window.
- Go back to the original dataset and double-click any cell.
- Excel has added a new row. As we selected a cell from the 6th row, we have a new row at the 8th position.
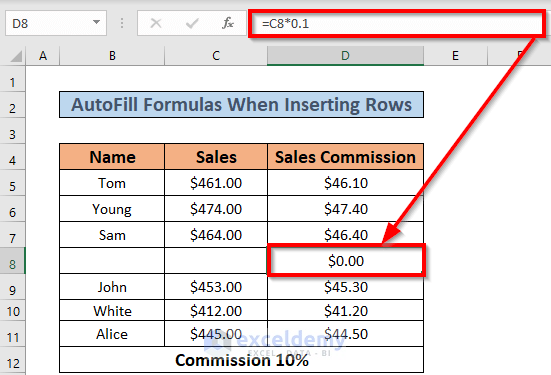
- Complete the row.

Method 4 – Using Options to AutoFill Formula When Inserting Rows
Steps:
- Go to the File tab.
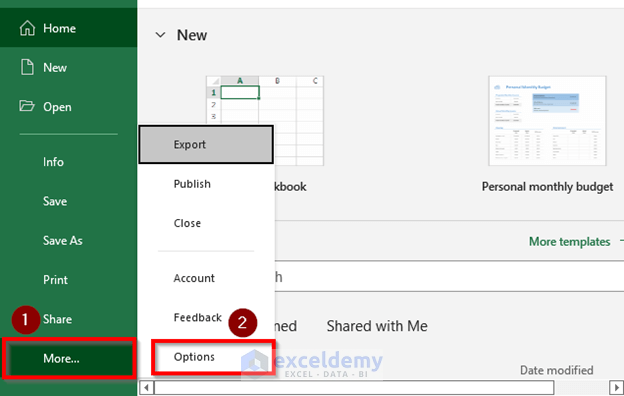
- Select More and choose Options.
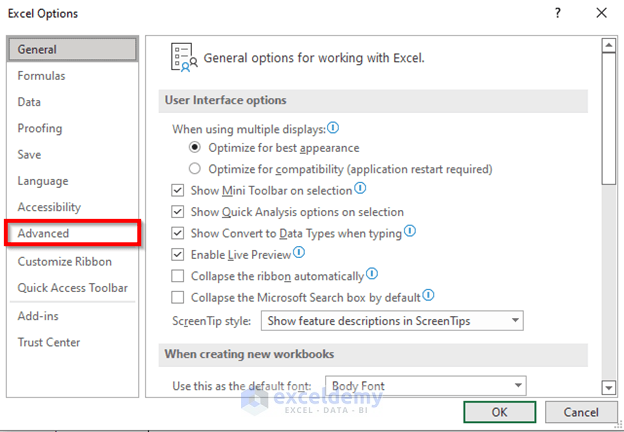
- Select the Advanced tab.
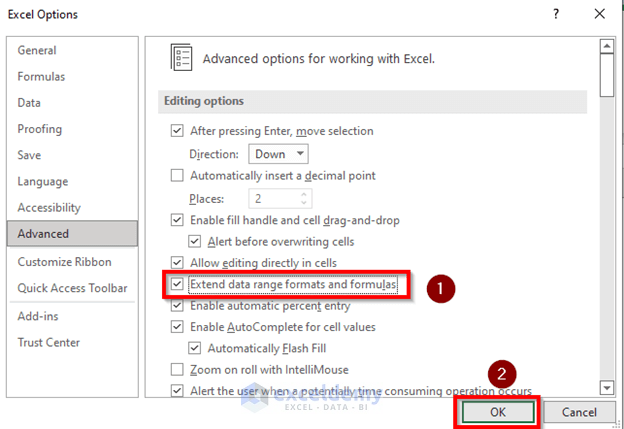
- Check the Exchange data range formats and formulas box.
- Click OK.
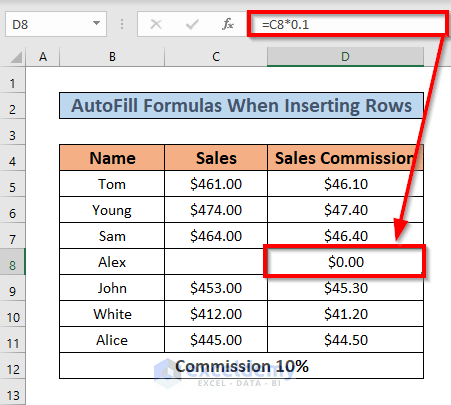
- Insert a new row by following method 1 or method 2.
- Excel has automatically calculated the result by applying the corresponding formula.
- Complete the row.

Practice Workbook
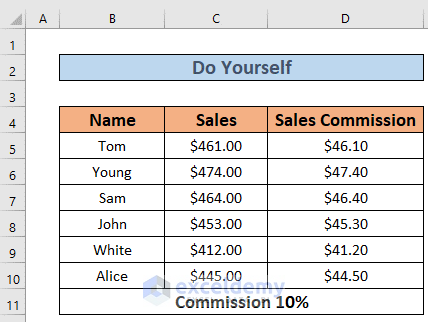
We have attached a practice sheet to the workbook so you can experiment with these methods.
Download the Workbook
Related Articles
- How to Autofill Dates in Excel
- How to Auto Populate from Another Worksheet in Excel
- Filling a Certain Number of Rows in Excel Automatically
- Excel Formulas to Fill Down Sequence Numbers Skip Hidden Rows
<< Go Back to Excel Autofill | Learn Excel
Get FREE Advanced Excel Exercises with Solutions!


Dear Akib,
many thanks for the above info but I have the following issue.
excel table is protected
excel cells with formula are protected
users are able to add or delete full rows by right clicking on the left side of the row, choose add (or delete) row.
but when adding rows the locked formula’s in protected table are gone.
throughout the table there are many protected cells with formula’s.
would you be able to give me the right VBA code to add rows and keep format and protected formulas or deleted rows when options is selected.
Many thanks in advance
Maurits
Hi Maurits
Thank you for your query.
I have worked on your problem.
From your comment, it seems like you have a table and you want to add rows to this table.
However, it is not clear whether you have protected the entire worksheet or only the table.
It will be helpful for us if you can send us the dataset at [email protected] and explain your problem in detail.
Regards
Akib
ExcelDemy
Hello Akib,
Thank you for this info. In method 3, can you replace the BeforeDoubleClick with a different event? For e.g., I would like to use the “insert” key and tried using the Application.OnKey but it;s not working. Appreciate any help you can provide.
Regards,
Sid
Hello Sid,
You can use the Application.OnKey method to assign a macro to a specific key. To handle the “Insert” key, you need to use the correct key code.To use the Insert key as an event along with Application.OnKey do the followings:
Copy paste the following code in the Moduel:
Then copy paste the following code in ThisWorkbook:
The Workbook_Open event, will set the Application.OnKey to assign the “Insert” key to this macro and the Workbook_BeforeClose event, clear the key assignment when closing the workbook.
Regards
ExcelDemy