To demonstrate how to change the column width into cm (centimeters) in Excel, we’ll use a dataset of order details with multiple columns.
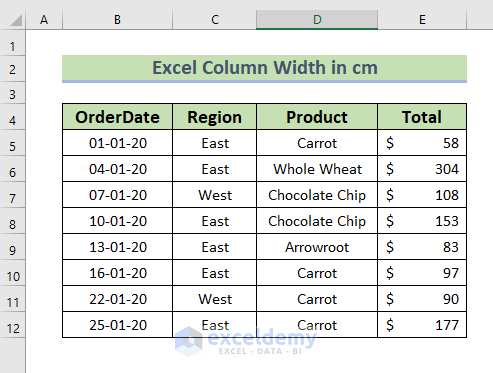
We’ve used Microsoft Excel 365 here, but the same processes apply to other versions of Excel.
Step 1 – Open Ruler Unit Settings from Excel Options
- Click on the File tab.
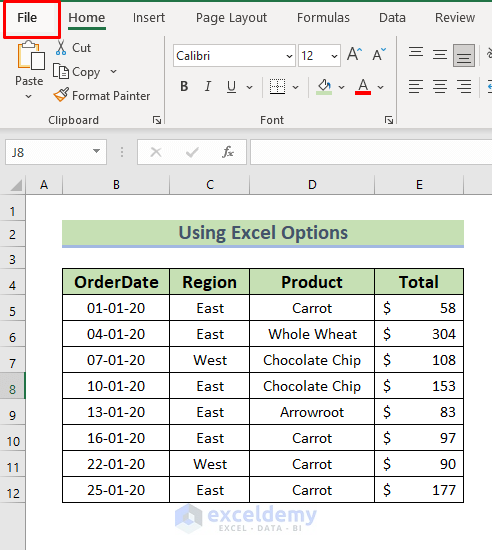
- Select Options.

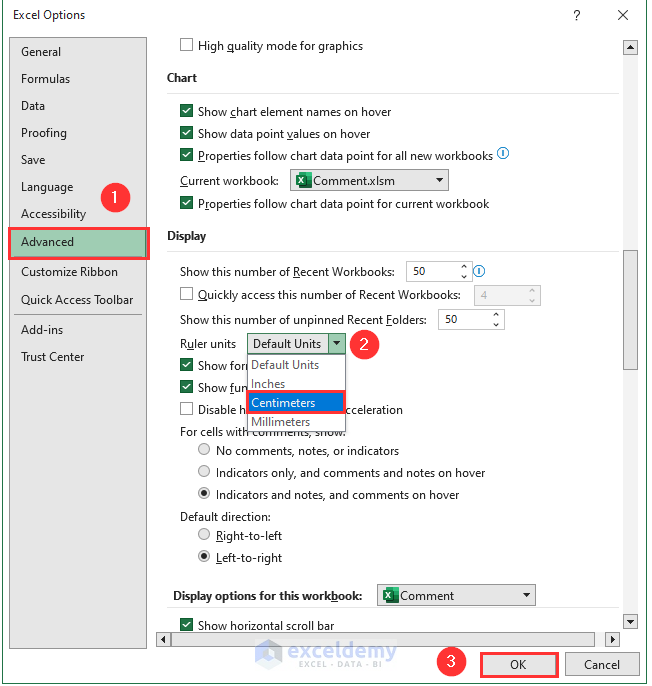
A dialog box of Excel Options will appear.
- Select Advanced.
- From Ruler units select Centimeters.
- Click OK.
Read More: How to Change Excel Column Width in Pixels
Step 2 – Preview Display with the cm Unit
- Click the View tab.
- Select Page Layout.
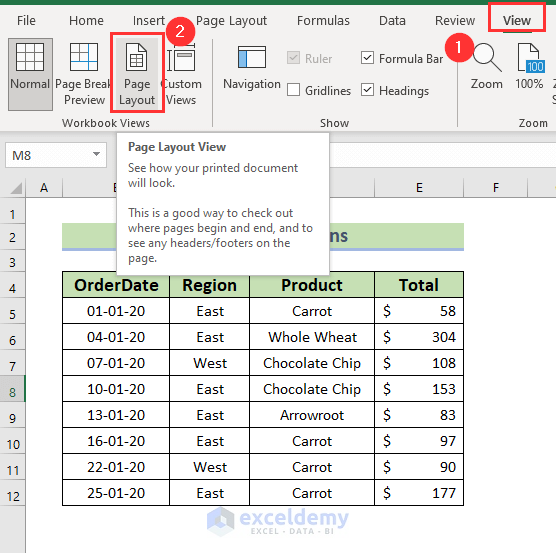
A ruler in centimeters (cm) is now visible in both row and column headers.
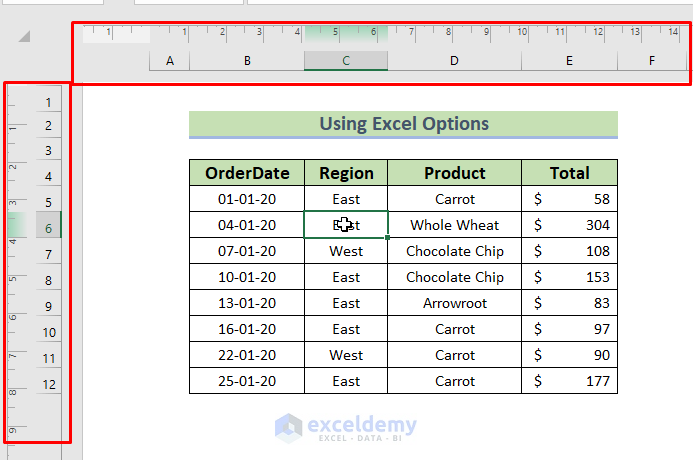
Step 3 – Change Column Width in cm
- Select the entire column.
- Right-click on the column header.
- Select Column Width….
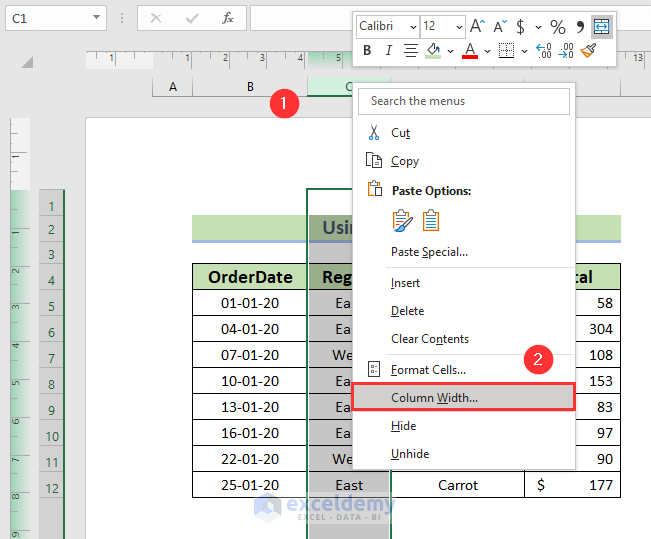
A Column Width dialog box will appear, displaying the width in cm.
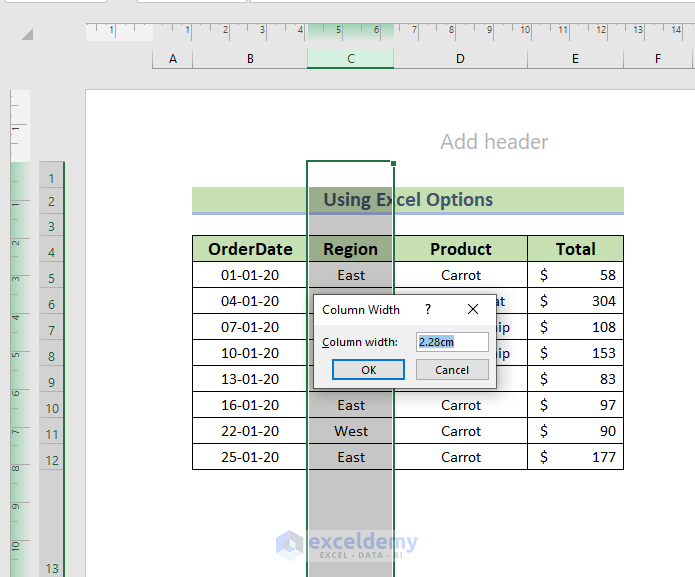
- To change the Column Width, insert any number of your choice. Here we insert 3cm.
- Click OK.
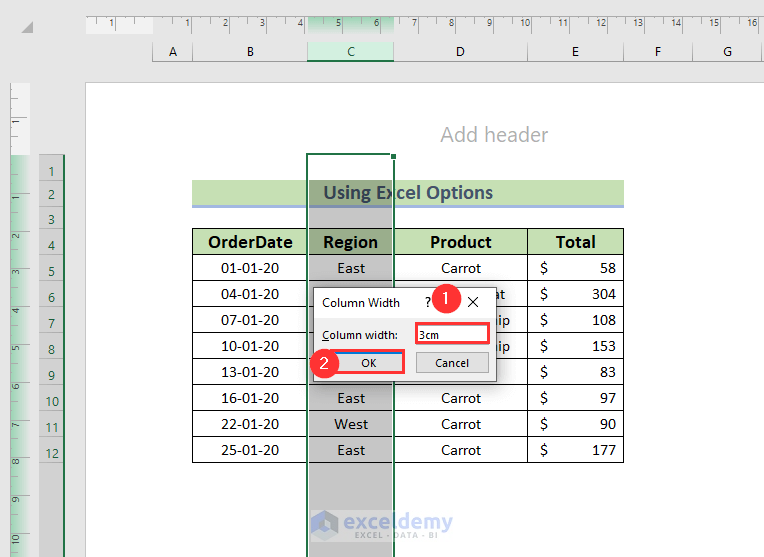
The column width is adjusted to the size specified.
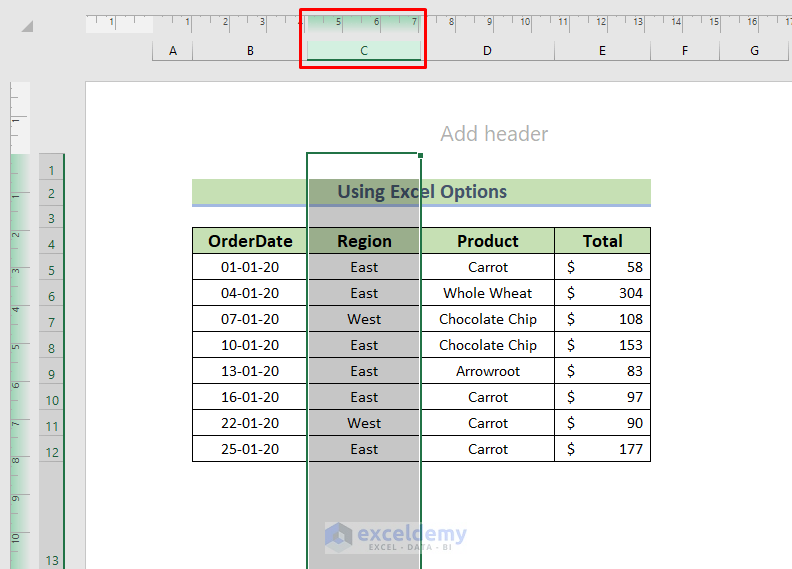
How to Increase or Decrease Column Width in Excel
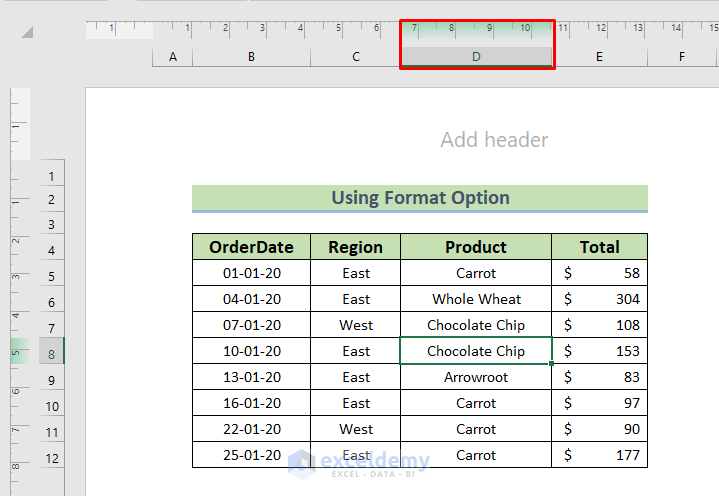
Example 1 – Using Format Option
- Select cell D8.
- Click the Home tab.
- Click Format.
- Select Column Width from the drop-down.
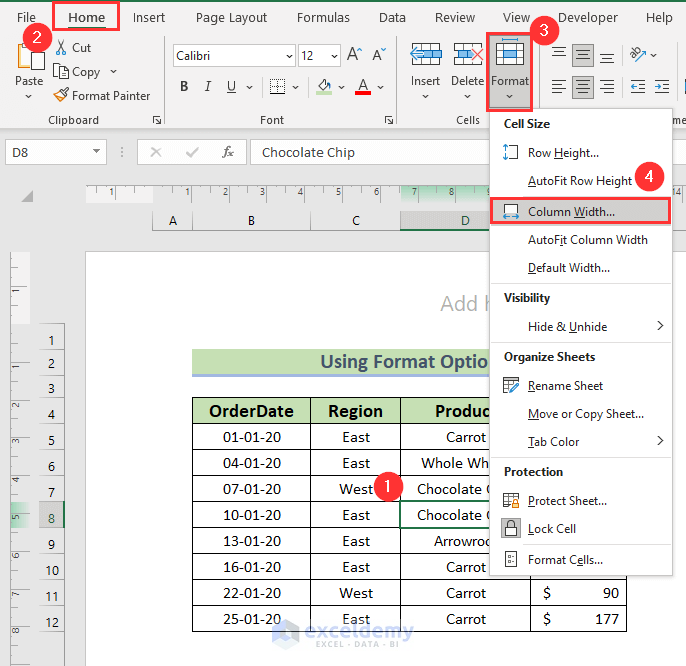
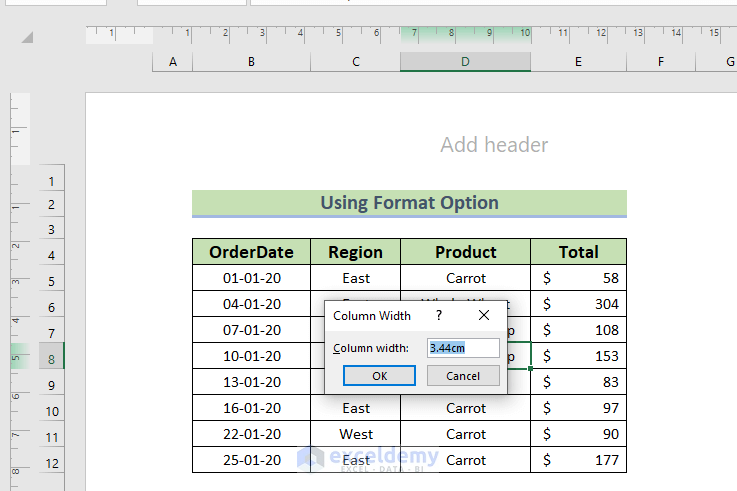
The Column Width dialog box will appear, displaying the width in cm.
- To change the Column Width, insert any number of your choice. Here we inserted 4cm.
- Click OK.
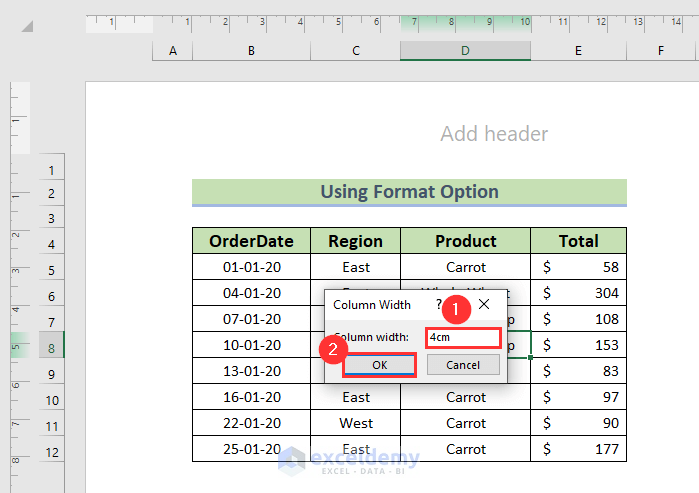
The column width adjusts to the specified size.
Example 2 – Dragging a Column
- Place the cursor on the right side of the column.
- The Adjust Icon will appear.
- Drag left or right to expand or shrink the column width.
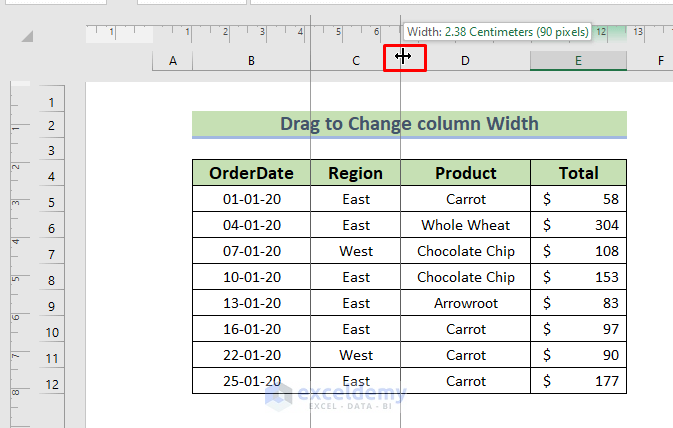
- Here, we dragged the icon to the right to expand the column width.
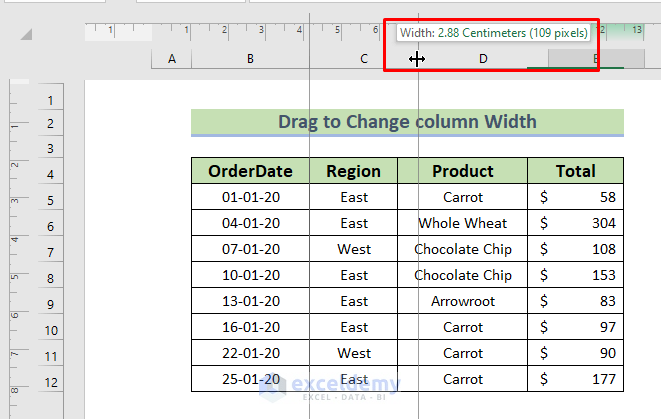
The column width adjusts automatically and is now 2.88 centimeters.

Example 3 – Using Shortcut Keys
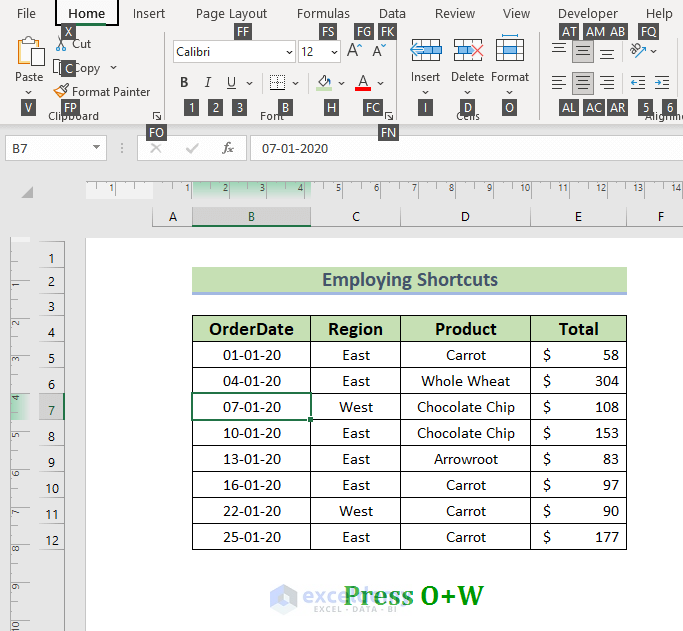
- Press ALT+H.
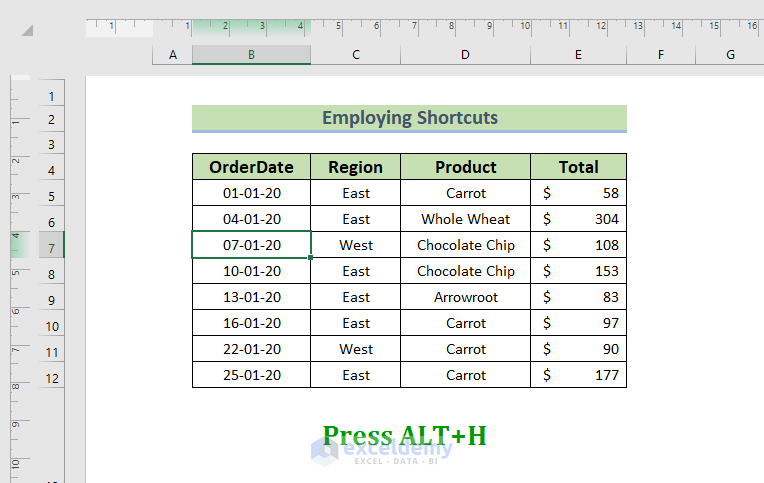
- Press O+W.
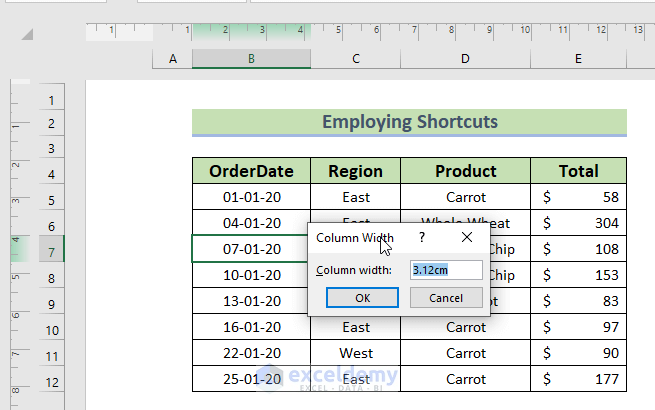
A Column Width dialog box will appear, displaying a Column Width of 3.12cm.
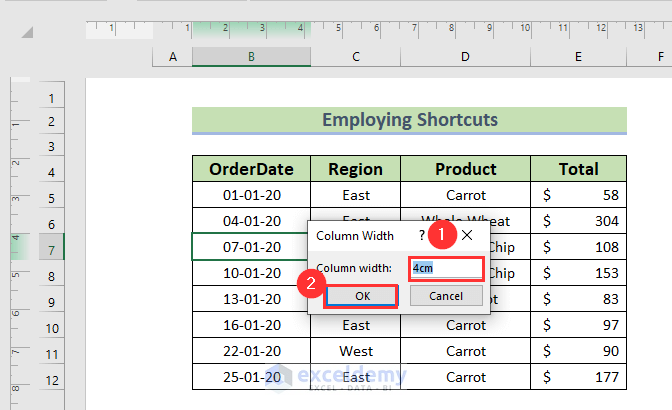
- To change the Column Width, insert any number of your choice. Here we inserted 3cm.
- Click OK.
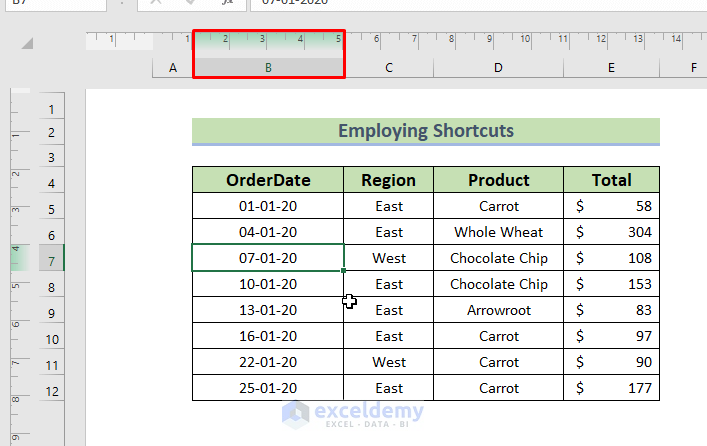
The width of Column B adjusts to the specified size.
Example 4 – Changing the Width of Multiple Columns
- Select any column.
- Hold down CTRL and select other columns as desired. Here, we selected column B along with D.
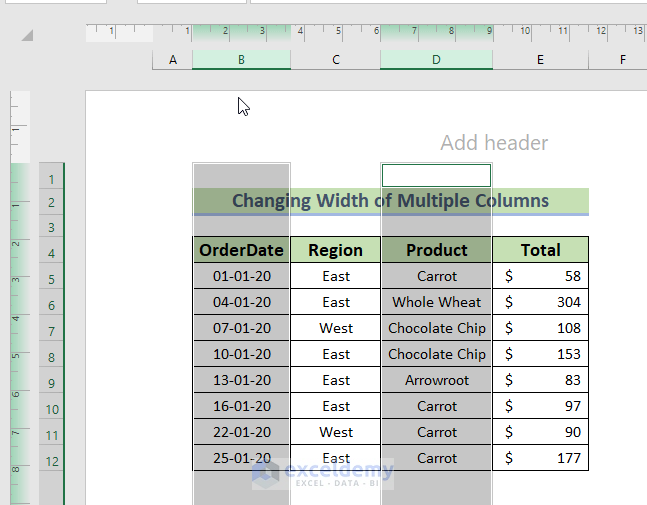
- Place the cursor on the Column Header.
- Right-click on the mouse.
- Select Column Width from the context menu.
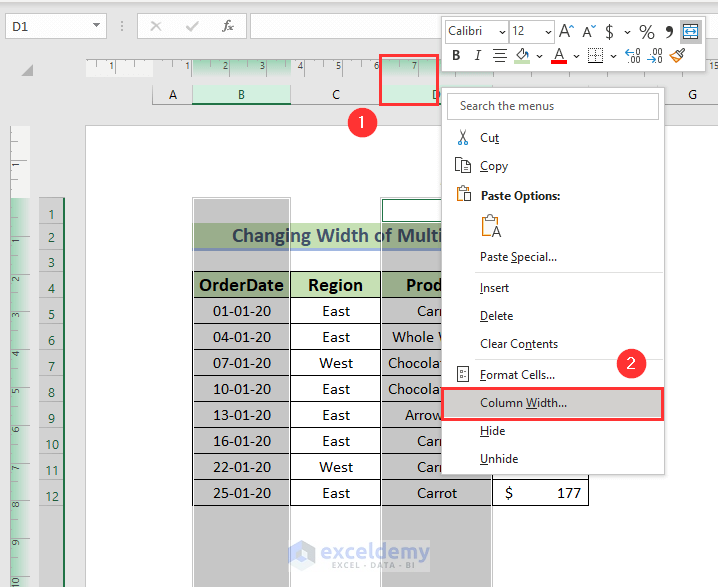
This time, because the two columns are different sizes, in the Column Width dialog box that opens, the Column Width option doesn’t display a value, only the unit.
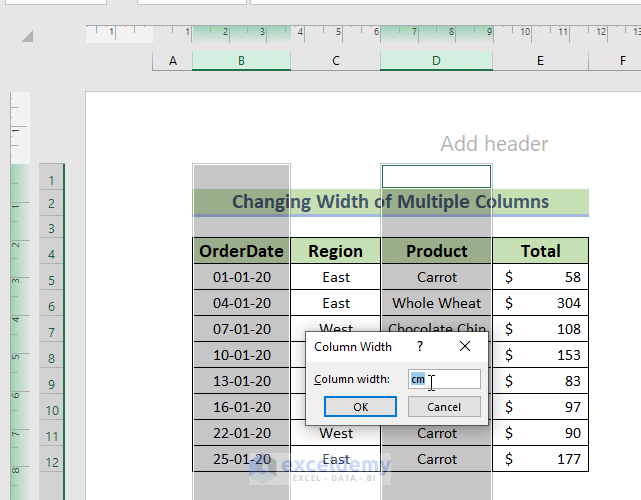
- Enter any number. We inserted 5cm.
- Press OK.
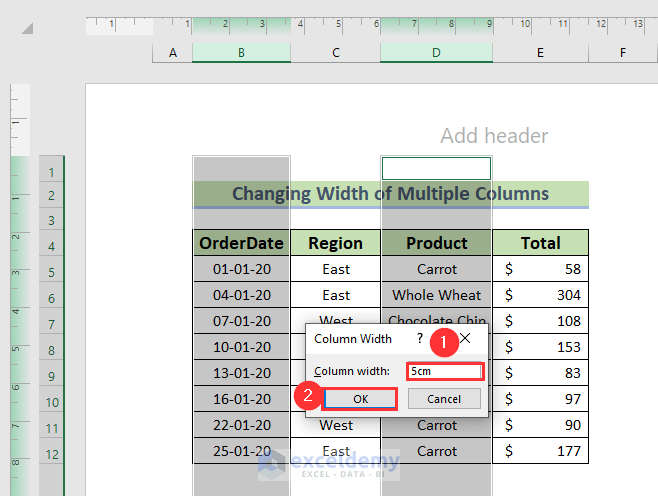
Both column widths will now be the same size, 5cm.
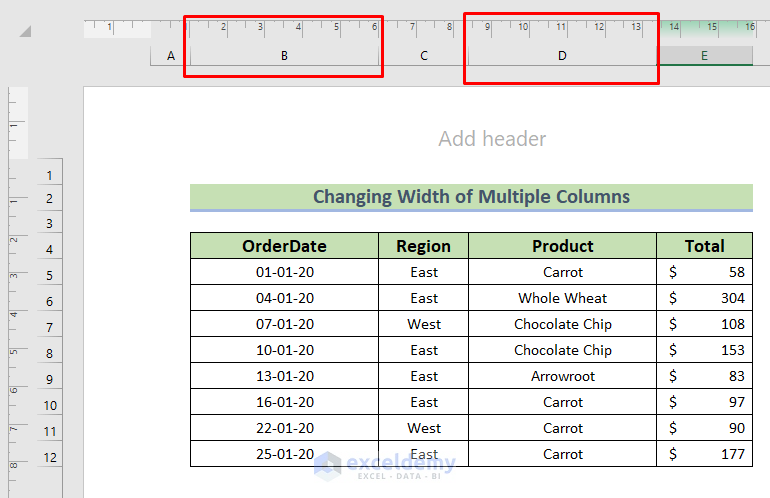
Excel Column Width in Inches
Changing the column width to inches can be accomplished by following the same steps.
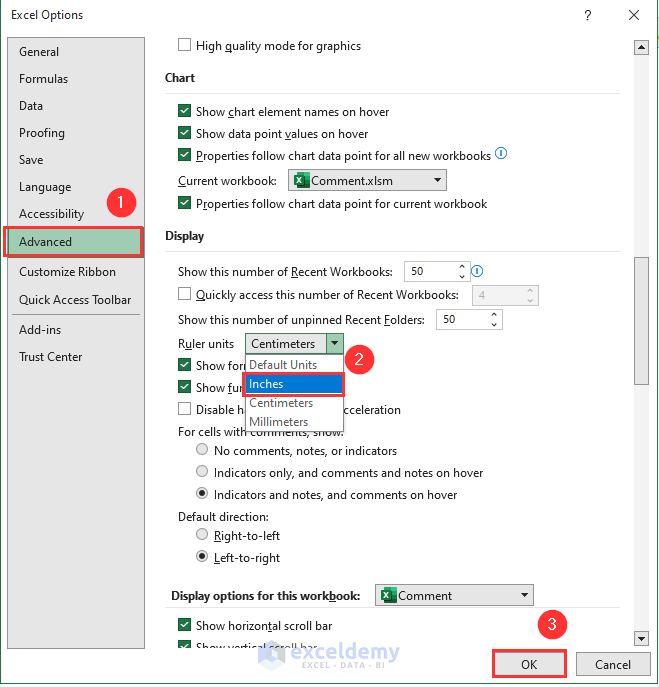
- Open the Excel Options window by following Step 1.
- Click Advanced.
- Select Inches from the Ruler units drop-down.
- Click OK.
- Click the View tab.
- Select Page Layout.

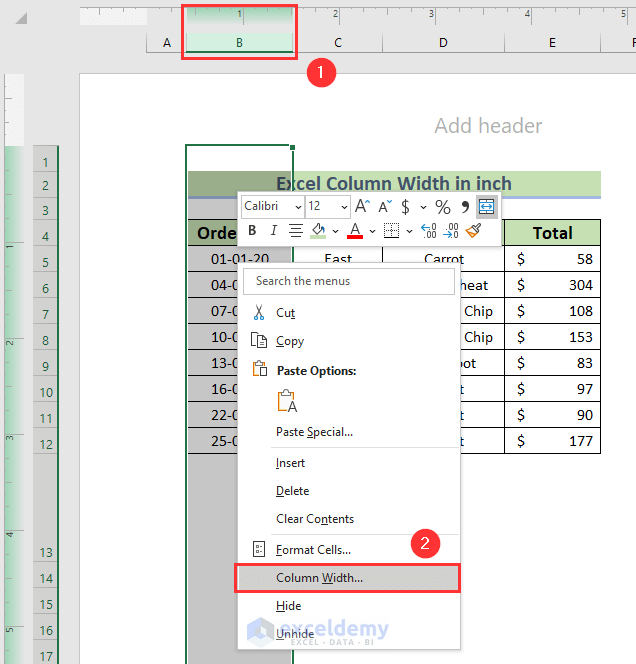
The scale of the row and column headers will now appear in inches.
- Select any row or column header and right-click on it.
- Select Column Width.
Now the Column Width is visible long along with the units.
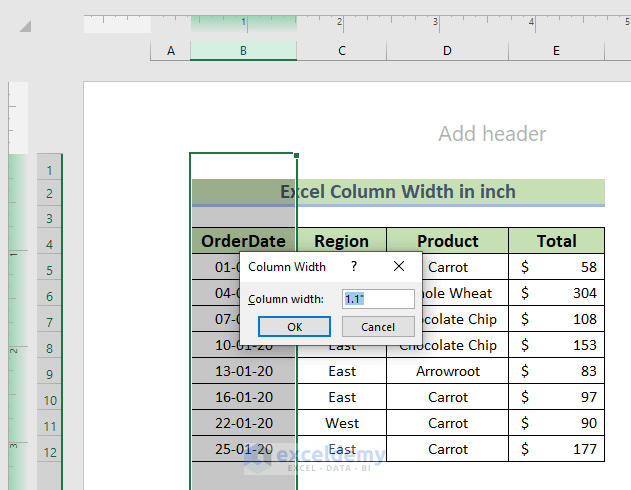
Note: Using this method, we can also change the column width into millimeters.
Things to Remember
The Default Units for column width in Excel is inches.
Download Practice Workbook
<< Go Back to Change Column Width | Learn Excel
Get FREE Advanced Excel Exercises with Solutions!

