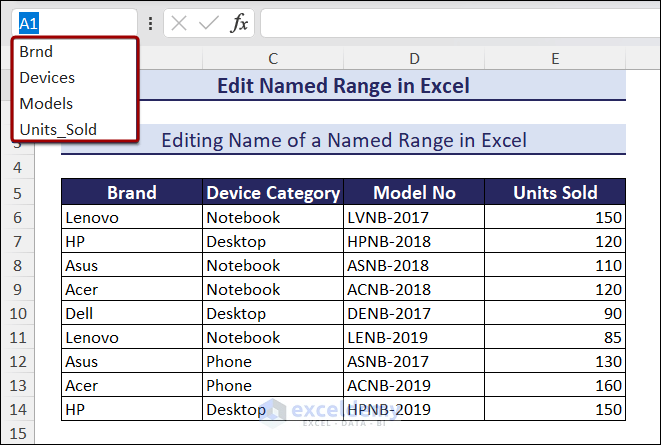
There is a spelling mistake in the named range: Brnd.
How to Edit the Name of a Named Range?
To change the Named Range Brnd to Brand:
Step 1:
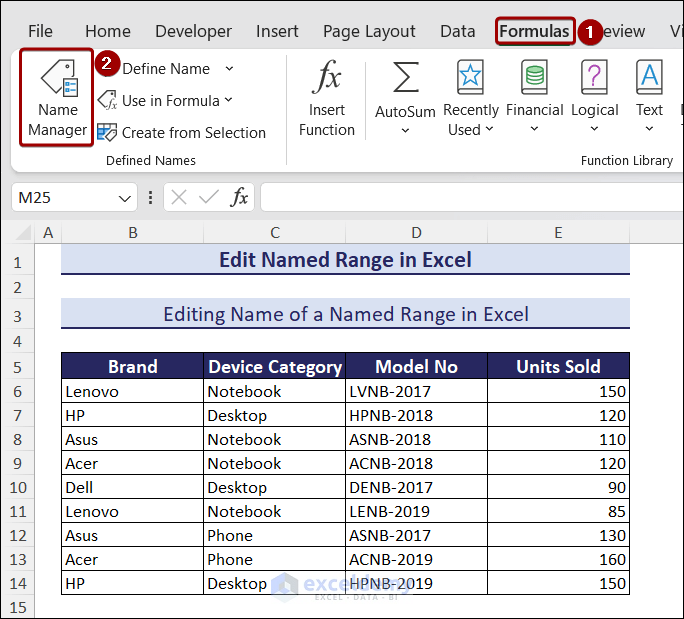
- Go to the Formulas tab ⇒ Name Manager. You can also press CTRL+F3.
Step 2:
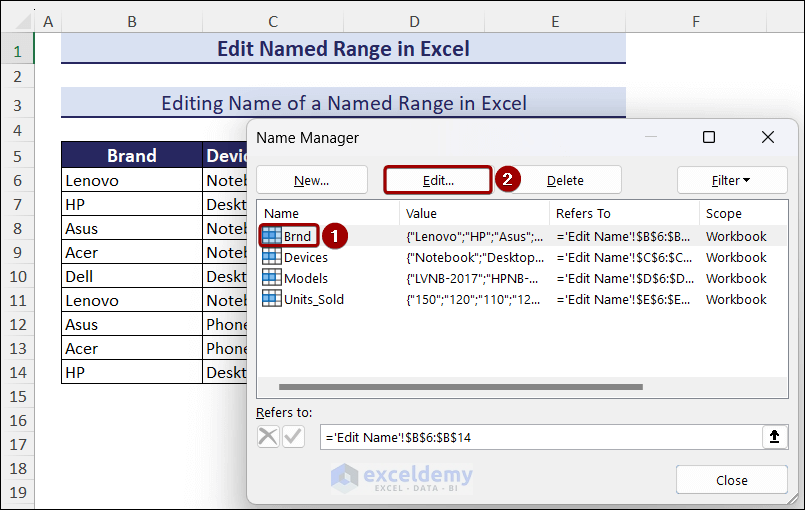
- Select the named range Brnd from the list ⇒ Click Edit.
Step 3:
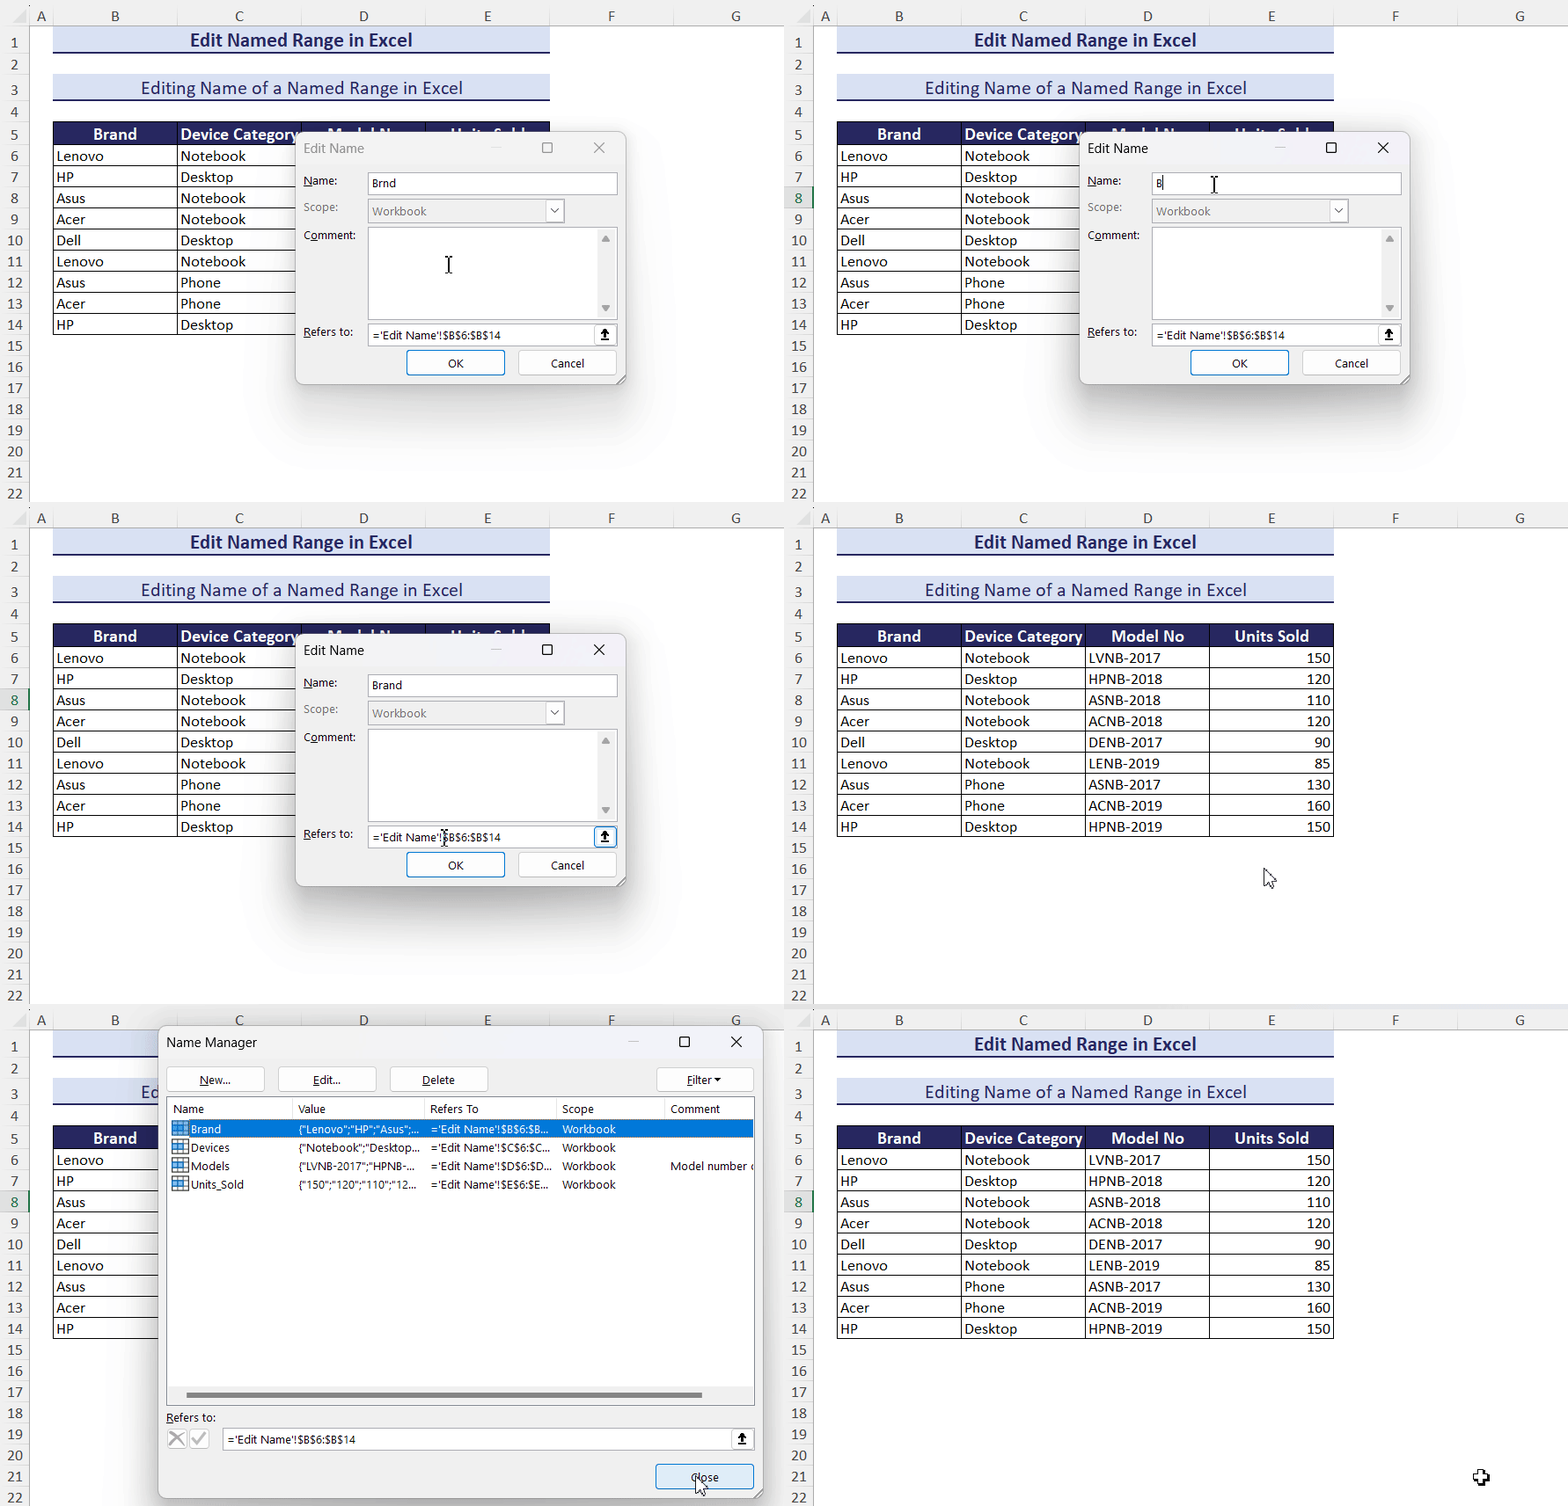
- Enter Brand ⇒ Click OK ⇒ Click Close.
Important Notes on Naming Ranges:
- The space character is not supported.
- The 1st character of a name must be a letter/underscore (_)/backslash (/).
- Other characters may be any letter, number, period, or underscore.
- Names are not case-sensitive. Names Brand and brand are the same.
- A name can contain 255 characters maximum.
- You cannot assign a name that is similar to a cell reference.
- You cannot use names that match keyboard shortcuts.
How to Edit the Range of a Named Range
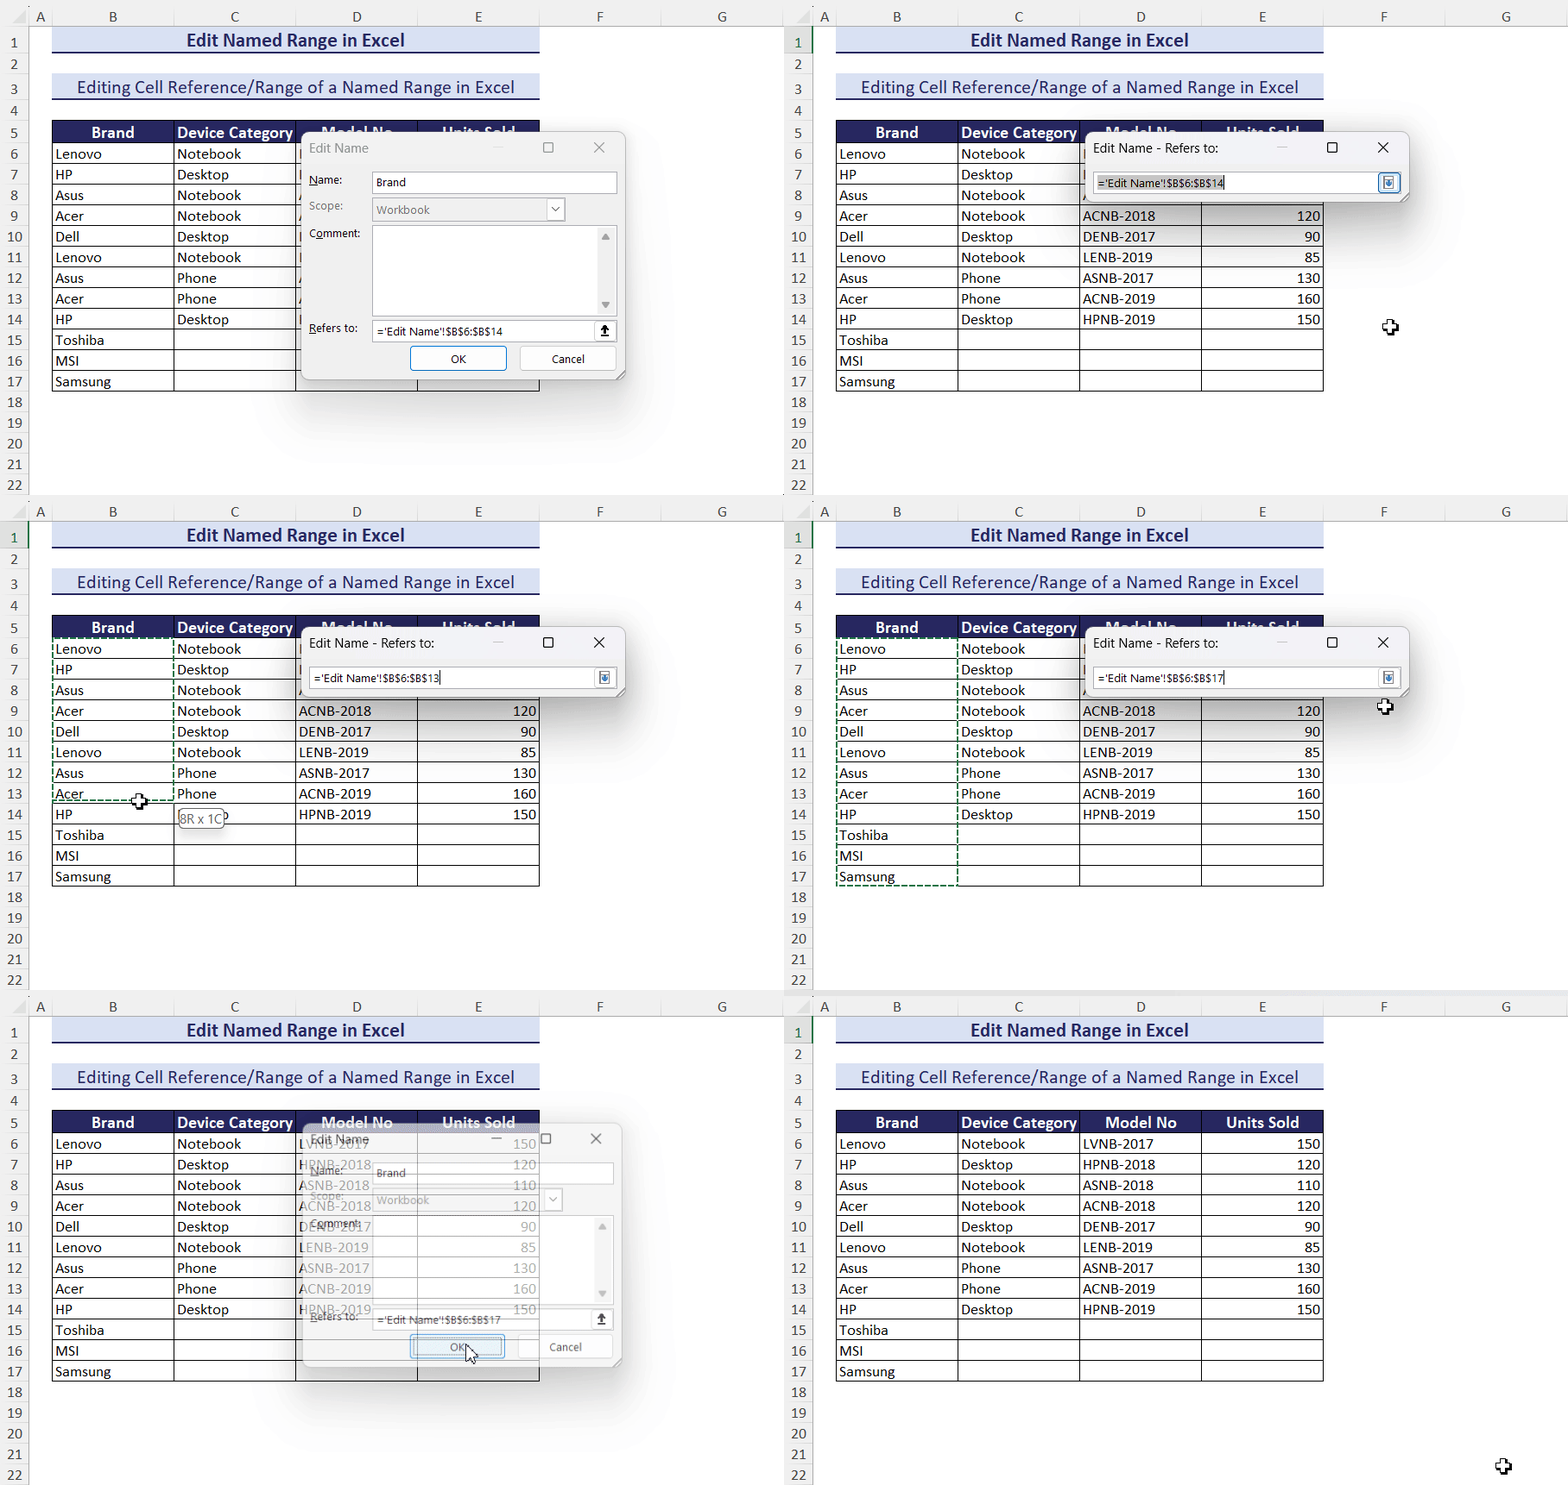
New brand names were added in Column B (Brand column). The previously named range was B6:B14.
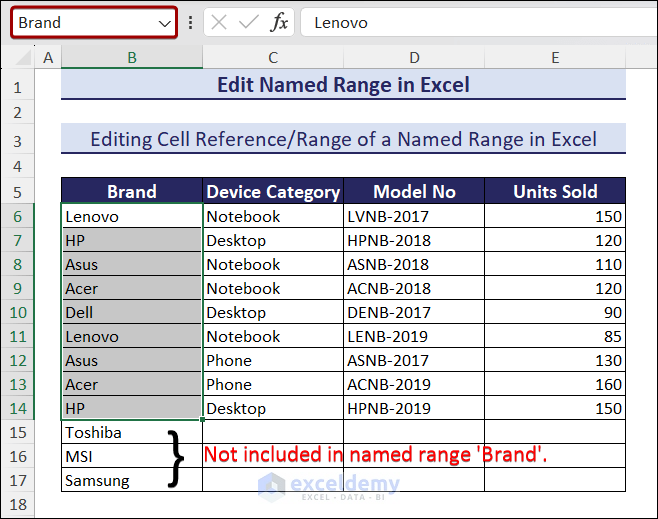
Step 1:
- Go to Formulas ⇒ Name Manager ⇒ Select Brand ⇒ Click Edit.
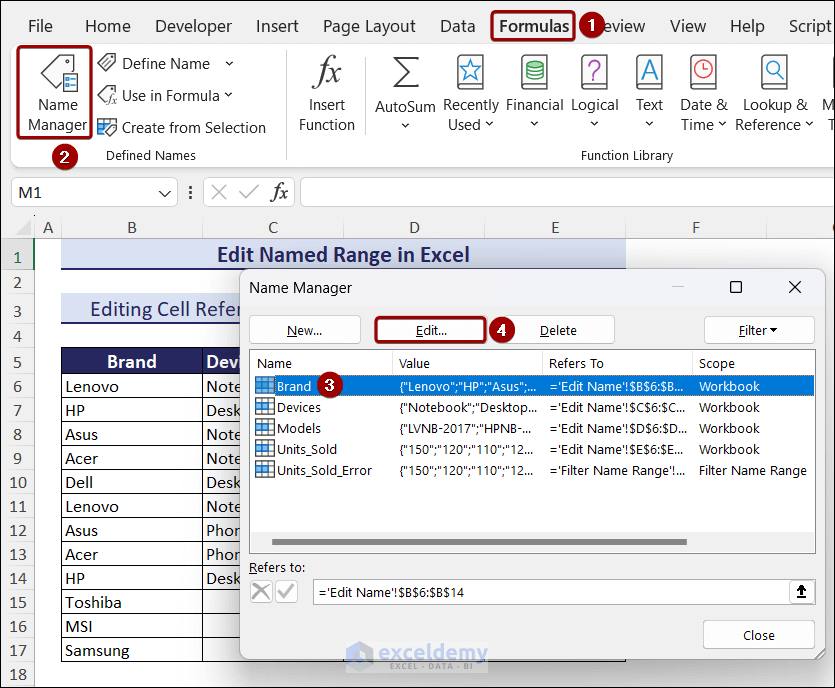
Step 2:
- Click the arrow in Refers to: ⇒ Select new range ⇒ Click the arrow button again ⇒ Click OK and Close.
How to Edit a Comment in a Named Range?
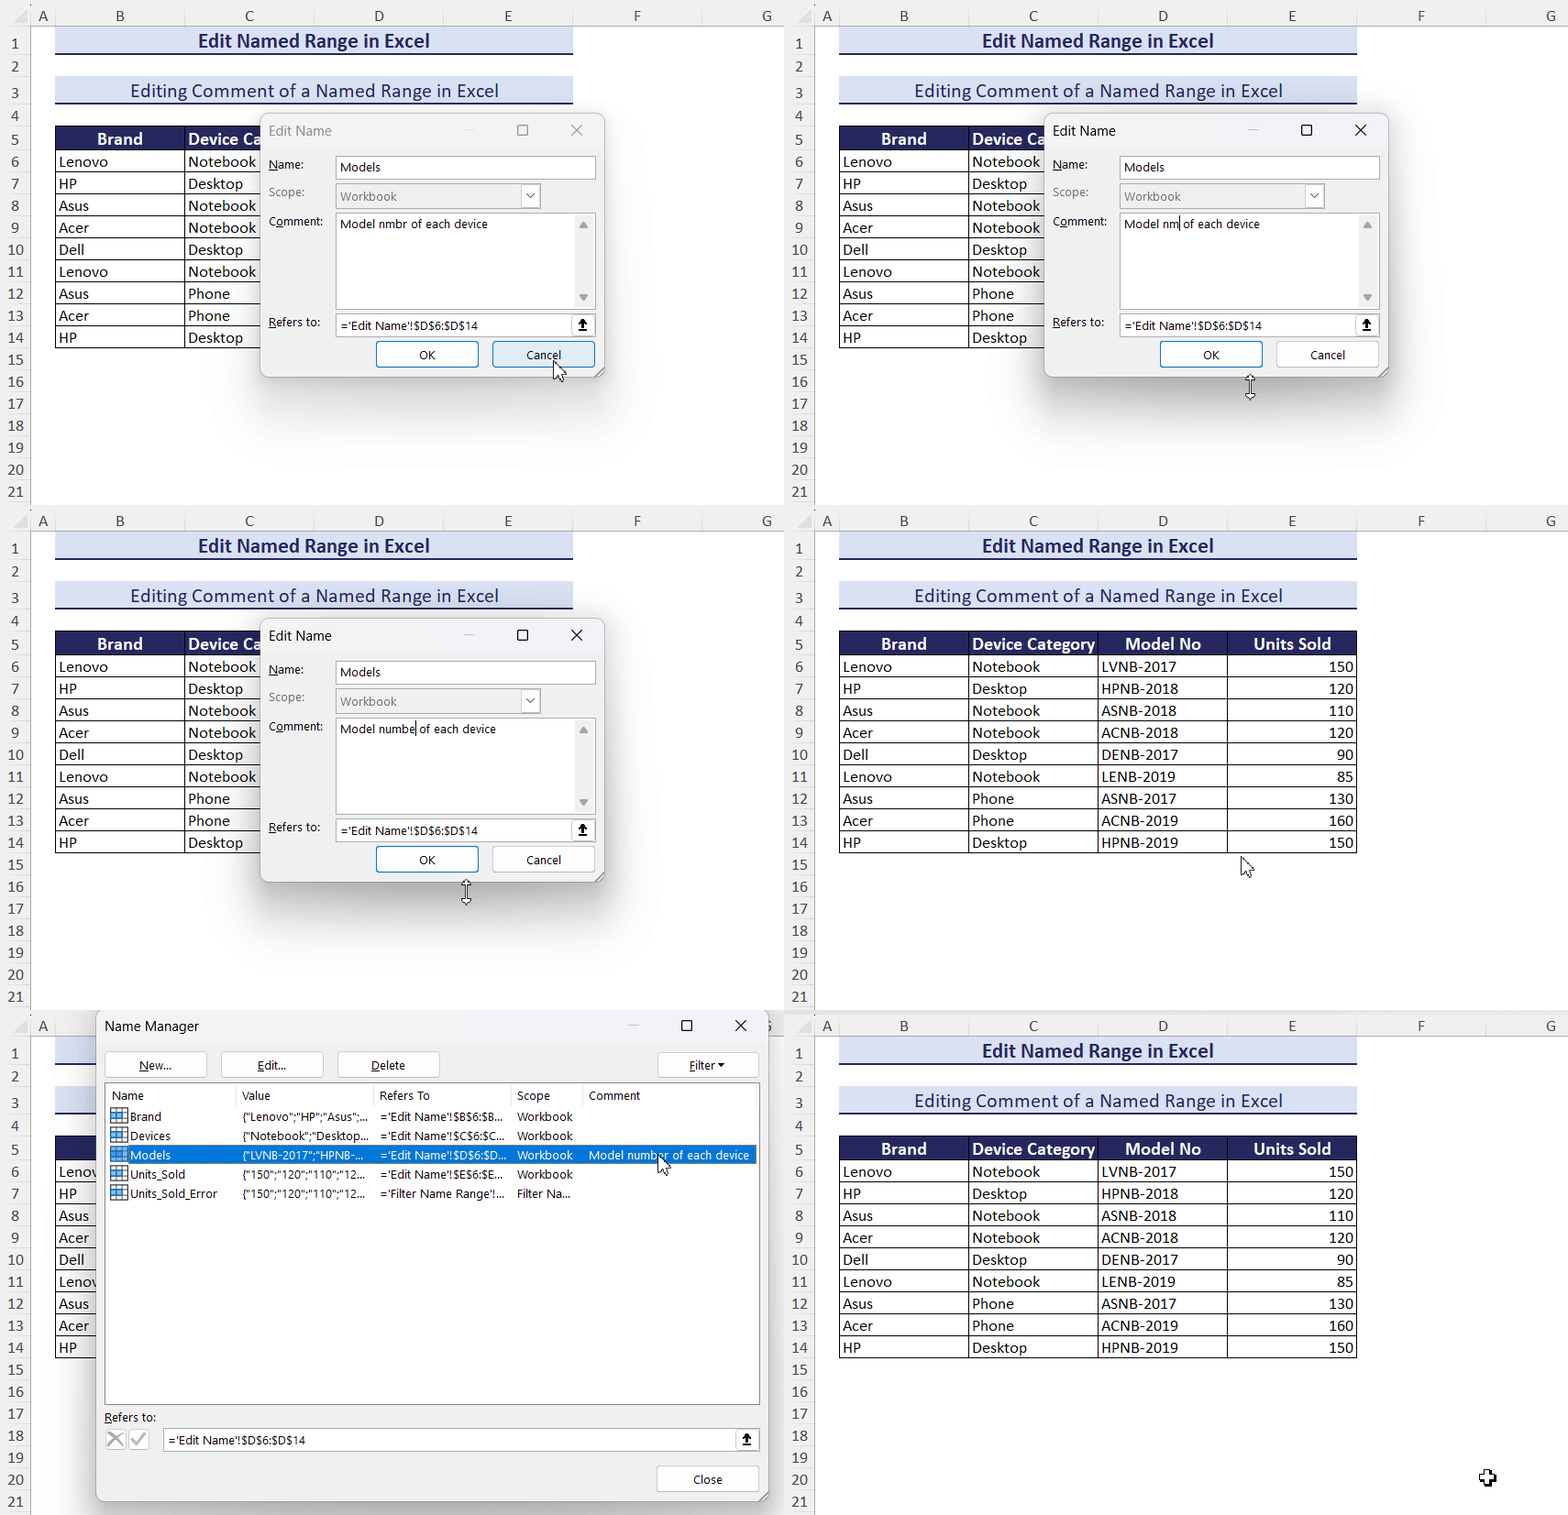
The Models named range contains a comment with a spelling mistake.
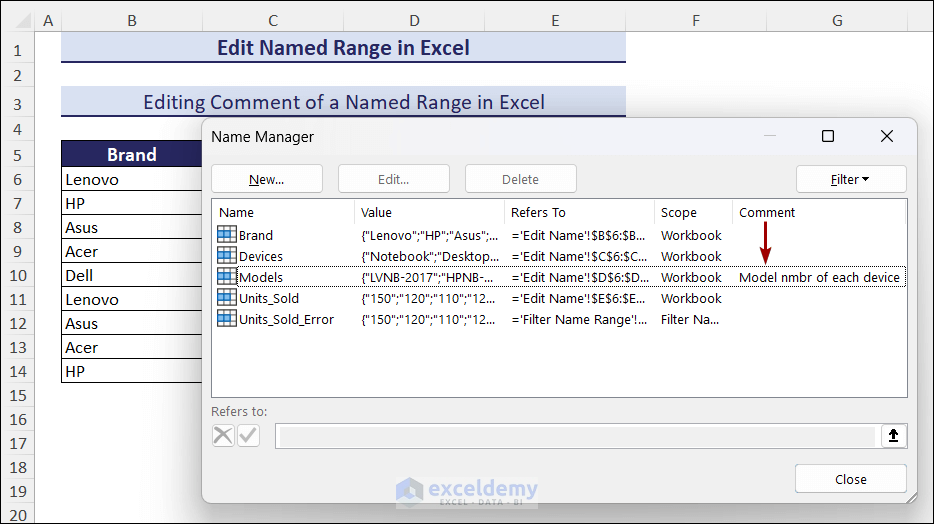
Step 1:
- Click Edit.
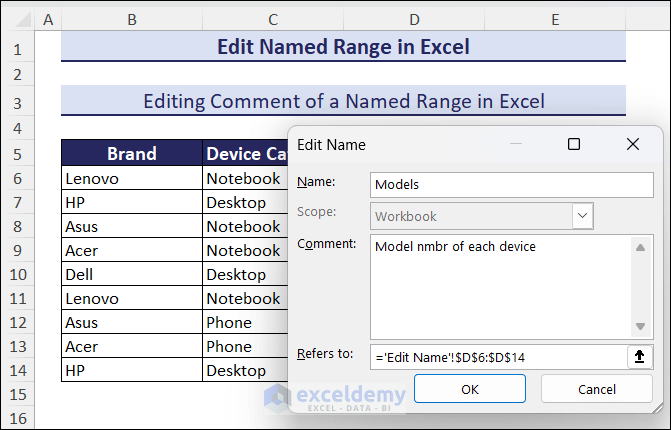
Step 2:
- Move the cursor into the Comment box ⇒ Edit the comment ⇒ Click OK.
- Click Close.
Is it Possible to Edit the Scope of Excel Named Ranges Once They Are Created?
No.
The Scope field is grayed out in the Edit Name window.
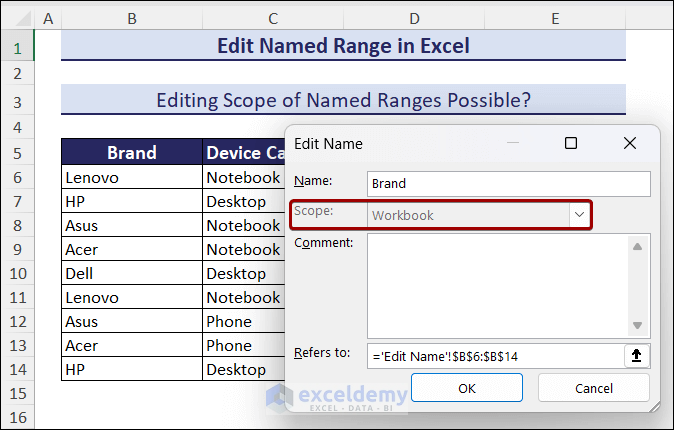
To change the Scope of a named range you need to delete the named range and create a new one.
How to Delete a Named Range in Excel?
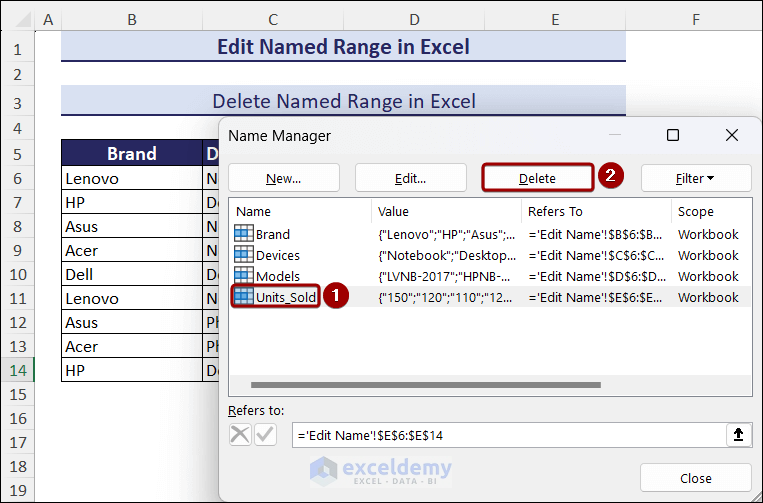
Step 1:
- Go to the Name Manager window ⇒ Select the named range you want to delete (here, Units_Sold) ⇒ Click Delete.
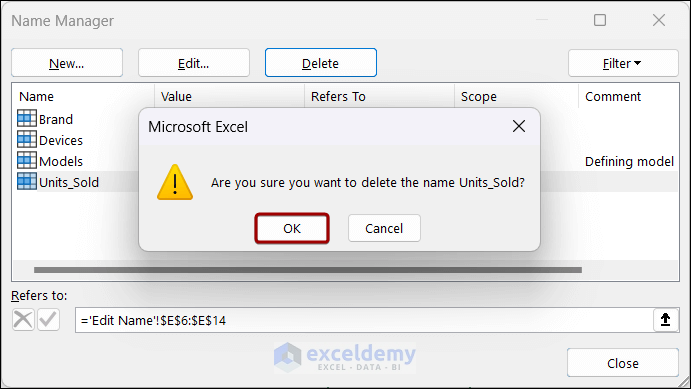
Step 2:
- In the warning window, click OK.
Read More: How to Delete All Named Ranges in Excel
Things to Keep in Mind while Editing a Named Range
- Named ranges can’t be edited in cell edit mode.
- Defined names can not be edited in the Name Box.
- The default Scope of any named range is the workbook.
- You can create multiple named ranges with the same name and different scopes.
- When you edit a named range, changes are reflected in the formulas.
Related Articles
- How to Display Named Range Contents in Excel
- How to Paste Range Names in Excel
- How to Name a Group of Cells in Excel
- How to Navigate to a Named Range in Excel
- How to Find a Named Range in Excel
- How to Name a Column in Excel
<< Go Back to Named Range | Excel Formulas | Learn Excel
Get FREE Advanced Excel Exercises with Solutions!


Thank you for the nice fairly comprehensive help for named ranges. One area left out which I cannot figure out and that is editing the range of an existing defined range that uses relative addressing. I have a named range using relative addressing (on the rows only) which is used for grabbing every other column value. I need to extend the range for additional columns. Since there is no “cell editing” in named ranges I don’t see a solution to add more columns. I could delete the range and redefine it but it has been used already in multiple locations so I cannot delete it without first deleting all formulas/functions that reference the range in my workbook. The only other option I see is to create a new named range and then replace all the others with the new and then potentially rename the new range to the old correct name. Are there other options?
Hello Ian,
Thank you for your feedback! Unfortunately, Excel doesn’t allow direct editing of ranges with relative addressing. Your suggested approach of creating a new named range and updating references seems to be the best workaround. Another option could be to use a formula in the new range to pull in data from the existing named range while expanding it. This way, you can keep your original named range intact for reference.
To create a new named range that expands on an existing one, you can use the INDEX function combined with OFFSET. Example formula:
=OFFSET(NamedRangeStart, 0, 0, ROWS(NamedRangeStart), COLUMNS(NamedRangeStart) + AdditionalColumns)
Replace NamedRangeStart with your existing named range, and AdditionalColumns with the number of extra columns you want to include. This formula effectively creates a dynamic range that expands based on your specifications.
Regards
ExcelDemy