Method 1 – Using Keyboard Shortcut
Steps:
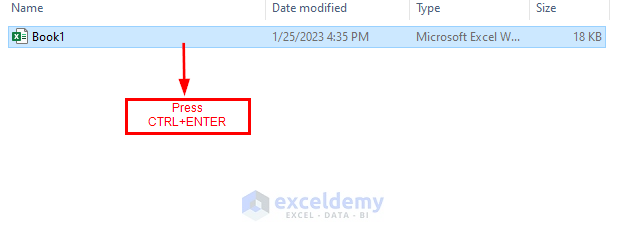
- Select the Excel file.
- Press CTRL+ENTER.
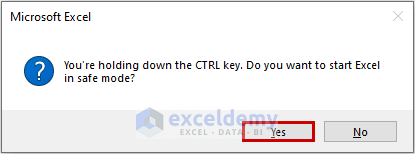
- After pressing ENTER, do not release CTRL until a confirmation dialog box appears.
- Click Yes.
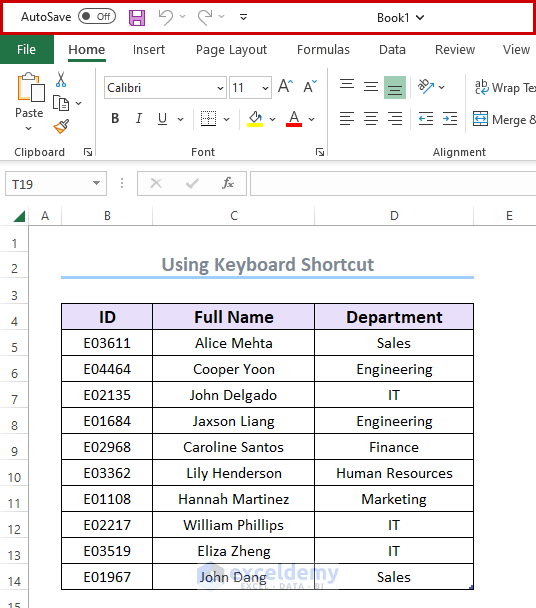
- See the top of the Excel file turned white. It means this file is now in safe mode.
Method 2 – Implementing Command-Line to Launch Excel in Safe Mode
Steps:
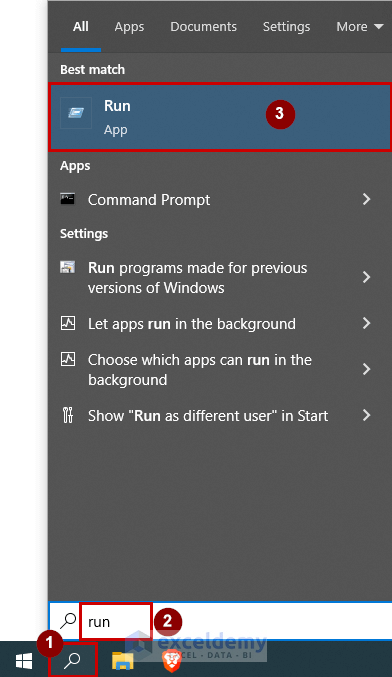
- Click on the Search bar in the Windows toolbar.
- Type run.
- Find the Run in the Best match section.
- Press Windows+R and the Run prompt will open.
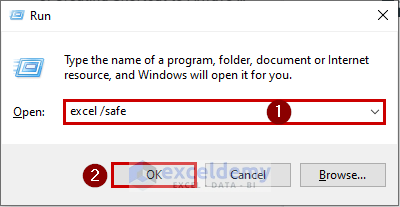
- In the Open text box, type excel /safe.
- Click OK.
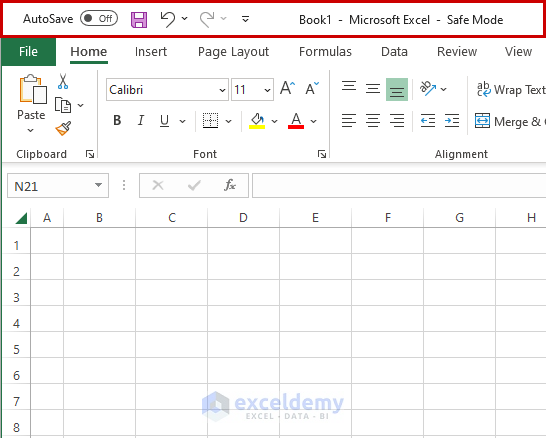
- It will be opening a new Excel file in safe mode.
Method 3 – Creating a Shortcut to Always Launch Excel in Safe Mode
Steps:
- Create a shortcut for the Excel file.
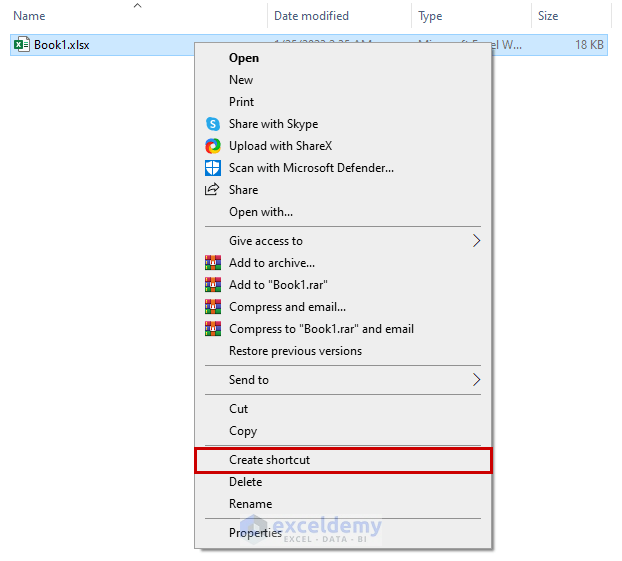
- Select the Excel file and right-click on it.
- Click on Create Shortcut.
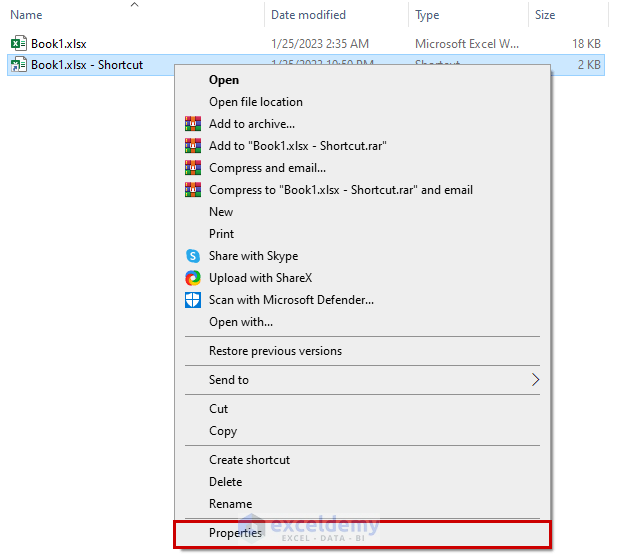
- Find the shortcut of the file to select and right-click on it.
- Click on Properties.
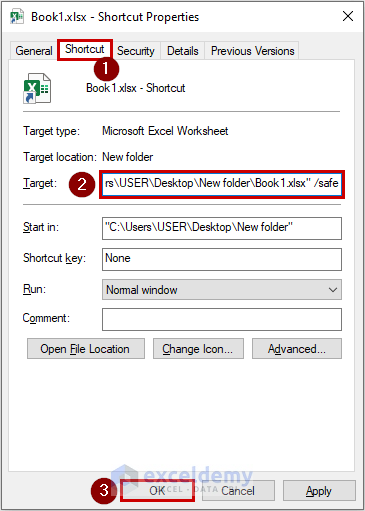
- A Shortcut Properties window will appear.
- Make sure you are on the Shortcut tab.
- Add “ /safe” at the end of the Target box text.
The space, before the slash(/), is mandatory. Leaving out the space will result in an error.
- Click OK.
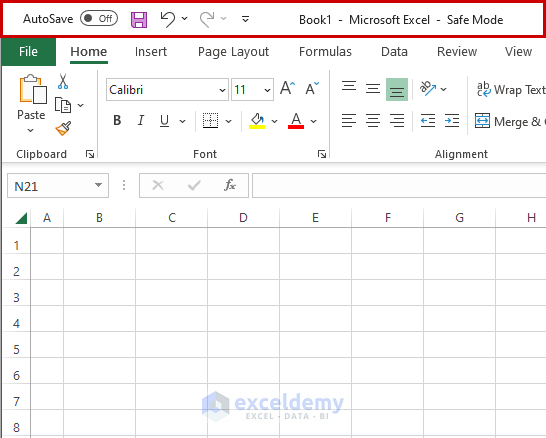
- If you open the Excel file from this shortcut, it will always run in safe mode.
Method 4 – Running Excel as Administrator from Windows Start Menu
Steps:
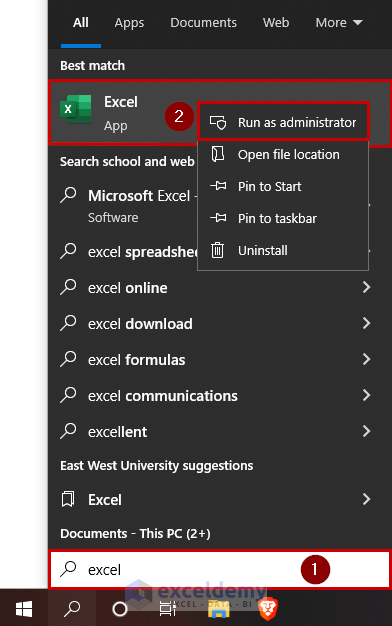
- Search Excel on the Windows Start Menu.
- Right-click on the Excel app.
- Click on Run as administrator.
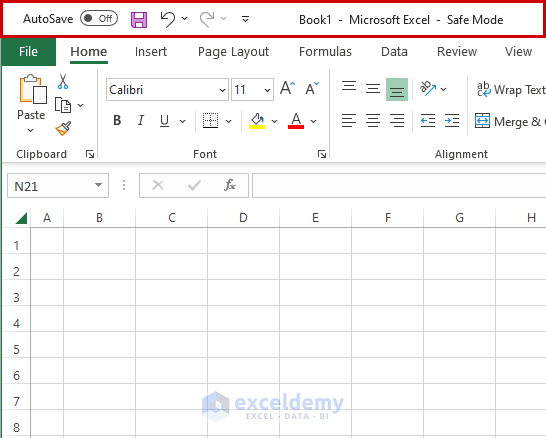
- A dialog box will appear asking if you want to select “Yes” or “No”. Click on the “Yes”. It will open your Excel file in safe mode.
How to Launch Excel When It Stops Responding
Steps:
- Search the Registry Editor on the Windows Start Menu.
- Click the Registry Editor app.
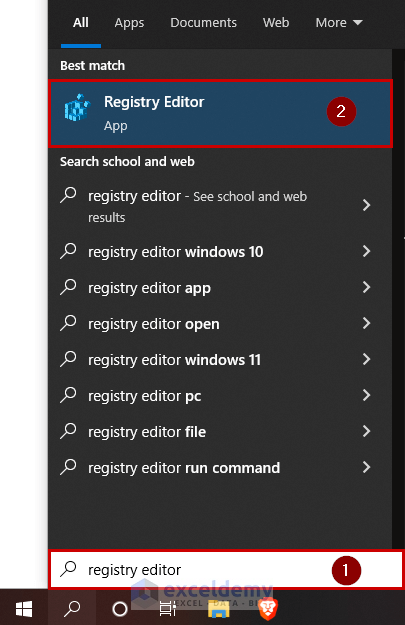
- The Registry Editor window will open up immediately.
- Click on the down arrow on the left side of HKEY_CURRENT_USER.
- Find SOFTWARE.
- Click on the down arrow beside it.
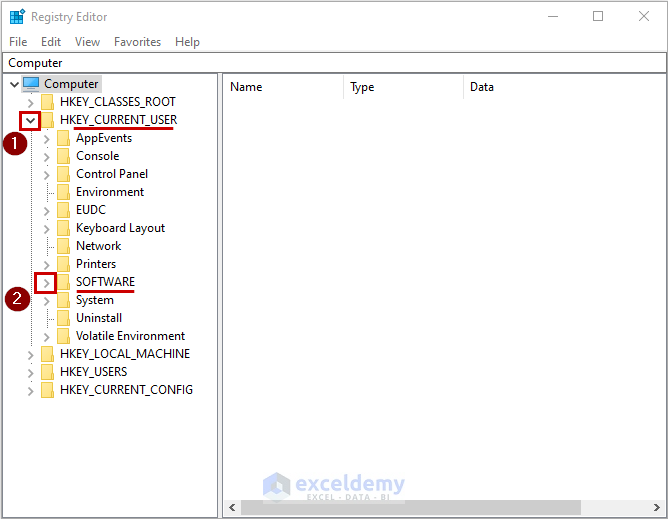
- At this moment, a SOFTWARE section will open up.
- Find Microsoft and expand it by clicking the down arrow beside it.
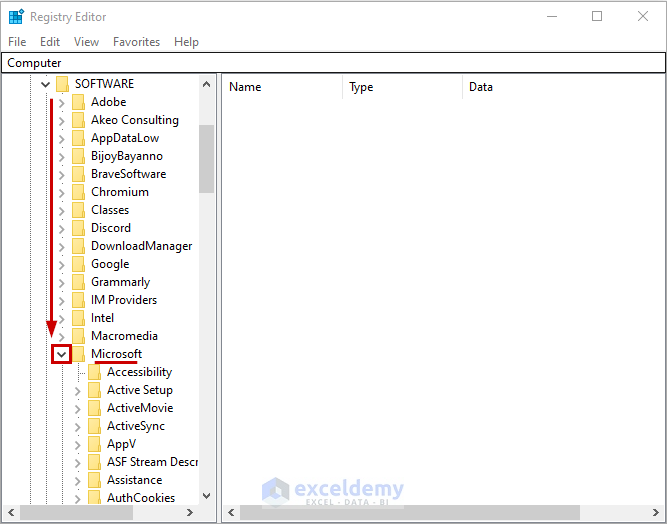
- Find Office under Microsoft and expand it.
- Find 16.0 under Office and expand it.
- Expand Common under 16.0.

- Find Open Find, and click on it.
- Right-click on the right-side space.
- Hover on New, and select DWORD (32-bit) Value.
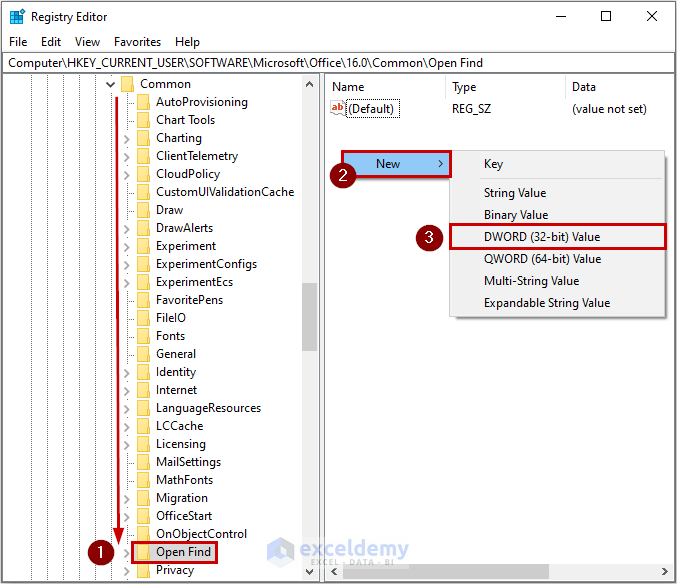
- Name the file EnableShellDataCaching.
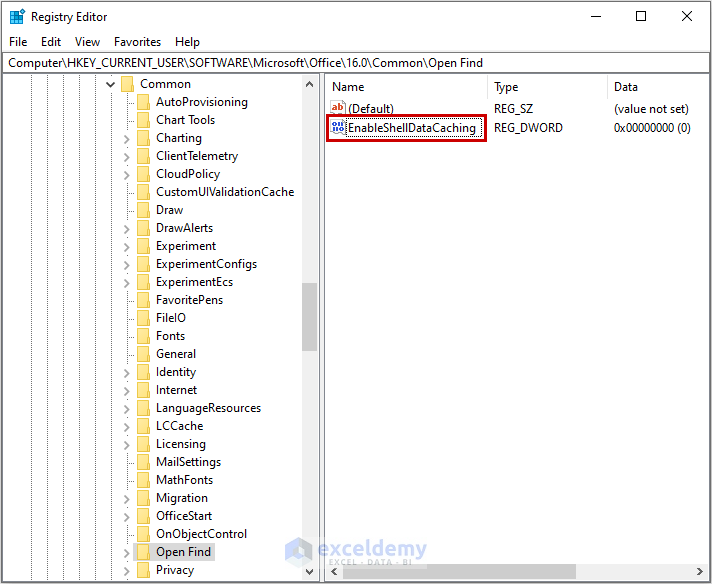
- Double-click on it to open the file.
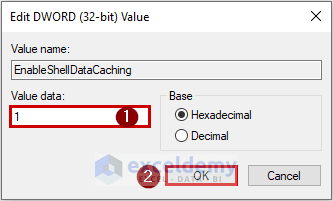
- A pop-up window of Edit DWORD (32-bit) Value will appear.
- Change the Value data to 1.
- Click OK.
- Restart your computer. The problem will be fixed.
Related Article
<< Go Back to Safe Mode | Workbook in Excel | Learn Excel
Get FREE Advanced Excel Exercises with Solutions!

