Method 1 – With Text to Columns Feature
⏩ Steps:
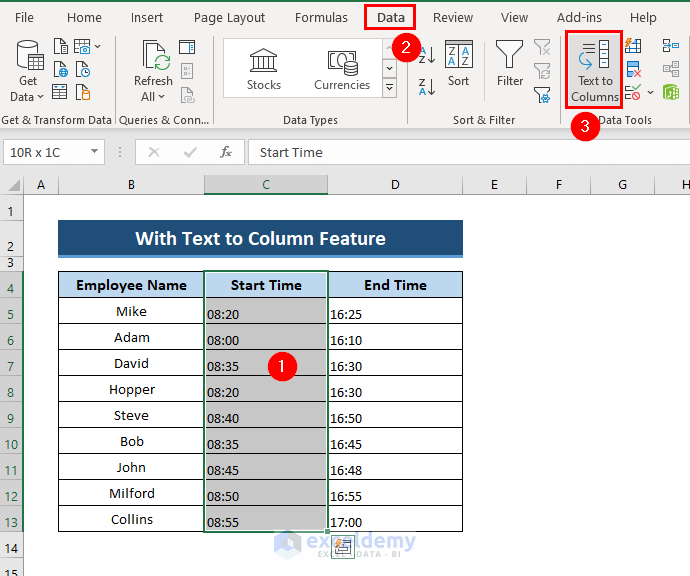
- Select a data range of a column (i.e. Start Time) > go to the Data tab> click the Text to Columns feature under the Data Tools group.
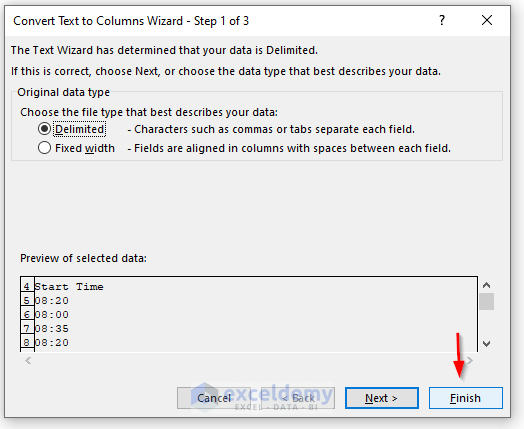
- Step 1 of 3 of the Convert Text to Column Wizard command box will appear. Click Finish.
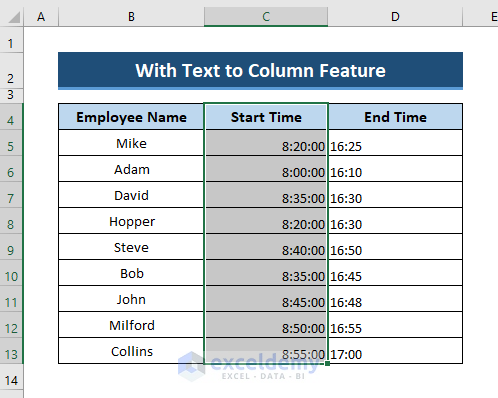
- The cell format will work instantly. You don’t need to double-click the cell and press ENTER to update this.
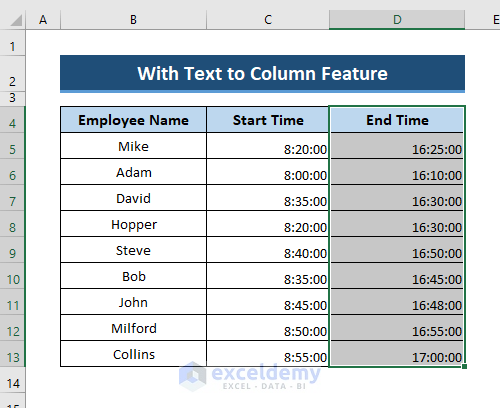
- Repeat the steps for the other column also.
Method 2 – Copying Blank Cell
The dataset contains dates in it. The cause of not working the cell formatting is the same as we described before.
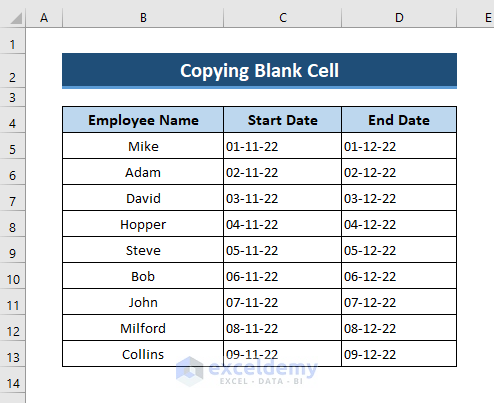
This dataset, we will copy a blank cell in order to make the cell format work properly.
⏩ Steps:
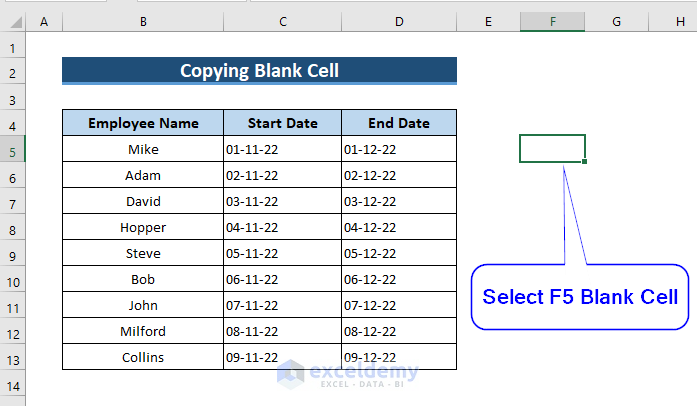
- Select a blank cell (i.e. F5) on the worksheet that doesn’t include any data, blank space, formula, etc.
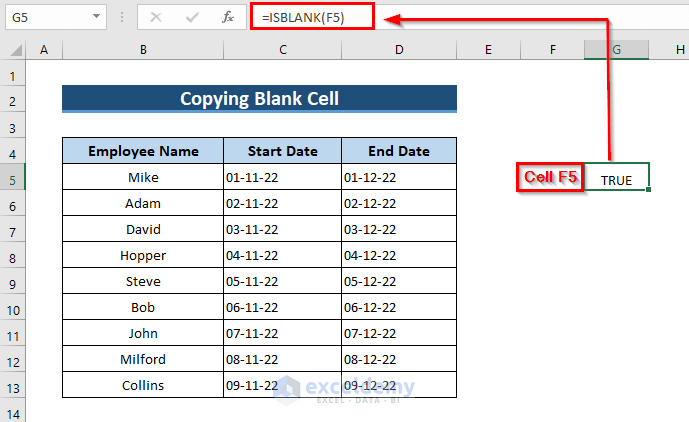
- The cell reference that you are selecting must result in TRUE by applying the ISBLANK function. Check that like the image below. If the ISBLANK function returns TRUE, then you can consider the cell blank.
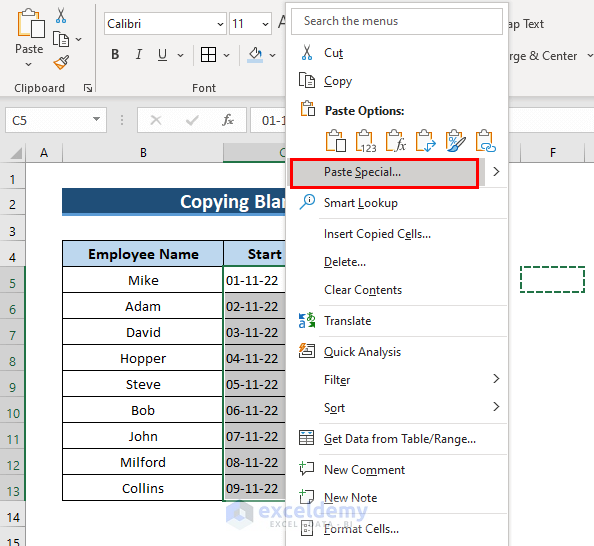
- Copy the blank cell (i.e. Cell F5) and then select the cells where you want to update formatting> right-click the mouse> select Paste Special…
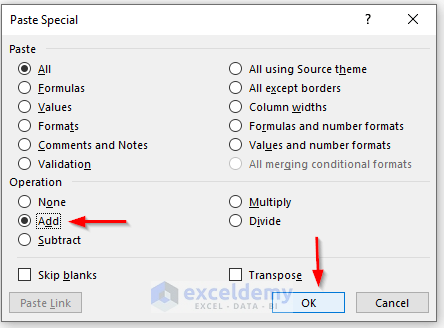
- The Paste Special dialog box, select Add from the Operation group> click OK.
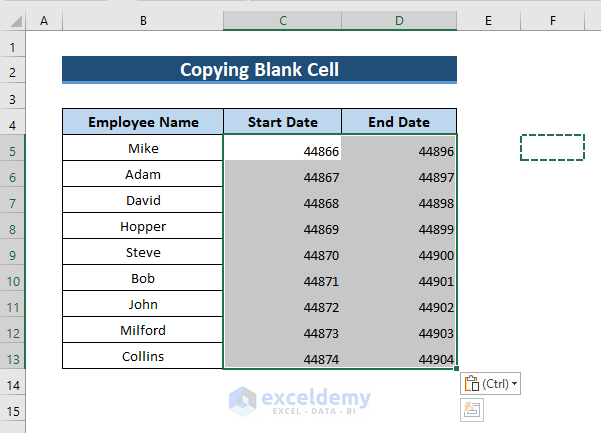
- The cell format will change like the image below.
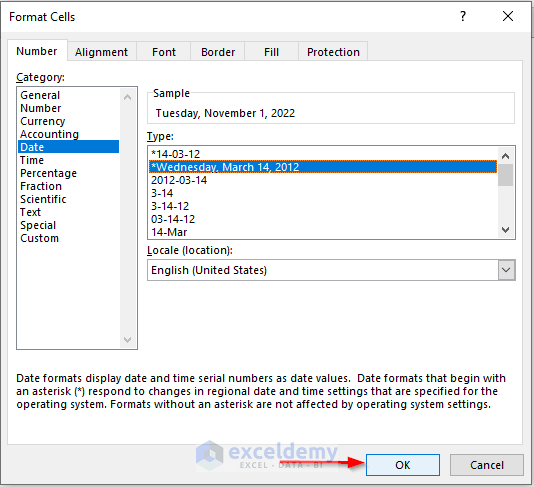
- Press CTRL+1 to open the Format Cells dialog box. Choose the Date Format (i.e. Wednesday, March 14, 2012) you want to show in the updated cells> click OK.
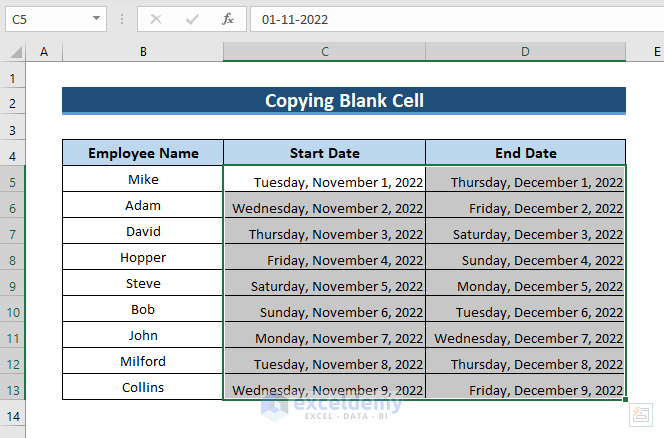
- All the cells will be updated according to the new Formatting.
Things to Remember
- While applying the Text to Columns feature, just select one column at a time because Excel doesn’t permit a user to apply this feature for more than one column.
- While copying the blank cell, make sure that this cell returns TRUE for the ISBLANK function.
Related Article
<< Go Back to Excel Cell Format | Learn Excel
Get FREE Advanced Excel Exercises with Solutions!

