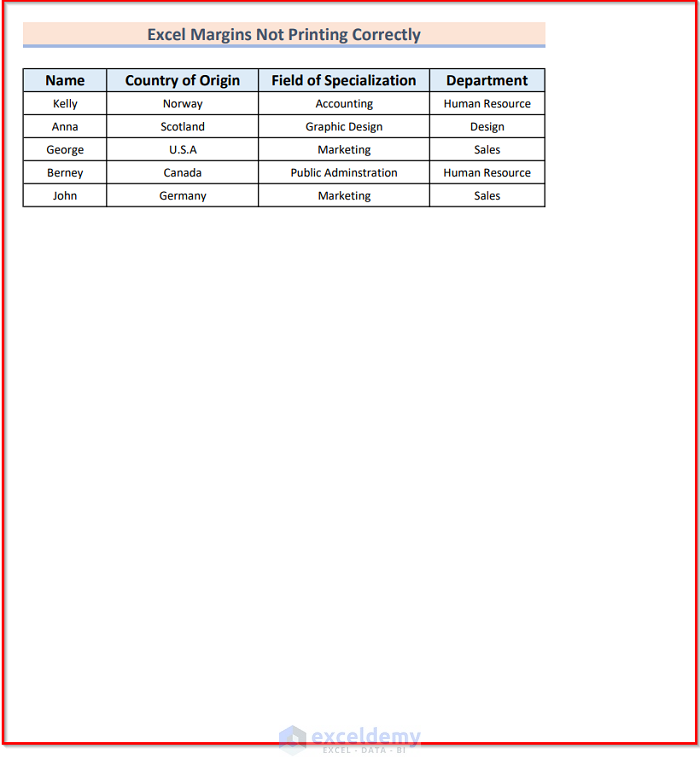
This tutorial will present various ways to solve the issue of margins not printing correctly in Excel.
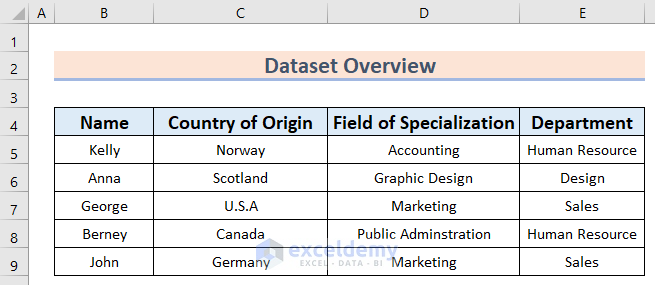
We’ll use the sample dataset below to illustrate our processes.
Method 1 – Using the Wrap Text Option
Steps:
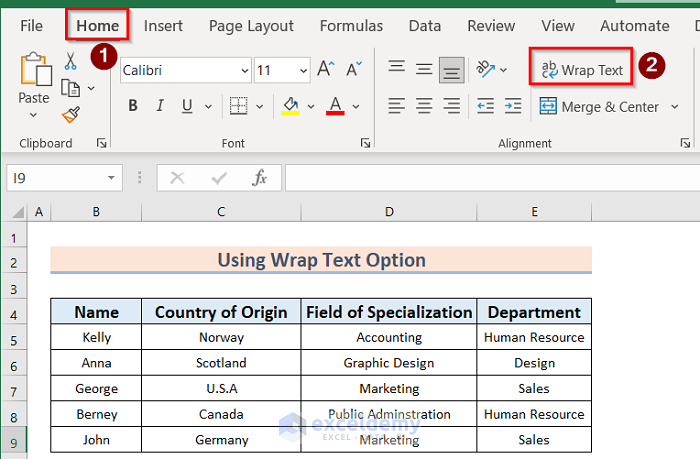
- Go to Home > Wrap Text.
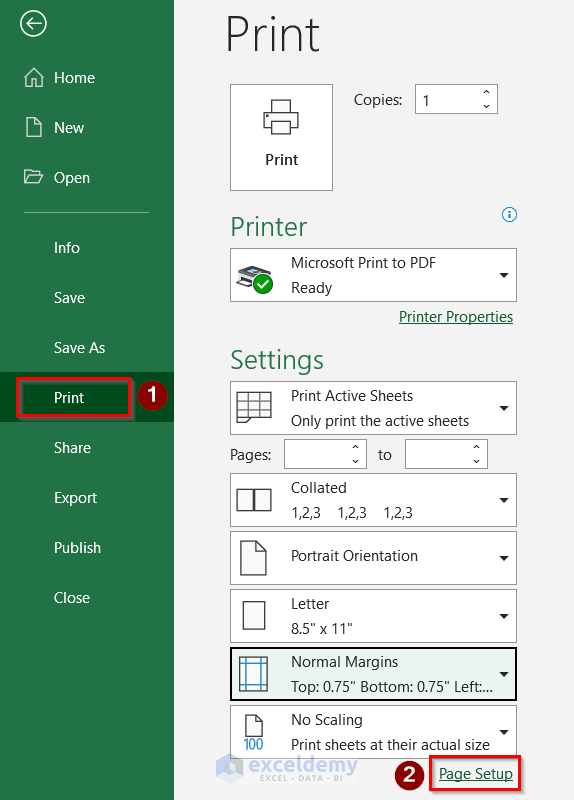
- Select the File tab.

- Select Print > Page Setup.
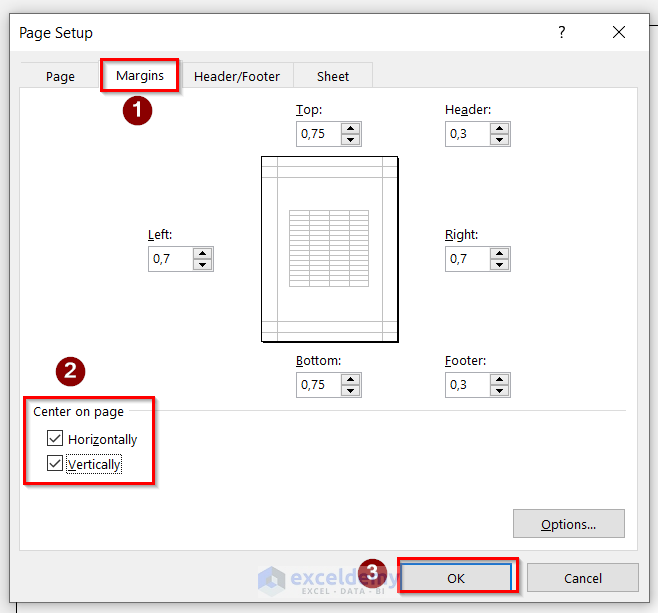
- In the Page Setup dialog box, select the Margins tab.
- Make the changes indicated in the image below and click OK.
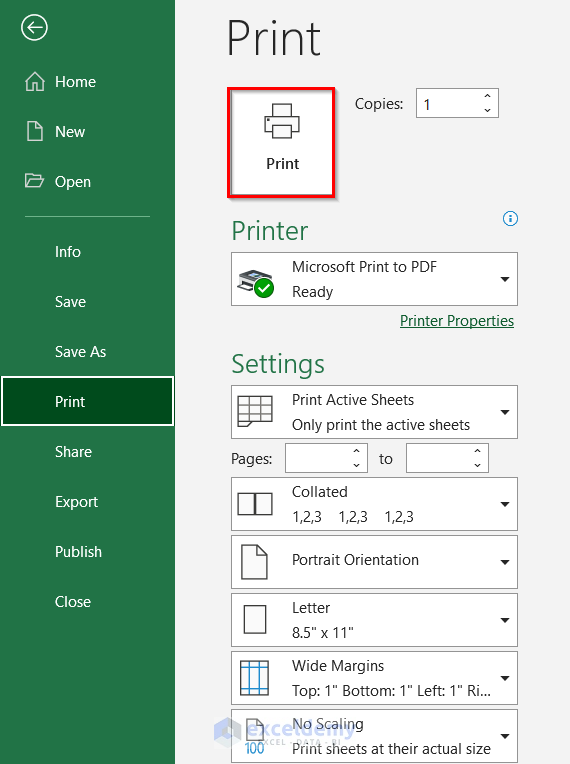
- Click on the Print button.
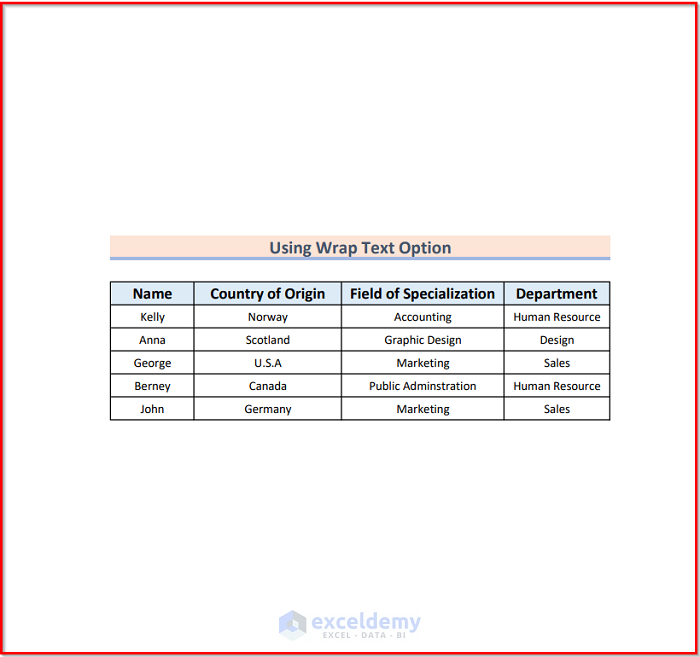
The result is as follows:
Method 2 – Adjusting the Page Margin
Steps:
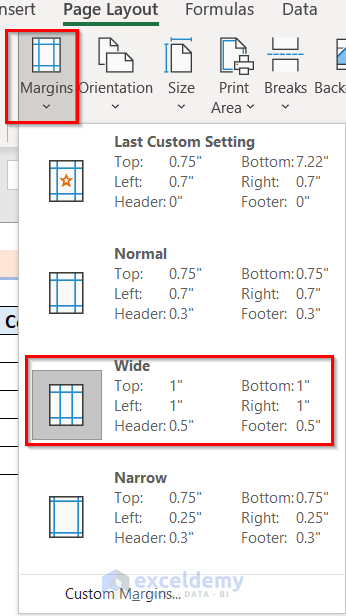
- Go to Page Layout > Margins.
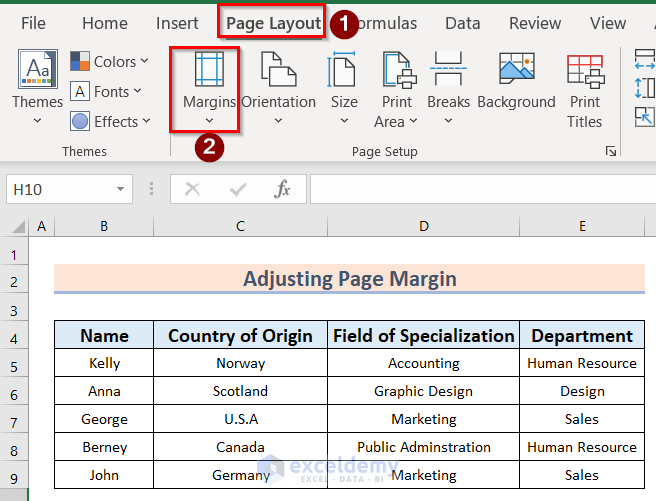
- In the Margins drop-down, select the Wide margin type.
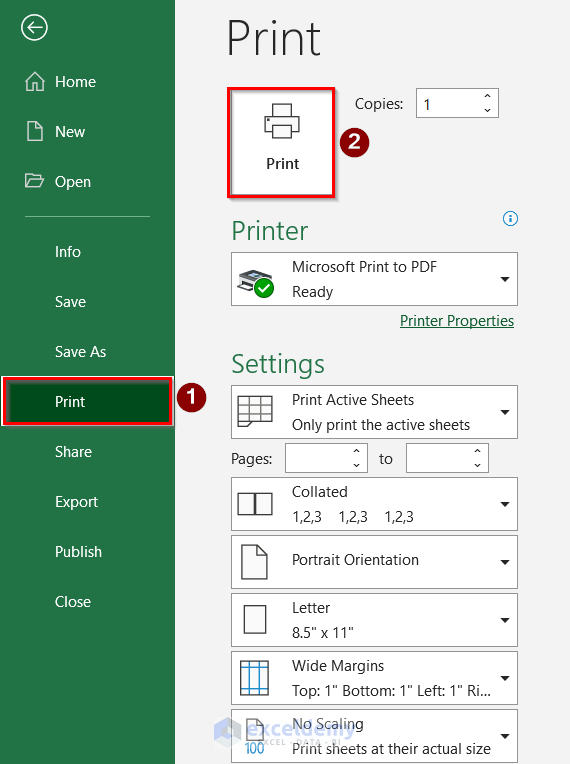
- Click on the File tab.

- In the Print window, select the Print option.
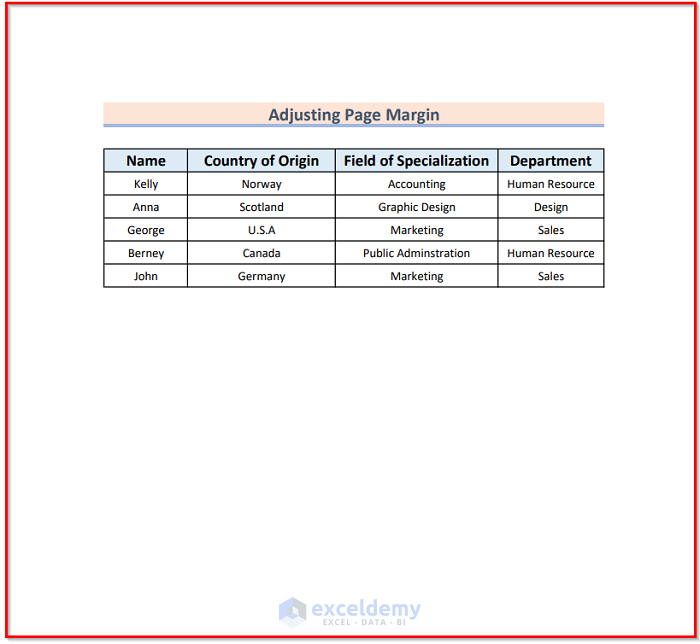
The outcome will be similar to the image below.
Method 3 – Changing the Orientation of the Page
Steps:
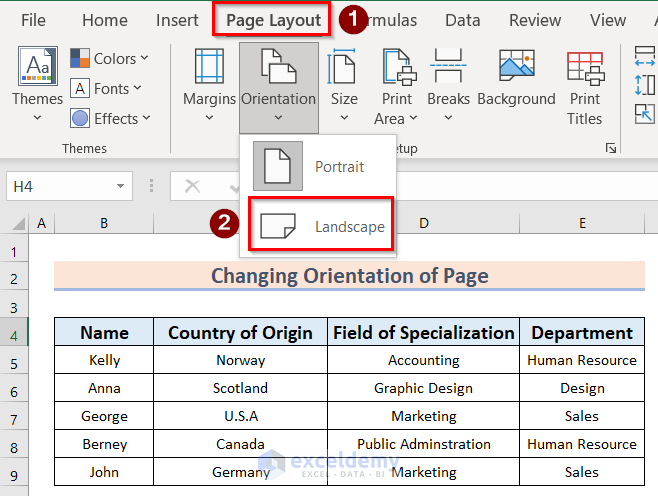
- Go to Page Layout > Orientation > Landscape.
- As above, go to File > Print window > Print to print the page.
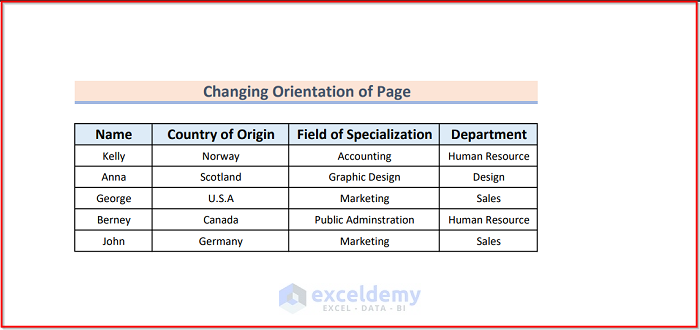
The result is as follows:.
Method 4 – Defining the Page Size
Steps:
- Go to Page Layout > Size.
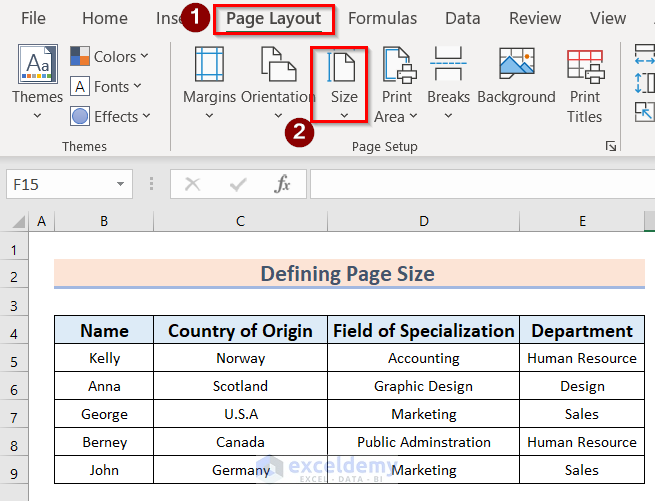
- From the Size drop-down, select the desired page size.

- In the Page Layout Tab, select the Page Setup option.

- In the Page Setup dialog box, go to the Page tab, change the Paper Size and Paper Quality, then click OK.

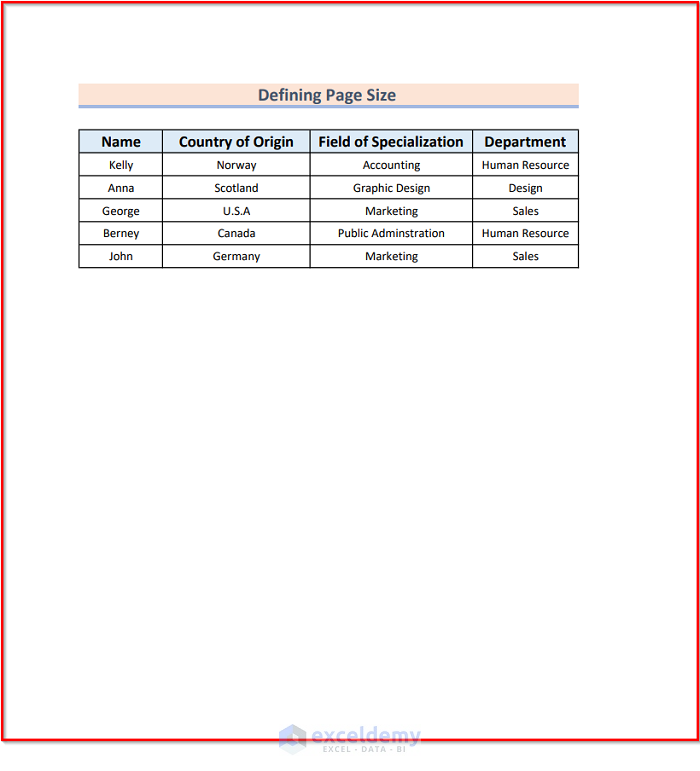
The result will look like the image below.
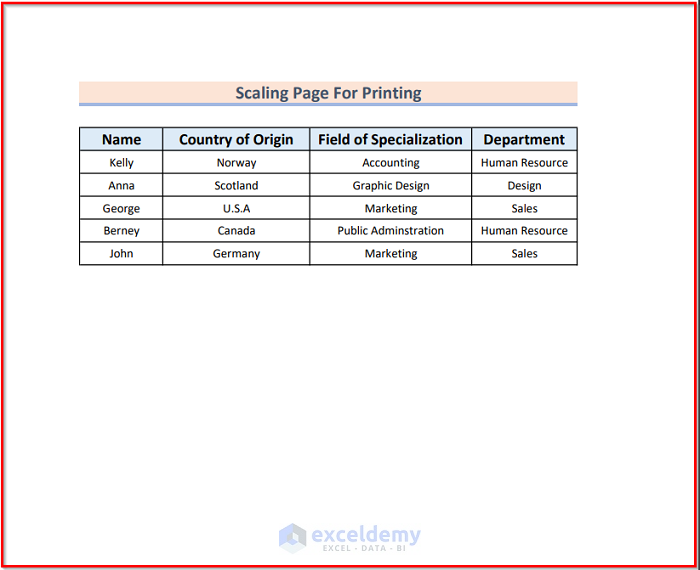
Method 5 – Scaling the Page for Printing
Steps:
- Go to the Page Layout tab and select the Scale to Fit set-up icon.

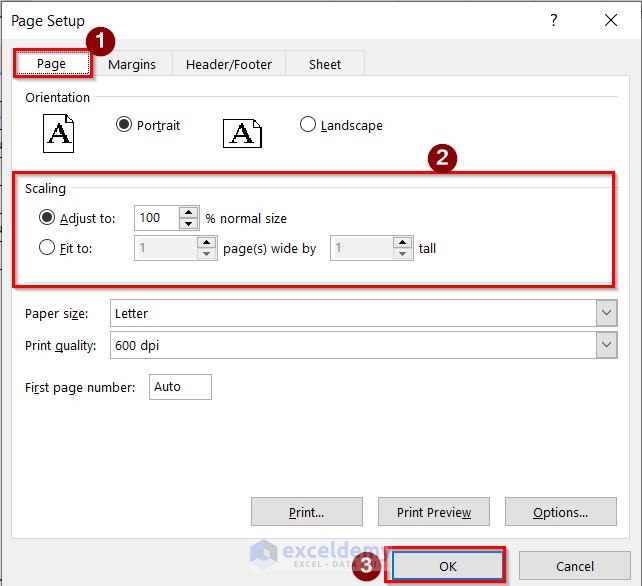
- In the Page Setup dialog box, select the Page tab.
- In the Scaling section, make the desired changes.
- Click OK.
The following is the result:
Method 6 – Selecting the Proper Print Area
Steps:
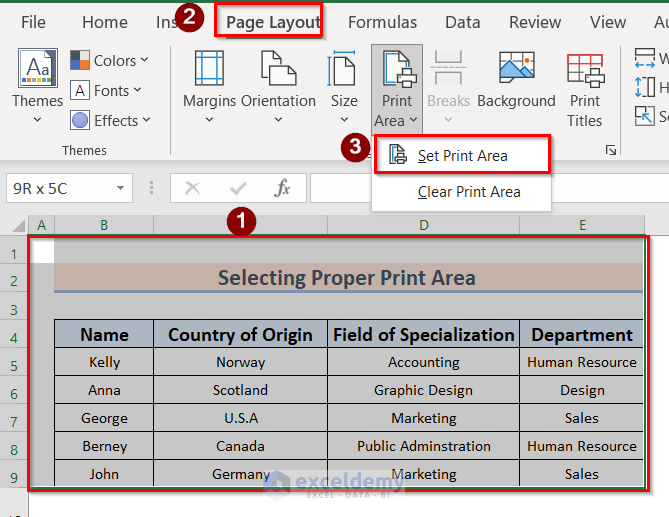
- Select the area to be printed.
- Go to Page Layout > Print Area > Set Print Area.
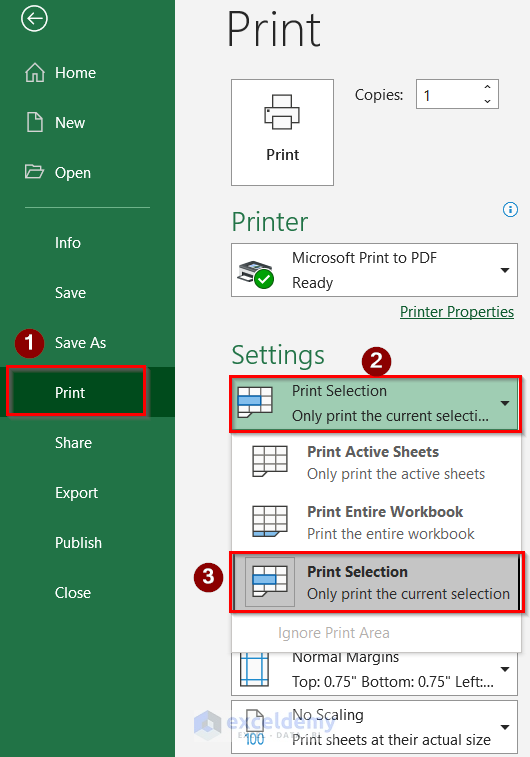
- Go to File > Print > Settings > Print Selection.
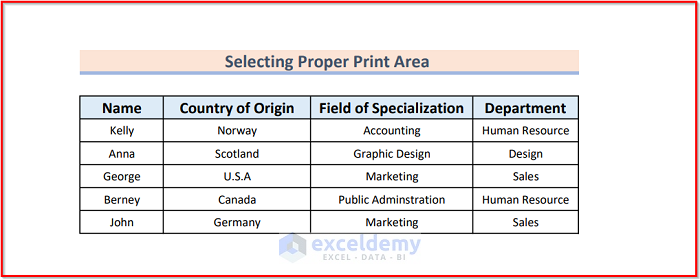
The outcome is as follows.
Download Practice Workbook
Related Articles
- How to Add Margin in Excel
- How to Apply Margin Setting in Excel
- How to Change Margins in Excel
- How to Change Page Margins to Wide in Excel
- How to Remove Print Margins in Excel
- Perform Commands to Center the Selected Worksheets in Excel
<< Go Back to Adjust Margin | Page Setup | Print in Excel | Learn Excel
Get FREE Advanced Excel Exercises with Solutions!

