We name ranges in Excel to make workbooks simpler to understand, formulae quicker to enter and analyze, and to construct variable-size ranges to keep our sheets flexible and updatable. But everything has its pros and cons. Sometimes when you want to delete all those named ranges, the delete button is greyed out or inactive.
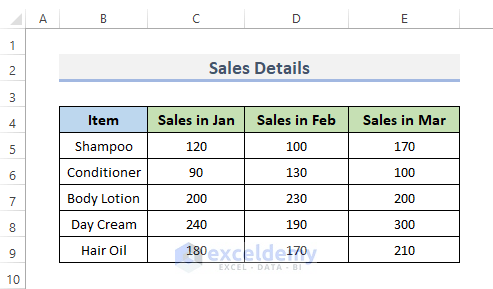
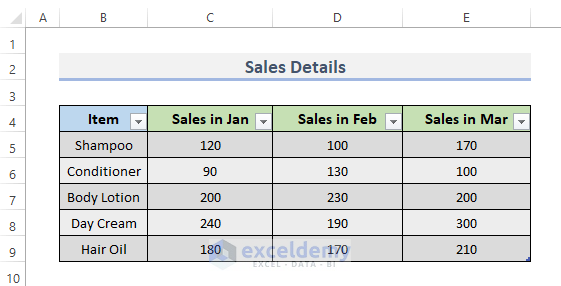
To demonstrate the reasons for this problem, and solutions, we’ll use the following dataset, containing some items and total sales in 3 months – January, February, and March.
Reason 1 – The Worksheet Is Protected
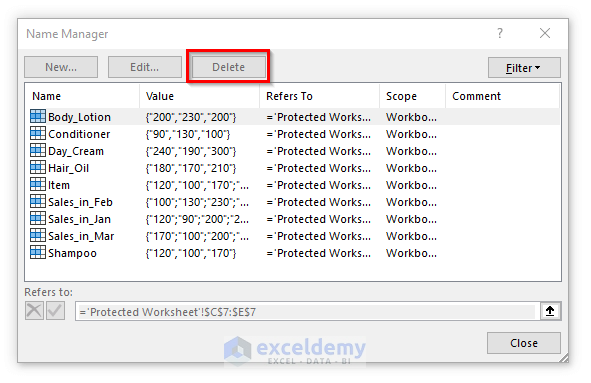
To restrict other users from modifying, relocating, or deleting data in a spreadsheet, whether mistakenly or deliberately, we protect our worksheet. But the protected worksheet greys out / inactivates the Delete option in the Name Manager.
Suppose, we have a protected worksheet and wish to delete some table names.
- Go to the Formulas tab from the ribbon.
- Click Name Manager in the Defined Names section.

- The Name Manager dialog box opens, but the Delete option is greyed out or inactive.
Solution – Unprotect the Sheet
STEPS:
- Select the sheet with the named ranges you want to remove.
- Click the Review tab from the ribbon.
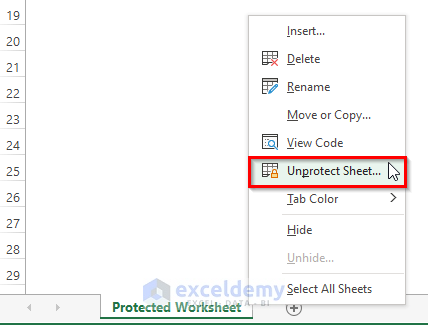
- In the Protect section, click on Unprotect Sheet.

- Alternatively, right-click on the sheet and select Unprotect Sheet from the context menu.
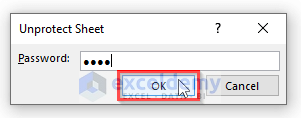
- The Unprotect Sheet pop-up window appears, requesting the Password.
- Enter the password for your sheet.
- Click OK.
- Open the Name Manager dialog box again. The Delete option is now active.
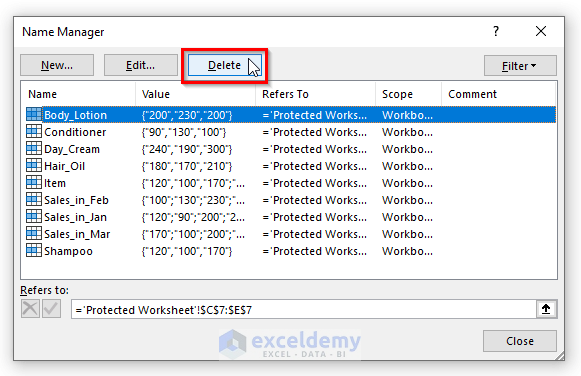
Read More: [Solved!] Names Not in Name Manager in Excel
Reason 2 – Tables in Excel
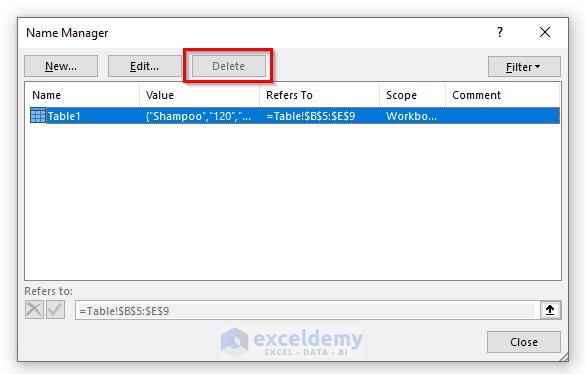
Excel tables allow for rapid and convenient reading of problems in rows and columns. Excel automatically formats tables, which can be modified.. But if your data is converted to a table, the Name Manager Delete option will be greyed out.
In our example, the named ranges are named as Table1, and can’t be deleted.
Solution – Convert Table to Range
The only method to delete the named range is to convert the table to a range.
STEPS:
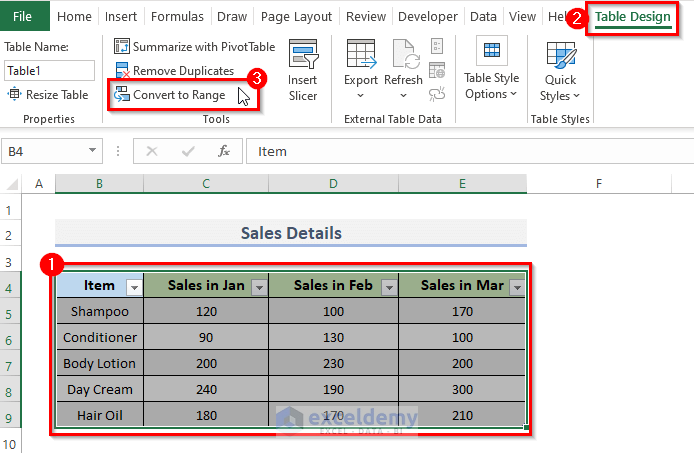
- Select the table.
- Click the Table Design tab on the ribbon.
- Under Tools, click on Convert to Range.
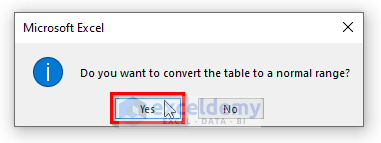
- A pop-up window opens, asking Do you want to convert the table to a normal range?
- Click Yes.
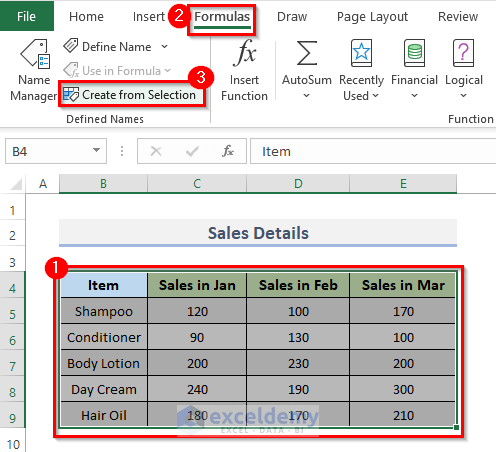
- To name the range, select the whole dataset.
- Click the Formulas tab on the ribbon.
- Click Create from Selection under Defined Names.
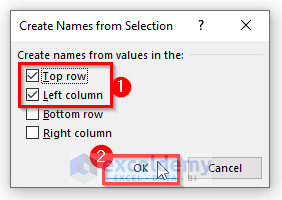
- A pop-up window opens. Tick the Top row and Left column boxes.
- Click OK.
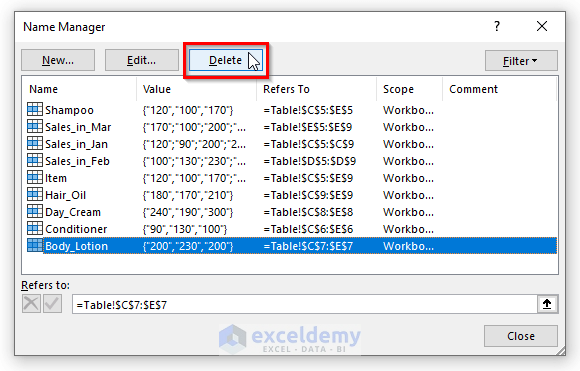
- In the Name Manager, the Delete option is now active.
Reason 3 – Excel Display Settings
The Name Manager Delete button will grey out on account of certain Excel settings. If the previous solutions do not solve the problem, these Excel settings need to be modified.
Solution – Change Advanced Settings from Excel Options
STEPS:
- Click the File tab on the ribbon.

- Click Options.

- The Excel Options dialog box opens.
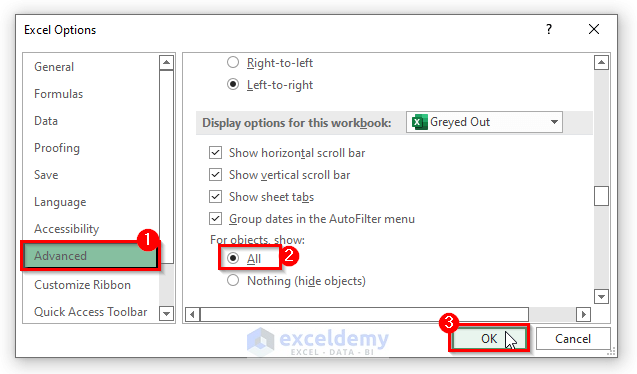
- Click Advanced on the left menu.
- Under Display options for this workbook, select All in the For objects show selection box.
- Click OK.
- In the Name Manager, the Delete option is now active.
Download Practice Workbook
Related Articles
- How to Delete Defined Names in Excel
- How to Edit Defined Names in Excel
- How to Copy a Sheet If Name Already Exists in Excel
<< Go Back to Name Manager | Excel Formulas | Learn Excel
Get FREE Advanced Excel Exercises with Solutions!

