What Is a CSV?
CSV or Comma-Separated Values stores the values as text strings separated by commas. Various software and programming languages like Python take CSV files as input. Excel offers several methods to save the file as CSV.
Method 1 – Saving the Excel File as a CSV with Commas Using the Save As Command
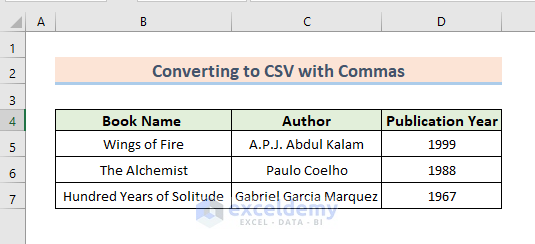
We’ll use the following sample dataset, but the process doesn’t depend on it.
Steps:
- Open the worksheet.
- Go to the File tab in the ribbon and select Save As from the options.

- In the Save As window, put a location and select CSV (Comma delimited) (*.csv) as the file type.
- Press Save.

- A notification will pop up if you have more than one sheet in the workbook. Press OK.

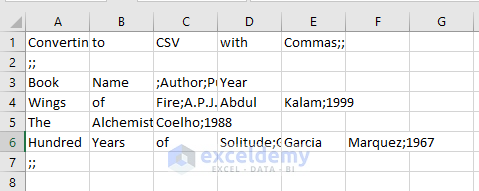
- A CSV file is saved in the selected location which should look like this when opened in Excel.
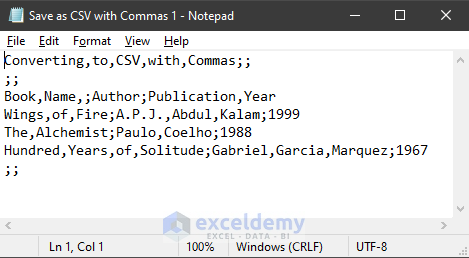
- You can also open the file in Notepad to show that there are commas between values.
Read More: Set Comma Instead of Semicolon as Delimiter in Excel CSV
Method 2 – Converting a File with Special Characters to CSV with Commas
Method 1 only works for sheets with ASCII characters only. If you have strings in languages that don’t use ASCII (such as Chinese) you’ll need a different method.
Save as a CSV UTF-8
This format doesn’t distort the Unicode characters.
Steps:
- Open the worksheet.
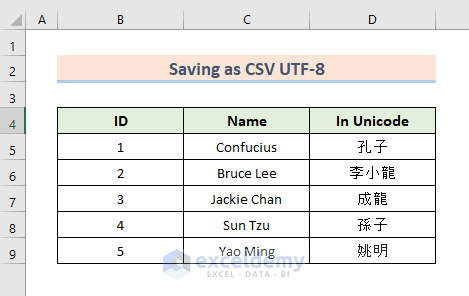
- Go to the File tab of the ribbon and select Save As from the list.
- In the Save As window, put the location where you want to save and select CSV UTF-8 (Comma delimited) (*.csv) as the Save File Type.
- Press Save.

- A notification will appear if there is more than one worksheet in the workbook. Press OK.
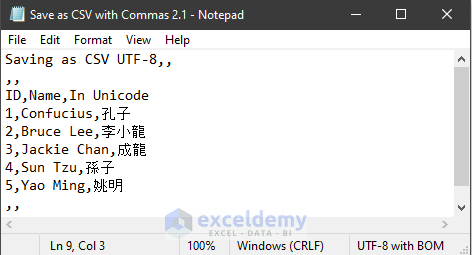
- A CSV file is saved. You can open it with Notepad.
- The Mandarin words are being displayed just fine and the values are separated by commas.
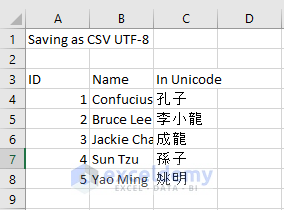
- If you open the file in Excel, the dataset has lost all formatting.
Save as CSV UTF-16
The CSV UTF-16 file type works better for a broader range of characters.
Steps:
- Open the sheet.
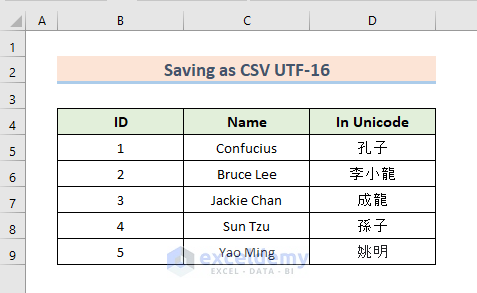
- Go to the File tab of the ribbon and select the Save As option.
- The Save As window will open. Select the location to save the file and choose Unicode Text as the Save Format Type.
- Press Save.

- A notification may appear if you have more than one worksheet in the workbook.
- Press OK.
- The saved CSV file contains the values from our selected worksheet.
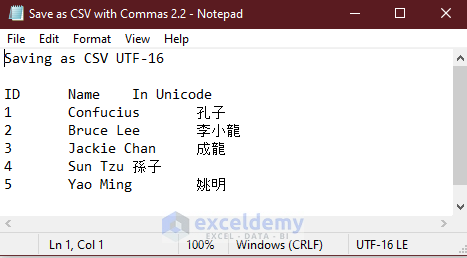
- Open the file in Notepad or another text editor.
- The values are not separated by commas yet.
- Copy the space between the values of the text file.
- Use the keyboard shortcut Ctrl + H to open the Find and Replace box.
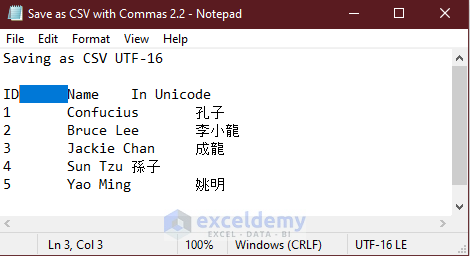
- Paste the copied space in the Find what section and put a comma (,) in Replace with section.
- Select Replace All.

- The values are separated by commas.
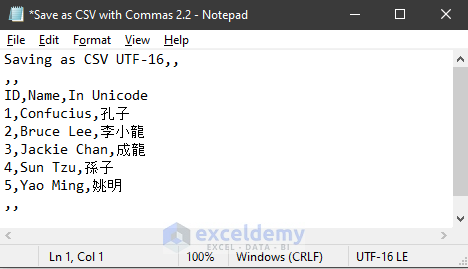
- Go to the File option in the notepad and select Save As.
- Select All Files as Save as type and write (.csv) at the end of the file name.
- Press Save.

- Here’s the result.

Read More: Save Excel as CSV with Double Quotes
Method 3 – Inserting VBA Code for Saving an Excel File as a CSV with Commas
Steps:
- Open one of the worksheets of the workbook.
- Press Ctrl + F11.
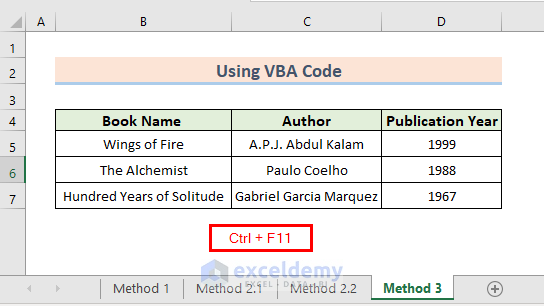
- Alternatively, select the Developer tab and go to Visual Basic to open the VBA code window.

- In the VBA window, select the active sheet and right-click.
- Select Insert and then Module.
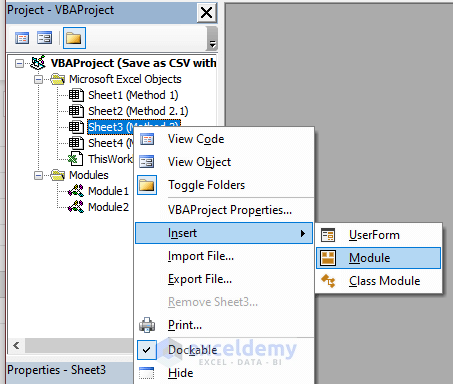
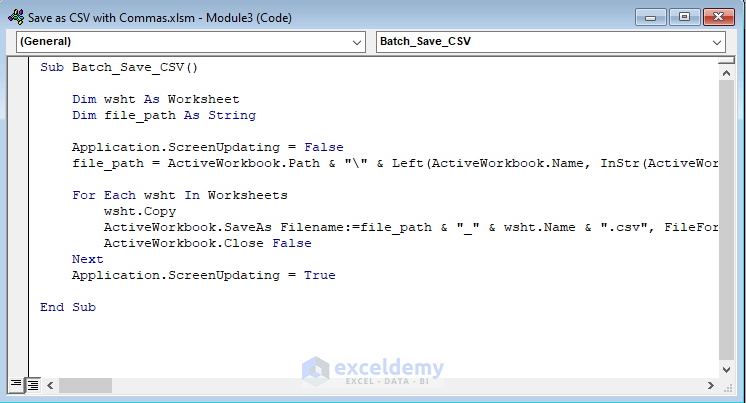
- A code window will open. Insert the following code in that window.
Sub Batch_Save_CSV()

Dim wsht As Worksheet
Dim file_path As String

Application.ScreenUpdating = False
file_path = ActiveWorkbook.Path & "\" & Left(ActiveWorkbook.Name, InStr(ActiveWorkbook.Name, ".") - 1)

For Each wsht In Worksheets
wsht.Copy
ActiveWorkbook.SaveAs Filename:=file_path & "_" & wsht.Name & ".csv", FileFormat:=xlCSV, CreateBackup:=False
ActiveWorkbook.Close False
Next
Application.ScreenUpdating = True

End Sub
Explanation of the Code:
Sub Batch_Save_CSV()

Dim wsht As Worksheet
Dim file_path As String
This section introduced a sub procedure named Batch_Save_CSV and declared variables wsht and file_pat.
Application.ScreenUpdating = False
file_path = ActiveWorkbook.Path & "\" & Left(ActiveWorkbook.Name, InStr(ActiveWorkbook.Name, ".") - 1)

For Each wsht In Worksheets
wsht.Copy
ActiveWorkbook.SaveAs Filename:=file_path & "_" & wsht.Name & ".csv", FileFormat:=xlCSV, CreateBackup:=False
ActiveWorkbook.Close False
Next
Application.ScreenUpdating = True

End Sub
This section creates a loop for each sheet in the workbook and changes its file type to CSV.
- Click on the Run button from the VBA window.

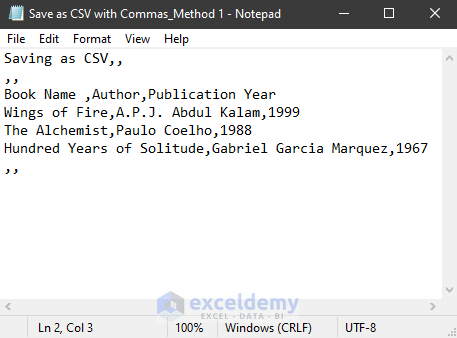
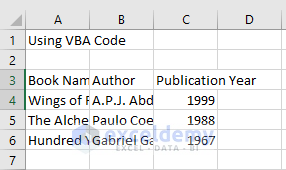
- Each sheet in our workbook is saved as a CSV file with commas. We can open the files in Notepad to see the changes.
- Here’s the CSV file for Sheet1.
- Here’s the CSV file for Sheet4.
Read More: [Fixed!] Excel Not Saving CSV with Commas
Download the Practice Workbook
Related Articles
- How to Create CSV File from Excel
- How to Convert Excel File to Text File with Comma Delimited
- Convert Excel to Comma Delimited CSV File
- How to Convert Excel to CSV without Opening
- How to Convert Multiple Excel Files to CSV
<< Go Back to Export Excel to CSV | Export Data from Excel | Learn Excel
Get FREE Advanced Excel Exercises with Solutions!
