When printing a large sheet, an all too common problem is being unable to fit the dataset on one page. In this article, we will discuss the reasons and solutions for this problem.
Download Practice Workbook
3 Fixes If Print Scale to Fit Is Not Working in Excel
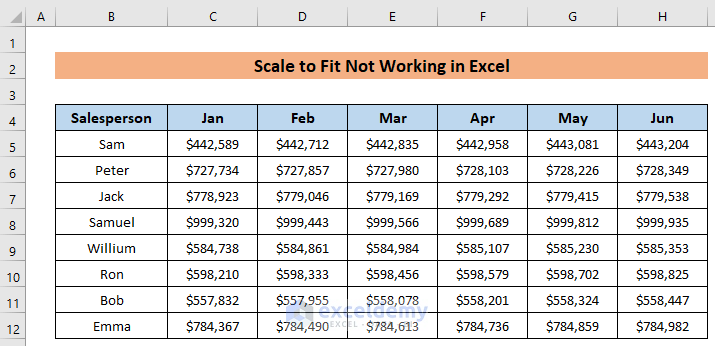
To illustrate our methods, we’ll use the following dataset containing the 6 month’s sales values of some salespersons.
Here is the print preview of the dataset, which shows only 6 of the 7 columns will fit on the page.
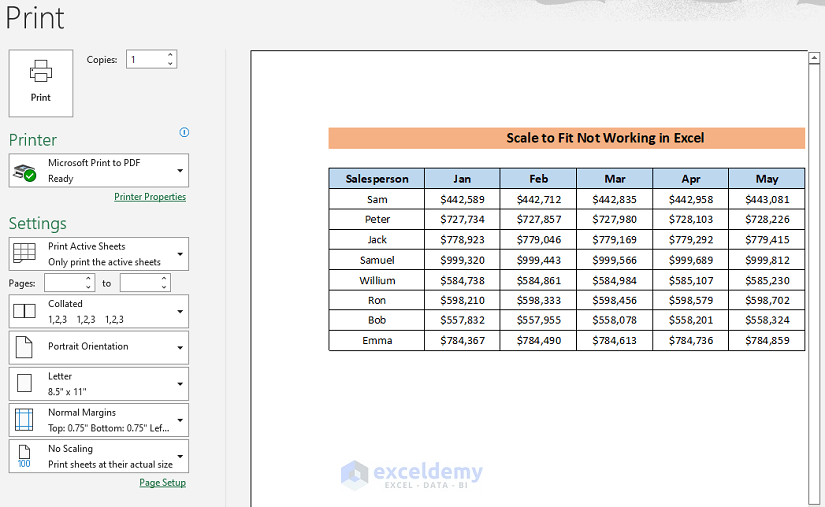
Let’s apply some fixes to make the dataset fit on the page properly.
Fix 1 – Removing Page Breaks
One of the most common reasons for scale-to-fit issues is the presence of page breaks in the dataset. In our dataset, there is a page break before the last column, which is why it is excluded from the print range.
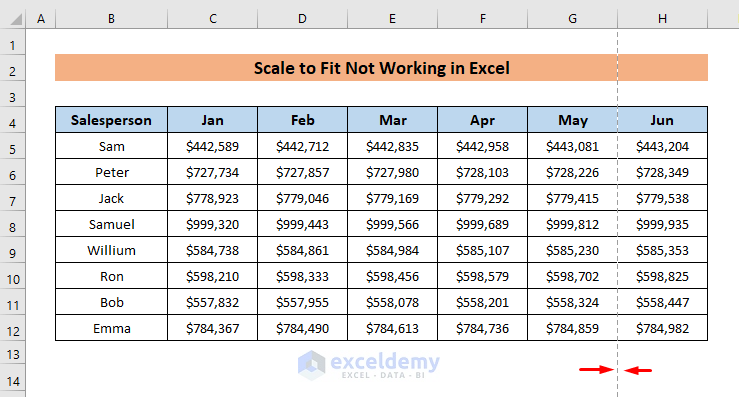
To resolve this problem, just remove all the page breaks from the sheet.
Steps:
- Click as follows to remove all the page breaks: Page Layout > Breaks > Reset All Page Breaks.
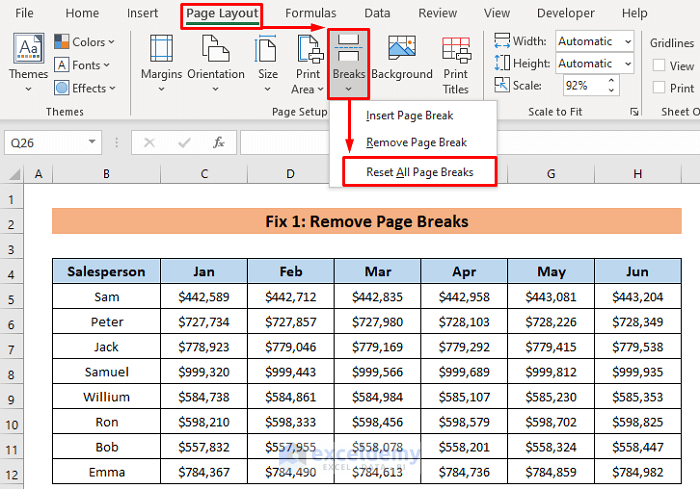
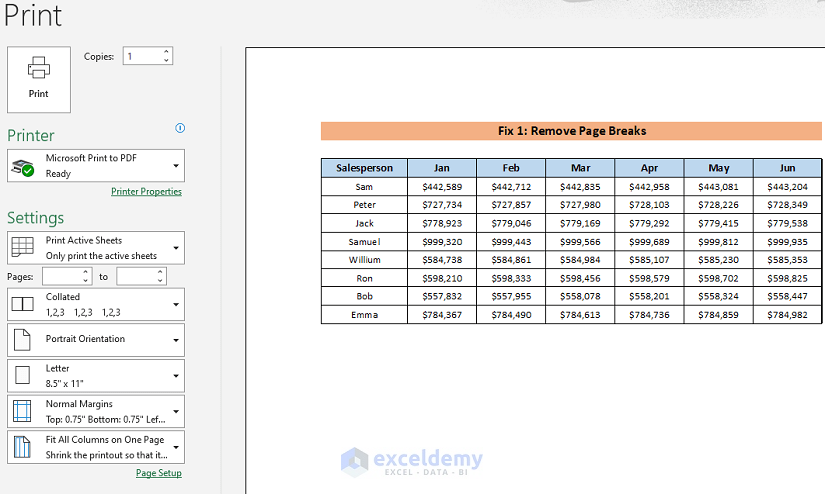
In the print preview, all the columns are now included on the page.
 Read More: How to Add Paper Size in Excel (4 Easy Ways)
Fix 2 – Fitting to One Page
By default, Excel sets the height and width of the printing page automatically, which can cause some columns in a large dataset to be printed on subsequent pages. We have 3 options to fix this.
2.1 – Changing the Percentage of the Scale
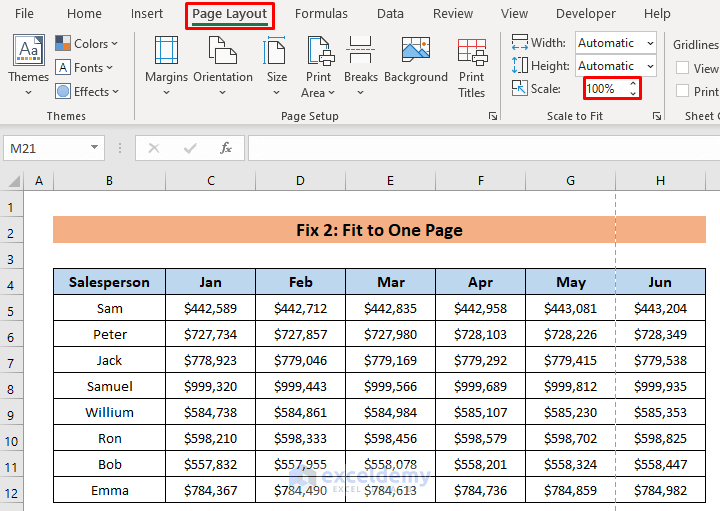
The default percentage of the scale for a page is 100%. In the image below, at 100% scaling the page break line is before the last column. Let’s change the percentage of the scale to push the page break to after the last column.
Steps:
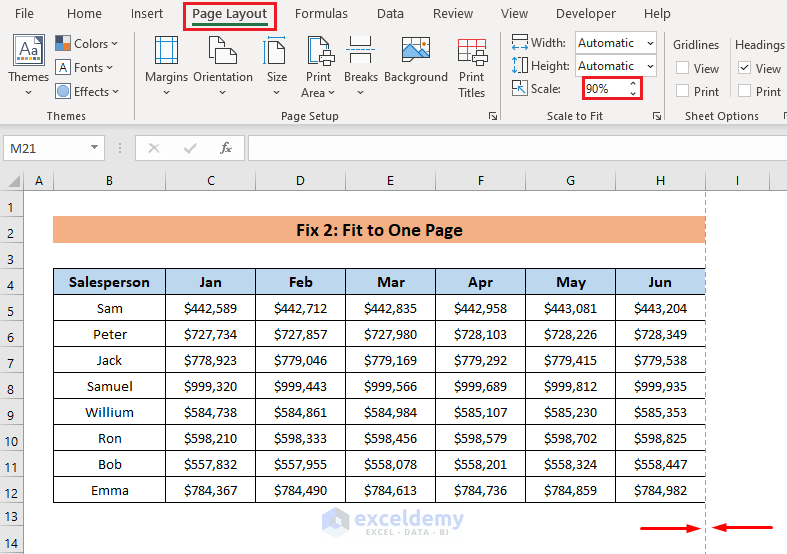
- Go to the Page Layout ribbon and press the down arrow of the Scale box in the Scale to Fit section until you have the desired decrease in scale. Or enter the value manually. Here, after changing it to 90%, the page break shifts to after the last column.
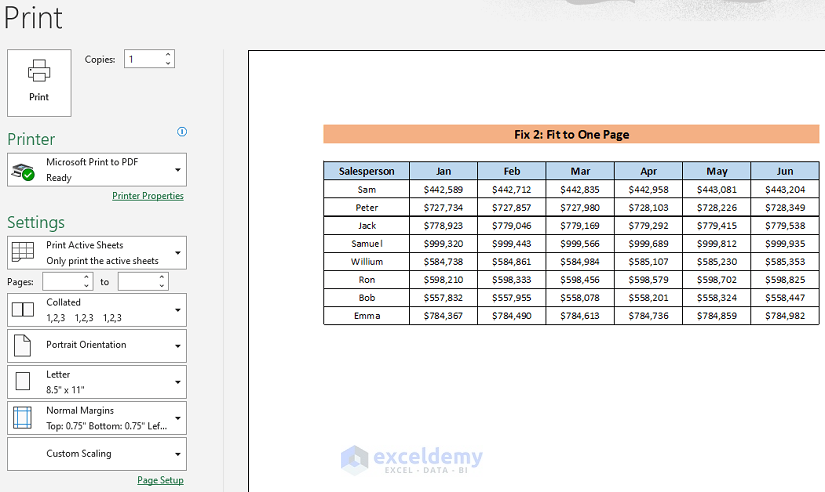
As a result, all the columns fit on one page.
Read More: How to Adjust Page Size for Printing in Excel (6 Quick Tricks)
Similar Reading
- Why Is My Excel Sheet Printing So Small (Reasons and Solutions)
- Excel Fit to Page Scale/Preview Looks Small (5 Suitable Solutions)
- How to Add A3 Paper Size in Excel (2 Quick Ways)
2.2 – Changing the Width to 1 Page
Changing the percentage manually is time-consuming, but there is a way we can set all the columns to print on one page at once directly.
Steps:
- From the Page Layout ribbon, choose 1 page from the Width drop-down box of the Scale to Fit section.
- To fit a large number of rows, choose 1 page from the Height drop-down box.
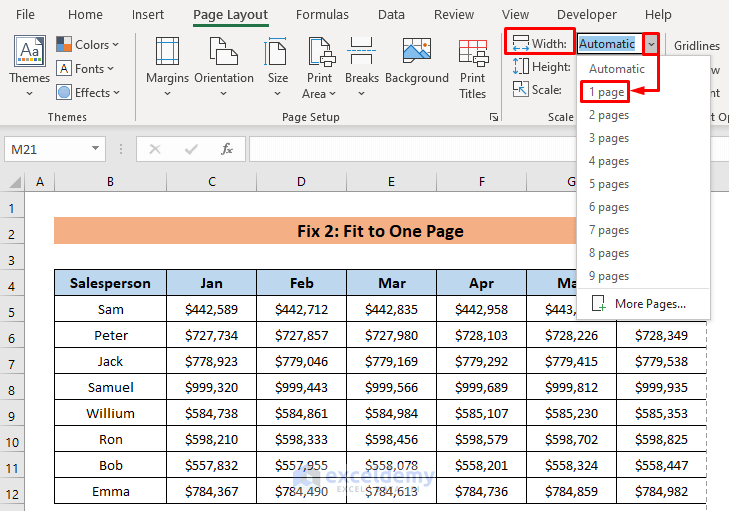
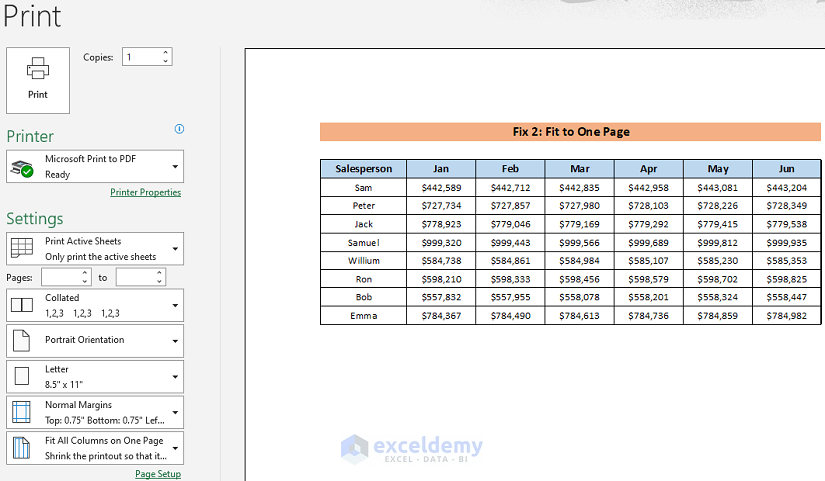
Now it will not matter how many columns are in your dataset, they will fit on one page.
Read More: How to Fit Excel Sheet on One Page in Word (3 Simple Ways)
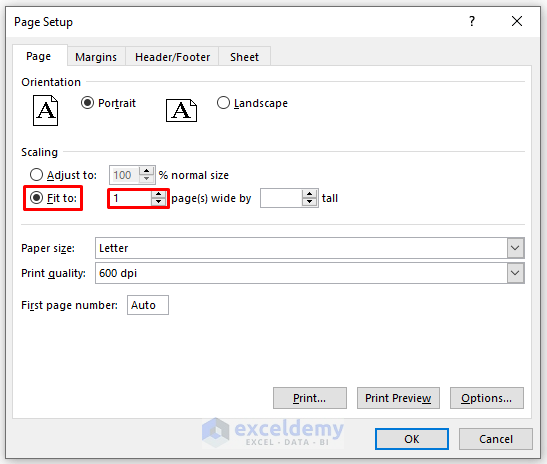
2.3 – Using the Page Setup Dialog Box
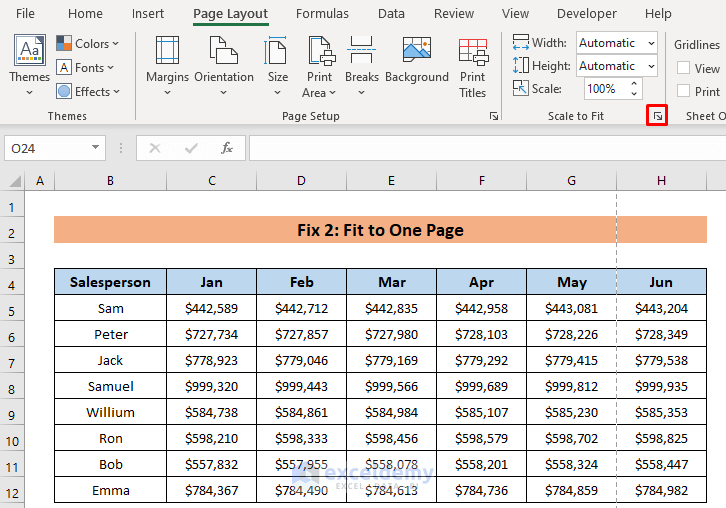
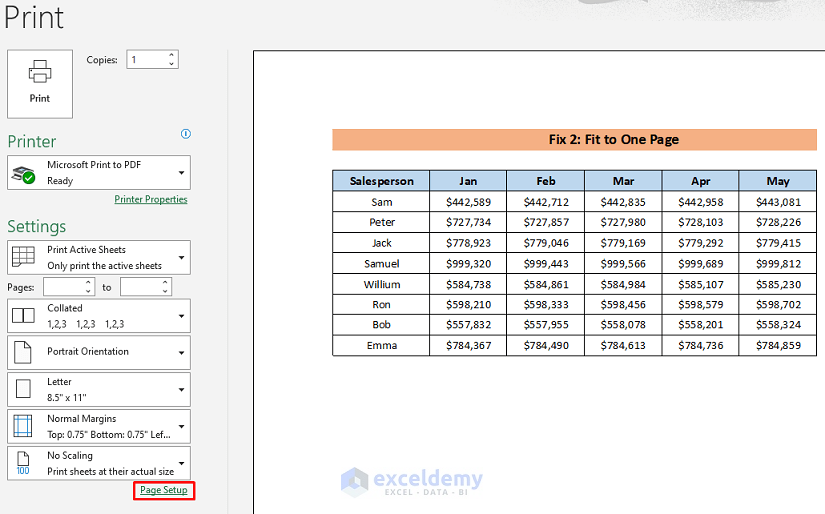
We can select 1 page from the Page Setup dialog box too. There are 2 ways to open it.
Steps:
- Click on the shortcut icon in the Scale to Fit section to open the Page Setup dialog box, as shown in the image below.
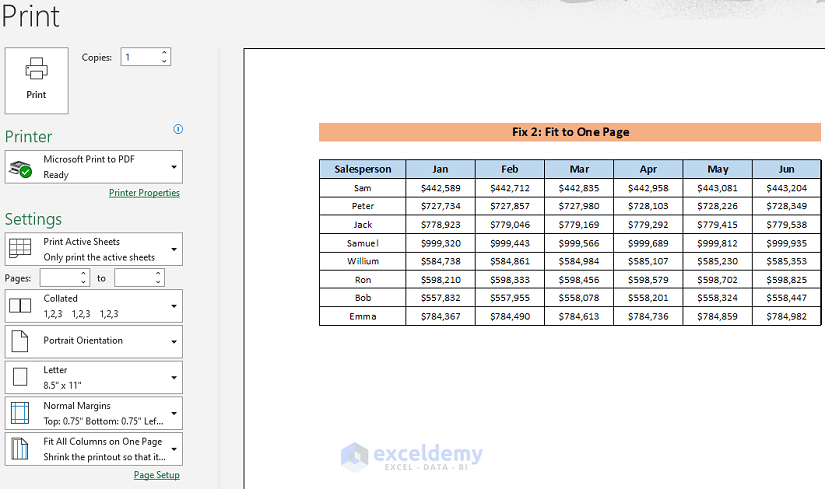
- Or, click on the Page Setup option available in the print preview.
- After opening the dialog box, select Fit to and insert 1 in the page(s) wide box.
- Click OK.
In the print preview, the columns now fit on one page.
Read More: How to Fit to Page in Excel (3 Easy Ways)
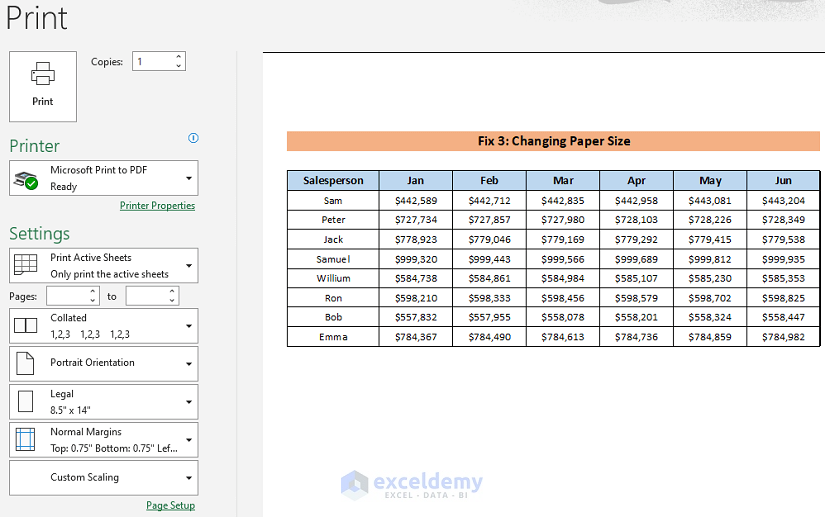
Fix 3 – Changing the Paper Size
An alternative way to fit all the columns on one page is to change the Paper Size from the Page Layout ribbon. In our example, the default paper size was A4 causing the last column not to fit on the page.
Steps:
- Click as follows to open the paper sizes: Page Layout > Size.
- Choose the size that suits your dataset, here Legal.
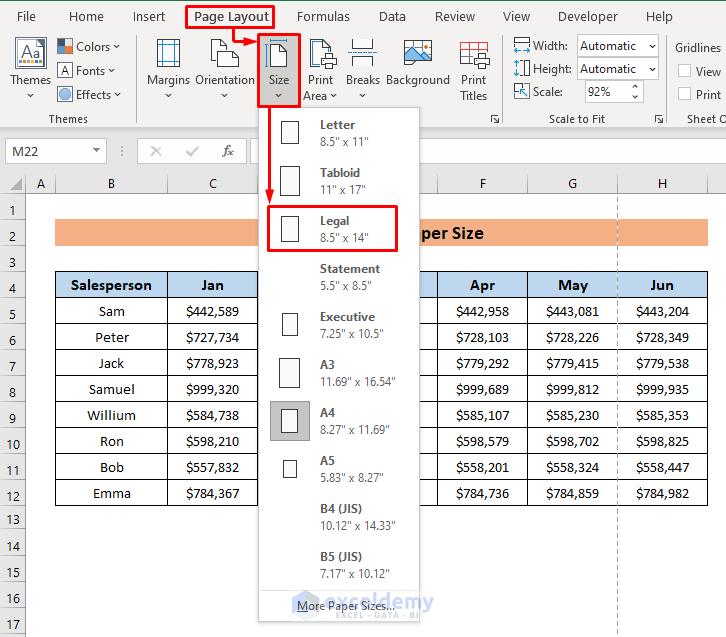
Selecting the Legal paper size moved the page break to after the last column.
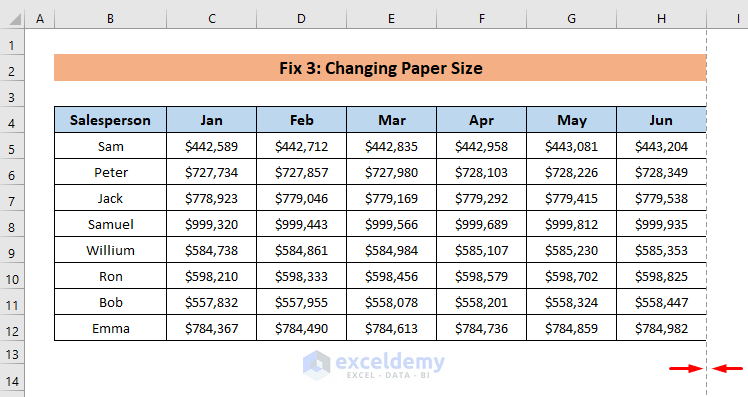
Now the whole dataset will fit on one page.
Read More: How to Add Legal Paper Size in Excel
Related Articles
- How to Fit Excel Sheet on One Page PDF (8 Simple Ways)
- Print Full Page of Excel Sheet in A4 Size (5 Simple Ways)
- How to Stretch Excel Spreadsheet to Full Page Print (5 Easy Ways)
- Change the Printing Scale So All Columns Will Print on a Single Page


