Method 1 – Change Scaling in Settings
Steps:
- Go to the File tab from the Ribbon or press Ctrl + P.
- Select Print from the menu list, and the window will show Print Settings.
- No Scaling is selected by default.
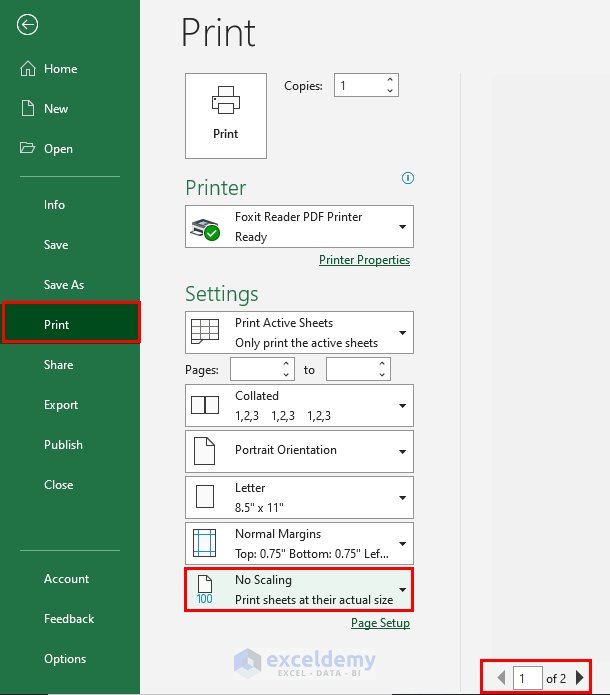
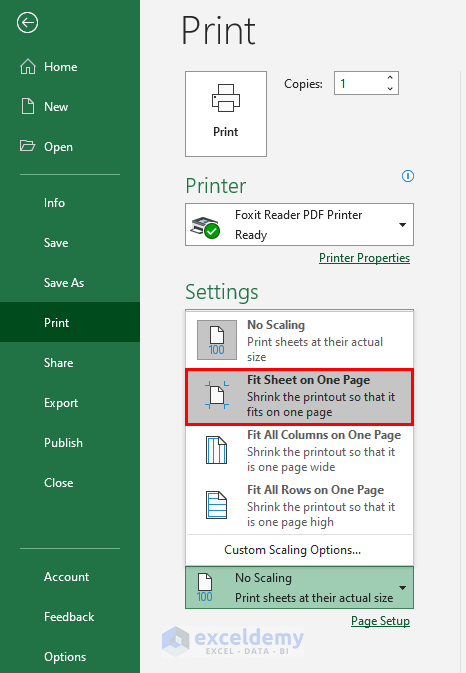
- Click this option and select Fit Sheet on One Page to squeeze all data in one page.
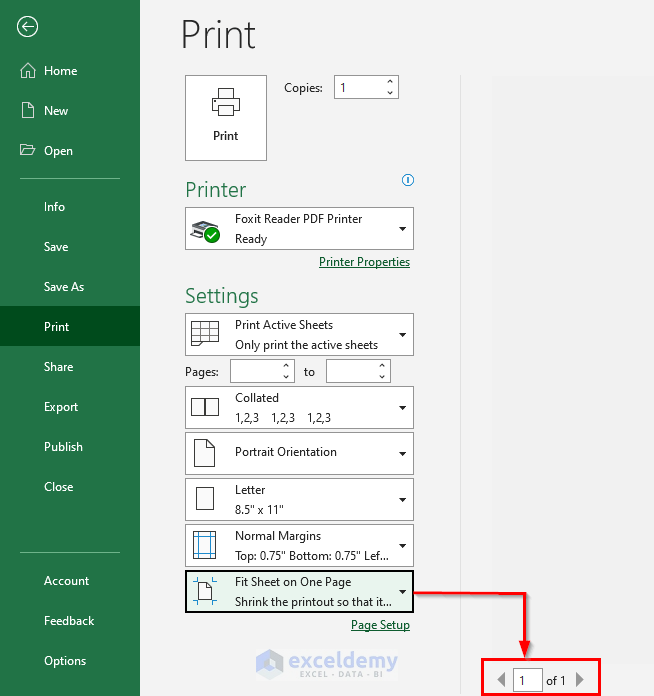
- You will see there is one page to print.
Read More: How to Use Scaling Option in Excel
Method 2 – Apply Scaling Manually
Steps:
- Go to the Page Layout tab and check the Scale option under the Scale to Fit group. By default, it is set to 100%.
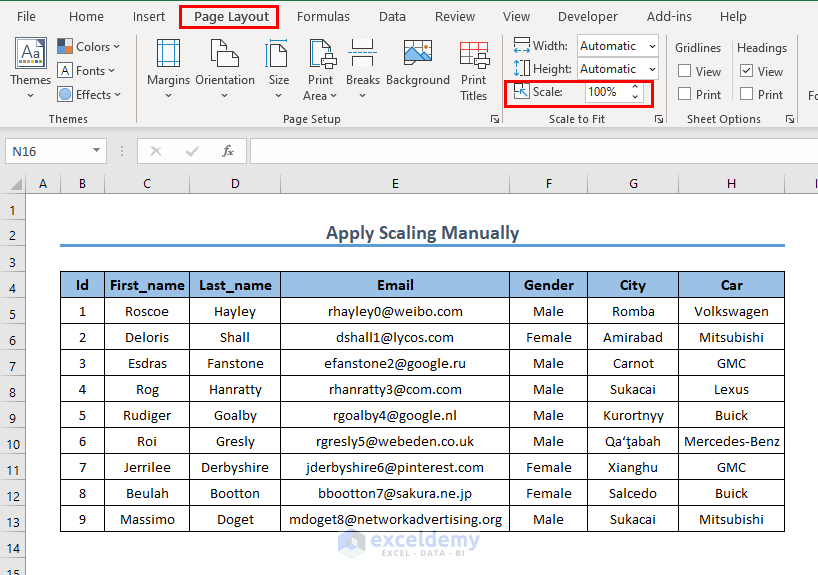
- By increasing or decreasing this percentage, a page break line will appear on the worksheet indicating this potion will appear on one page while printing.
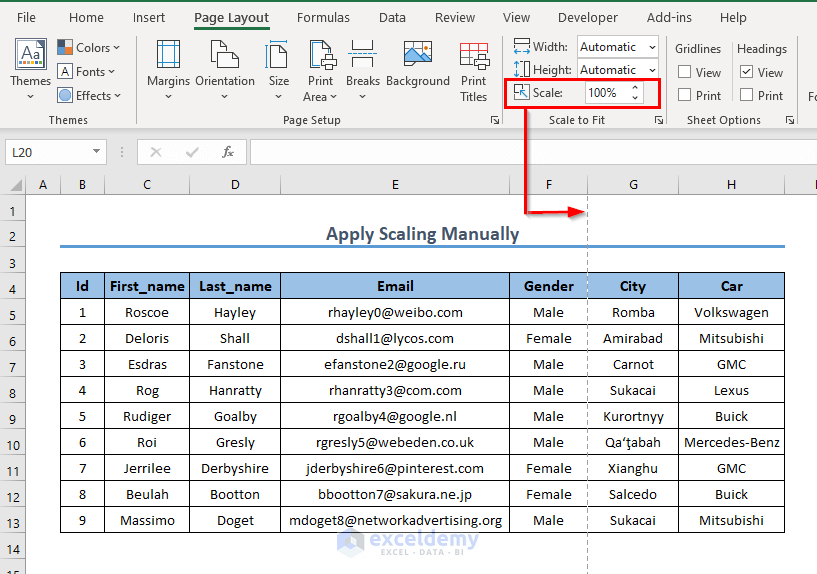
- If you press Ctrl + P, you can see the print preview. Notice the page break line decides the border.
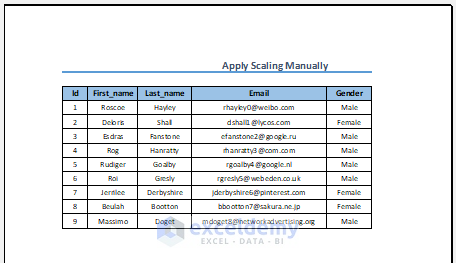
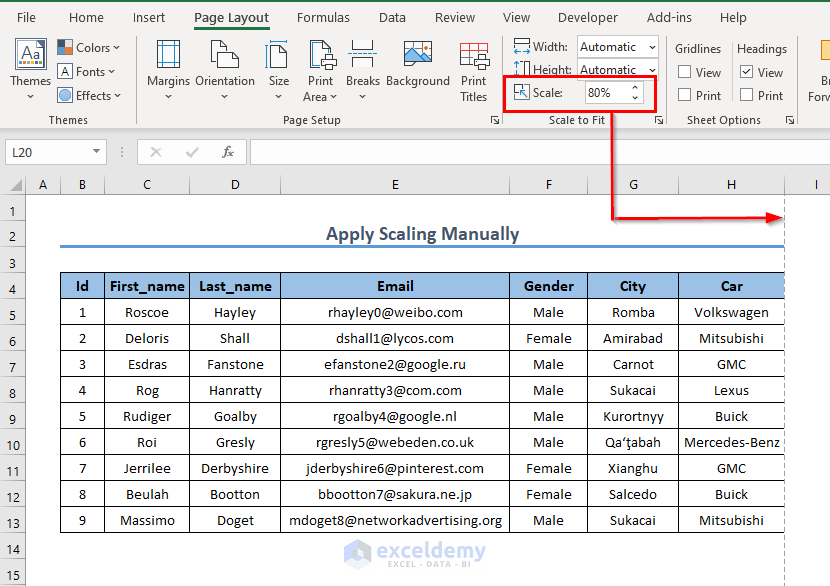
- Decrease the percentage of Scale and your page break line will proceed to the right. If you shift the line just on the right of your dataset, you will be able to squeeze the data into one page.
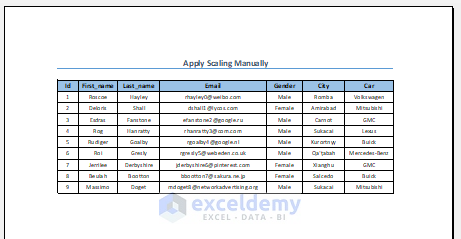
- Press Ctrl + P again to check the view in PDF or print format.
Alternative:
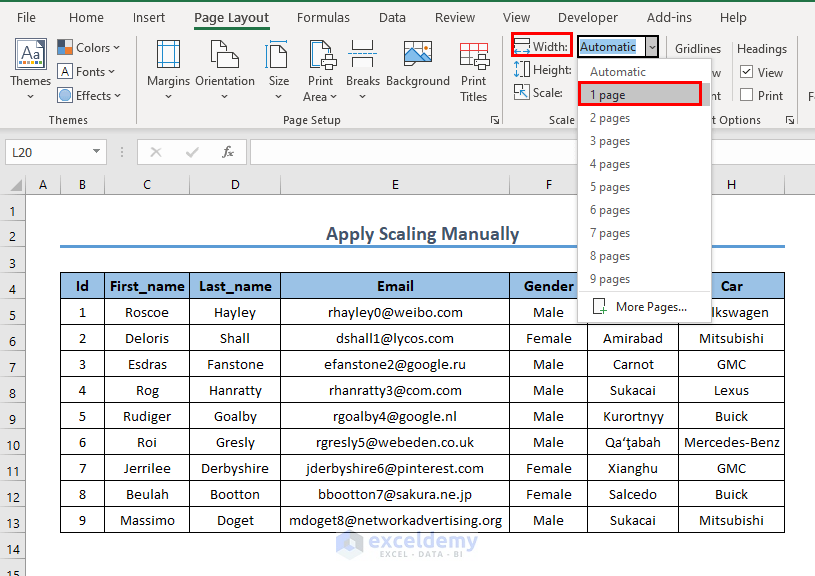
- Change the width to 1 page.
What to Do If the Resolution Is too Large in Excel?
Steps:
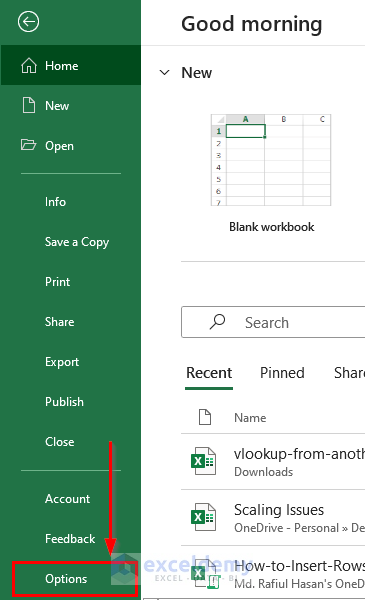
- Go to the File tab and select Options.
- A dialog box for Excel Options will appear.
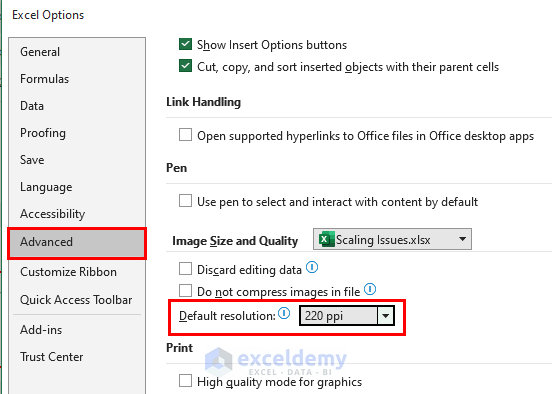
- Select Advanced.
- From the Advanced options, you will find a segment of Image Size and Quality.
- Under this group, the Default Resolution has been set to 220ppi.
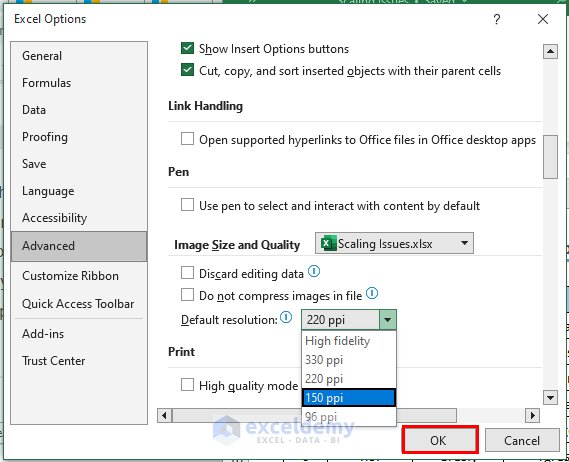
- Click the dropdown of this option and you can decrease the resolution from this dropdown.
- Click OK when you’re done.
Download the Practice Workbook
Related Article
<< Go Back to Page Setup | Print in Excel | Learn Excel
Get FREE Advanced Excel Exercises with Solutions!

