Method 1 – Greyed Out Slicer for Excel Table
Reason: Earlier Version
Slicers are not natively supported in older versions of Excel, such as Excel 2010 and earlier. They were introduced as a new feature in Excel 2013. The availability and functionality of slicers can vary depending on the edition of Excel. In Excel 2013 Standard Edition, slicers are available for PivotTables but not for regular data tables.
In newer versions of Excel (2013 Professional Plus Edition and onwards, including Excel 2016, Excel 2019, and Excel 365), comprehensive slicer features are available for PivotTables and regular data tables.
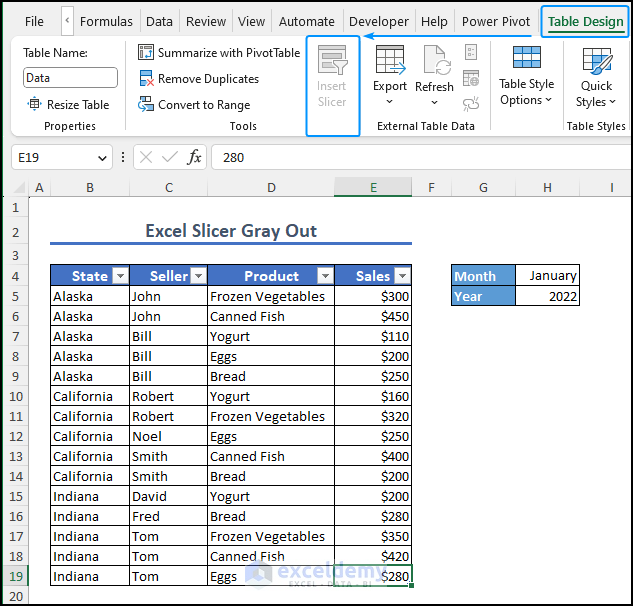
if you use older versions of Excel or your data is saved in a previous format, you may encounter limitations in accessing Excel slicers. Compatibility issues can arise when opening files created in newer versions of Excel with older versions of the software.

Solutions:
If you encounter any of the mentioned Excel issues where the slicer is greyed out and inaccessible, you can follow these steps to resolve the problem.
Go to the File tab and select Info.
Look for the Compatibility Mode section, which is highlighted in pale yellow. This indicates that the file requires your attention and may have compatibility issues.
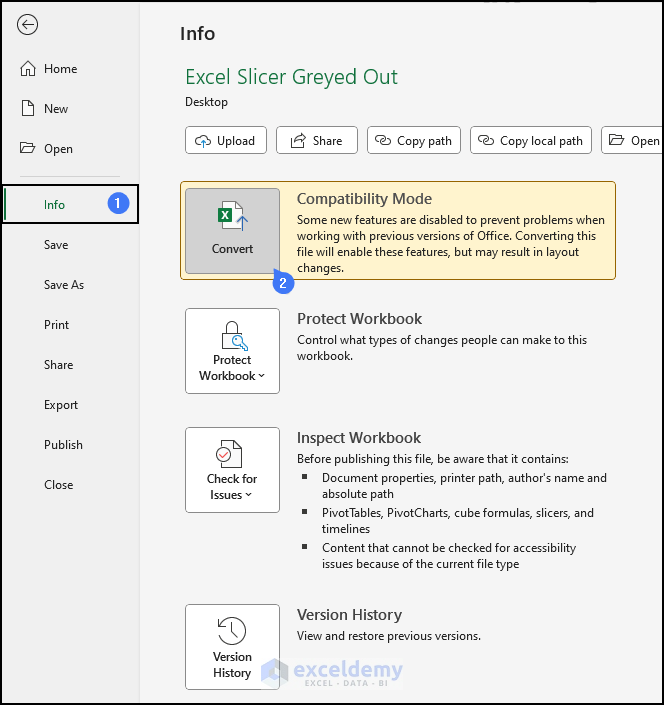
Click on Compatibility Mode and a warning notification box will appear, informing you that the original workbook will be deleted and cannot be restored due to file format conversion. Press OK to proceed.

Another notification window will then appear, asking for permission to close the current workbook and reopen it. Grant permission by clicking OK and your workbook will reopen.
After reopening, you will notice that the Excel slicer greyed-out problem is resolved, and the slicer is now accessible.
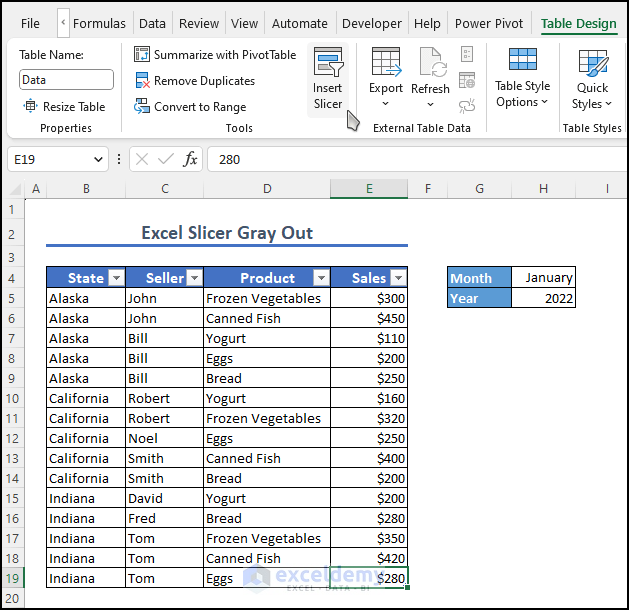
Method 2 – Greyed Out for Pivot Table
When working with pivot tables, you may encounter a similar problem where the slicer is not working in Excel. This can happen if the data is saved in previous versions of Excel or if there are compatibility issues.
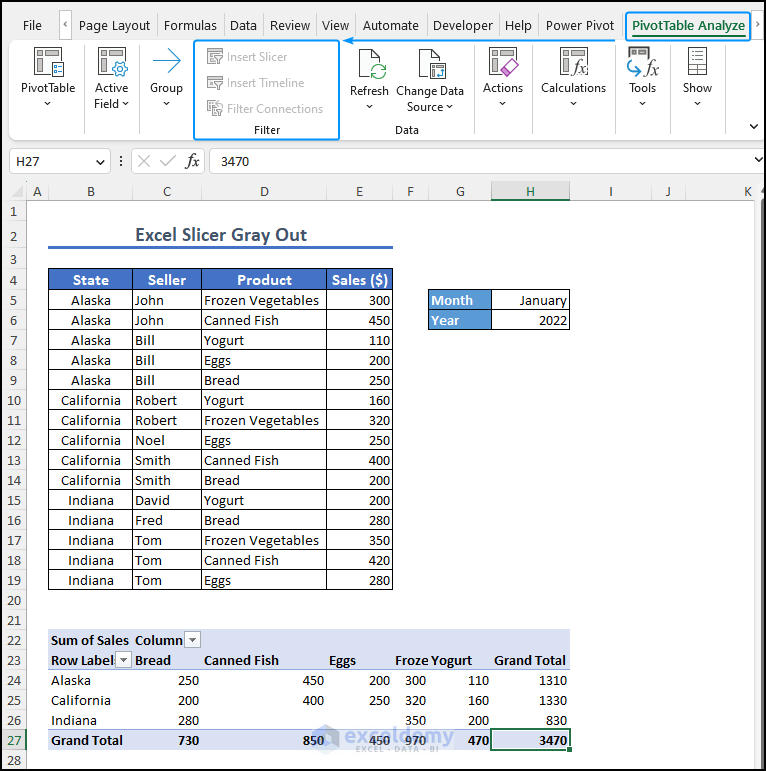
Solutions:
To resolve this issue, follow the same solution mentioned earlier. By doing so, you will overcome the problem and regain access to the slicer functionality.
You have another option to manually save and convert the file type from .xls to .xlsm. Check the following steps to do so.
- Click on the File tab.
- Select “Save As“.
- Choose the desired location to save the file.
- From the “Save as type” drop-down menu, select “Excel Workbook (*.xlsx)“.
- Click “b” to confirm the change.
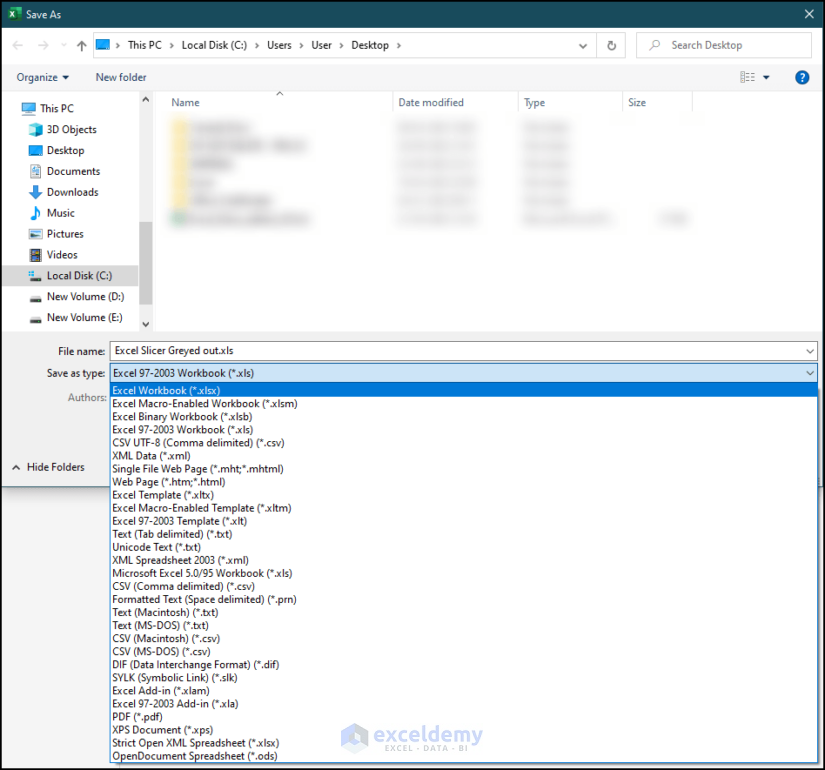
These steps, you will successfully save and convert the file type, which can help in resolving the Excel slicer greyed-out problem.
Removing Greyed-Out Slicer Options in Excel
When working with slicers in Excel, it is common to filter, delete, add, or manipulate data to achieve the desired outcome. Let’s consider a scenario where we have a dataset and a pivot table at the bottom of the sheet, along with two slicers for the state and product.
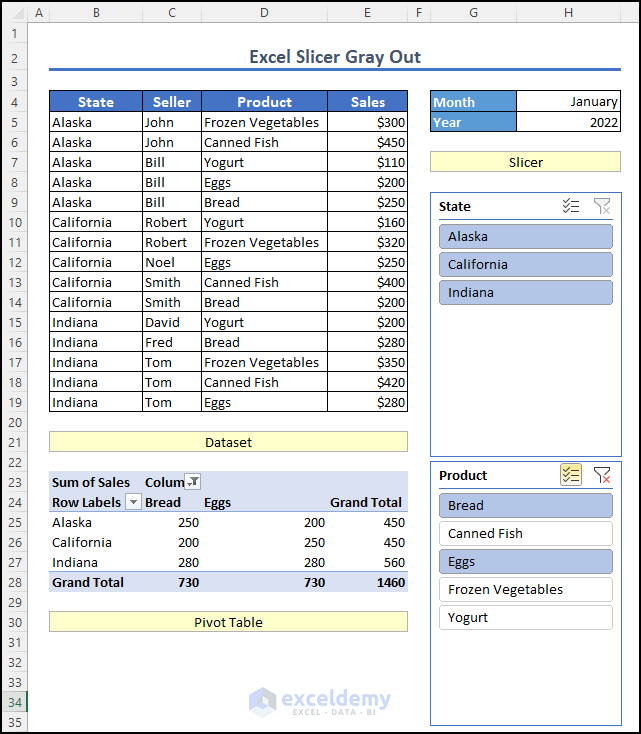
In this case, let’s use the slicer to filter the data accordingly and focus on two specific states, Alaska and California. We may also simplify the analysis by deleting all the data or entries related to Indiana.
Even though the data related to Indiana is no longer in the table, the slicer still displays the option for Indiana, albeit in a greyed-out state. This can be confusing and may not accurately reflect the current data situation.
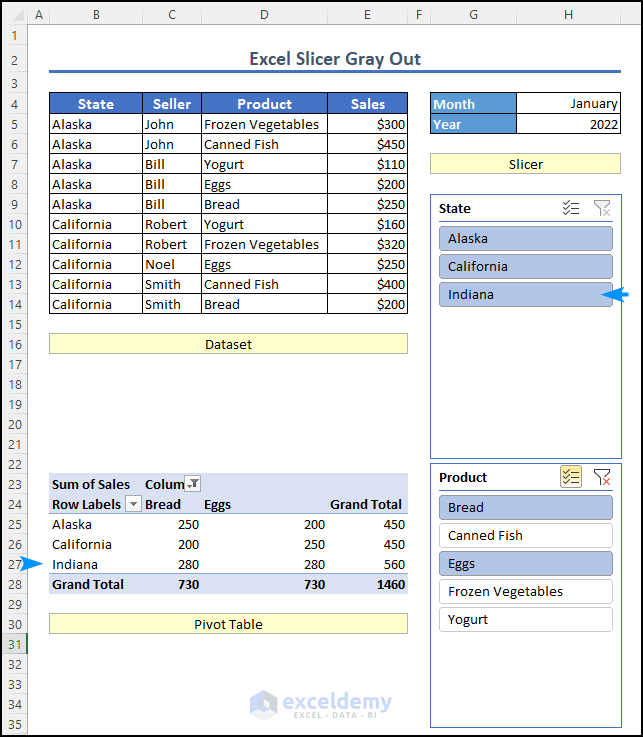
There are two possible solutions to synchronize the slicer options with the data in the table and resolve the situation.
- To update the pivot table and reflect the changes made to the data, simply right-click anywhere within the pivot table or the slicer. Select Refresh from the menu. If the option is greyed out and selecting it shows no data in the pivot table, it indicates no new changes to update.
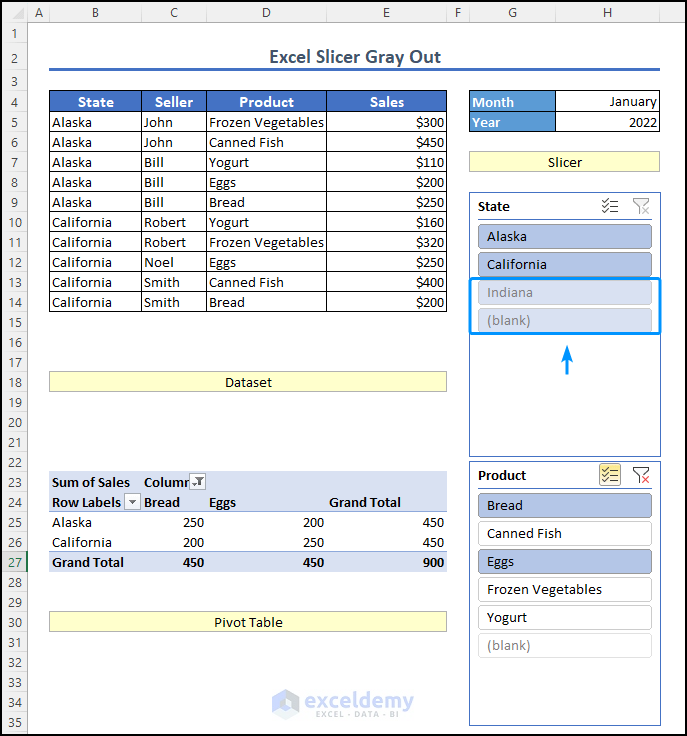
- If you want to remove the option from the slicer completely, follow the following steps.
Right-click on the slicer. Choose Slicer Settings from the menu that appears. In the Slicer Settings dialog box, locate the Item Sorting and Filtering section. Uncheck the option says “Show items deleted from the data source“.
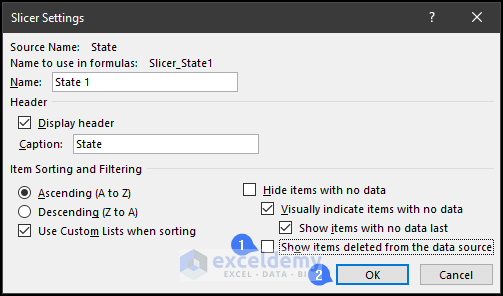
Click “OK” to apply the changes. This will remove the greyed-out items and make your slicer display only the relevant data.
You can check the ‘Hide items with no data” box to completely hide cells with no data.
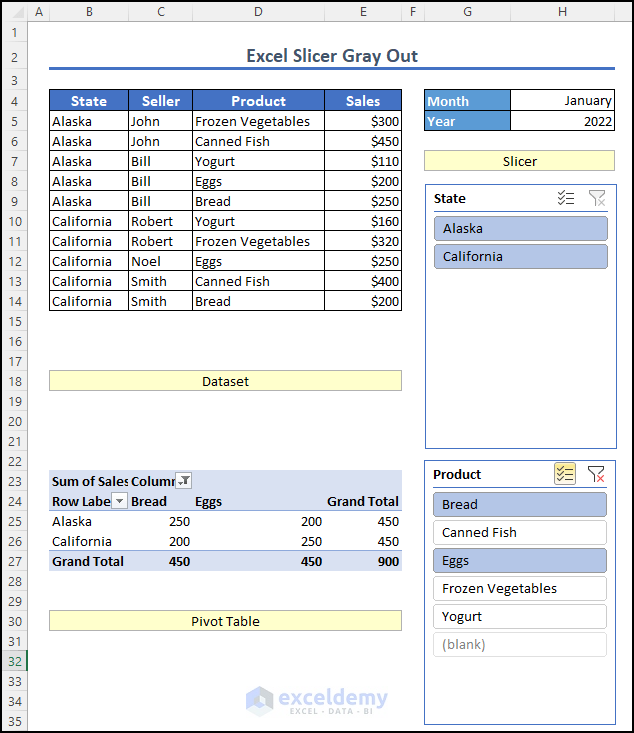
By performing these steps, you can ensure that the slicer accurately reflects the data in the pivot table without showing the options for states or products without corresponding data entries.
Things to Remember
- Grayed-out but selectable slicers indicate no data for that category in the visible source data.
- Slicer interaction may be disabled due to sheet protection settings.
- Compatibility issues with Excel versions can cause greyed-out slicers.
- Update and refresh data sources regularly to avoid compatibility issues.
- An invalid data source (Deleted or Moved) can cause slicers to be disabled and greyed out
Frequently Asked Questions
1. What does it mean when a slicer is greyed out in Excel?
A slicer that is greyed out means it is currently inactive or not accessible for usage.
2. Why are some slicers greyed out while others are active in Excel?
Slicers can be greyed out selectively if they are connected to different data sources or if some data sources have issues. If there are multiple slicers, it means no data for that category is present in the viewable source data when slicers are greyed out but selectable.
3. How do I refresh greyed-out slicers in Excel?
To refresh greyed-out slicers, right-click on the slicer and select “Refresh” or use the Refresh All option in the Data tab.
4. Can a slicer be greyed out due to filtered data in Excel?
Yes, if the slicer is connected to filtered data and no items meet the filter criteria, it may appear greyed out.
5. Can a slicer be greyed out if it is protected or locked in Excel?
Yes, it is possible for the slicer to be greyed out and inaccessible if the worksheet or workbook that contains it is protected or locked.
Download Practice Workbook
You can download the workbook, where we have provided a practice section on the right side of each worksheet. Try it yourself.
Get FREE Advanced Excel Exercises with Solutions!

