To add a sheet with a specific name in Excel using VBA, we’ll utilize the Sheets object. Below is the fundamental VBA code snippet to achieve this:
Sheets.Add ([Before], [After], [Count], [Type])
Here’s what each parameter means:
- Before: An optional parameter. It adds a new sheet before a specific sheet.
- After: Also optional. It adds a new sheet after a specific sheet.
- Count: Another optional parameter. It indicates the number of sheets to add.
- Type: Optional as well. It specifies the type of sheet. The default value is xlWorksheet.
Example Scenario
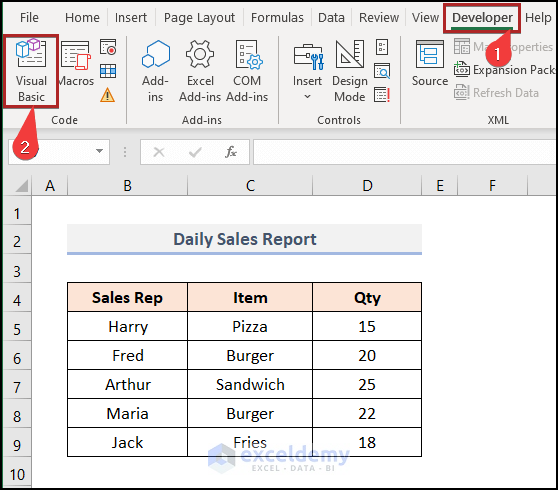
Let’s say we have a worksheet named Sales Report. It contains daily sales data for a cafeteria, with columns B, C, and D representing Sales Reps, Items, and Quantity, respectively.

Method 1 – Adding a Sheet with a Name
In this method, we’ll add a sheet with a user-defined name. Follow these steps:
- Go to the Developer tab.
- Select Visual Basic in the Code group.
- Alternatively, press ALT + F11.
Note: Ensure you press the ALT key to the left of the SPACEBAR; other ALT keys won’t work.
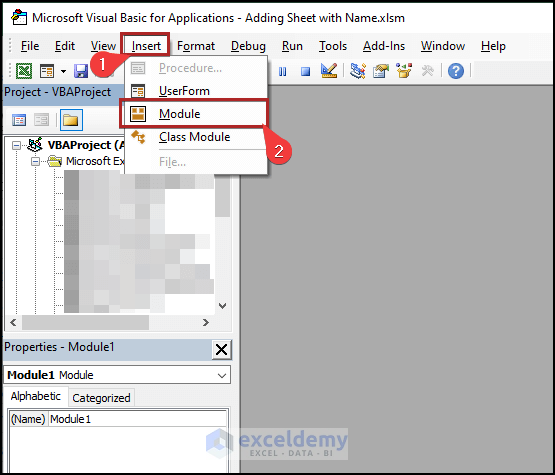
- The Microsoft Visual Basic for Applications window will open.
- Move to the Insert tab and select Module.
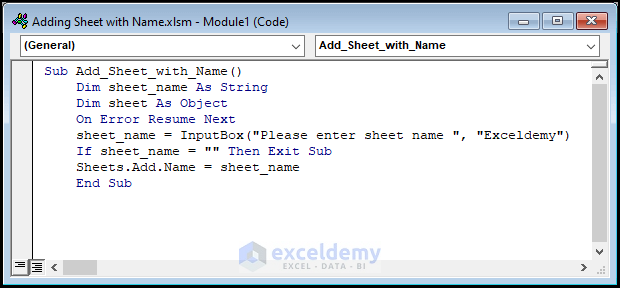
- Write the following code in the Module:
Sub Add_Sheet_with_Name()
Dim sheet_name As String
Dim sheet As Object
On Error Resume Next
sheet_name = InputBox("Please enter sheet name ", _
"Exceldemy")
If sheet_name = "" Then Exit Sub
Sheets.Add.Name = sheet_name
End Sub
Code Breakdown
- We define a Sub procedure called Add_Sheet_with_Name.
- Variable types are specified.
- We use On Error Resume Next to ignore any errors.
- An InputBox prompts the user to enter the desired sheet name, and we store it in the sheet_name variable.
- If the sheet name is empty, the code exits.
- We use the Add.Name method to name the newly created sheet with the user-provided name.
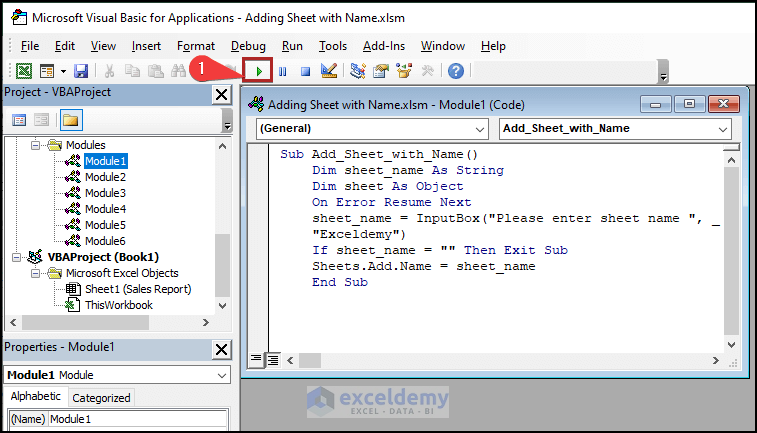
- Click the Run (⏵) icon or press F5 on your keyboard.
- An input box appears. Enter the desired sheet name (e.g., Profit) and click OK.
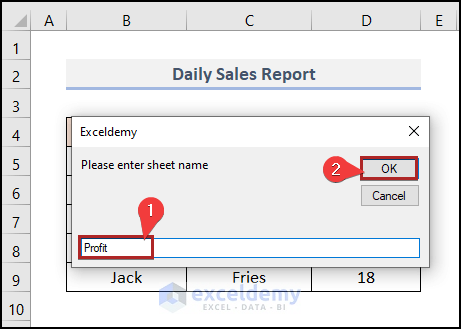
- The code executes, adding a sheet named Profit.
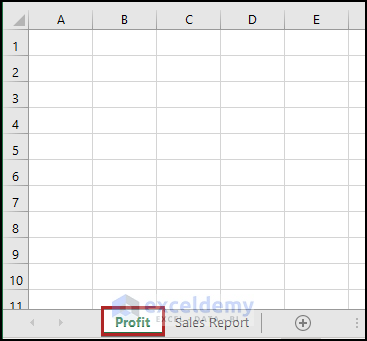
Note: By default, the sheet is placed before the active sheet.
Read More: Excel VBA to Add Sheet with Variable Name
Method 2 – Adding a Sheet Before a Specific Sheet
In this method, we’ll create a new sheet with a custom name before a specific existing sheet. Follow these steps:
- Open the Visual Basic for Applications (VBA) editor by going to the Developer tab and selecting Visual Basic in the Code group. Alternatively, press ALT + F11.
- In the VBA editor, create a new module (if not already done).
- Write the following code in the module:
Sub Add_Sheet_Before_Specific_Sheet()
Worksheets("Sales Report").Activate
Sheets.Add(Before:=Sheets("Profit")).Name = "Balance Sheet"
End Sub
Code Breakdown
- We define a Sub procedure called Add_Sheet_Before_Specific_Sheet.
- The Worksheets(“Sales Report”).Activate line ensures that the code runs even if we’re on a different sheet.
- Using the Add.Name method, we create a new sheet named Balance Sheet before the existing sheet named Profit.
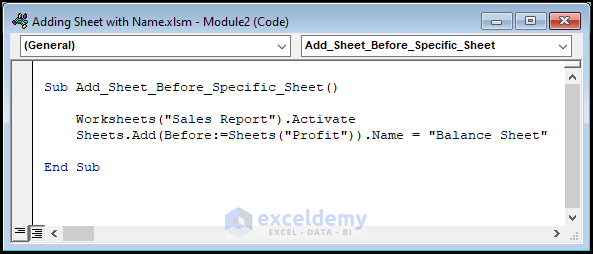
- Run the code (click the Run icon or press F5).
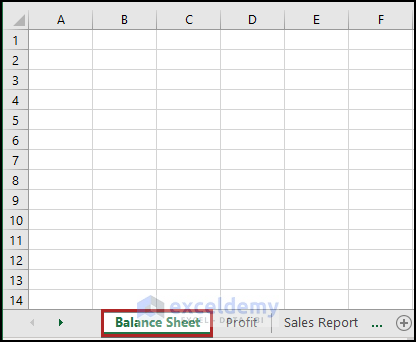
- The result: A new sheet named Balance Sheet will be added before the sheet named Profit.
Read More: Excel VBA to Add Sheet If It Does Not Exist
Method 3 – Adding a Sheet After a Specific Sheet
In this method, we’ll add a sheet after an existing sheet (specifically, after the sheet named Profit). Follow these steps:
- Open the VBA editor.
- Create a new module (if needed).
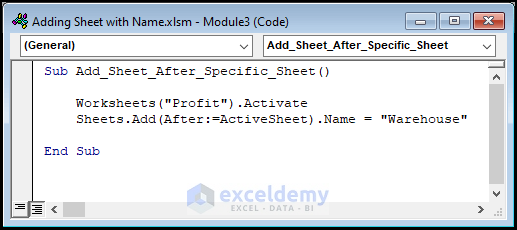
- Write the following code:
Sub Add_Sheet_After_Specific_Sheet()
Worksheets("Profit").Activate
Sheets.Add(After:=ActiveSheet).Name = "Warehouse"
End Sub
Code Breakdown
- Similar to Method 2, we define a Sub procedure.
- We use the After parameter to add the new sheet after the active sheet (which is the sheet named Profit).
- Run the code.
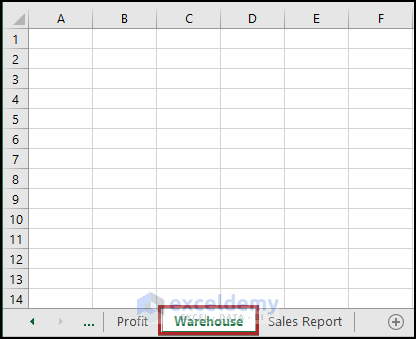
- Result: A new sheet named Warehouse will be added after the sheet named Profit.
Read More: How to Add Sheet After Current One with Excel VBA
Method 4 – Inserting a Sheet at the Start of the Workbook
To insert a new sheet at the beginning of the workbook, follow these steps:
- Open the VBA editor.
- Create a new module.
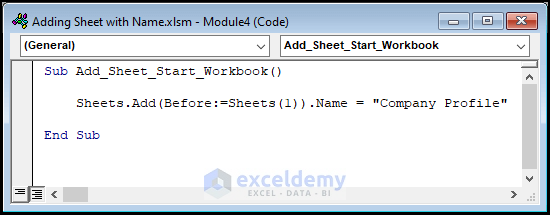
- Write the following code:
Code Breakdown
- We create a new sheet before the first sheet (index 1) in the workbook.
- The sheet is named Company Profile.
- Run the code.
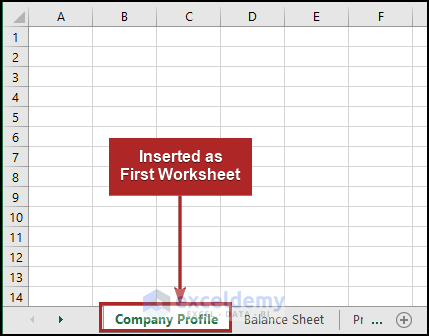
- Outcome: A new sheet named Company Profile will be added at the start of the workbook.
Read More: Excel Macro: Create New Sheet and Rename
Method 5 – Adding a Sheet at the End of the Workbook
To add a sheet after the last sheet in the workbook, follow these steps:
- Open the VBA editor.
- Create a new module.
- Write the following code:
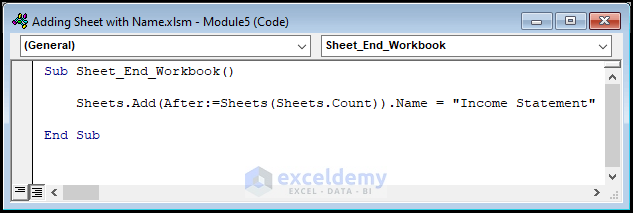
Sub Sheet_End_Workbook()
Sheets.Add(After:=Sheets(Sheets.Count)).Name = "Income Statement"
End Sub
Code Breakdown
- We create a new sheet after the last sheet in the workbook (using Sheets.Count to determine the last sheet index).
- The sheet is named Income Statement.
- Run the code.
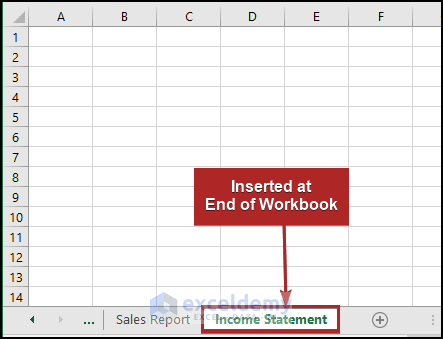
- Result: A new sheet named Income Statement will be added at the end of the workbook.
Method 6 – Adding Multiple Sheets Using Cell Values in Excel VBA
In this method, we’ll create multiple sheets in the workbook, naming them based on values from a specified range of cells. Additionally, we’ll prompt the user to enter the cell range for the sheet names. Let’s walk through the steps:
- Open the Visual Basic for Applications (VBA) editor by following the steps mentioned in Method 1.
- Copy and paste the following code into a new module:
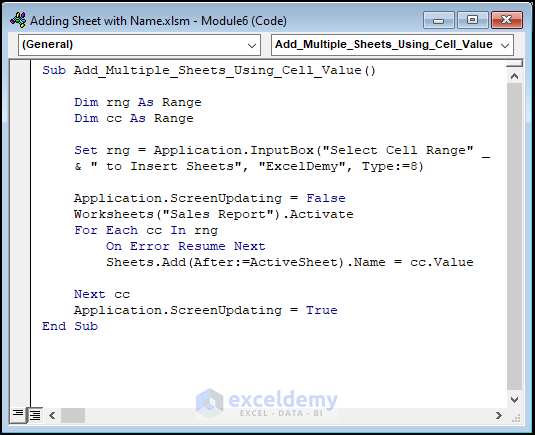
Sub Add_Multiple_Sheets_Using_Cell_Value()
Dim rng As Range
Dim cc As Range
Set rng = Application.InputBox("Select Cell Range" _
& " to Insert Sheets", "ExcelDemy", Type:=8)
Application.ScreenUpdating = False
Worksheets("Sales Report").Activate
For Each cc In rng
Sheets.Add(After:=ActiveSheet).Name = cc.Value
Next cc
Application.ScreenUpdating = True
End Sub
Code Breakdown
- We define a Sub procedure called Add_Multiple_Sheets_Using_Cell_Value.
- Variable types are specified.
- An InputBox prompts the user to select the cell range containing the desired sheet names.
- We activate the Sales Report sheet to ensure the code runs correctly even if we’re on a different sheet.
- Using a For Each loop, we iterate through each cell in the selected range.
- The Add.Name method creates a new sheet after the active sheet (Sales Report) and names it based on the value in the current cell.
- Run the code (click the Run icon or press F5).
- Instantly, the Exceldemy input box opens.
- Insert the cells in the B5:B9 range in the box.
- Click OK.
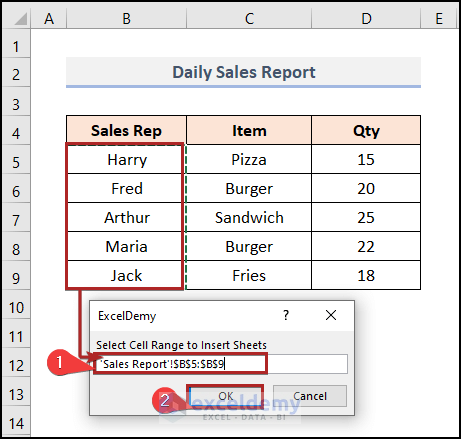
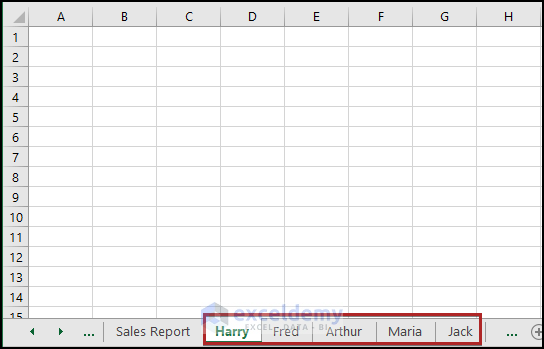
- Result: Five new sheets will be inserted, each named after the cell values in the specified range (e.g., B5:B9), all placed after the Sales Report sheet.
Read More: How to Add Sheet with Name from Cell Using Excel VBA
Download Practice Workbook
You can download the practice workbook from here:
Related Articles
- Excel Macro to Create New Sheet and Copy Data
- How to Create New Sheet from Template Using Macro in Excel


