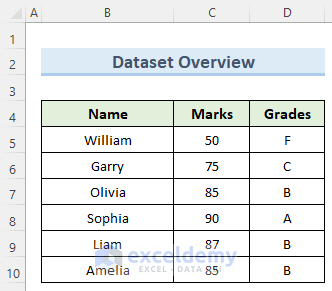
We have taken a simple and concise dataset that has 3 columns and 6 records of students’ marks to show how to save it as an XLSX file.
Method 1 – Using the SaveCopyAs Method
Steps:
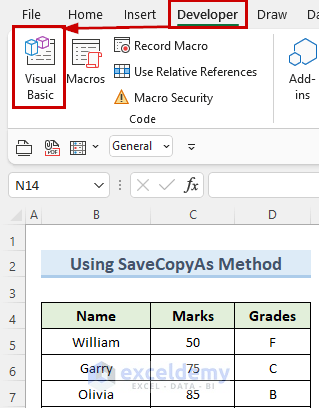
- Go to the Developer tab and select Visual Basic.
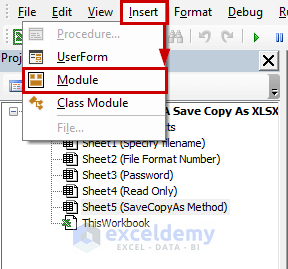
- In the Visual Basic window, click on Insert and select Module.
- In the new module window on the right, insert in the following code:
Sub SaveCopyAs_Method()
Application.DisplayAlerts = False
ActiveWorkbook.SaveCopyAs "C:\Users\USER\Desktop\5700\SaveCopyAs method.xlsx"
End Sub
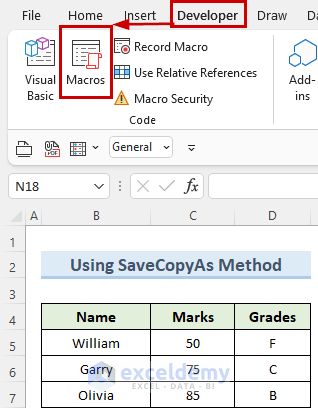
- Close the VBA window and navigate to the Developer tab again.
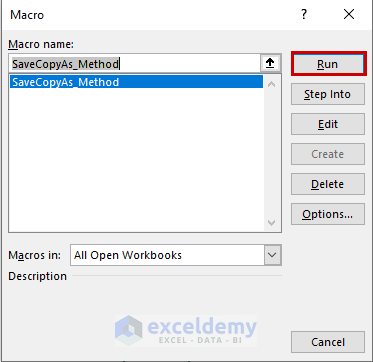
- Select Macros.
- In the Macro window, you should see the macro code we inserted.
- Click on Run.
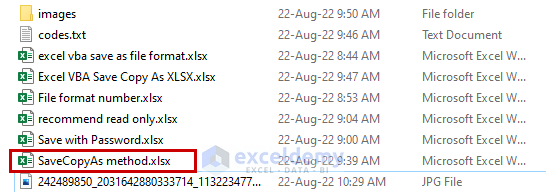
- Open the folder where you saved the file, and it should be available in the XLSX format.
Read More: Create New Workbook and Save Using VBA in Excel
Method 2 – Specifying a Filename
- Open a new VBA module (see Method 1 for exact steps).
- Insert the below code in the VBA module window.
Sub Specify_file_name()
Dim location As String
location = "C:\Users\USER\Desktop\5700\Specify file name.xlsx"
ActiveWorkbook.SaveAs Filename:=location
End Sub
- Run it from the Macros option as shown previously.
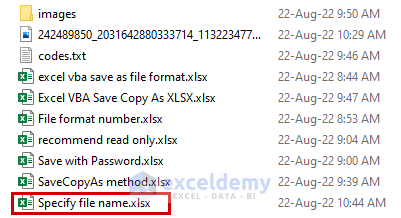
- Go to the save folder and the file with the XLSX format should be there.
Read More: Excel VBA to Save Workbook in Specific Folder with Date
Method 3 – Entering a File Format Number
Our goal is to save an Excel copy as an XLSX file using VBA. We will use the format number 51, which denotes the XLSX file type.
- Insert the following code in the VBA module:
Sub file_format_number()
Dim location As String
Application.DisplayAlerts = False
location = "C:\Users\USER\Desktop\5700\File format number"
ActiveWorkbook.SaveAs Filename:=location, FileFormat:=51
End Sub
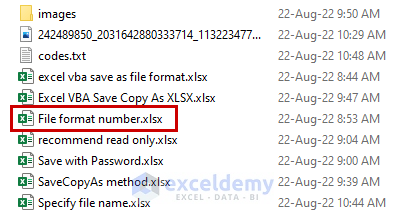
- If you run this code, Excel will immediately save the workbook in an XLSX format. You can confirm that by checking in the destination folder.
Read More: Excel VBA Save as File Format
Method 4 – Saving with a Password
- Enter the below VBA code in the Module window:
Sub Save_With_Password()
Application.DisplayAlerts = False
ActiveWorkbook.SaveAs _
Filename:="C:\Users\USER\Desktop\5700\Save with password.xlsx", Password:="one"
End Sub
- Run this code from the Macros options.
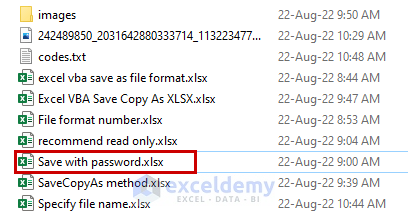
- If you go to your saved folder, you should find the file with the name that you gave and the XLSX extension at the end.
Method 5 – Save by Recommending Read Only
- Insert the following code in the VBA module:
Sub recommend_read_only()
Application.DisplayAlerts = False
ActiveWorkbook.SaveAs _
Filename:="C:\Users\USER\Desktop\5700\Recommend read only.xlsx", _
ReadOnlyRecommended:=True
End Sub
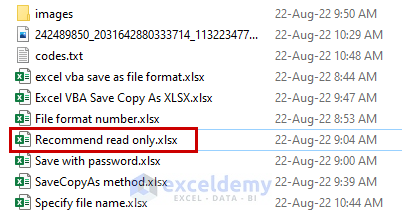
- Run this code from the Macros option under the Developer tab. This should save an XLSX copy of the current workbook as shown below.
Read More: Excel VBA to Save File with Variable Name
Things to Remember
- Make sure to change the saving path of the XLSX file in the VBA. It should match a folder path inside your computer.
- Double-check to see that you are spelling all the built-in VBA functions exactly as I have done.
- In some cases, the VBA code may not be available anymore in the VBA window after running the code.
Download the Practice Workbook
Related Articles
- Excel VBA: Save Workbook Without a Prompt
- How to Save Excel Macro Files as Filename from Cell Value
- How to Use Macro to Save Excel File with New Name
- Excel VBA: Save Workbook as New File in Same Folder
- Excel VBA to Save as File Using Path from Cell
- Excel VBA: Save Workbook in Specific Folder


