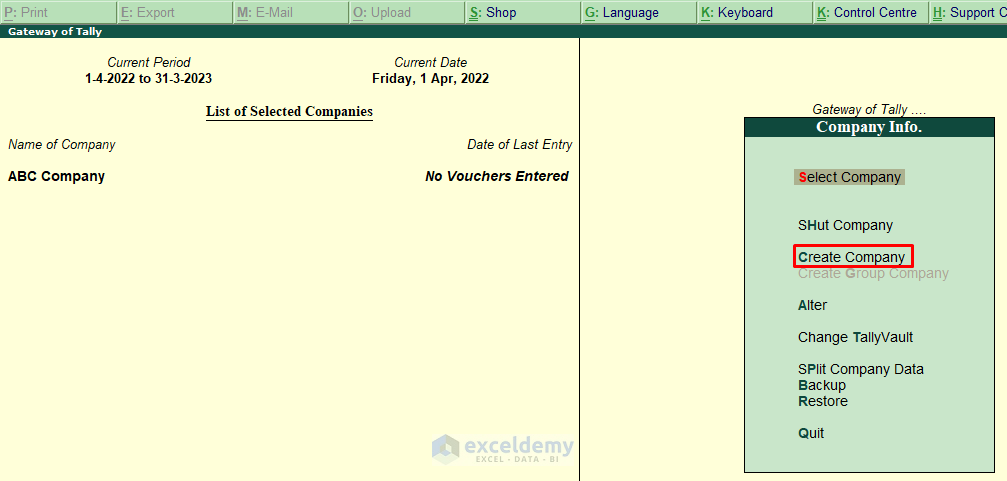
Step 1 – Create Tally Data in Tally.ERP 9 Software
Ensure Software Functionality
Before creating a file in Tally, make sure you’ve downloaded and installed Tally.ERP 9. Verify that the software is functioning correctly.
Company Creation
- Open Tally.ERP 9.
- Click on the Create Company option under Company Info.
- Enter your desired company name in the provided field.
Company Details
- Fill in the following details under Mailing & Contact:
- Mailing Address
- Statutory Compliance for
- Telephone No
- Mobile No
- Under Company Details, enter data in the following fields:
- Currency Symbol
- Maintain
- Financial Year From
- Books Beginning from
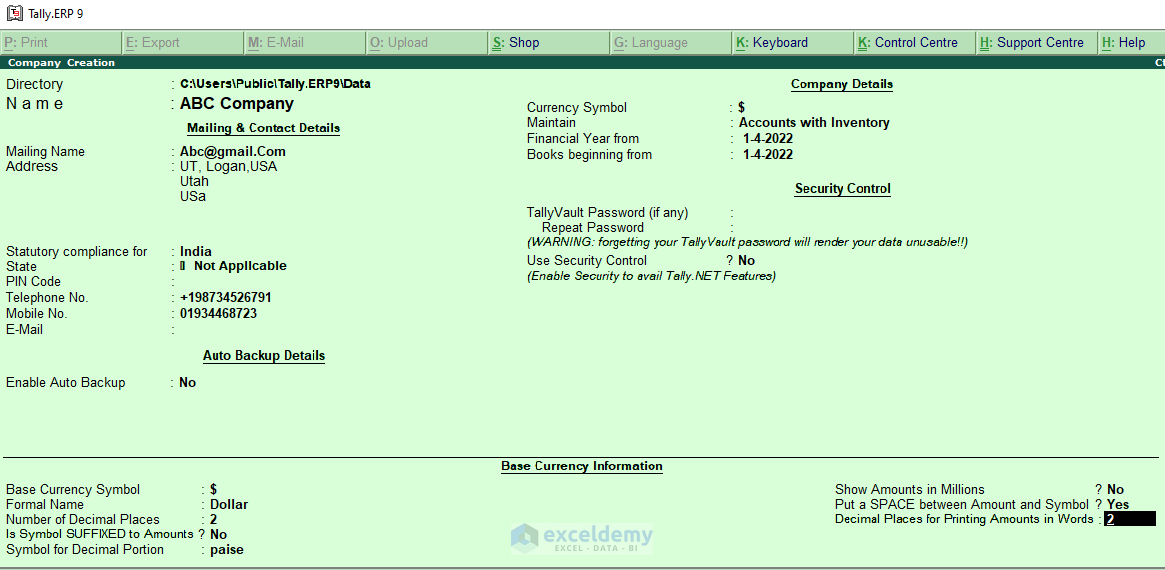
Basic Information Dataset
After entering the above data, you’ll have created a basic information dataset for your company. This dataset includes essential company details.
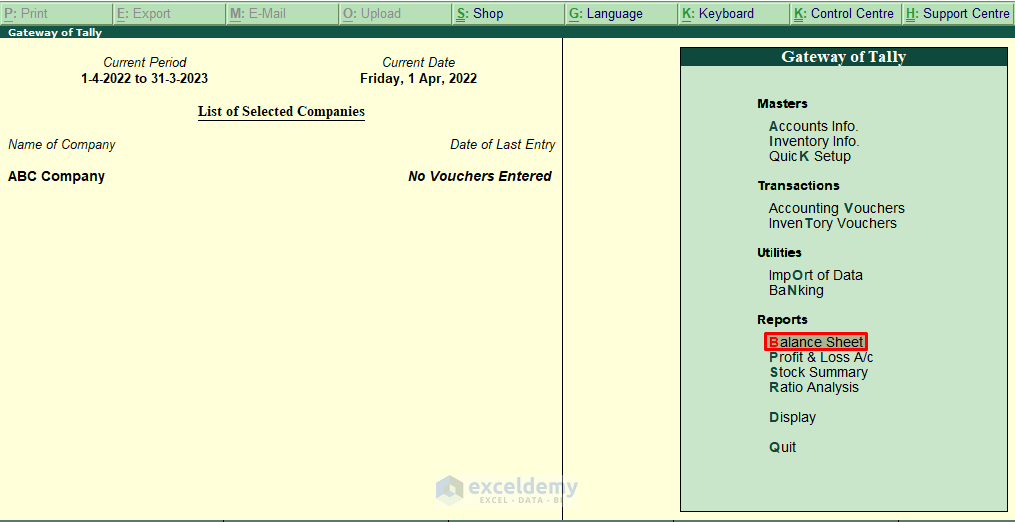
Gateway of Tally
- Explore the Gateway of Tally section, where you can store additional information about your company.
- Sections available include Masters, Transactions, Utilities, and Reports.
Creating a Balance Sheet
- Navigate to the Reports section and select Balance Sheet.
- Input the required data related to your company’s financials.
- Enter values for:
- Capital Account
- Loans (Liability)
- Current Liabilities
- Profit & Loss A/C
Entering Data
- For specific sections (e.g., Capital Account), click on the relevant section.
- Use the highlighted fields to input the necessary data.
- Repeat this process for other relevant sections.

File Creation Options
- While we’ve focused on creating a balance sheet, Tally.ERP 9 allows you to create other files such as Ledgers or Profit & Loss Statements.
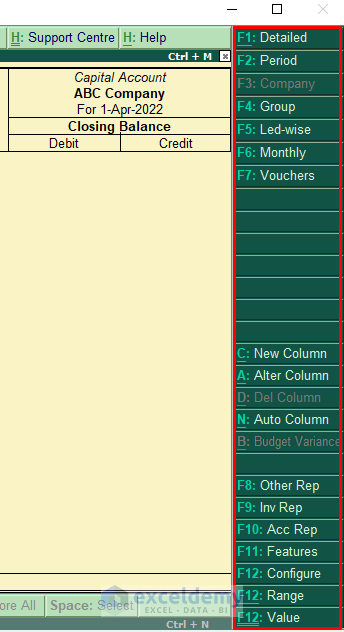
Step 2 – Export File in Excel
Once you’ve created the required file, the next step is to export it to Excel using Tally.ERP 9. This versatile software allows you to convert files into various formats, including PDF, Excel, XML, JPEG, HTML, and ASCII. Follow these steps to export your file to Excel:
- Access Export Options
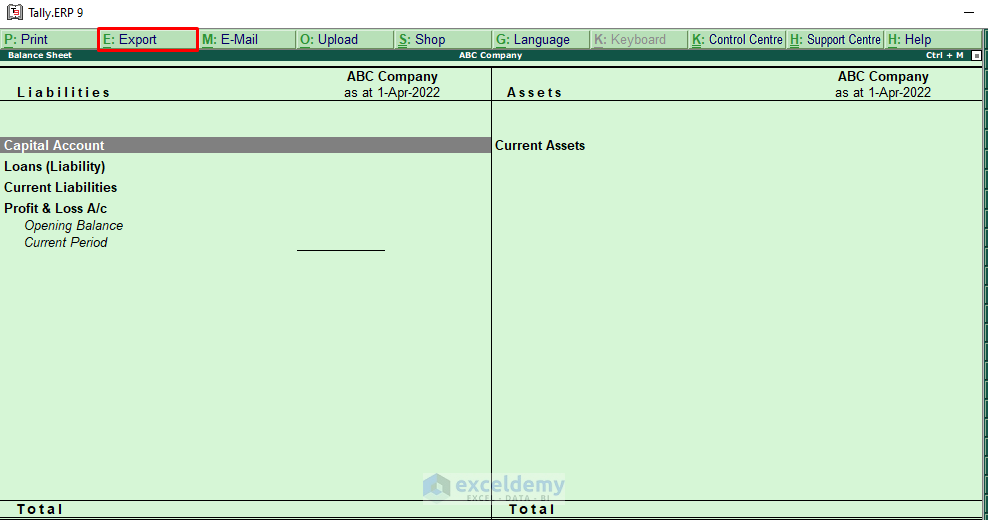
- Click on the Export button (as shown below).
- Alternatively, press Alt+E on your keyboard.
- Format Selection
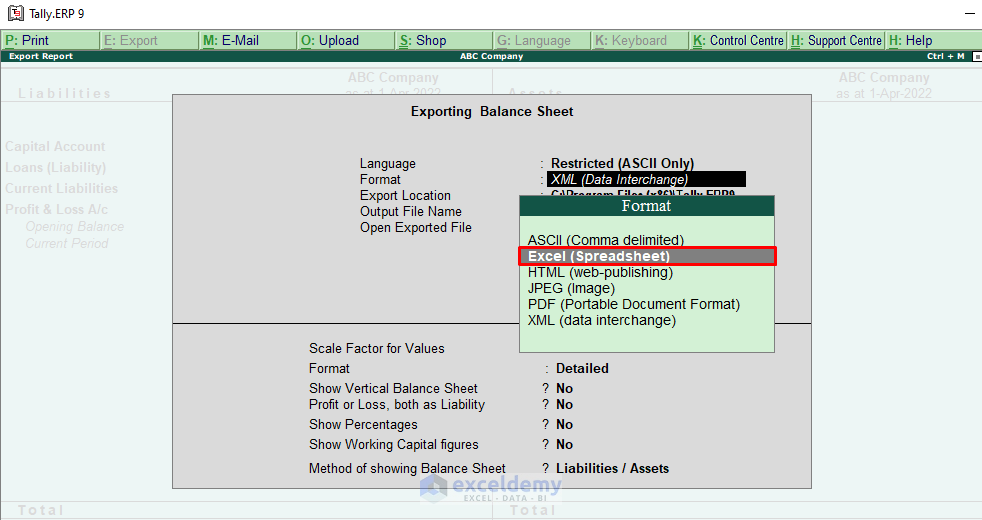
- Press the Esc key to open the format selection window.
- Choose Excel (Spreadsheet) from the available options.
- Specify Export Details
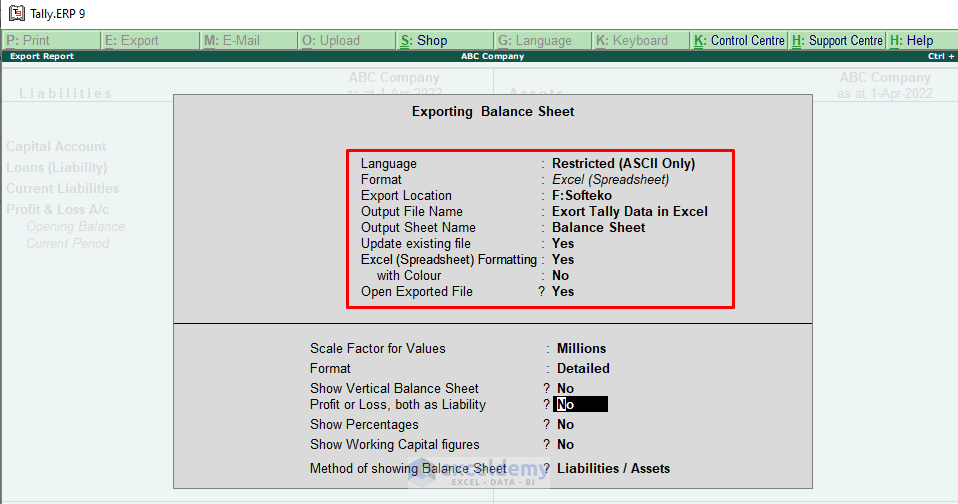
- Indicate the desired export location in the Export Location box.
- Enter a name for the exported sheet in the Output Sheet Name box.
- Decide whether to automatically open the exported file in Excel by selecting Yes or No in the Open Exported File box. We recommend choosing Yes for convenience.
- Additional Options
- Leave other sections unchanged or customize them according to your preferences.
- Balance Sheet Display
- Under Method of showing Balance Sheet, choose how you want to display the data in Excel. For example, select Liabilities/Assets tally if that’s your preference.
- Export Confirmation
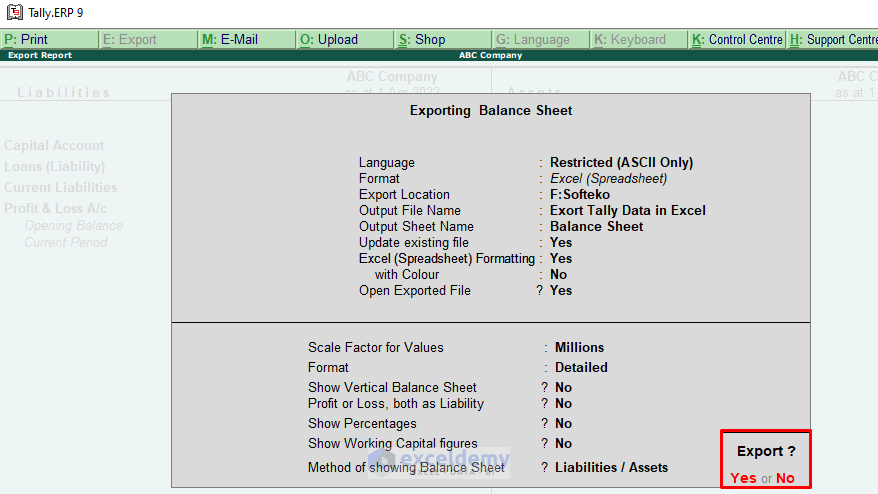
- After entering all the necessary data, an Export window will appear.
- Confirm the export by selecting Yes.

- View the Result
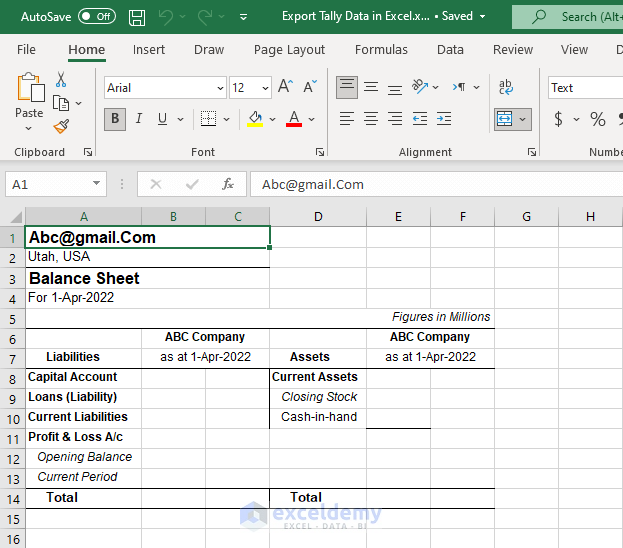
- You’ll now have successfully exported Tally data to Excel.
- Open the Excel file to see the exported data.
Read More: How to Make a Tally Sheet in Excel
Download Practice Workbook
You can download the practice workbook from here:
Related Articles
- How to Create a Tally Button in Excel
- How to Make Tally Marks in Excel
- How to Tally a Column in Excel
- How to Tally Words in Excel
- How to Tally Votes in Excel
- How to Make a Tally Chart in Excel
<< Go Back to Tally in Excel | Excel for Statistics | Learn Excel
Get FREE Advanced Excel Exercises with Solutions!
