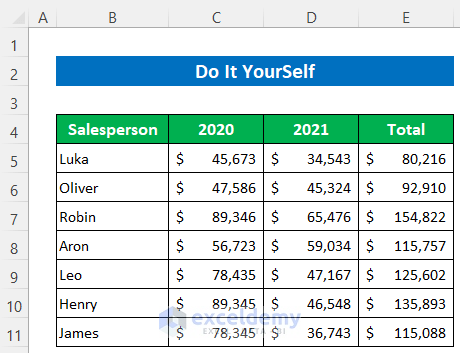
The sample dataset represents sales in two consecutive Months and Total Sales.
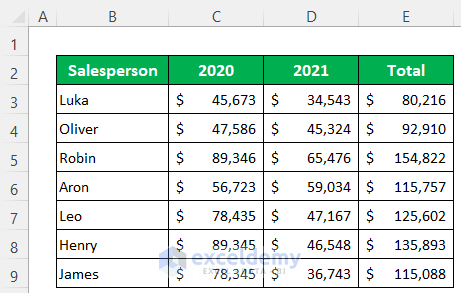
Method 1 – Using Paste Special to Extract Data from Excel to Word
Steps:
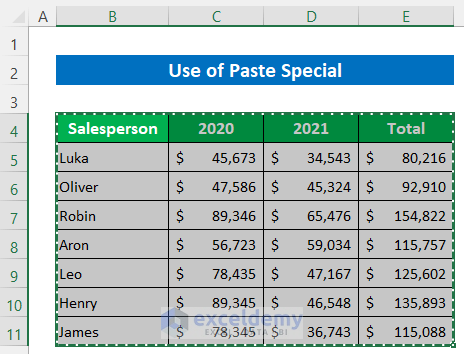
- Select the data range. We selected the range B4:E11.
- Press Ctrl + C.
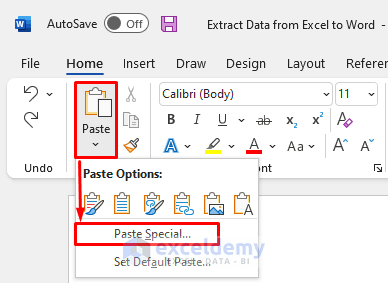
- Open a new Word file and click on Paste, then select Paste Special.
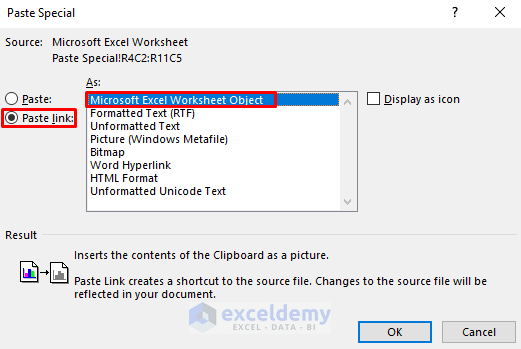
- Mark Paste link.
- Select Microsoft Excel Worksheet Object from the As: box and press OK.
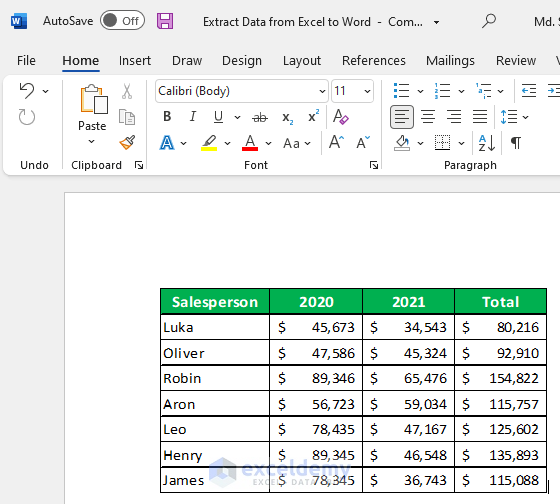
- You will get the extracted data in the Word file.
Read More: How to Export Data from Excel to Word
Method 2 – Insert an Excel Object to Extract Data from Excel to Word
Steps:
- Open the sheet you want to extract.
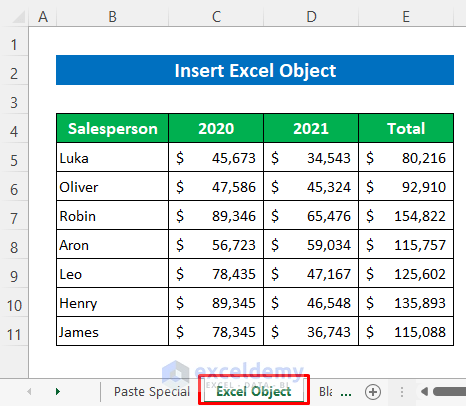
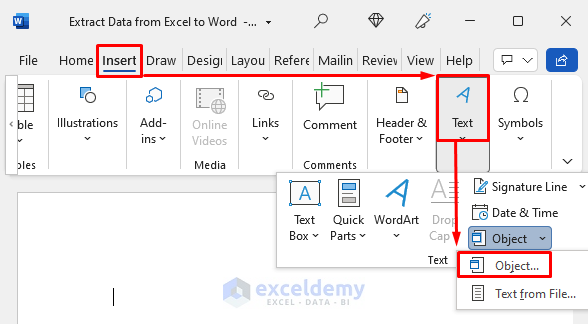
- Open Word and go to Insert, then Text, and select Object and choose Object.
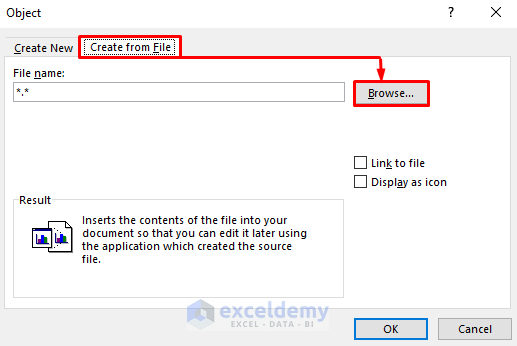
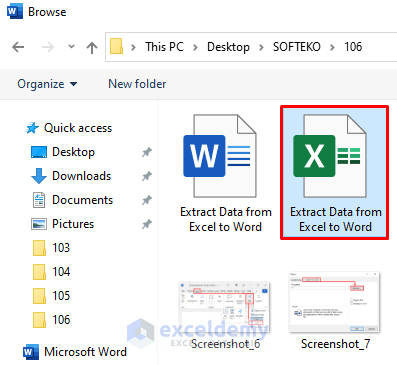
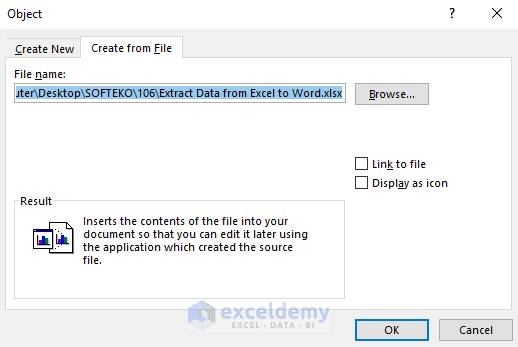
- Click on Create from File and press Browse.
- Select your file from the file explorer and press OK.
- Press OK to finish.
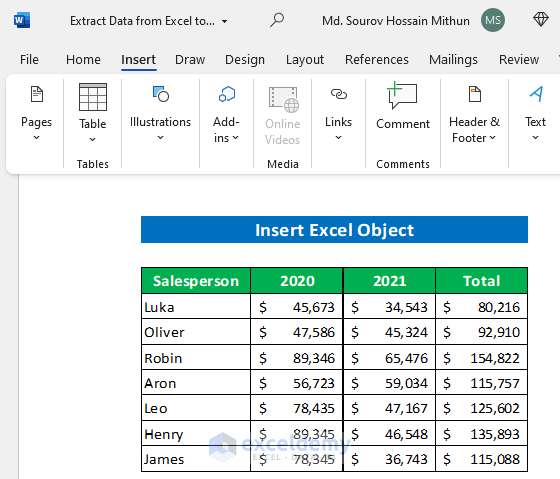
- We have inserted data from the Excel Spreadsheet into Word.
Read More: How to Transfer Data from Excel to Word Automatically
Method 3 – Inserting a Blank Excel Table to Extract Data from Excel to Word
Steps:
- Open a new Word file.
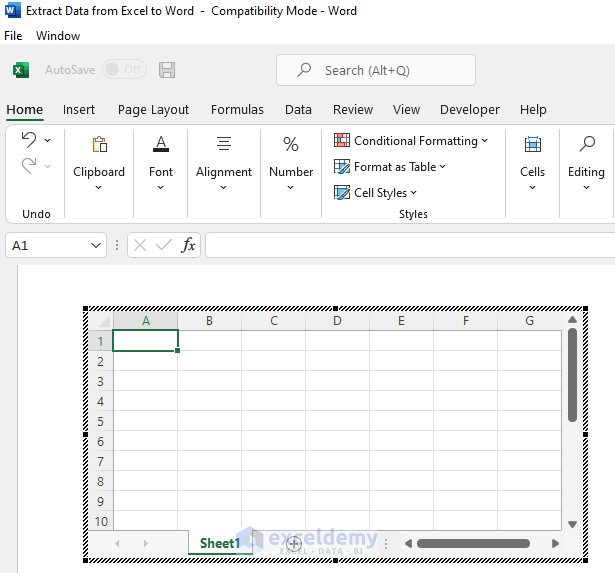
- Go to Insert, select Table, and choose Excel Spreadsheet.
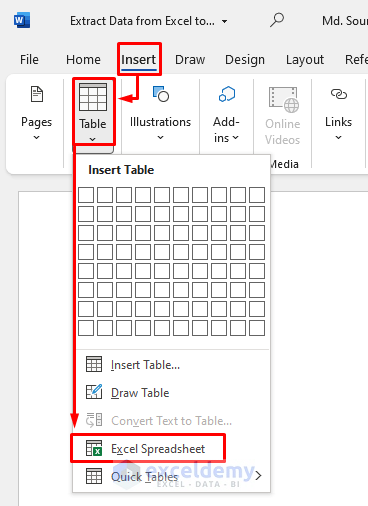
- An Excel window is opened in the Word file. You can use all Excel functions inside or copy the range from an Excel file inside.
Method 4 – Mail Merge from Excel to Word
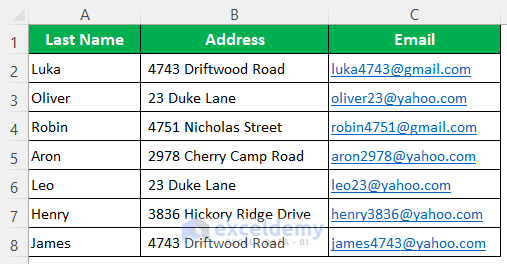
We have a new dataset that contains the Salespersons’ Last Names, Addresses, and Emails.
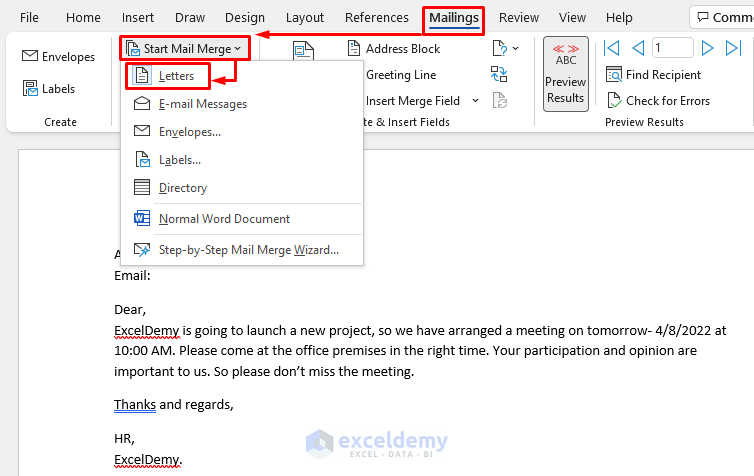
We have opened a new Word file and wrote a letter to send to the salespersons. We’ll extract the Address, Email, and Last Name from the Excel file.

Steps:
- Go to the Word file and click on Mailings, then on Start Mail Merge, and select Letters.
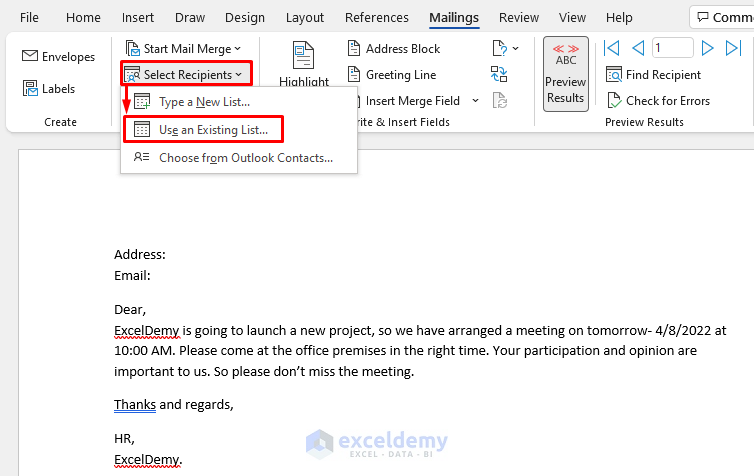
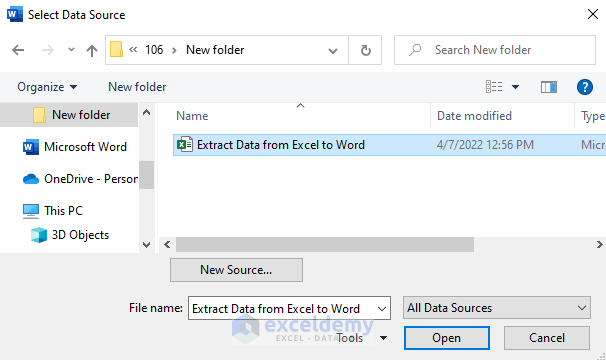
- Click Select Recipients and select Use an Existing List.
- Select the Excel file and press Open.
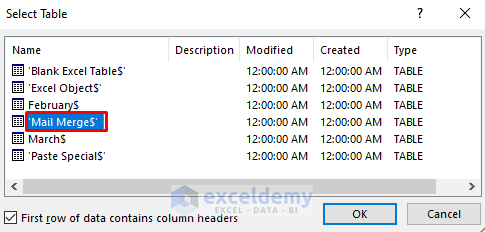
- Select the specific sheet and press OK.
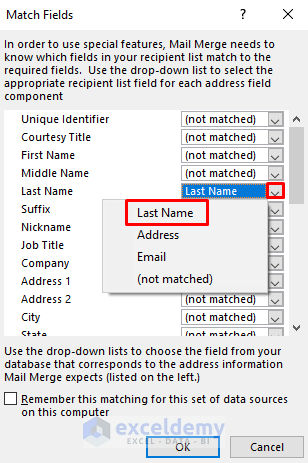
- Click on the Match Fields from the Mailings tab.

- By pressing the drop-down icon from any field, you can choose the related header name of your Excel file if Excel failed to set it automatically.
- Keep the cursor where you want to get the address.
- Click on the dropdown icon from the Insert Merge Field.
- Select Address.
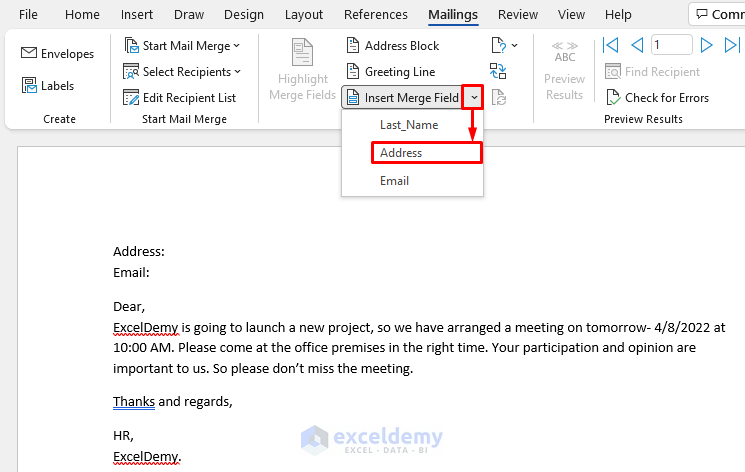
- The Address is added successfully.
- In the same way, add the Email.
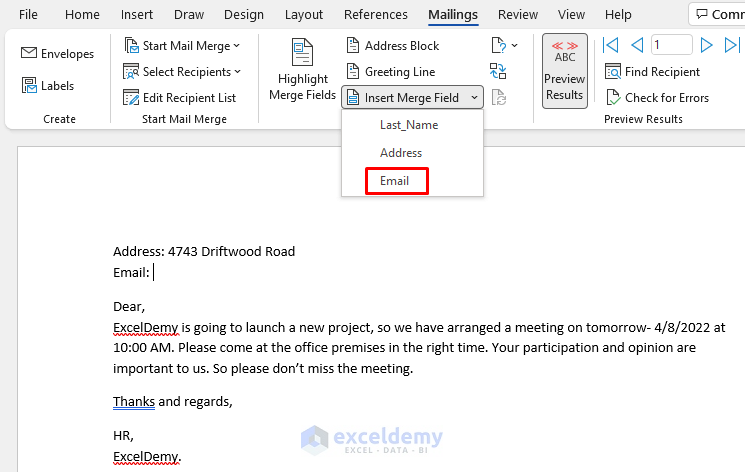
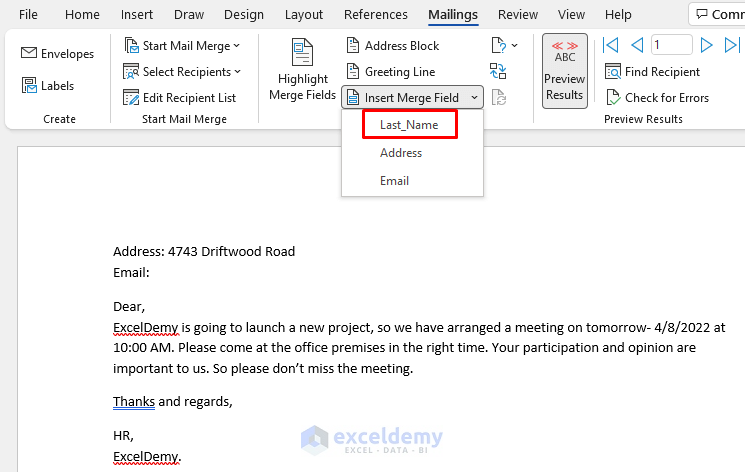
- Add the last name after “Dear” in the letter.
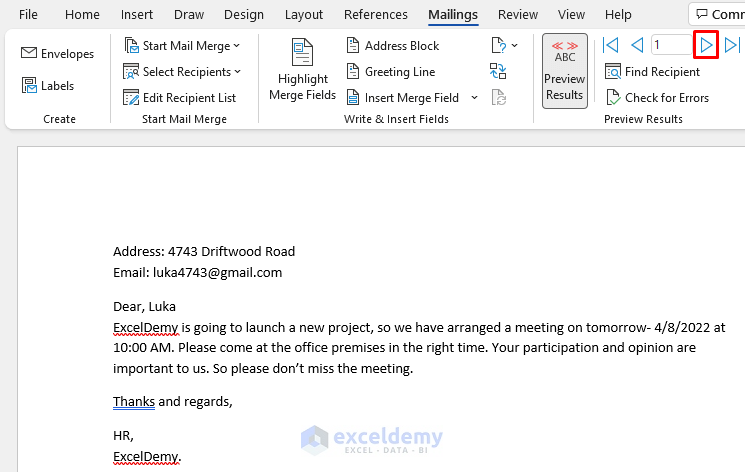
- The letter is filled with the specific fields for the first salesperson. If you press the Next button, the same letter will be shown for the next salesperson.
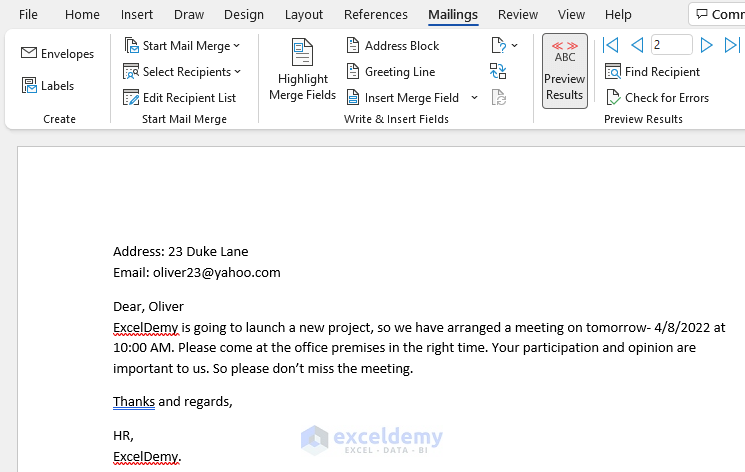
- Here’s an overview.
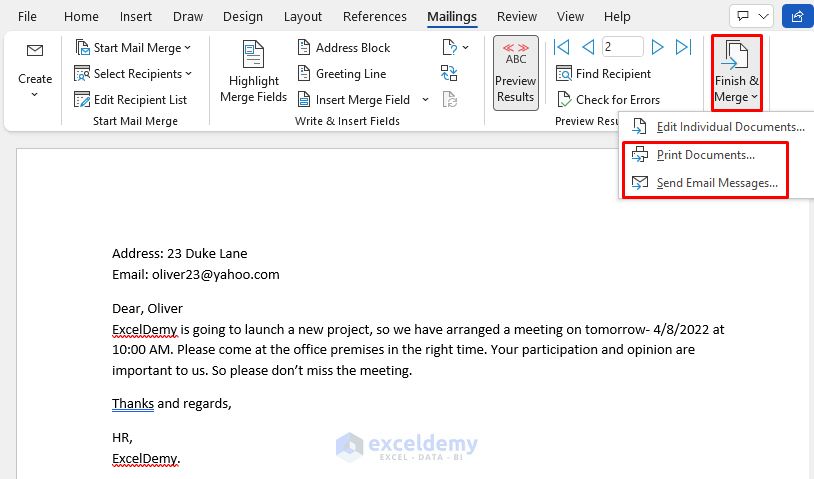
- You can print or send the emails. Click on Finish & Merge and select your desired option: Print Documents or Send Email Messages.
Practice Section
You will get a practice sheet in the download file to test the methods.
Download the Practice Workbook
Related Articles
- How to Copy Only Text from Excel to Word
- How to Copy from Excel to Word Without Losing Formatting
- How to Copy a Chart from Excel to Word
- How to Link Excel Cell to Word for Automatic Update
- How to Copy and Paste from Excel to Word Without Cells
- How to Insert an Excel Spreadsheet into Word
<< Go Back to Export Excel to Word | Export Data from Excel | Learn Excel
Get FREE Advanced Excel Exercises with Solutions!

