To check the encoding of an Excel file, we need to view the file in XML format. An Excel file is actually a compacted form of multiple XML files that document every component and characteristic of that file in detail. In fact, an Excel file (.xlsx) has folders containing different files. These folders are compressed in ZIP format by Excel and then given the Excel file extension (.xlsx). To check the encoding of the file, we have to unzip the file before examining the xml.
Step 1 – Changing the File Extension of the Excel File
First, we must rename the file extension of the Excel file to zip.
- Select the Excel file for which you want to check the encoding in Windows File Manager.
- Select the Rename option.

- Change the extension from .xlsx to .zip.

This converts the Excel file into a compressed zip file.
Step 2 – Open the Zip File in Windows Explorer
Windows Explorer is the default software for opening a compressed file.
- Select the file and right-click on it.
- Click on Open with > Windows Explorer.
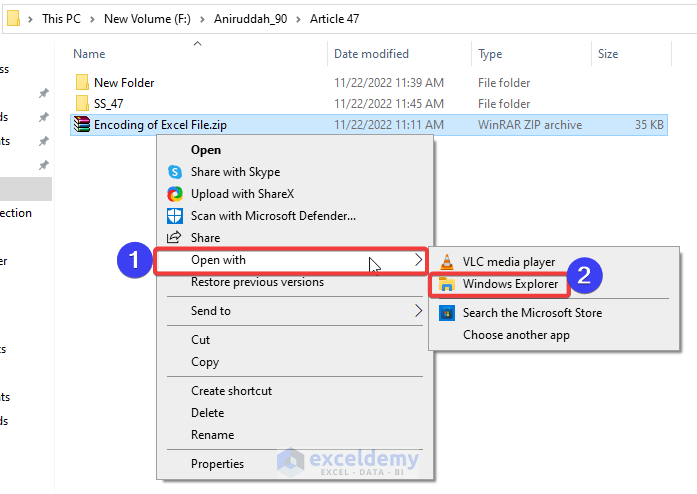
Windows Explorer will open the zipped file.
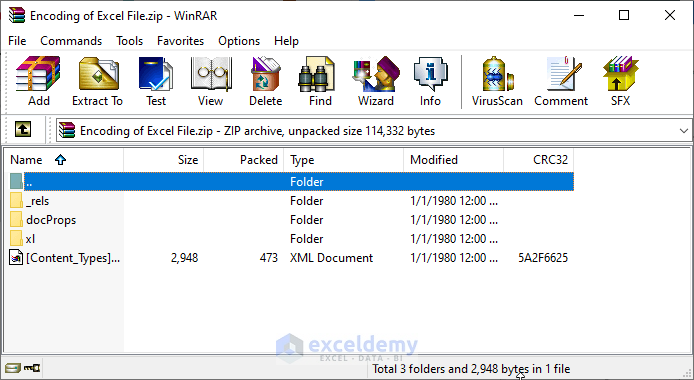
Step 3 – Opening the Worksheets Folder
- Double click the xl folder to open it.
- Double click the worksheets folder to open it.
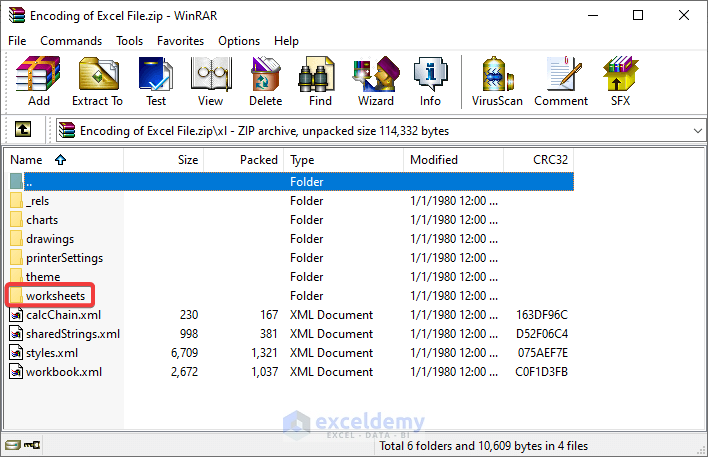
Separate XML files for every sheet are displayed.
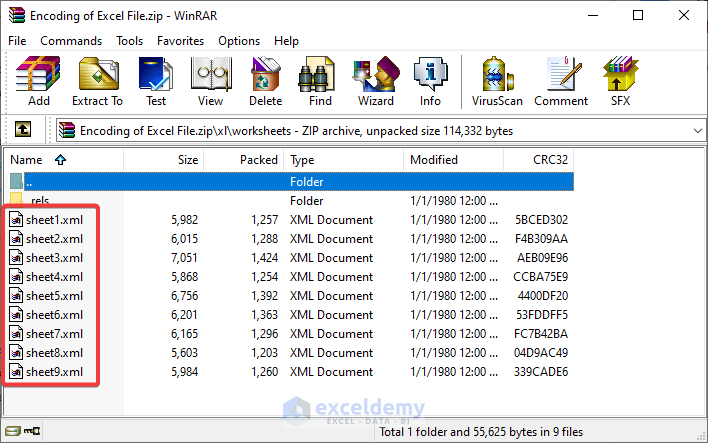
Step 4 – Opening the XML Files in Notepad
Now we can check the encoding of the Excel file.
- Double click the sheet file you want to open.
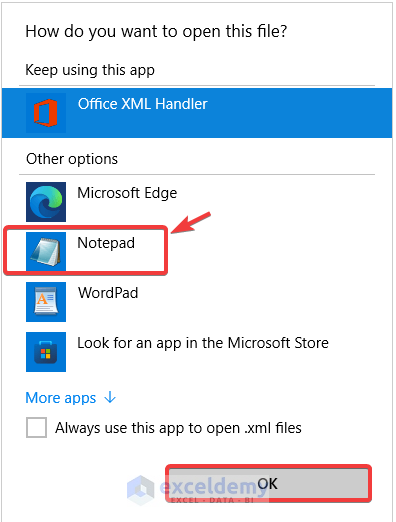
A window will open up asking how we want to open the file.
- Choose Notepad.
Step 5 – Observing the First Line of the XML File
- Look at the first line of the code.
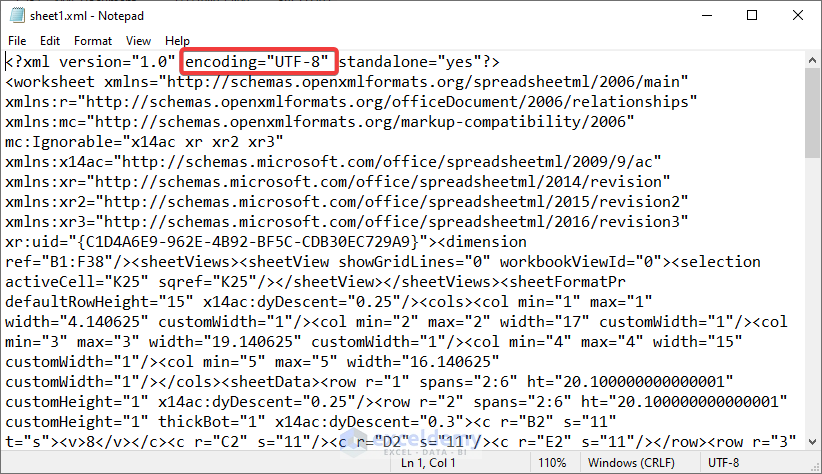
Here, we can see that the file is encoded in UTF-8. Similarly, we can check any other sheet’s encoding.
- After checking the encoding, close the file.
- Rename the file extension back from .zip to to .xlsx.
Read More: How to Encode Data in Excel
How to Change the Encoding of an Excel File
Sometimes some words in Excel do not display properly. There are various possible reasons, but its usually due to incorrect encoding of Excel files. Changing the encoding of the file will fix this.
Steps:
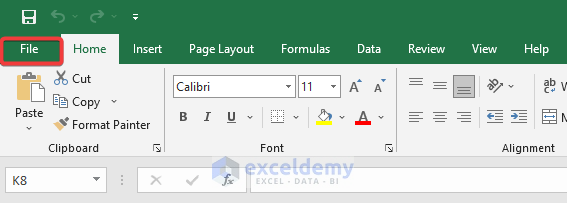
- Go to the File tab.
- In the File tab, click on Save As.
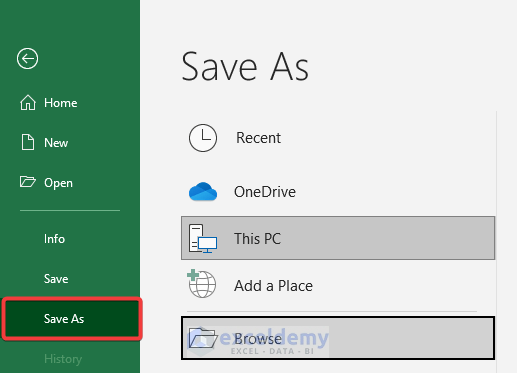
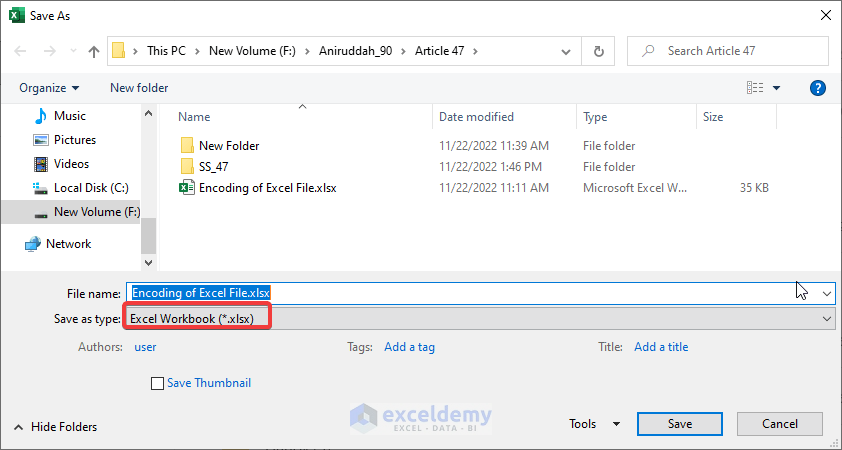
- Choose the destination and formatting of the file.
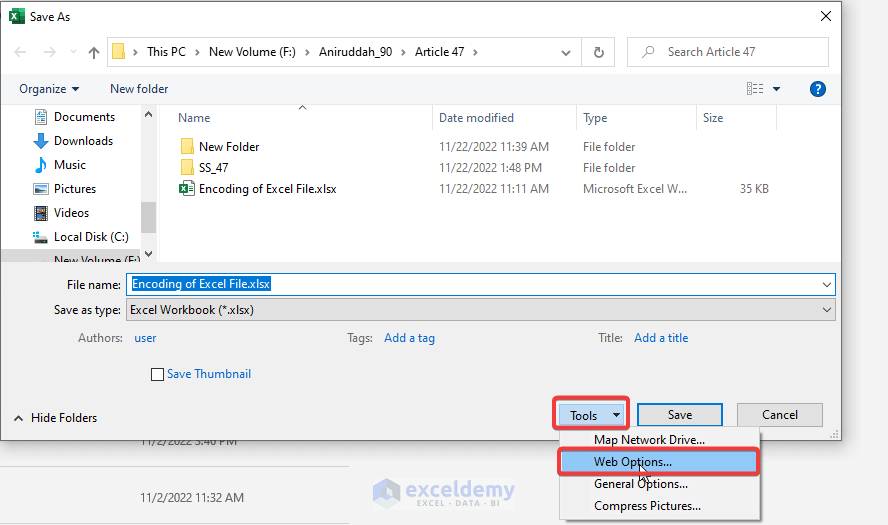
- Choose Web Options from the Tools drop-down.
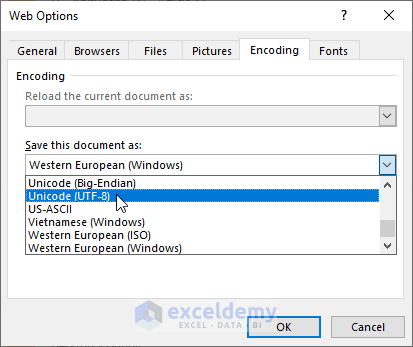
- In the Web Options dialog box that opens, choose the Unicode (UTF-8) option from the Save this document as dropdown menu
- Click OK.
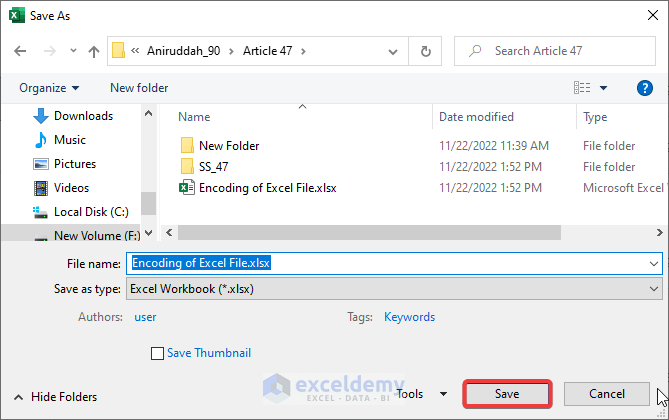
- Save the file by clicking on Save.
- Check if the file is displaying all the words properly or not.
If the file still doesn’t display correctly, try the other options in the same way until you get the desired result.
Read More: How to Apply UTF 8 Encoding on CSV File in Excel
Things to Remember
- You can use 3rd party software like 7Zip instead of Windows Explorer to open the zip file.
Download Practice Workbook
Related Articles
<< Go Back to Excel Encoding | Excel Files | Learn Excel
Get FREE Advanced Excel Exercises with Solutions!

