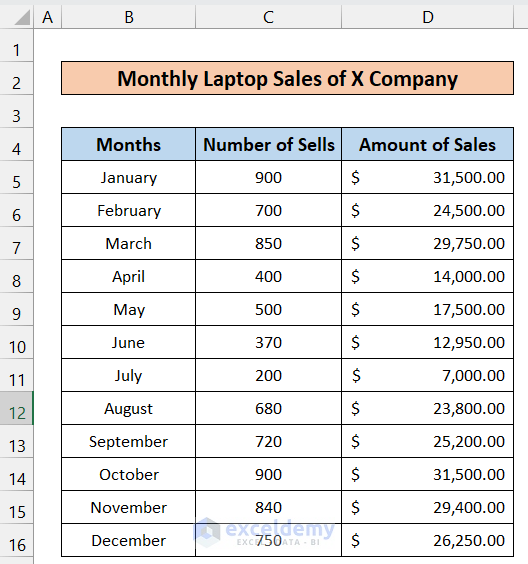
To illustrate, we have taken an Excel file where the data of Monthly Laptop Sales of X Company is shown.
We have a Word file where we want to export data from the Excel file.
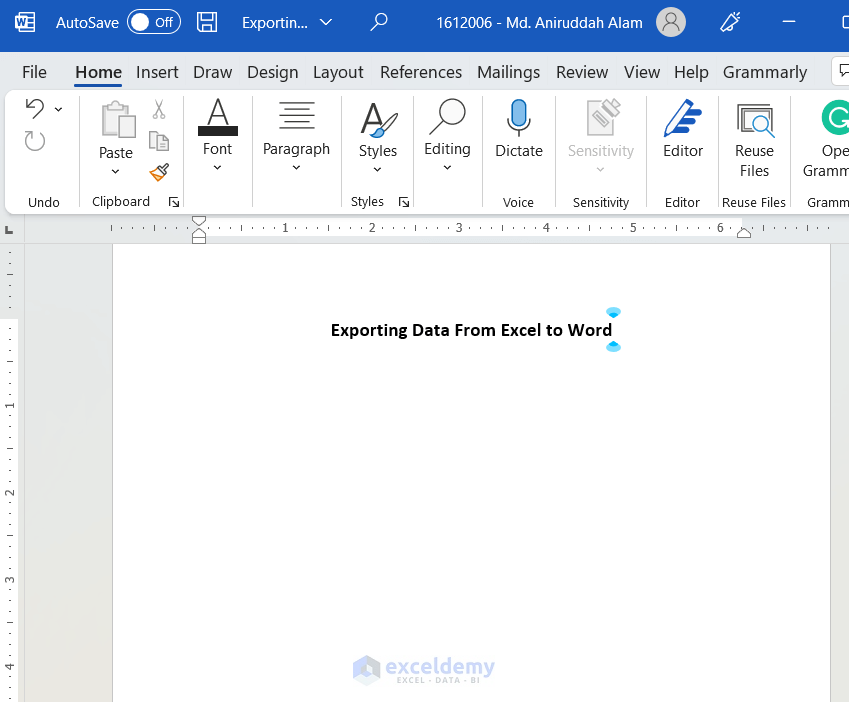
We’ll try to export data from an Excel file to a Word file. Let’s try our first method.
Method 1 – Use of Copy Paste to Export Data from Excel to Word
Steps:
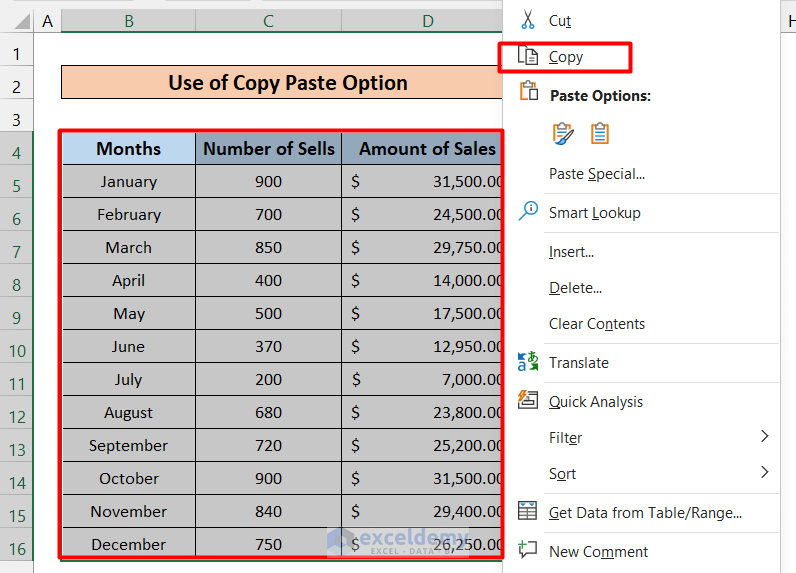
- Copy the data that you want to export from Excel. To do that, select the data and then right-click your mouse. From the appeared menu, select Copy. Alternatively, you can just type Ctrl+C to do the same.
- Go to the Word file and right-click on the mouse where you want to paste the data. Consequently, a menu will appear from where you will see many paste options.
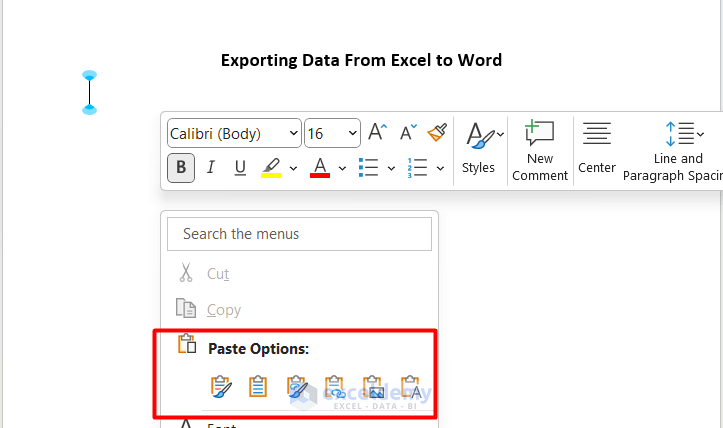
- You can copy from Excel to Word without losing formatting, select the first option. Your data will look exactly how it was in the Excel file.
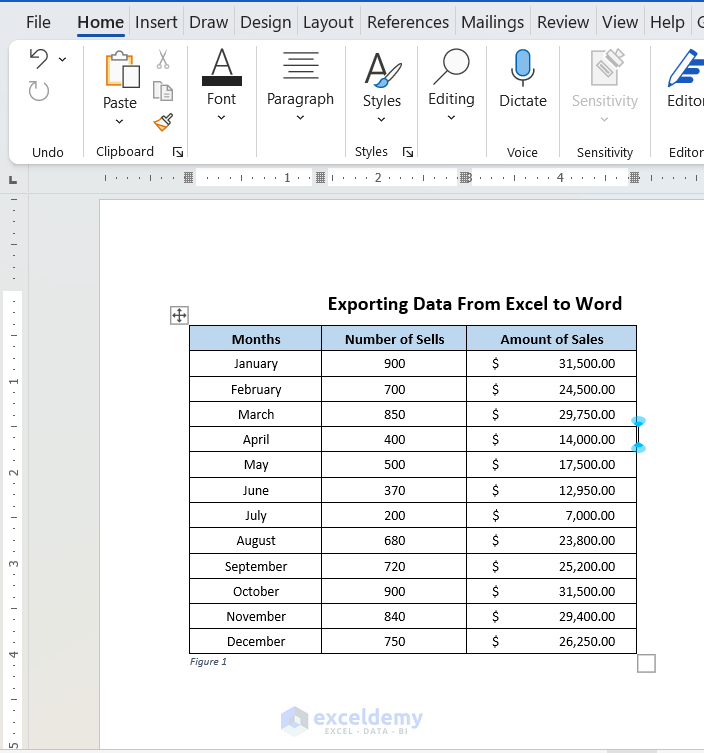
- Use Destination Styles, your data representation format will be converted to the existing Word file format.
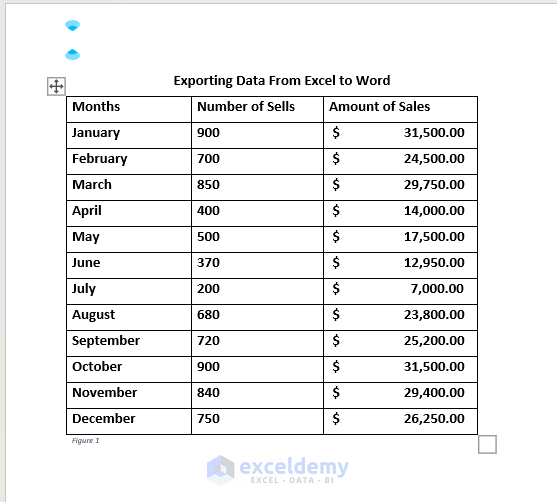
- Select Link & Keep Source Formatting and the data will be displayed in Excel format. It will also be linked to the original Excel file. In other words, if you change anything in your original Excel file, it will be reflected in this Word file too.
- Select Link & Use Destination Styles, the data will be connected like the previous one but the representational format will be according to the word file.
- Select the Picture option, the data will be added as a picture captured from the Excel file. You can resize the picture but can’t edit the data.
- Select Keep Text Only and only the texts will be imported from Excel to Word. So no table will be generated.
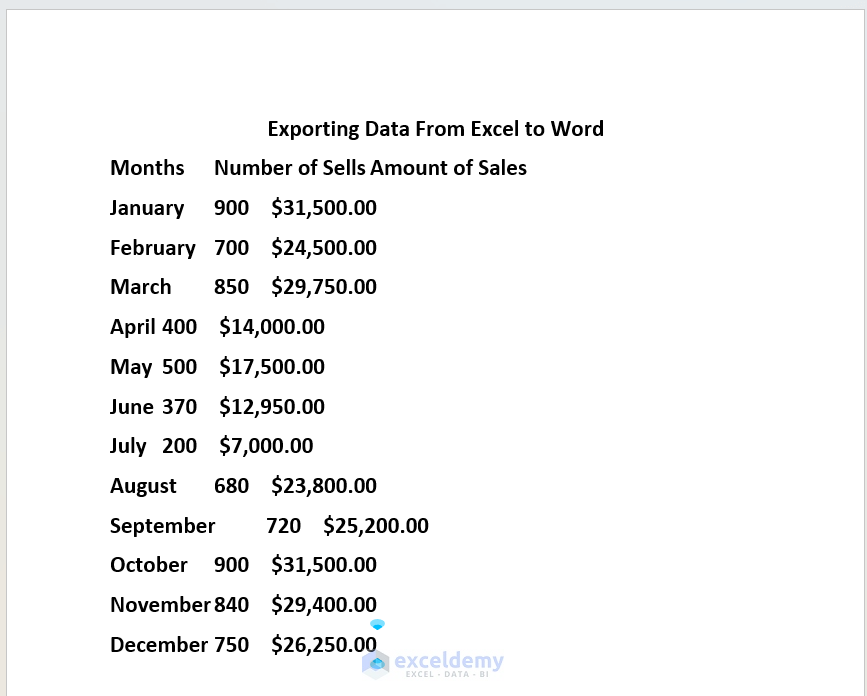
- The columns are separated with tabs and rows are separated with a line gap.
Method 2 – Export Data from Excel to Word by Utilizing Object Insert Feature
Steps:
- Go to Insert Tab and click on Object from Text group.
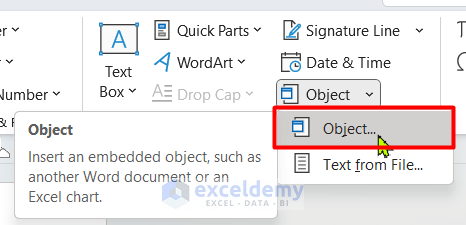
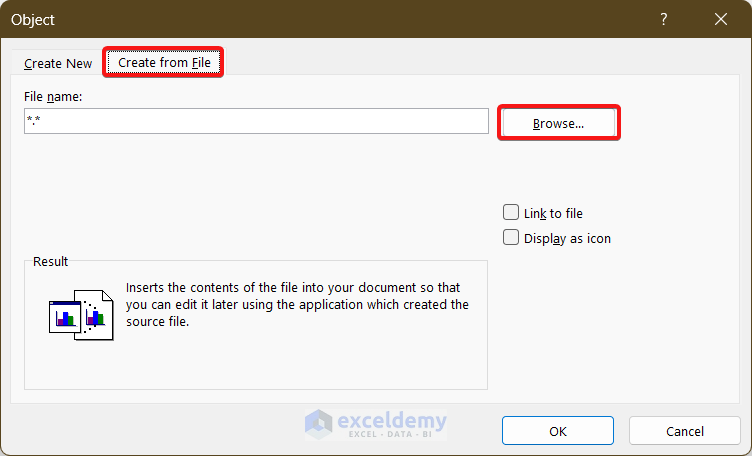
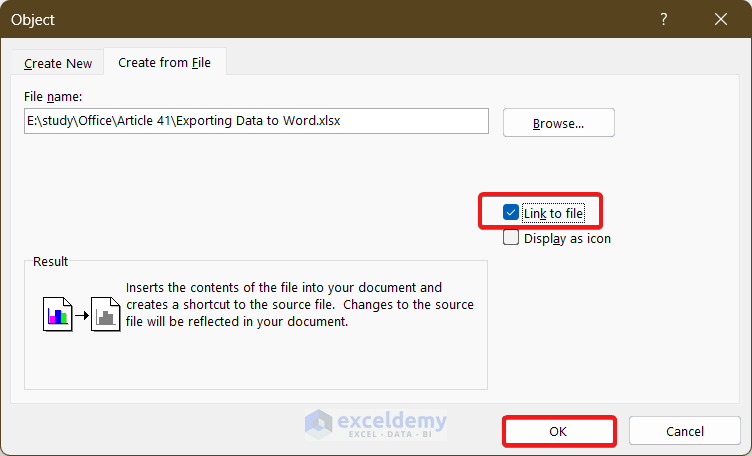
- A new window will appear named Now, go to Create from File tab and then click on Browse to choose the Excel file you want to import.
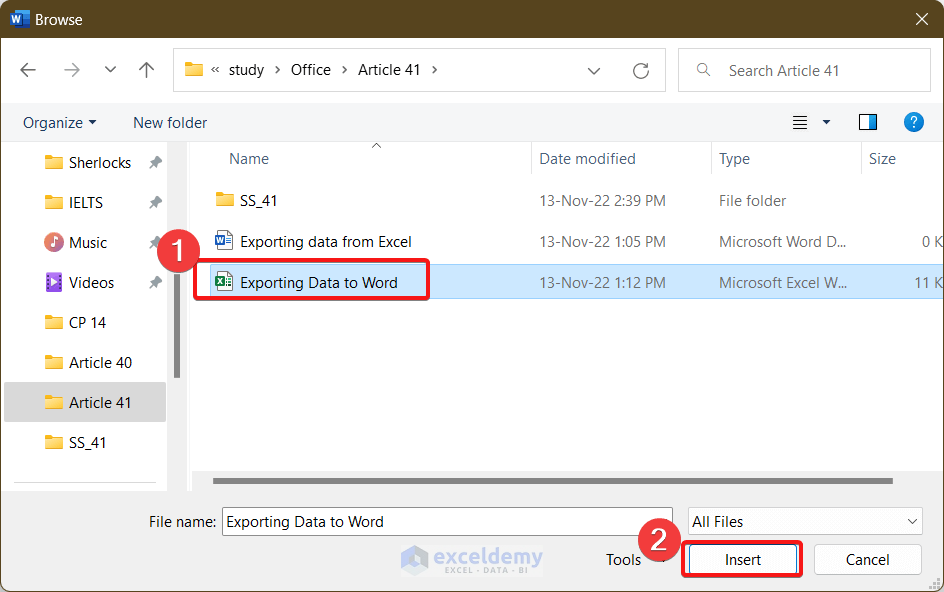
- From the browse window, select “Exporting Data to Word”.
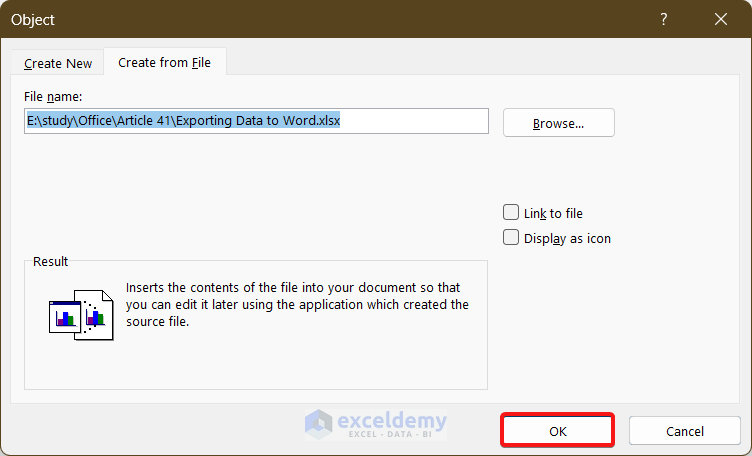
- Click OK.
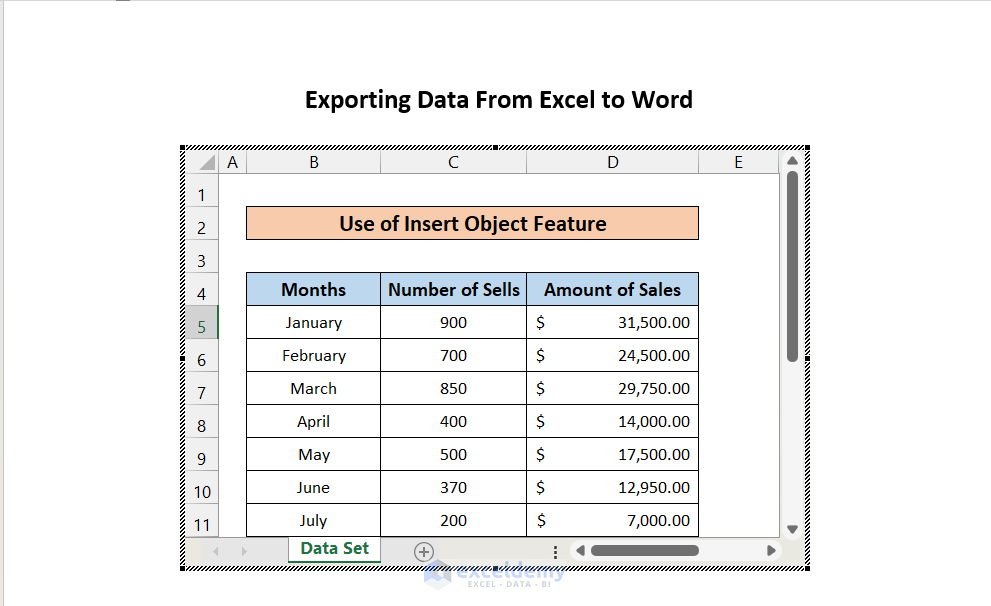
- Your inserted data from the Excel file will look like this in Word.
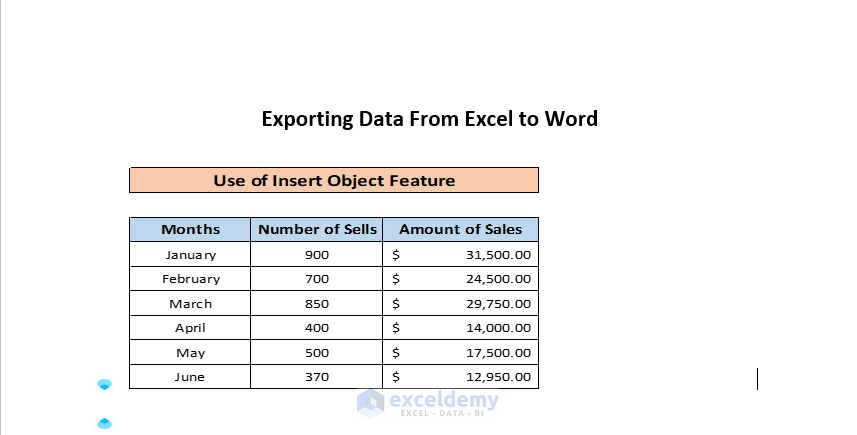
- Double-click on the object and you will be able to edit the data.
- On the Object window, there are a couple more options. If we click on Link to File, the inserted file will be linked and if we change anything from the main file, it will be reflected on the Word file as well. Moreover, if you double-click the object, the main excel fill will be opened.
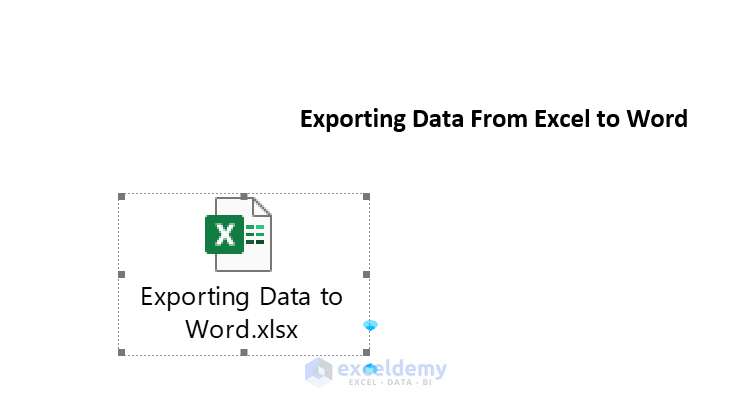
- If we click on Display as Icon, the file will be displayed as an icon but the content will not be there to display.
Method 3 – Insertion of Excel Table into Word to Export Data from Excel to Word
To create an Excel table inside MS Word, there is an elegant way to do it. This is very helpful when you are unable to open Word and Excel files simultaneously due to a shortage of computer memory. Follow the steps below.
Steps:
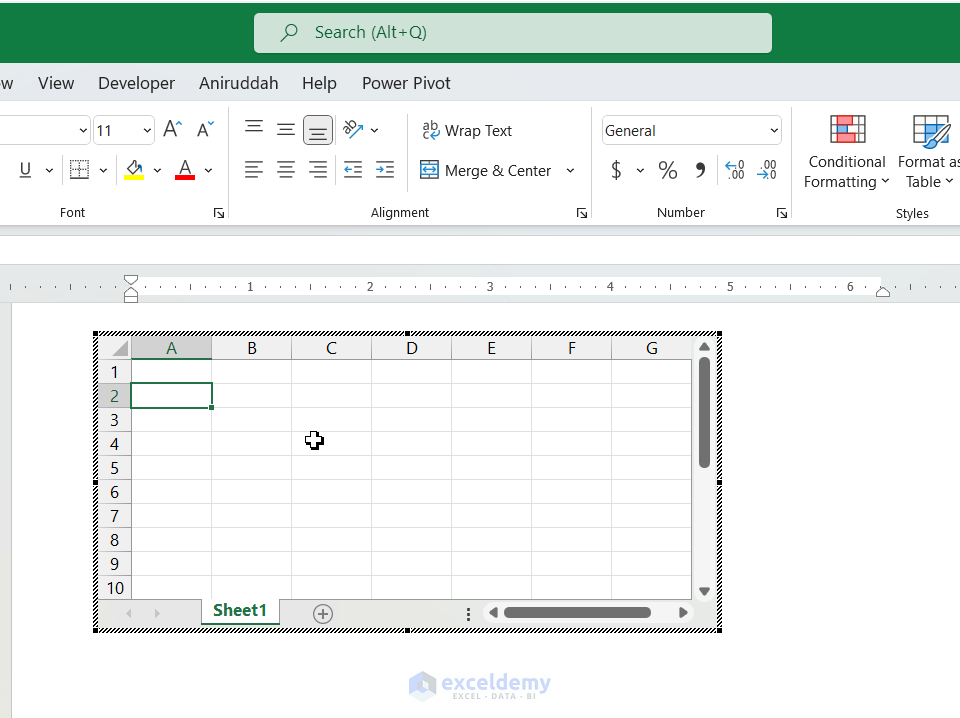
- On MS Word, go to the Insert tab, click on Table, and select Excel Spreadsheet.
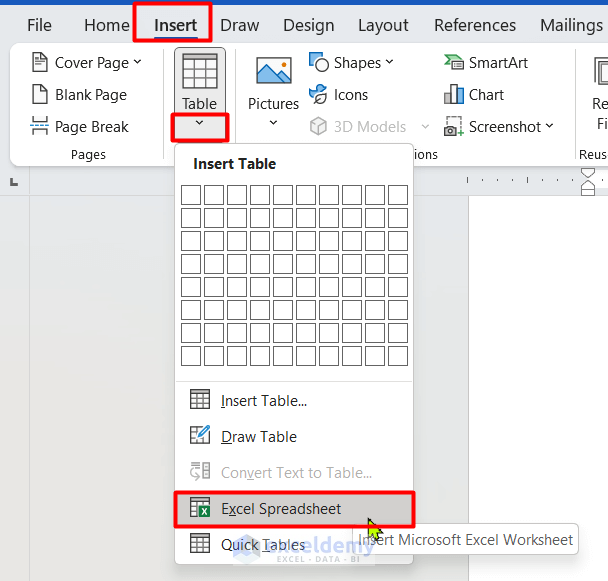
- An Excel sheet will be embedded with the Word file and you can perform any Excel task on the Word file.
Things to Remember
- The 1st Option is very quick and you should only use it when you only need to export a portion of an Excel file to Word.
- If you need to export an entire Excel file content to Word, the 2nd option is the best one.
Download Practice Workbook
Download this practice workbook to exercise while you are reading this article.
Export Excel to Word: Knowledge Hub
- Copy a Chart from Excel to Word
- Link Excel Cell to Word for Automatic Update
- Copy and Paste from Excel to Word Without Cells
- Copy Only Text from Excel to Word
- Put a Large Excel Table into Word
- Auto Populate Word Document from Excel
- Create Multiple Word Documents from Excel
- Insert Excel Table into Word with Formulas
- Paste Excel Table into Word in Landscape
<< Go Back to Export Data from Excel | Learn Excel
Get FREE Advanced Excel Exercises with Solutions!


