Dataset Overview
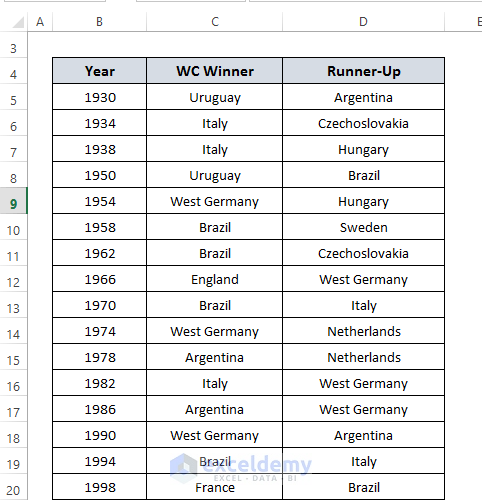
We’ll use a data set containing World Cup Winners and Runner Ups to demonstrate these methods.
Method 1 – Manually Limit Scroll Area
- Open your Excel sheet.
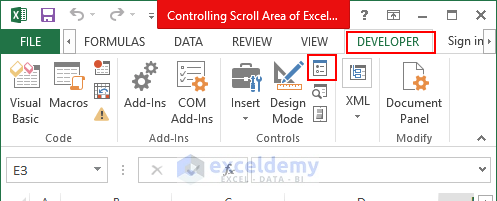
- Go to the Developer tab.
- Click on Properties.
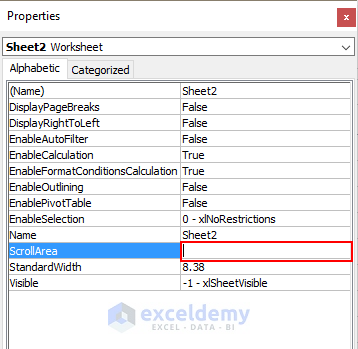
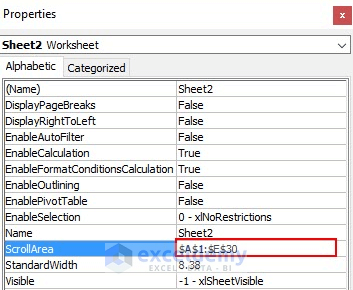
- In the ScrollArea box, specify the area you want to scroll (e.g., A1:E30).
- This will keep that area active while fixing other areas.
Note: This is a short-term solution; changes will be lost when you close and reopen the file.
Method 2 – Hide Option from Context Menu
- Select column F.
- Press CTRL+SHIFT+Right Arrow to select all columns to the right of column E.
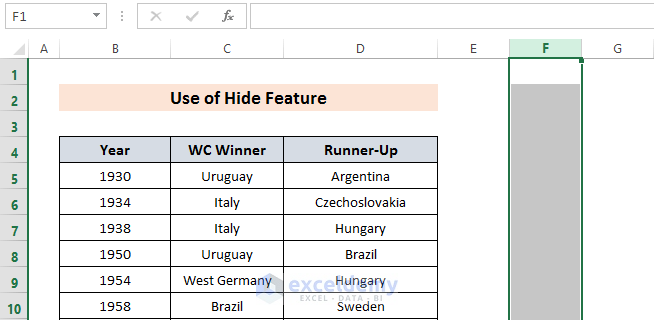
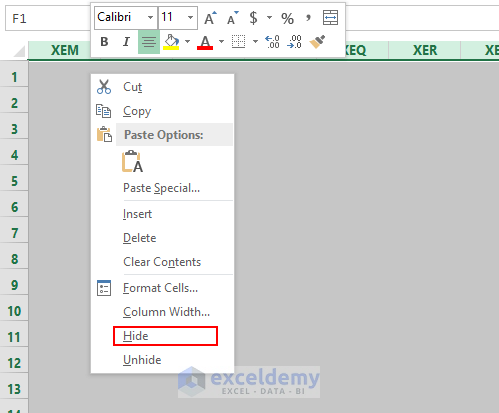
- Right-click and choose Hide. This hides all columns from F onward.
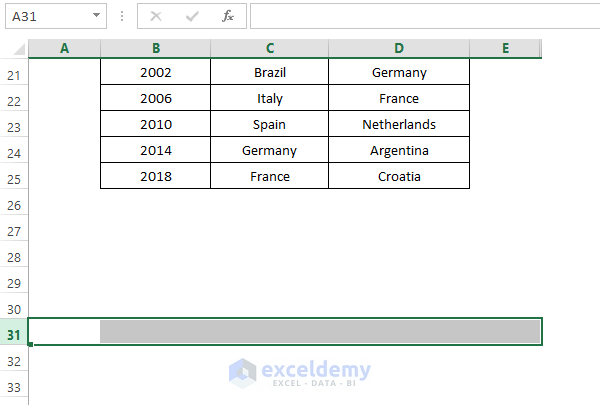
- For rows, select row 31 and press CTRL+SHIFT+Down Arrow to select all rows from 31 downward.
- Right-click and choose Hide.
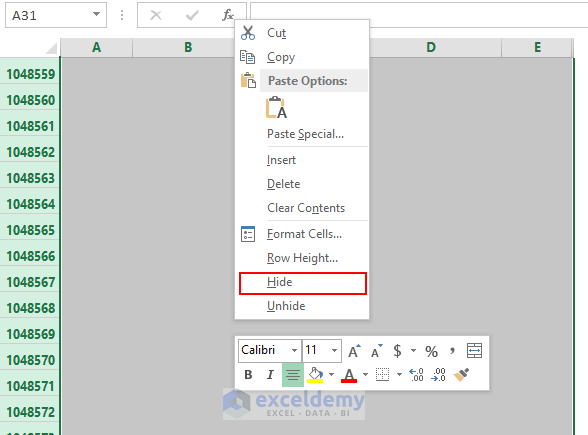
Your scroll area will now be limited to Column F and Row 30.
Method 3 – Use VBA Code
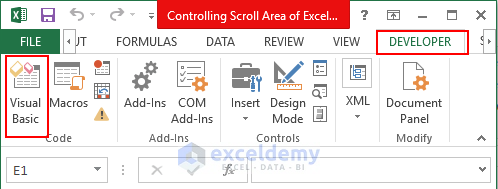
- Go to the Developer tab and select Visual Basic.
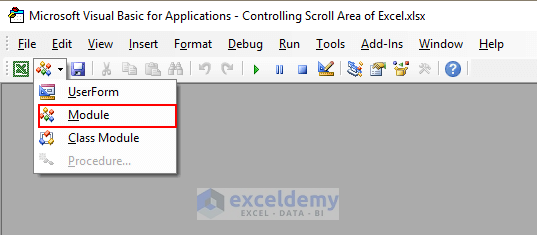
- Click on Module.
Enter the following code and close the window:
Sub controllScrollarea()
Dim sk As Worksheet
Set sk = ActiveSheet
sk.ScrollArea = "$A$1: $E$30"
End Sub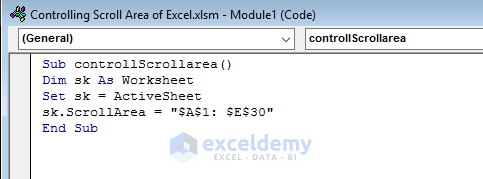
- Customize the range (A1:E30) as needed.
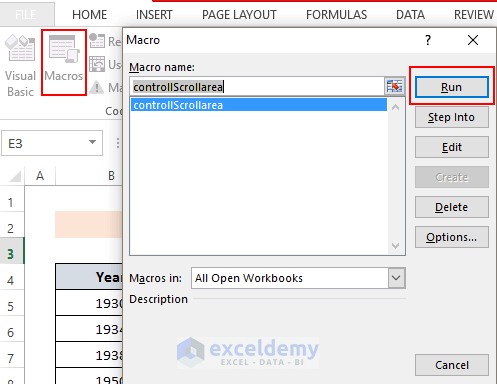
- Go to Macros, select the macro, and click Run.
- You’ll now be constrained to scroll within the specified area.
Download Practice Workbook
You can download the practice workbook from here:
Related Articles
- Smooth Scrolling with Mouse Wheel in Excel
- How to Move Up and Down in Excel
- Viewing Multiple Workbooks: Synchronous Scrolling in Excel
- [Fixed!] Excel Scrolling Too Many Rows
- How to Scroll One Row at a Time in Excel
<< Go Back to Scrolling in Excel | Navigation in Excel | Learn Excel
Get FREE Advanced Excel Exercises with Solutions!

