Method 1 – Recovering Unsaved Excel File after Crash or Restart
Steps:
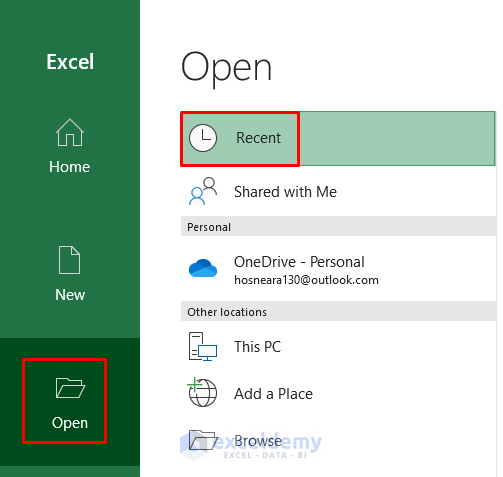
- Open Microsoft Excel and go to Open > Recent.
- Click on Recover Unsaved Workbooks under the Workbooks section.
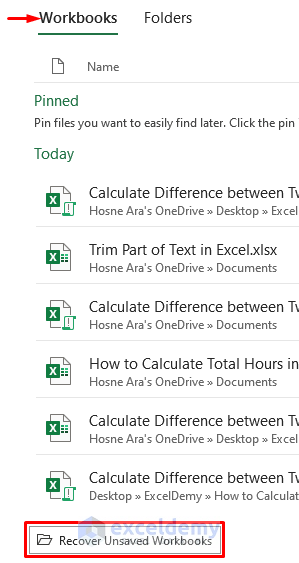
- Excel will display the list of the unsaved files (overwritten and never saved).
- Double-click on the file to be recovered.
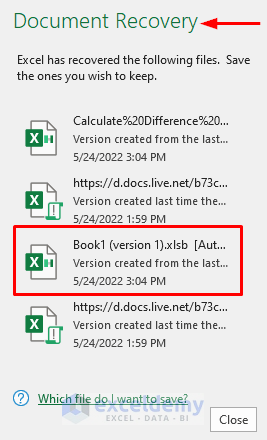
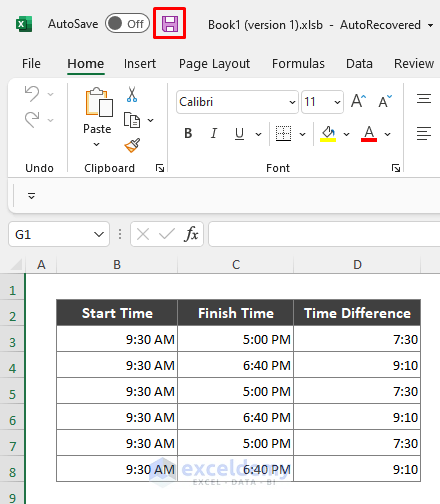
- The recovered Excel workbook is named Book1.
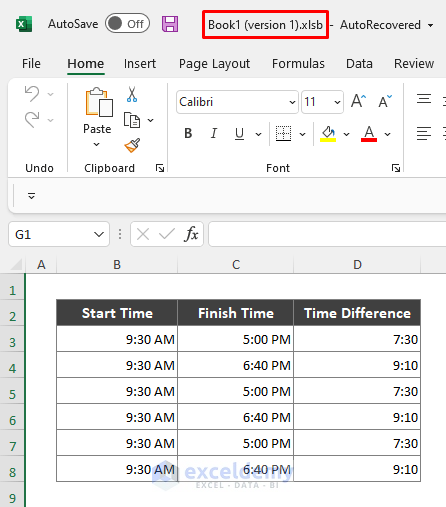
- Save the file by clicking on the Save icon in Excel.
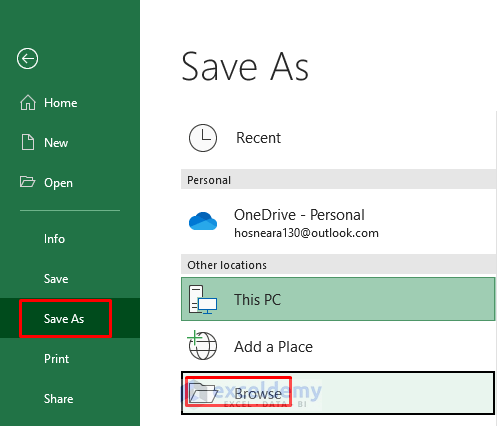
- Go to Save As > Browse.
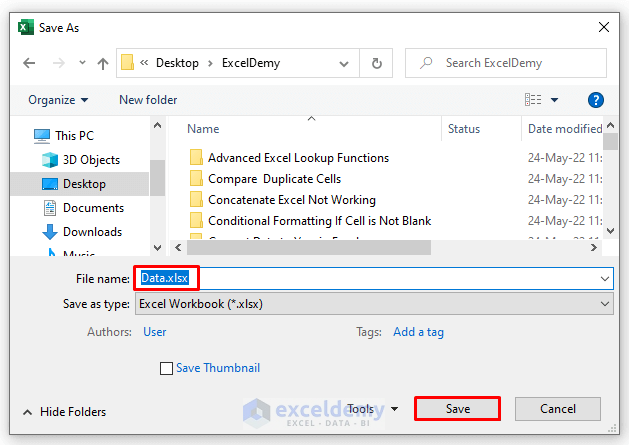
- Choose the file location, give it a file name, and click on Save.
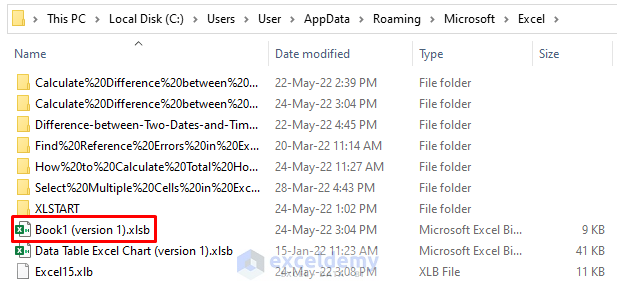
- Unsaved Excel files can be found in the below location, saved as temporary files.
C:\Users\User\AppData\Roaming\Microsoft\Excel
- In the case of never-saved Excel workbooks, when you go to Open > Recent > Recover Unsaved Workbooks, the below dialog will show up.
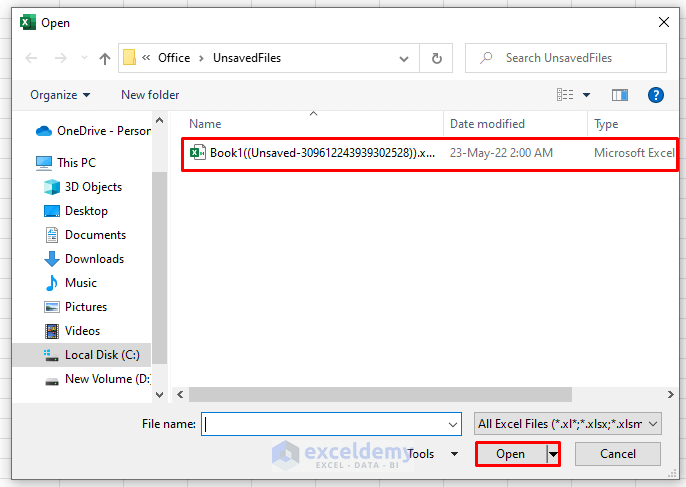
- By default, unsaved Excel files are backed up in .xlsb format. You can choose the file format when restoring the file.
Read More: How to Recover Corrupted Excel File
Method 2 – Restoring Overwritten Excel Files After Crash
Steps:
- Open the Excel file that was overwritten and go to the File tab from Ribbon.
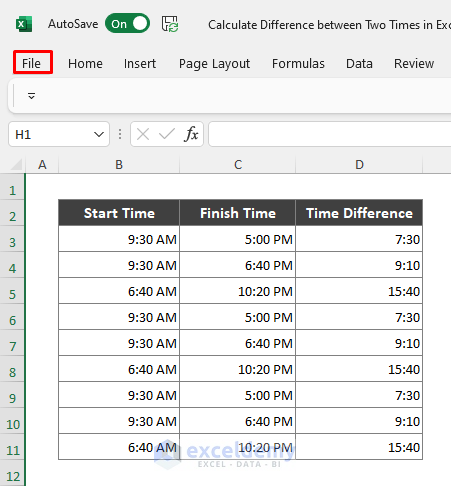
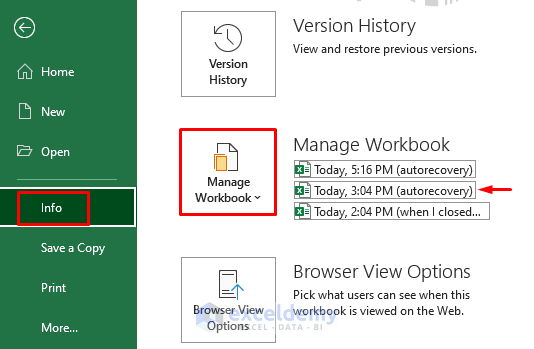
- Go to Info > Manage Workbook to see the list of the versions of the file.
- Choose the version you want to open and click on it.
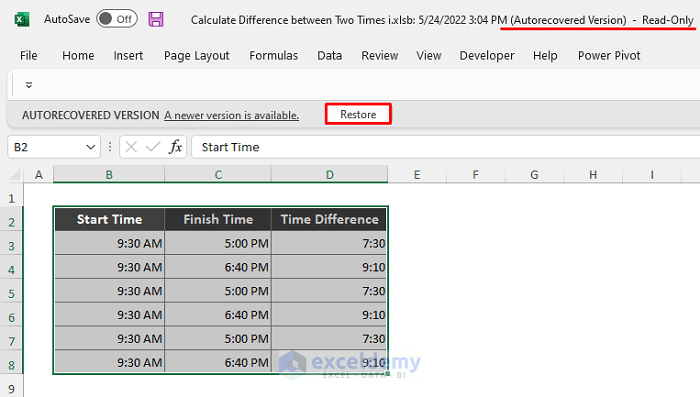
- This recovered file is read-only. Make sure you have restored the file and saved it as a separate file.
You can see the version history of an overwritten Excel file with the following steps.
- Open the specific Excel file, and go to the File tab.
- Go to Info > Version History.
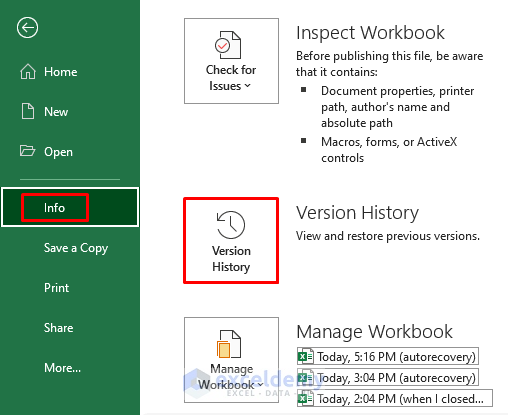
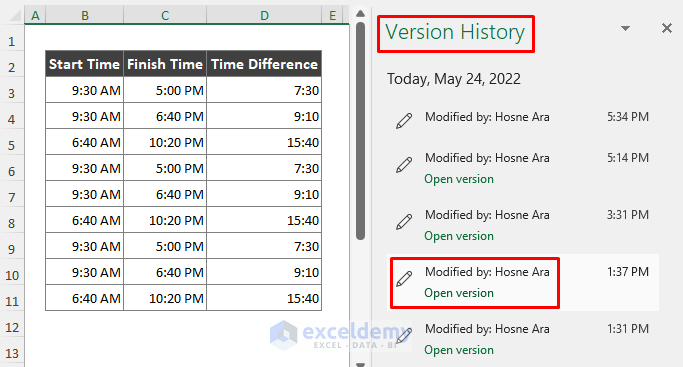
- You will see the history of the different versions of a particular Excel file.
- Open any version by double-clicking on it.
- These versions can also be restored.
Read More: How to Recover Overwritten Excel File with No Previous Version
Method 3 – Recovering Overwritten Excel File Saved on OneDrive
Steps:
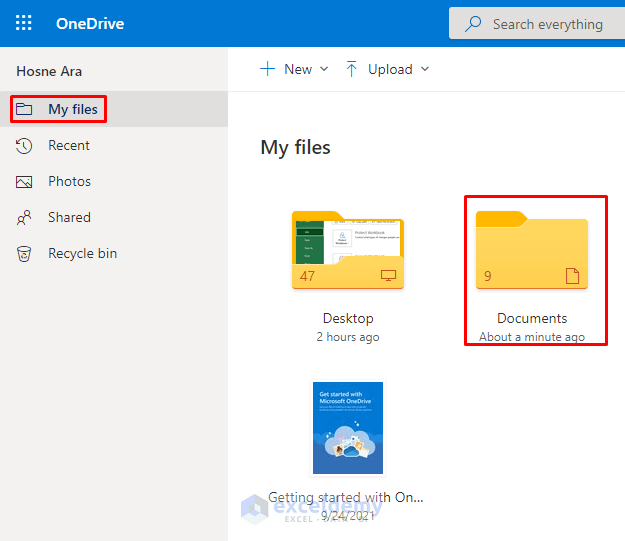
- Go to onedrive.live.com.
- Go to My Files > Documents.
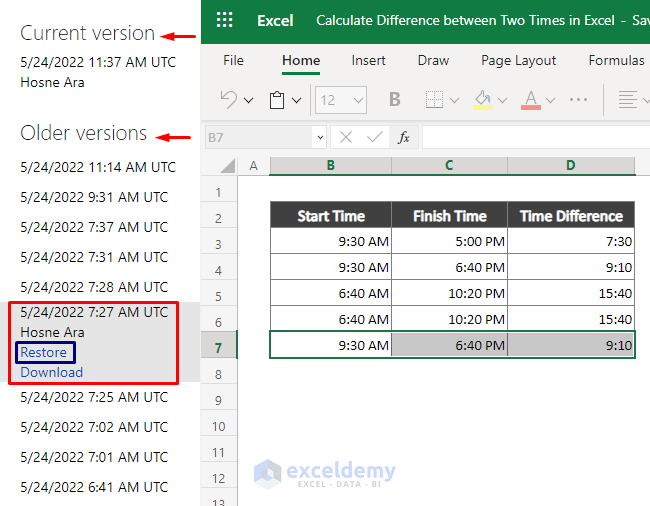
- Right-click on a specific Excel file and select Version History.
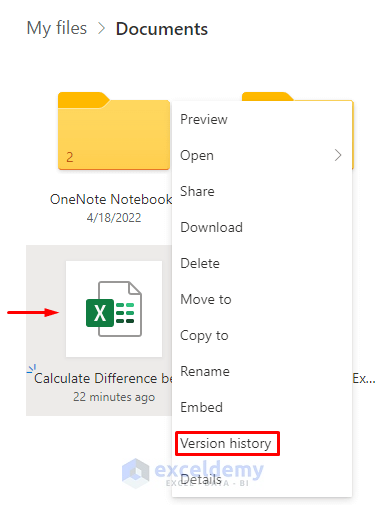
- The Excel file will open in a different tab with version histories (Current and Older). Choose the version required and restore it.
Method 4 – Restoring Previous Version of Excel File with File History
Steps:
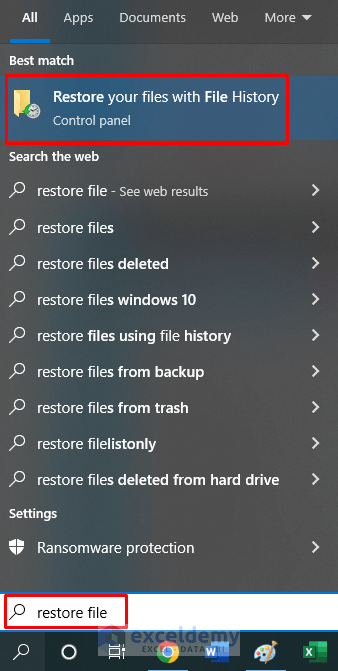
- Click on the Start menu first, and search for ‘Restore File’.
- Click on ‘Restore your files with File History.
- The File History window will appear. Locate the backed-up Excel file and use the arrow keys to see what versions are available.
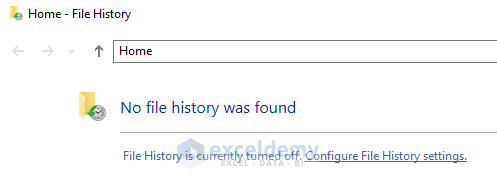
- On my PC, File History is not enabled, so there are no Excel files available.
Read More: How to Recover Previous Version of Excel File
How to Activate AutoSave and AutoRecovery Options in Excel
Steps:
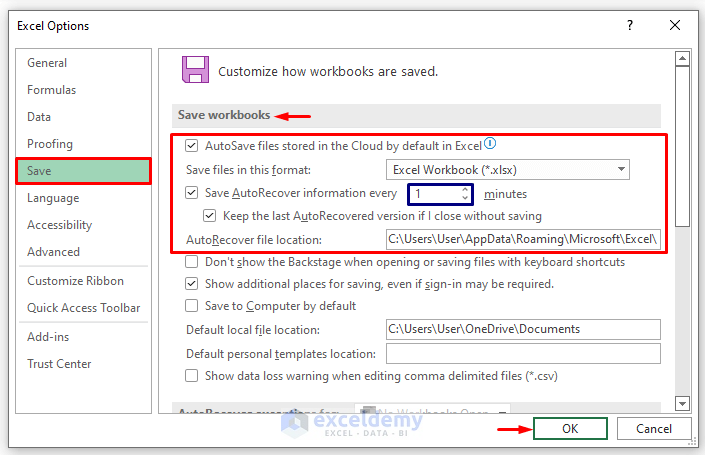
- Open the Excel application, and click on Options.

- Select the Save option.
- From the Save Workbooks section, put a checkmark on ‘Autosave files stored in the cloud by default in Excel’.
- Tick the ‘AutoRecover information every’ option and set the time. By default, excel sets this time as 10 minutes. However, you can change the time if necessary.
- Put a checkmark on ‘Keep the AutoRecovered version if I close without saving’.
Read More: How to Find Backup Files in Excel
How Does AutoSave Work in Excel 365
Steps:
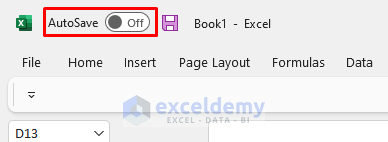
- Go to the upper left corner of the Excel window, and move the AutoSave from Off to On.
- Give the file a name and press OK.
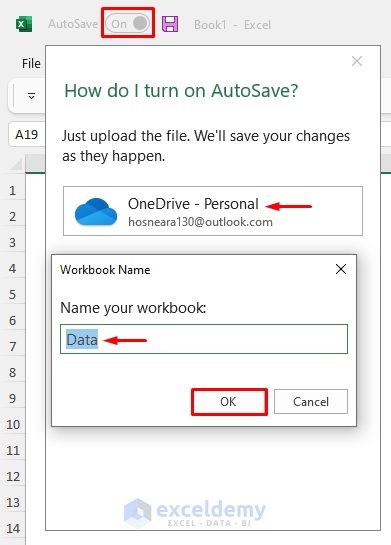
- The Excel file is now linked to OneDrive.
Download Practice Workbook
Related Articles
- How to Undo Changes in Excel after Save and Close
- [Fixed:] Unsaved Excel File Not in Recovery
- How to Recover Corrupted Excel Files from USB
- How to Recover Permanently Deleted Excel Files Online
- How to Auto Backup Excel File
- How to Backup Excel Files to a Flash Drive
<< Go Back to Recover Excel File | Excel Files | Learn Excel
Get FREE Advanced Excel Exercises with Solutions!

