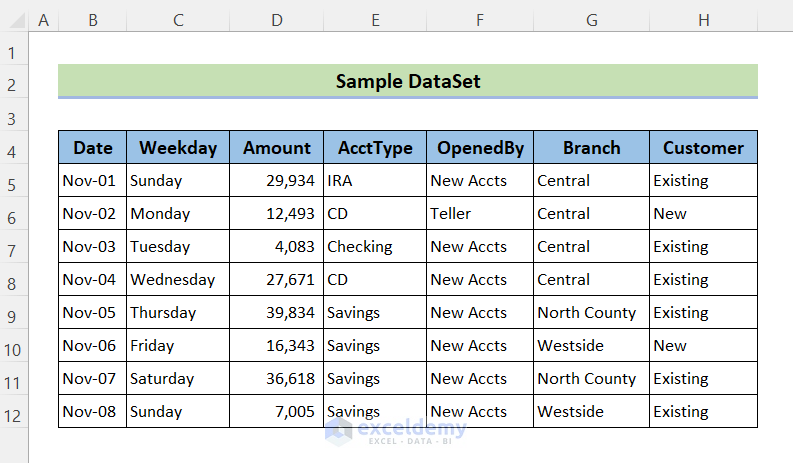
This dataset includes data on bank account openings, which includes 7 columns and 8 rows. This data will be inserted into a Word file.
Method 1 – Insert an Excel Worksheet into Word by Direct Copy and Paste
Steps:
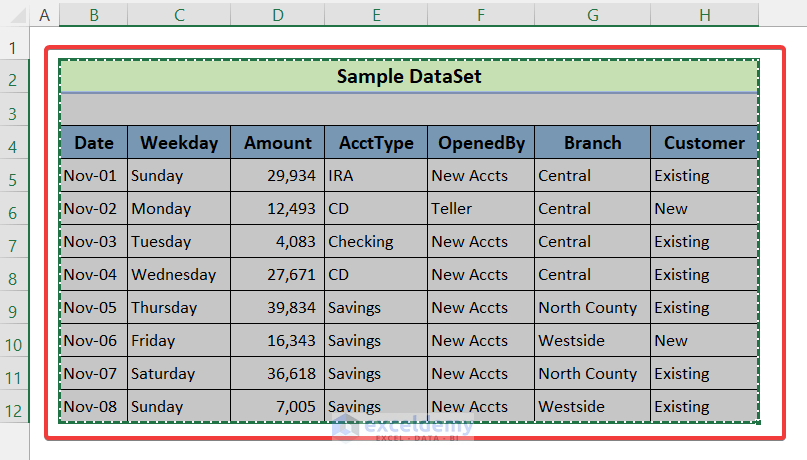
- Open the Excel file and select the data you want to insert into the document (drag the mouse while pressing the left button).
- Press Ctrl+C on the keyboard. You should see a dashed rectangle surrounding the selected cells.
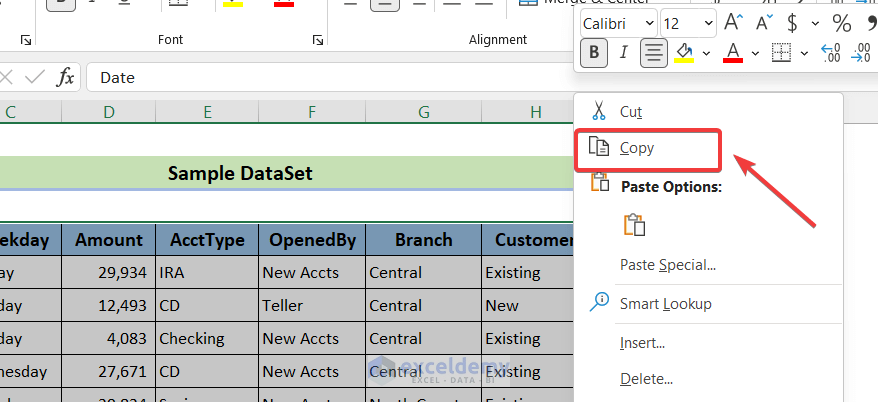
- Press the right button on the mouse after selecting the cells.
- When the window opens, select the Copy option.
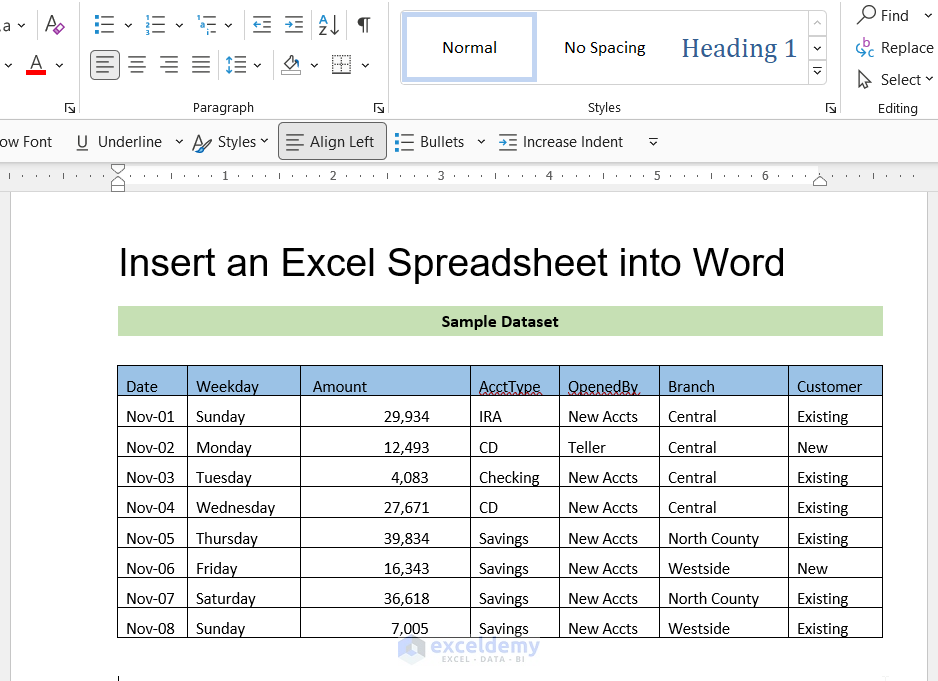
- Go to an open Word document, place the cursor into the file, and press Ctrl+V on the keyboard.
- The selected and copied cells from the Excel file will appear with the same formatting.
- Alternatively, right-click on the mouse to open the window.
- Go to Paste Options.
- Select the first one, “Keep Source formatting” to keep the formatting the same as the Excel file.
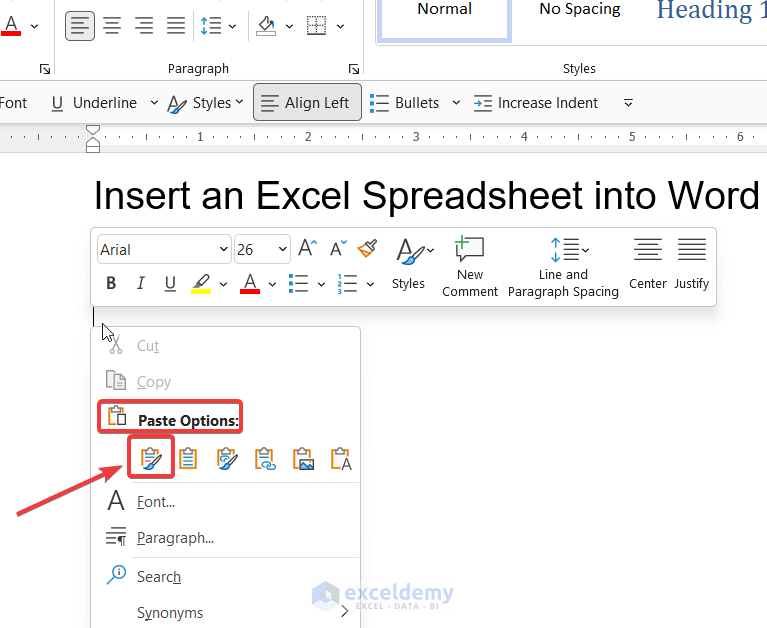
Notes: This method converts the Excel cells to a data table. In the Word document, you can’t use any formula or do any calculations if needed. This method is useful if you want to add the Excel data to be viewed only.
Read More: How to Copy from Excel to Word Without Losing Formatting
Method 2 – Insert the Table as an Embedded Object
Steps:
- Copy the selected cells in the Excel spreadsheet that you want to insert by using Ctrl+C.
- Go to the Word document and place the cursor in the location where you will insert the table.
- Head to the Top Ribbon and select the following: Home > Paste > Paste Special
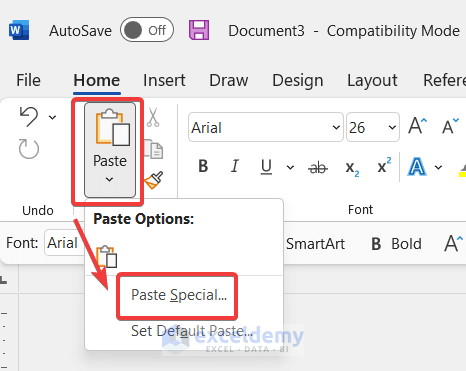
- A dialogue box named “Paste Special” will appear with the Paste option already selected.
- Select “Microsoft Excel Worksheet Object” from the dropdown menu.
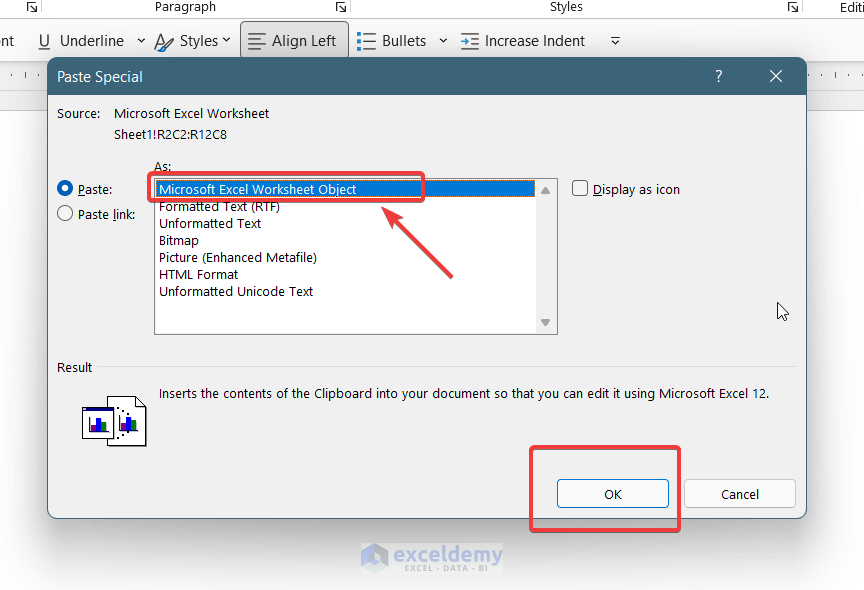
- Press the OK button.
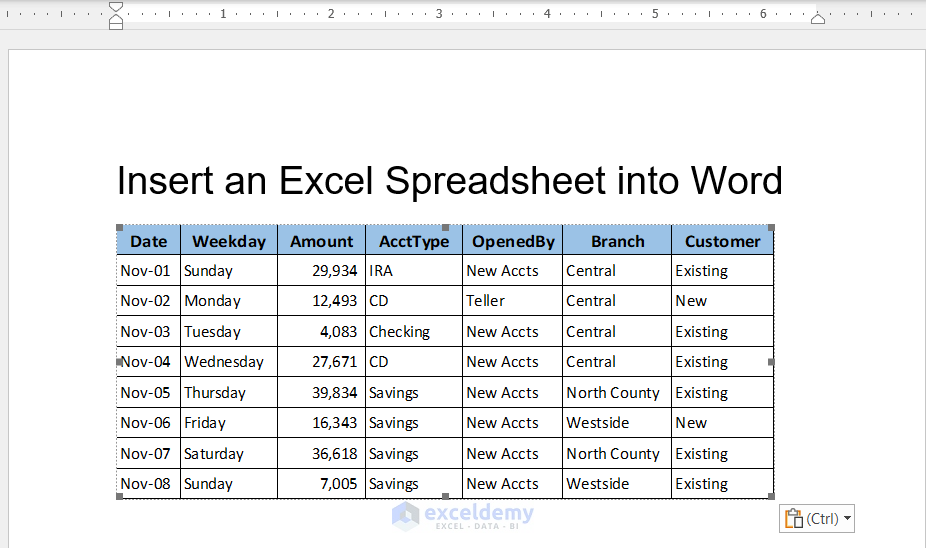
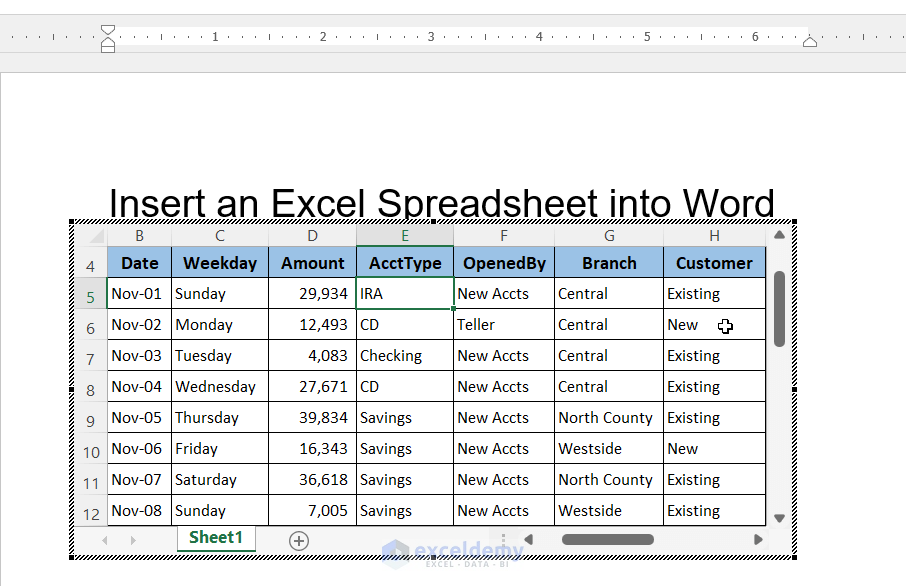
- The copied cells have appeared in a box as an object. You can change the dimensions to fit the data. To edit the data, Double-click on the object. Inside the object, an entire Excel file will open; you can edit, save, and do anything, but the “spreadsheet” is inside the Word document. The main Excel file will remain unchanged.
Read More: How to Export Data from Excel to Word
Method 3 – Insert as a Linked Object
Steps:
- Copy the selected cells in the Excel file that you want to insert by using Ctrl+C.
- Go to the Word document and place the cursor in the location where you will insert the table.
- From the Top Ribbon, go through these steps: Home > Paste > Paste Special
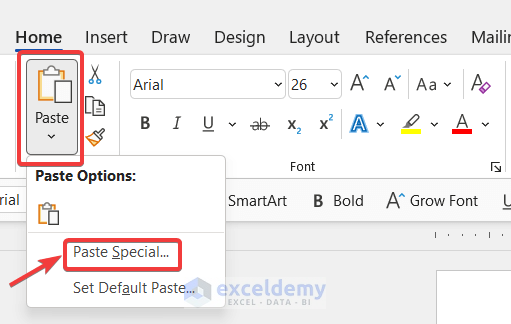
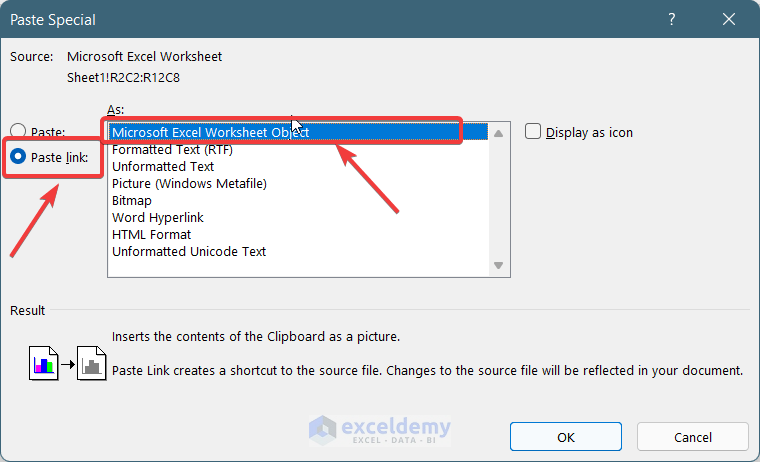
- Select the “Paste link” option and select “Microsoft Excel Worksheet Object” in the drop-down menu.
- Press OK.
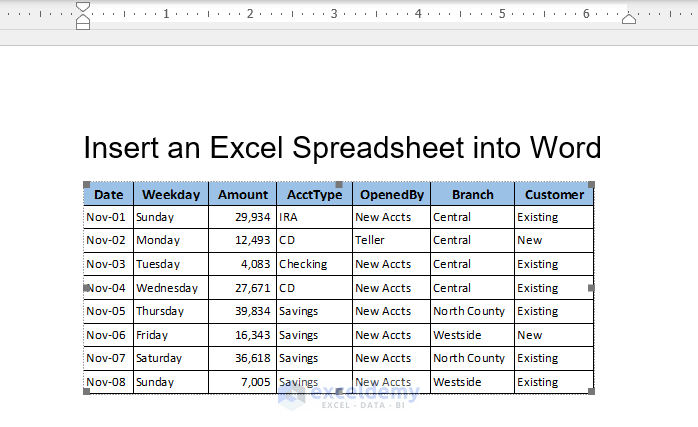
- You will see the copied cells appear as an object. Double-clicking on the object will open the Excel file from where the cells are copied. When you edit the main Excel file, it will change the Word file automatically.
Method 4 – Insert Using the Table Option
Steps:
- Open a Word document and select the location where you want to insert the table.
- From the Top Ribbon, press the Insert option and go through these steps:
Insert > Table > Excel spreadsheet
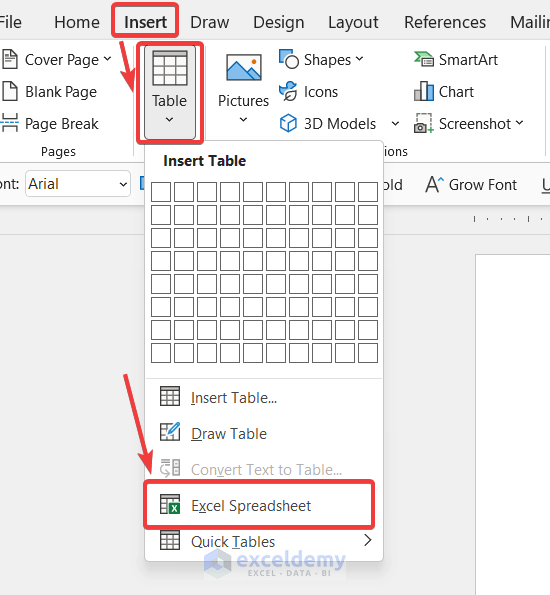
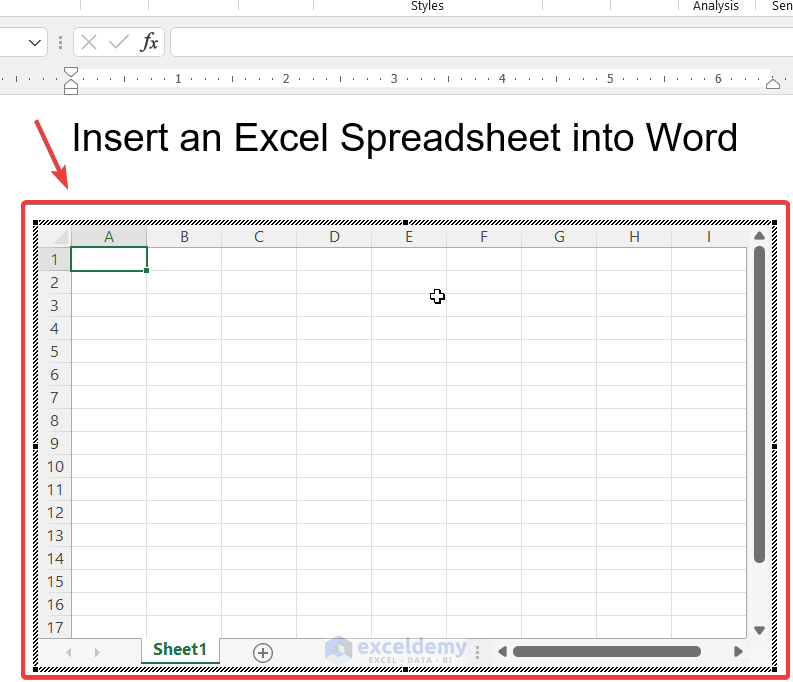
- You will see a spreadsheet box appear. Copy and Paste cells here to bring data from external Excel files.
Read More: How to Transfer Data from Excel to Word Automatically
Download Practice Workbook
Download the following practice workbook for free.
Related Articles
- How to Extract Data from Excel to Word
- How to Copy and Paste from Excel to Word Without Cells
- How to Copy a Chart from Excel to Word
- How to Copy Only Text from Excel to Word
<< Go Back to Export Excel to Word | Export Data from Excel | Learn Excel
Get FREE Advanced Excel Exercises with Solutions!

