Method 1 – Using Shortcut Keywords
1.1 Using SHIFT + CTRL + Equal (=) Shortcut
To add a column left of the “Name” column,
- Select all of column C.
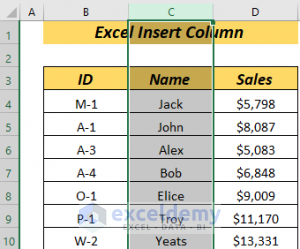
- Press CTRL + SHIFT + Equal (=). A new column will be added to the left of the header “Name”. The result will look like the image below.
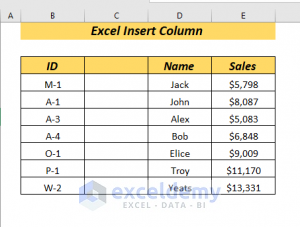
1.2 Using Shortcut ALT + I, C
To add a column to the left of the “Name” column,
- Select all of column C.
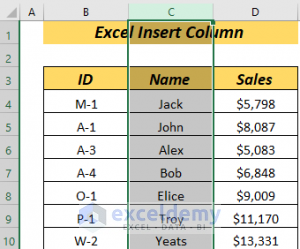
- Press ALT + I (Do not hold the keys).
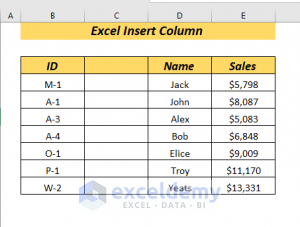
- Press C.
A new column will be added to the left of the header “Name”. The result will look like the image below.
Read More: How to Insert Columns without Affecting Formulas in Excel
Method 2 – Inserting Multiple Adjacent Columns
2.1. Using Shortcut SHIFT + CTRL + Equal (=)
- To add two adjacent columns to the left of column C, select column C, and column D at once by right-clicking and dragging the mouse.
OR
- Hold the CTRL key and then select multiple columns.
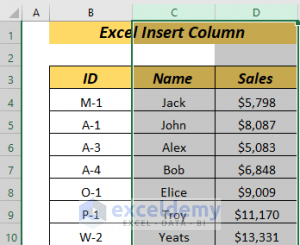
- Press CTRL + SHIFT + Equal (=)
You will add two adjacent columns next to the “Name” column.
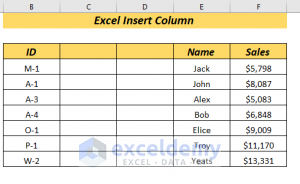
2.2. Using Shortcut ALT + I, C
To insert two adjacent columns to the left of the “Name” header, select column C and column D at once by right-clicking and dragging the mouse.
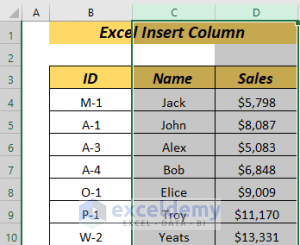
- Press ALT + I.
- Press C.
Two new columns adjacent to each other will be added to the left of the “Name” column.
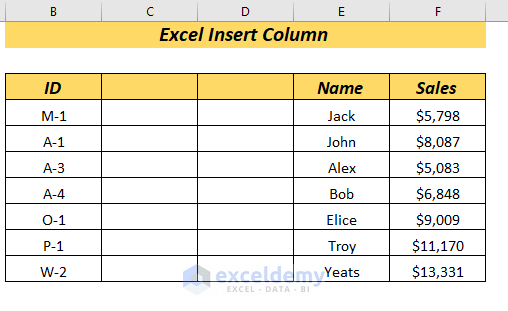
Note: You must select column C and column D at once by right-clicking and dragging the mouse.
Method 3 – Inserting Multiple Non-Adjacent Columns
3.1. Using Shortcut SHIFT + CTRL + Equal (=)
To add two columns that will not be adjacent to each other, select column C and column D.
But this time,
- Select column C.
- Hold the CTRL Key and select column D.
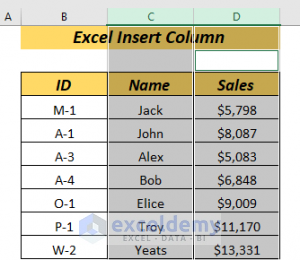
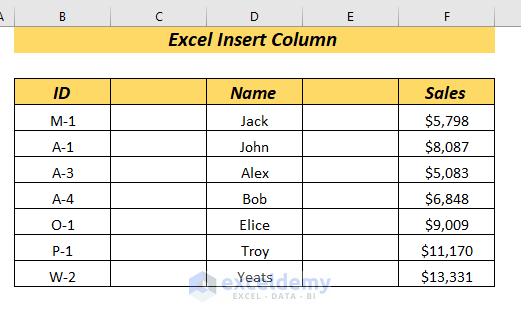
- Press CTRL + SHIFT + Equal (=). Two new columns will appear, but they will not be adjacent to each other. One will be to the left of the header “Name” and another one to the left of the “Sales” header.
3.2. Using Shortcut ALT+I, C
- Select column C.
- Hold CTRL.
- Select column D.
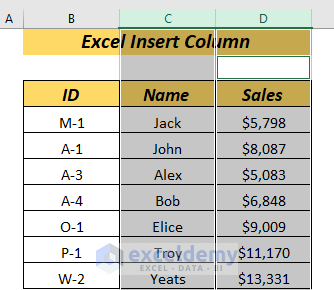
- Press ALT + I.
- Press C.
Two new columns will appear, but they will not be adjacent to each other. One will be to the left of the header “Name” and another one to the left of the “Sales” header.

Note: You must first select column C, then press CTRL Key, then select column D.
Read More: How to Insert a Column Between Every Other Column in Excel
Method 4 – Inserting a Column Using VBA
To insert a column to the left of Column C,
Steps:
- Go to the Developer tab >> select Visual Basic.
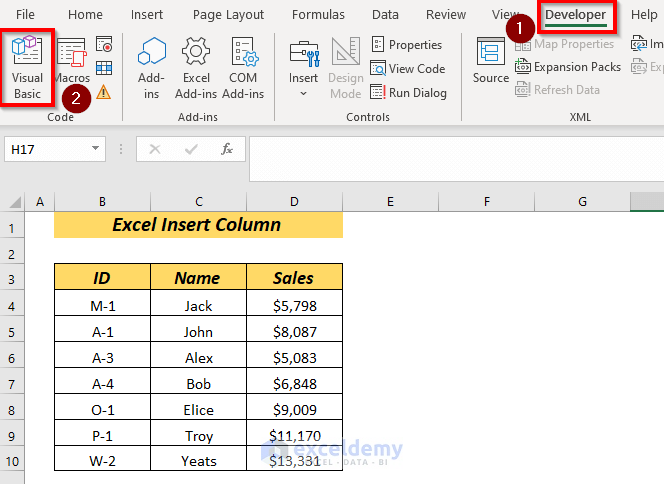
A new window will appear.
- From Insert tab >> select Module.

- Enter the following code in the Module:
Sub Shortcut_to_Insert_Column()
Range("D3").EntireColumn.Insert
End Sub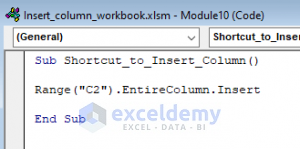
Here,
⇒ In the Sub Shortcut_to_Insert_Column, I have used the “Entire Column” property and the “Insert” method.
➤ And I have used C2 to refer to the whole Column C.
To run the program from the Run tab >> select Run Sub/UserForm.
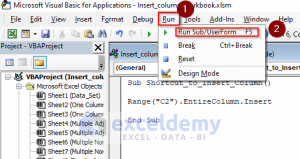
A new column will be added to the left of the Name header.

Download Practice Workbook
Download the workbook to practice.
Related Articles
<< Go Back to Insert Columns | Learn Excel
Get FREE Advanced Excel Exercises with Solutions!


Very useful.
Extraordinary! Brilliant