Using the Page Layout Tab
STEPS:
- Select the worksheet you want to print.
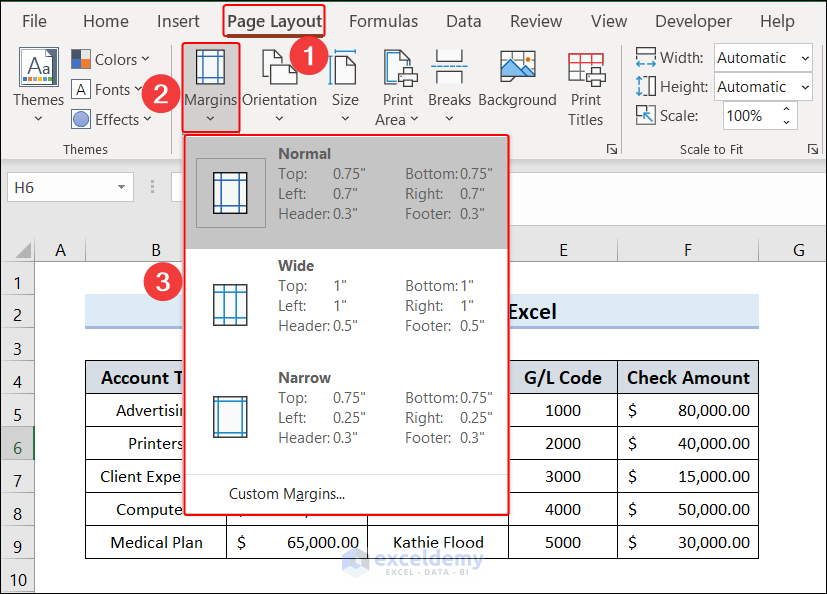
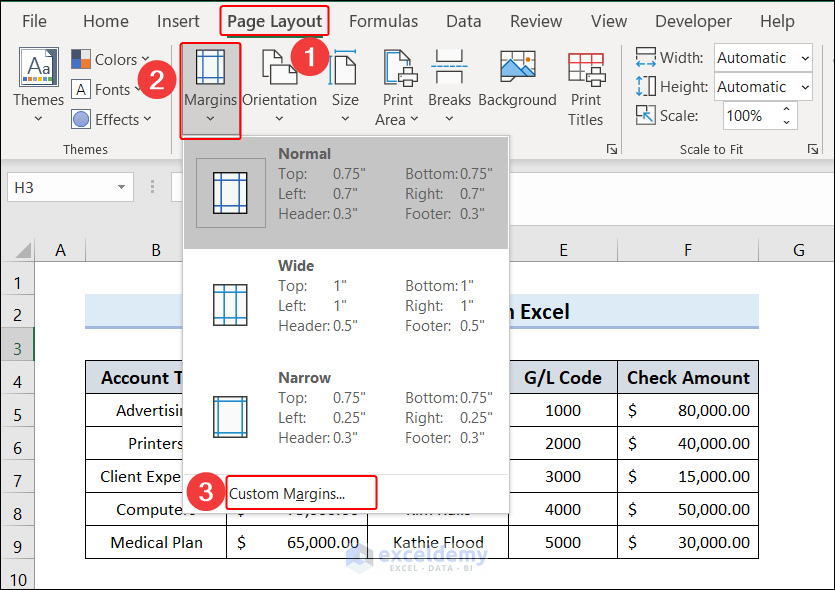
- Go to the Page Layout tab, and from Page Layout, select Margins.
- From the margin options, choose any predefined margin, such as Normal, Wide, or Narrow.
Note: You can simultaneously press the Alt + P + M keys to view the margin options quickly.
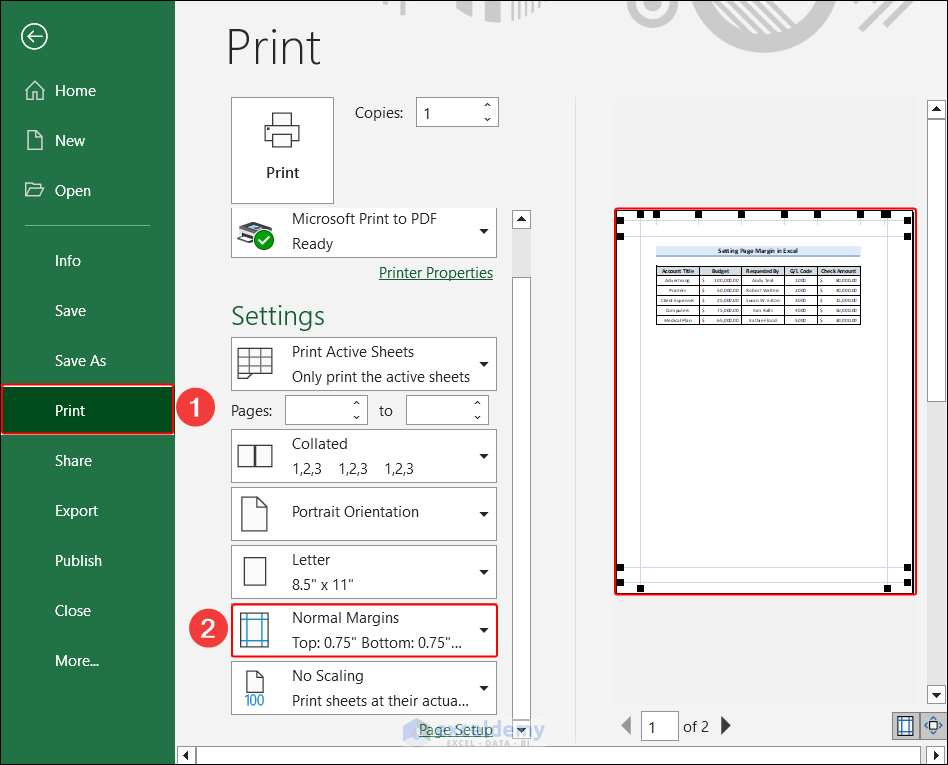
- We chose Normal. To see the applied margin, go to File >> Print.
Using Print Preview Window
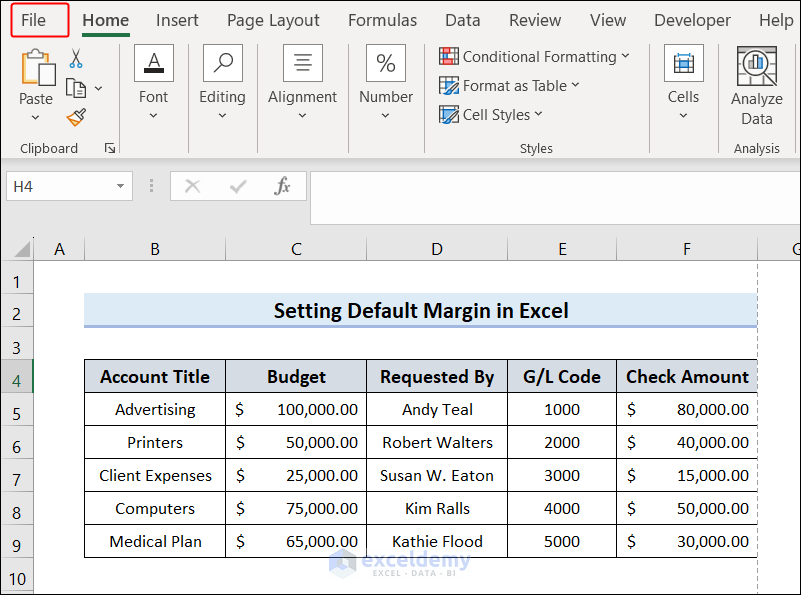
- Go to the file tab.
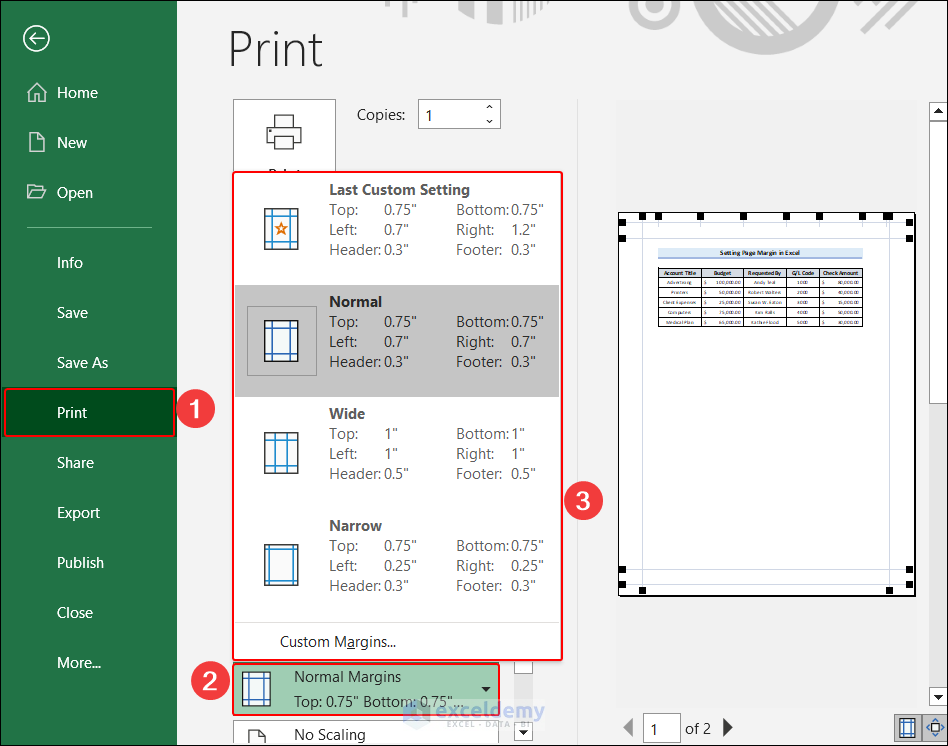
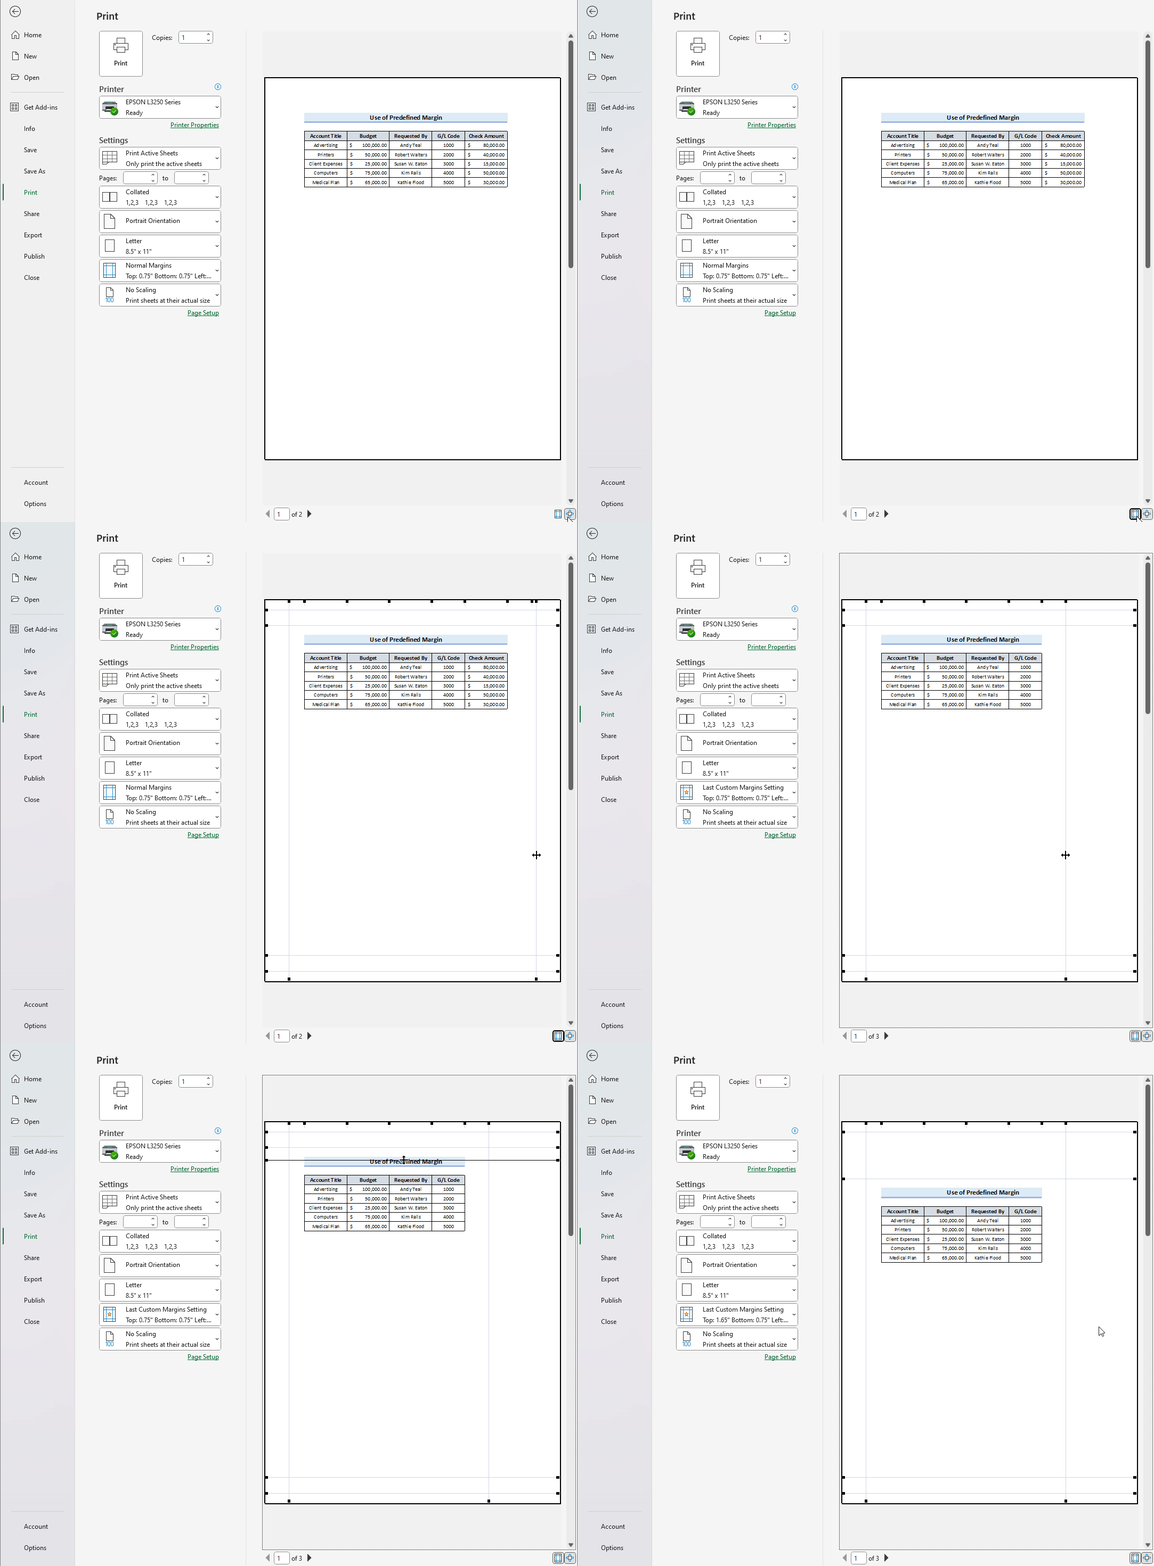
- Click the Print option from the left-side pane. From there, click the margin options dropdown and choose any predefined margins.
How to Set Custom Margins in Excel
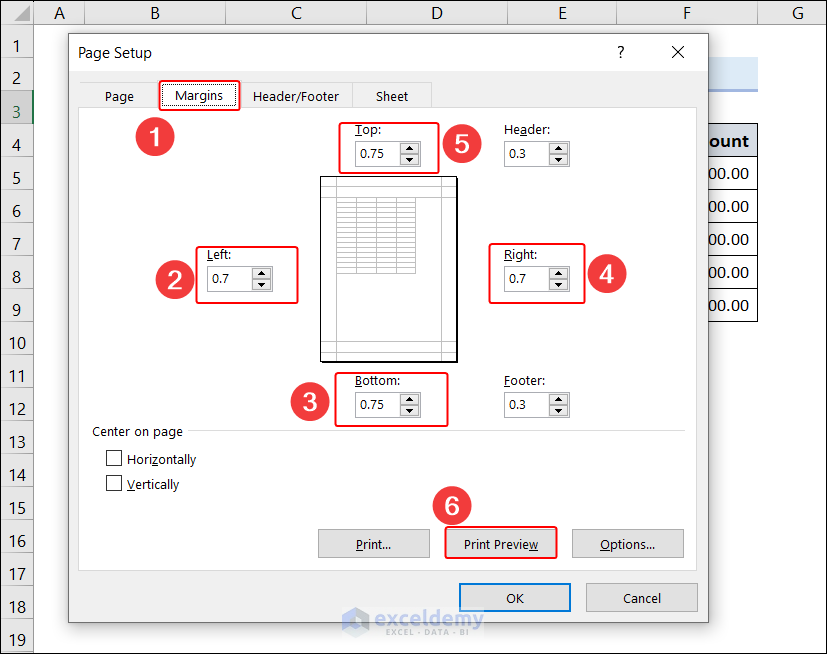
- Go to Page Layout >> Margins>> Custom Margins.
Note: You can simultaneously press the Alt + P + M + A keys to open the Margins tab of the Page Setup dialog box.
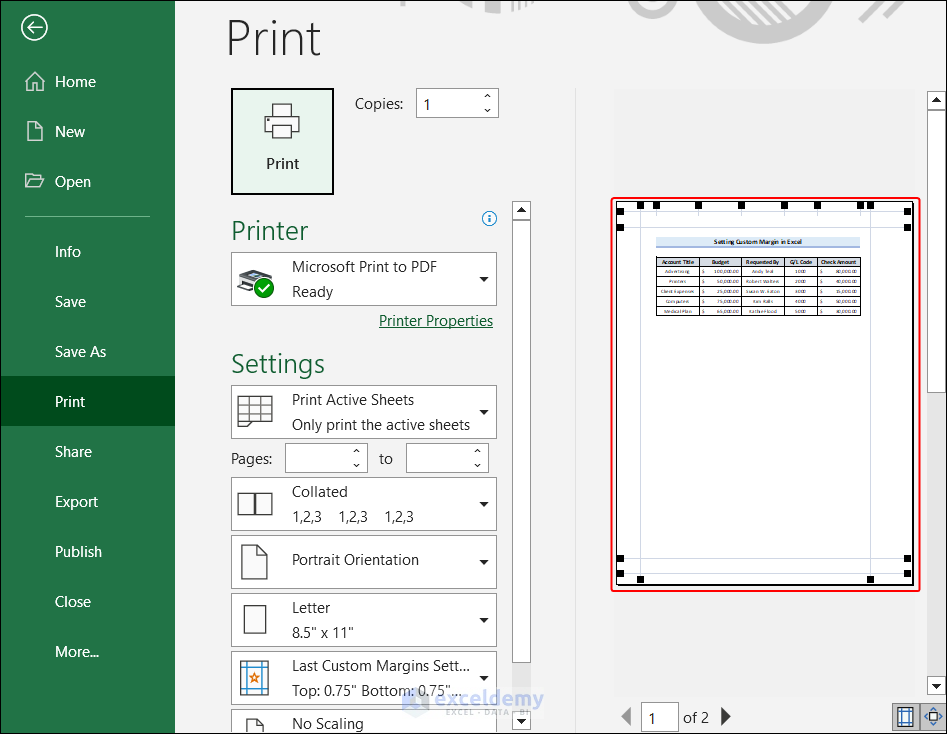
- You will get the Page Setup dialog box, where you can adjust the Top, Bottom, Left, and Right heights and widths according to your preference. Clicking on the Print Preview button will preview the margin.
- After clicking the Print Preview button, you will see the view of the custom margin.
Read More: How to Add Margin in Excel
How to Change/Adjust Margin with Mouse in Excel
- Go to the Print Preview like the previous method. Then click on the Show Margins button at the bottom right of the window.

- After clicking the Show Margins button, we can see the margins in the preview.
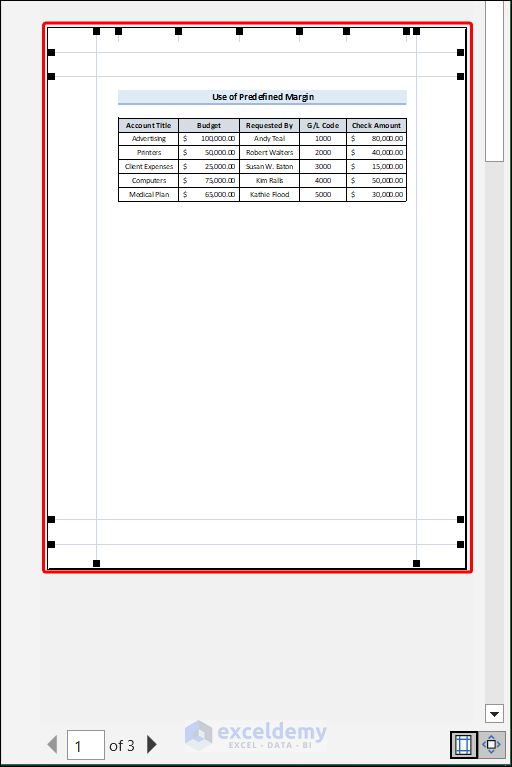
- Drag these margins with your mouse to adjust them.
Read More: How to Change Margins in Excel
Download the Practice Workbook
How to Adjust Margin in Excel: Knowledge Hub
<< Go Back to Page Setup | Print in Excel | Learn Excel
Get FREE Advanced Excel Exercises with Solutions!

