Here’s an overview of the View tab and the most common View options you’ll need in Excel.
Download the Practice Workbook
Download this practice workbook while reading this article.
Normal View in Excel
The Normal View is the default view of the Excel worksheet. If you want to switch from a different view to a Normal view, go to the View tab and select Normal.

Sheet View in Excel
Part 1 – How to Enable Sheet View
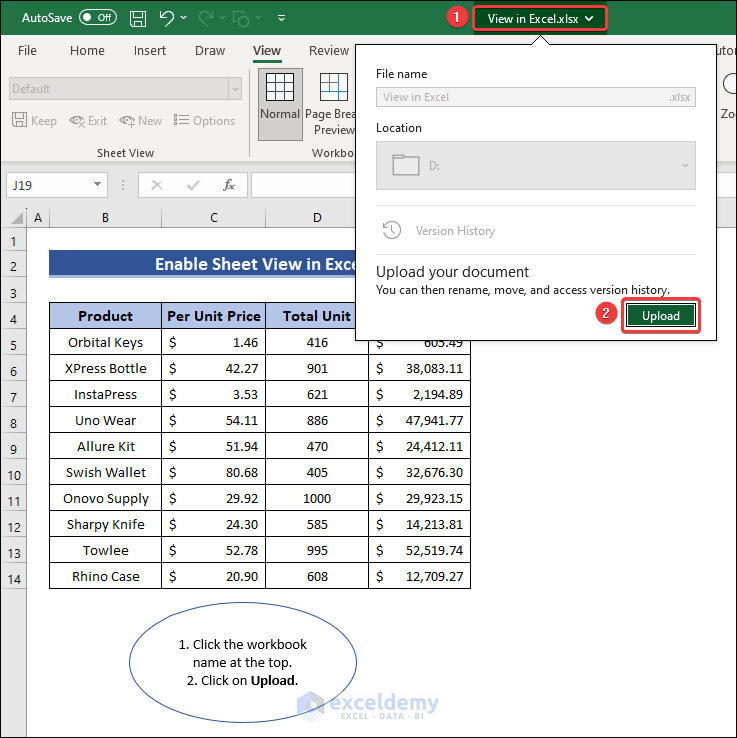
- Click on the workbook name at the top and then click on Upload.
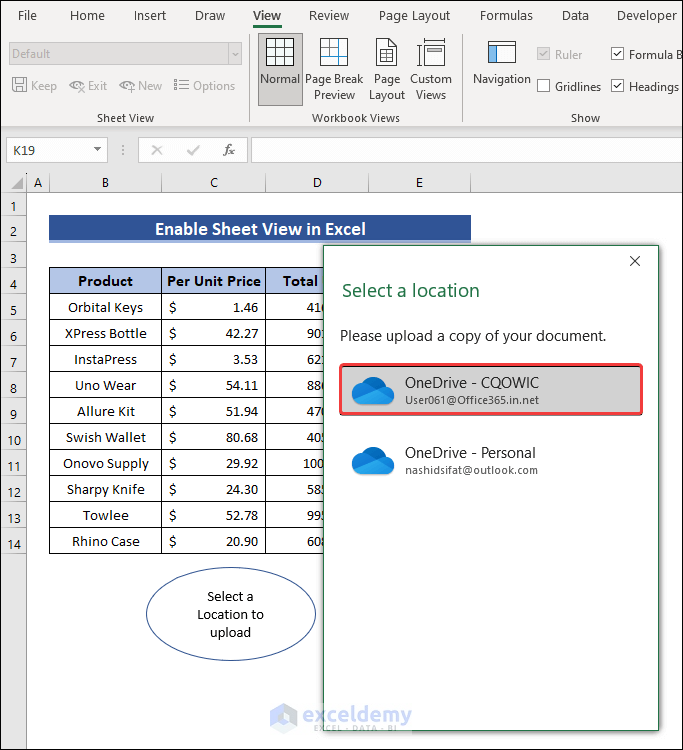
- Select a location to upload the workbook.
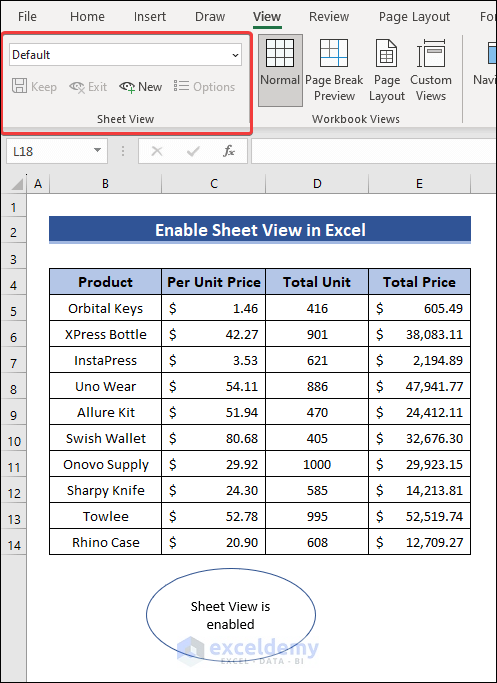
- The Sheet View will be enabled.
Part 2 – How to Create a Sheet View
- Go to View, then select New in Sheet View.
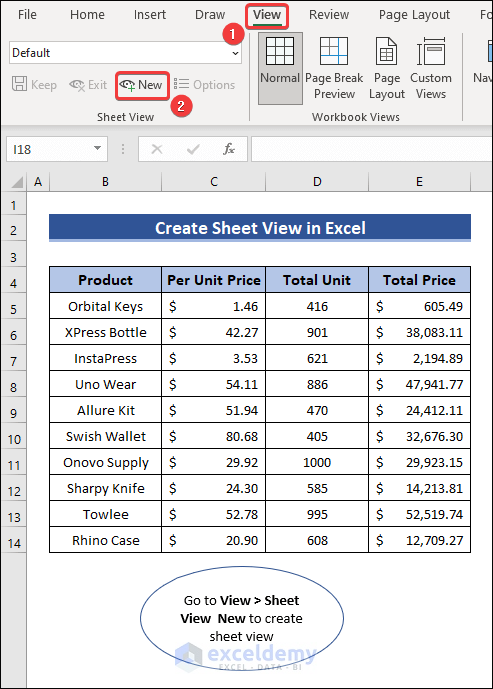
- A temporary Sheet View will be created.
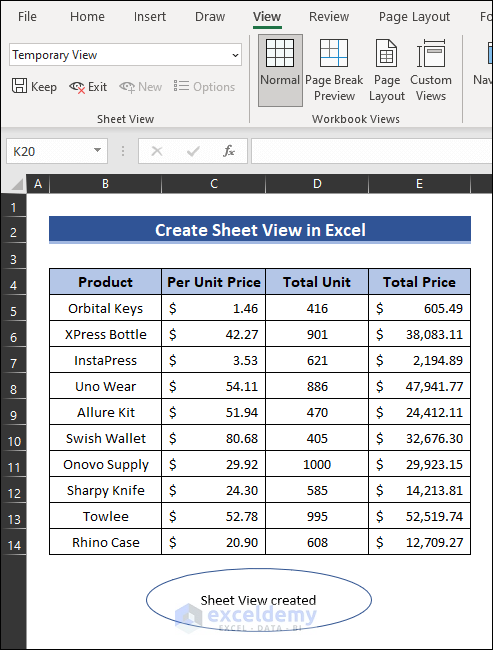
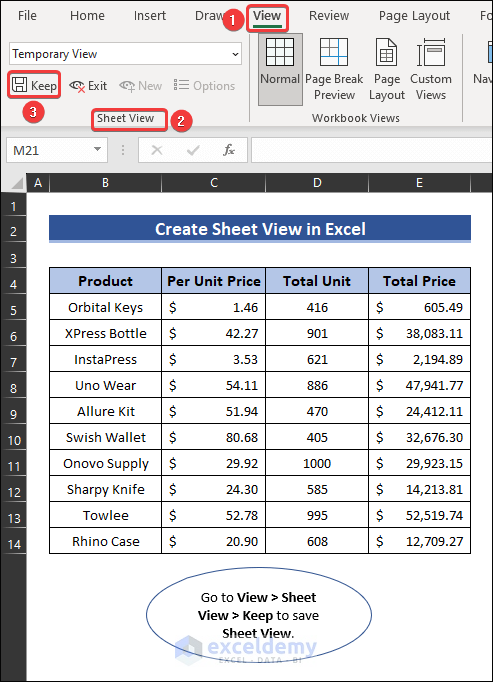
Part 3 – How to Save Sheet View
- Go to View and select Keep in Sheet View.
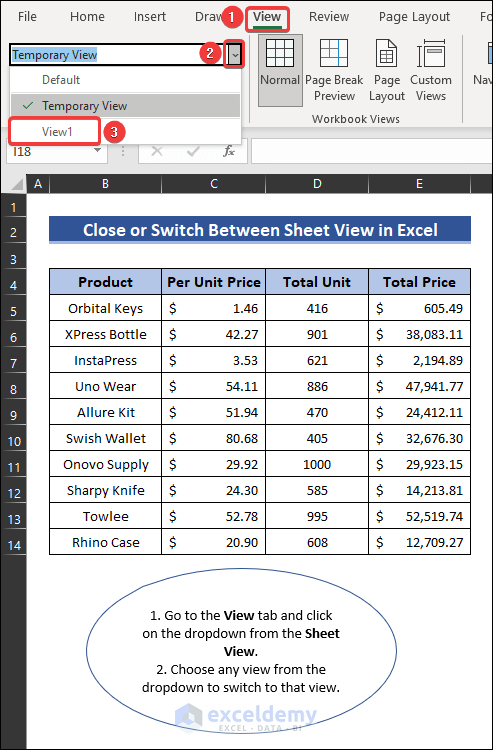
Part 4 – How to Close or Switch Between Sheet View
- Go to the View tab and choose Exit from the Sheet View group.
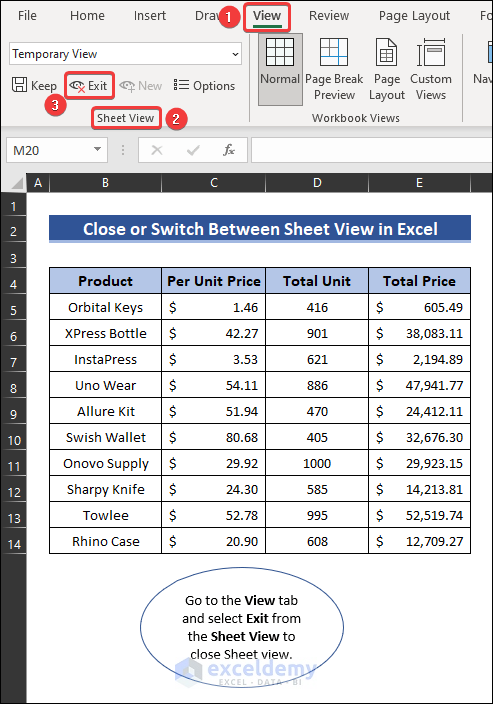
- For switching to a new sheet view, click on the dropdown beside the sheet view name and select the view you want to switch to.
Part 5 – How to Rename/Duplicate/Delete Sheet View
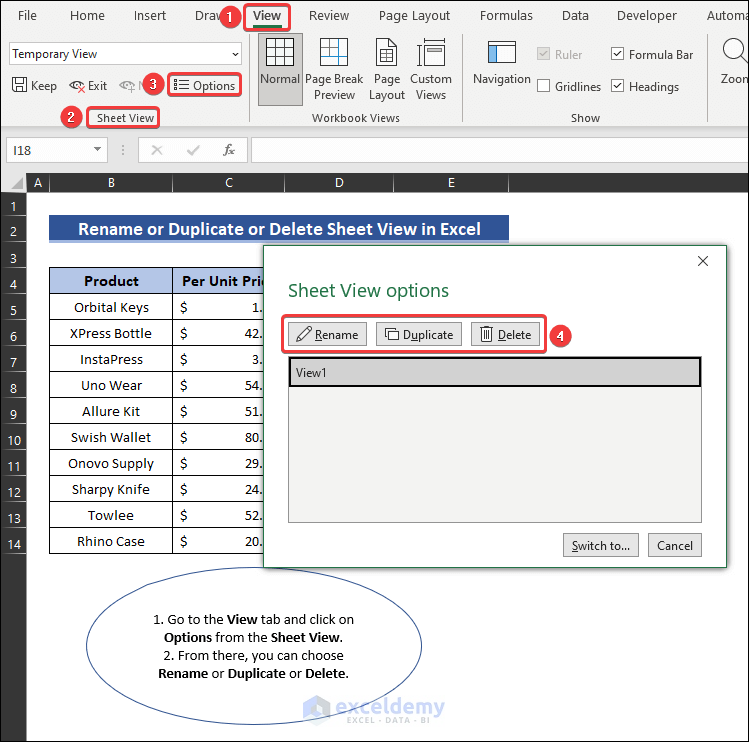
- Go to the Sheet View group and click on Options.
- You will find three options to Rename, Duplicate, and Delete your sheet view.
Page Break View in Excel
Page Break View can be created from the View tab.
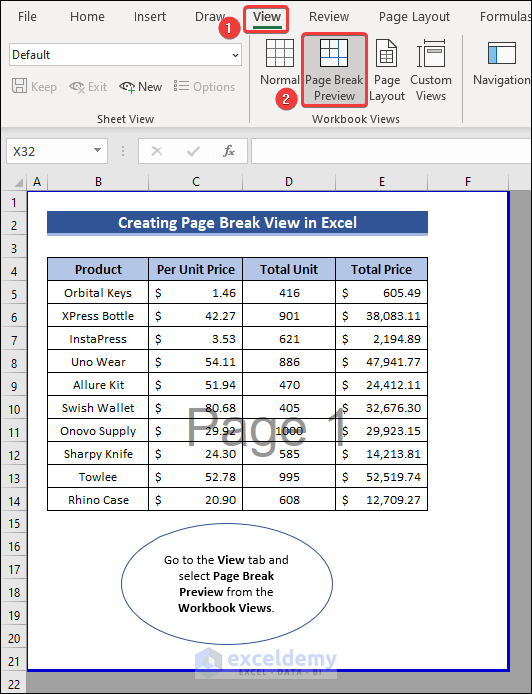
- Go to the View tab and click on Page Break Preview from the Workbook Views group.

Page Layout View in Excel
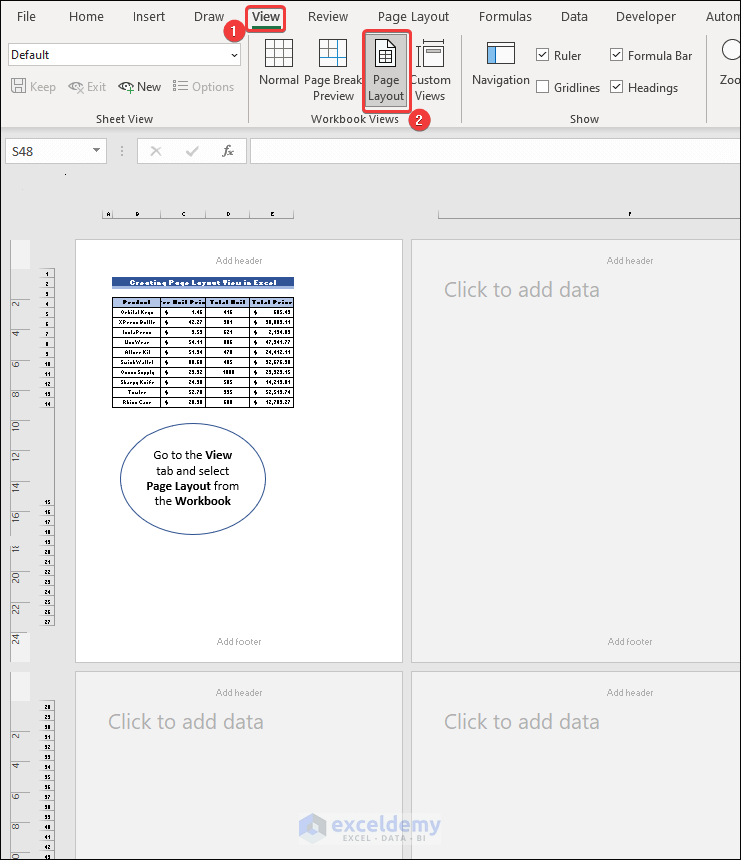
- Click on the View tab and select Page Layout to create a Page Layout View in your workbook.
Custom View in Excel
Part 1 – How to Create a Custom View
- From the View tab, select Custom Views.
- Click on Add in the Custom Views dialog box.
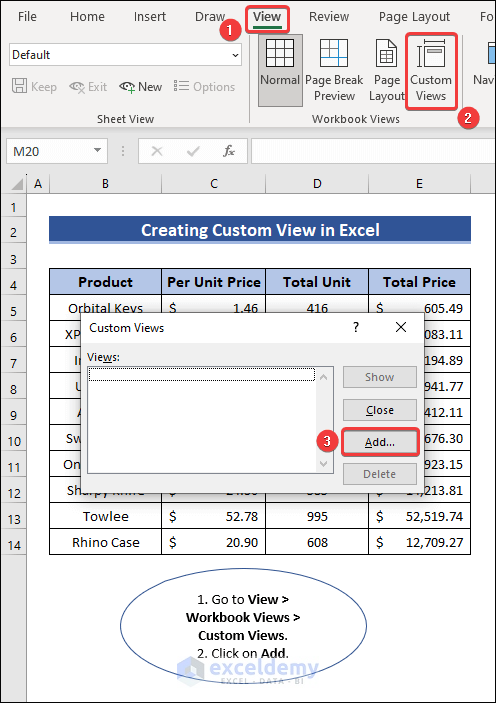
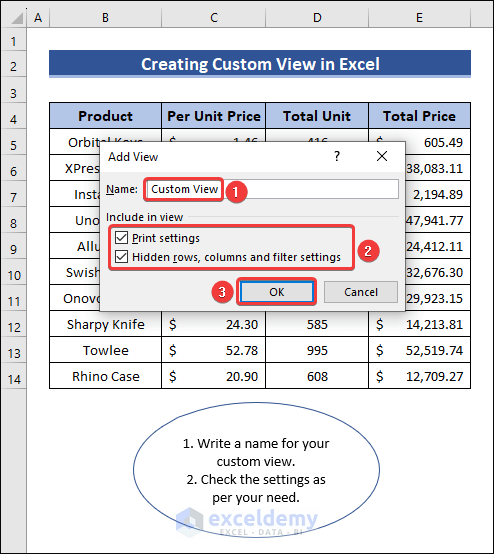
- Write a name for your custom view and check the boxes of the settings as needed.
Part 2 – How to Apply a Custom View
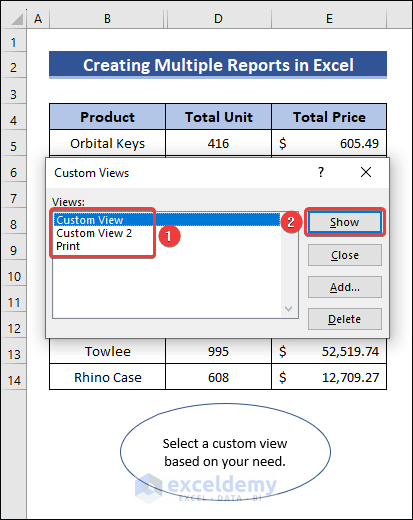
- Go to the View tab and click on Custom Views.
- Select a view and click on Show to apply the custom view.

Part 3 – How to Print Only Required Cells
- Select the cells you want to print.
- Go to Page Layout, select Print Area, and choose Set Print Area
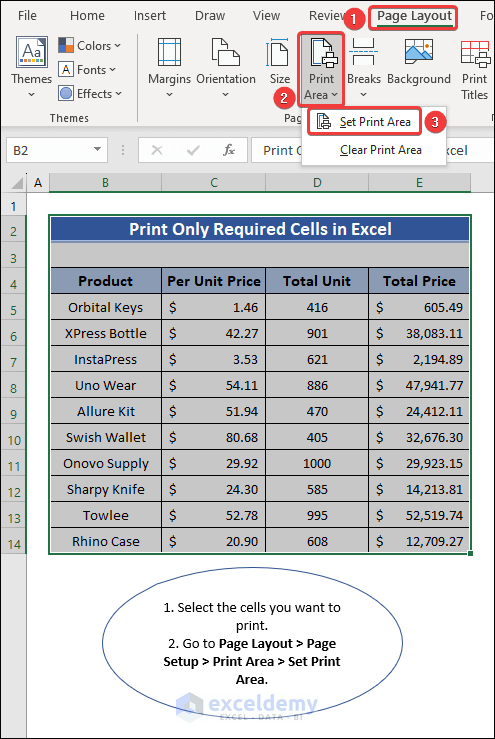
- You can create a custom view of this print area as before.
Part 4 – How to Create Multiple Reports from One Worksheet
- You can use Ctrl + 0 to hide columns and Ctrl + 9 to hide rows in your worksheet.
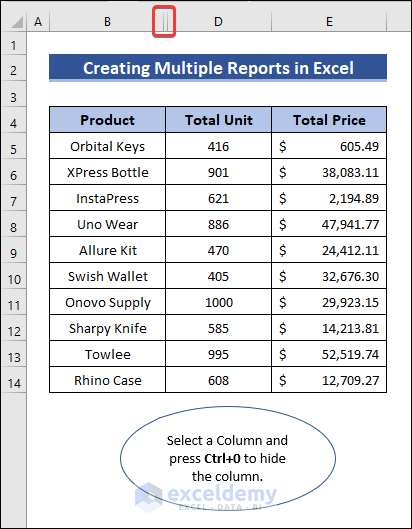
- After hiding necessary rows and columns, create a custom view as shown before.
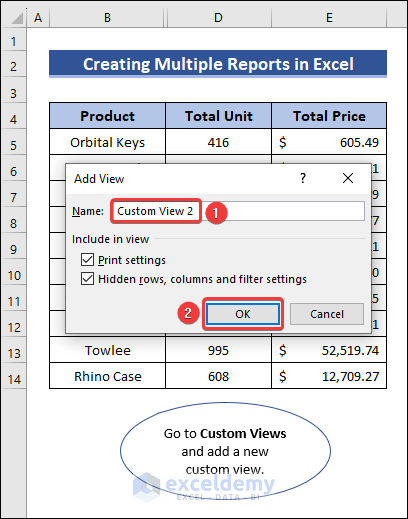
- You can show different custom views to different users.
Part 5 – How to Add a Custom View Drop-down to the Ribbon
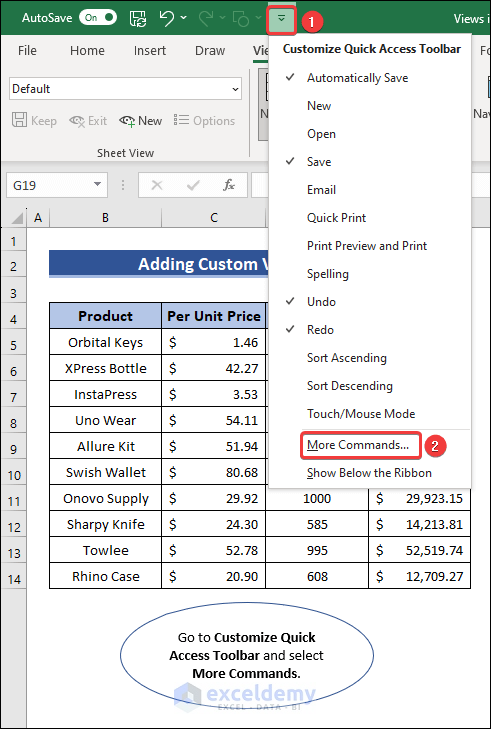
- Go to the Custom Quick Access Toolbar and select More Commands.
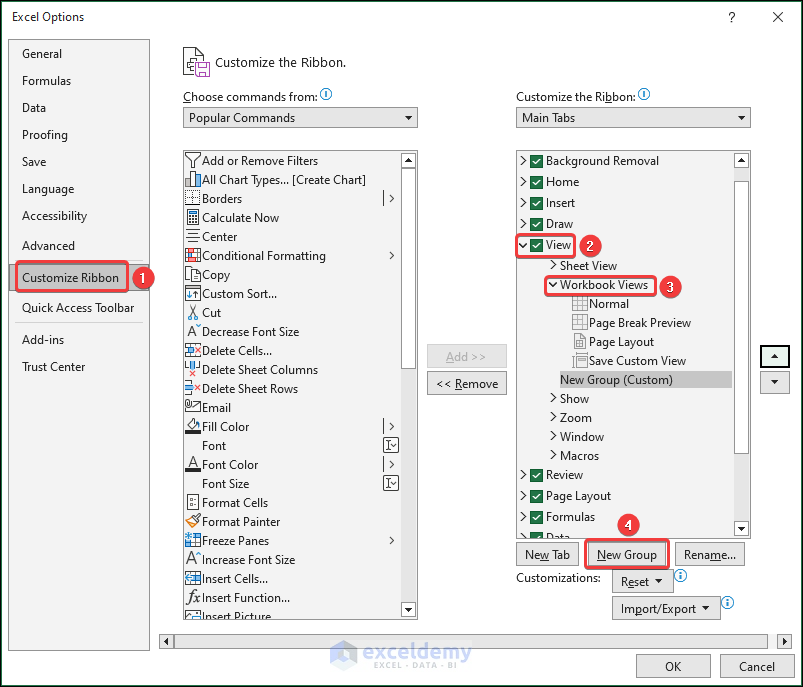
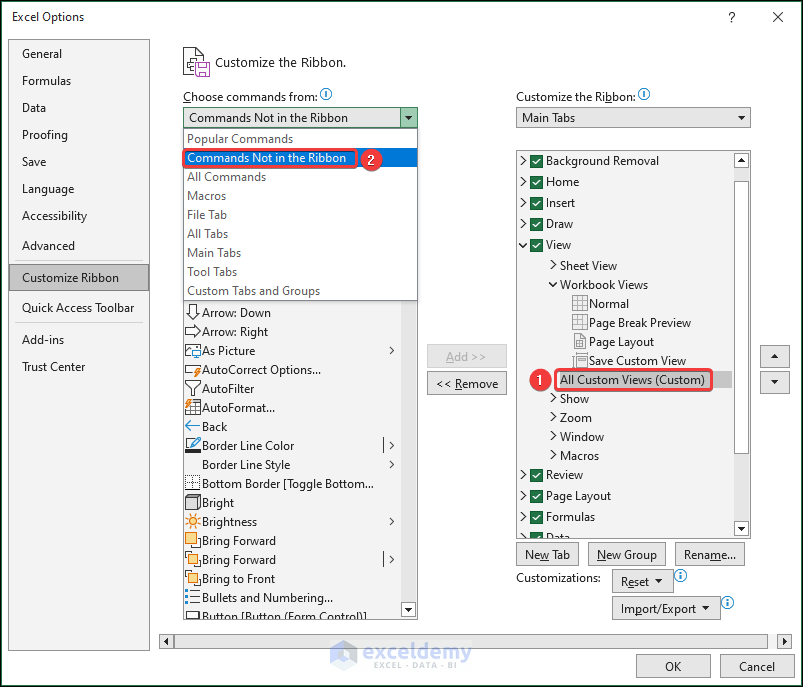
- Click on Customize Ribbon and expand View and Workbook Views.
- Select New Group.
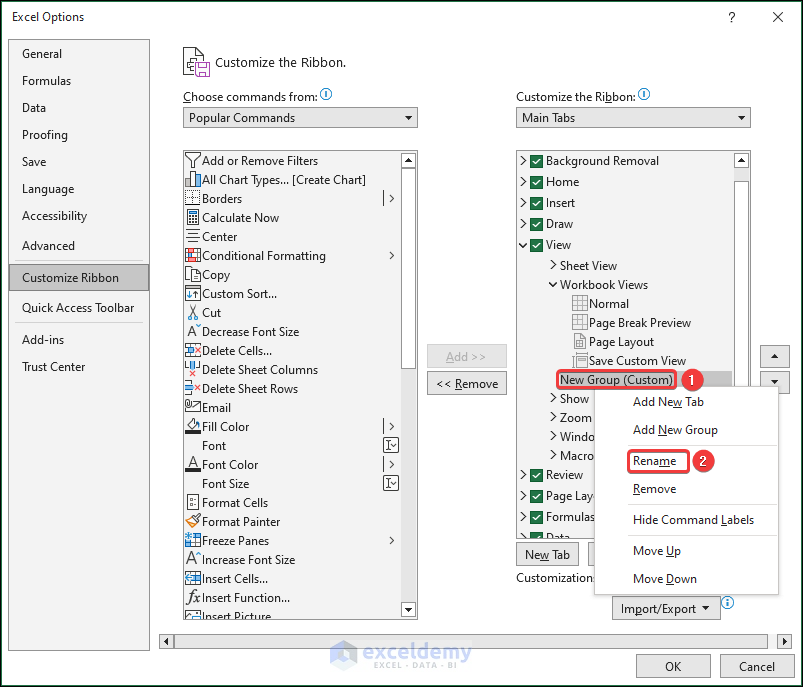
- Rename the newly added group by right-clicking on the created group and choosing the Rename option.
- Select Commands Not in the Ribbon from the Choose commands from: drop-down.
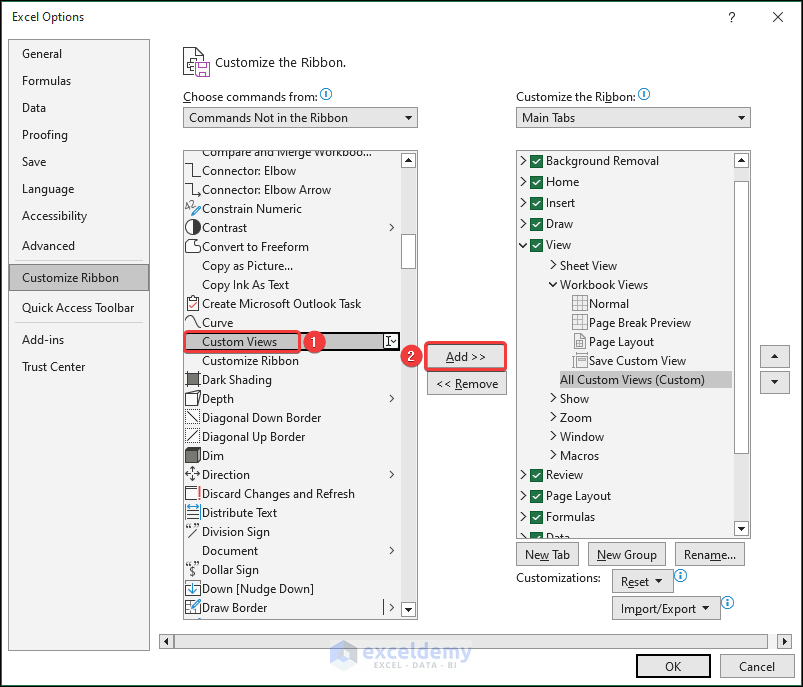
- Select Custom Views and click on Add.
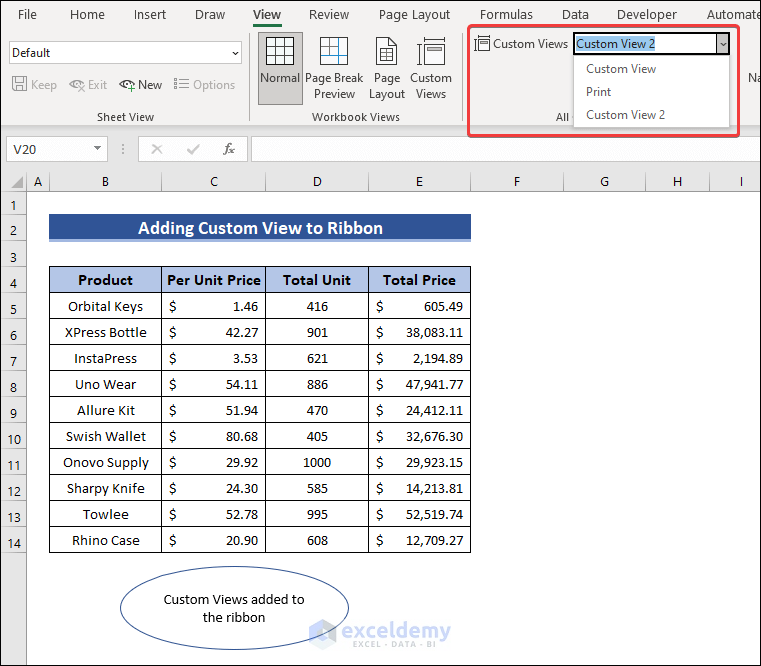
- The Custom Views group will be added to the ribbon.
Part 6 – How to Delete a Custom View
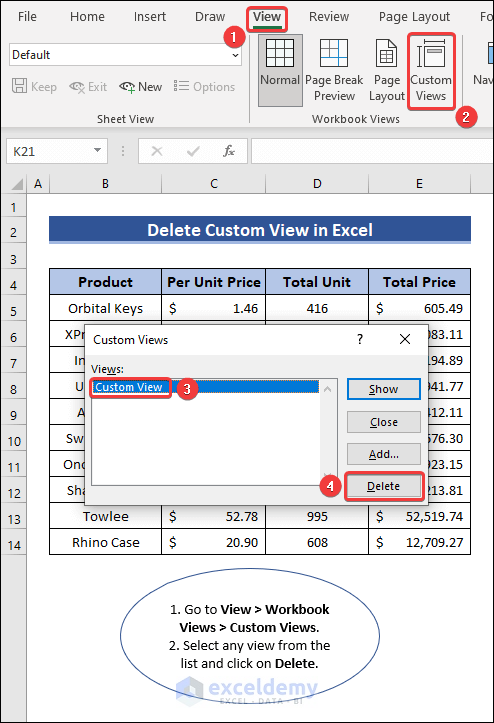
- Click on the View tab and go to Custom Views.
- Select a custom view and click on Delete.
Frequently Asked Questions
Can I apply filters or sort in different views?
It is possible to apply filters and sorting in all views in Excel. All the other features are also applicable in all of the different views that are available in Excel.
Are views in Excel specific to individual worksheets or entire workbooks?
Views in Excel are specific to individual worksheets. Each worksheet can have its own type of view. One worksheet can have the Sheet View, whereas another worksheet can have the Page Layout View.
Can I have multiple views of the same worksheet open simultaneously in Excel?
Excel does not support multiple views of the same worksheet open simultaneously. One worksheet can have only one view at a time. If you switch the view of the worksheet from one to another, the previous view closes.
Things to Remember
- You must upload your workbook online before using the Sheet View.
- If you want to fit all the information on the same page, click and drag the page breaks in Page Break Preview.
Understanding Views in Excel: Knowledge Hub
<< Go Back to Learn Excel
Get FREE Advanced Excel Exercises with Solutions!

