Difference between Linking and Embedding
Before we dive into linking and embedding Word documents in Excel, let’s first understand the difference between these two approaches:
- Linking:
- When you link an MS Word file to an Excel worksheet, the original Word document and the Word file placed in the Excel sheet maintain a connection.
- In other words, any edits or deletions made in the original Word document will automatically reflect in the Word file within the Excel file, and vice versa.
- Embedding:
- Embedding a Word document in an Excel worksheet breaks the connection between the Word files instantly.
- If you update the original Word file, those changes won’t be reflected in the Word file embedded in the Excel sheet.
- Keep in mind that embedding files increases the size of the Excel file.
Method 1 – Using the ‘Object’ Option
Follow these steps:
- Open the Excel worksheet where you want to create the linkage (for example, navigate to the desired cell, like B4).

- Go to the Excel Ribbon and click on the Insert tab.

- Select Text and then choose Object.

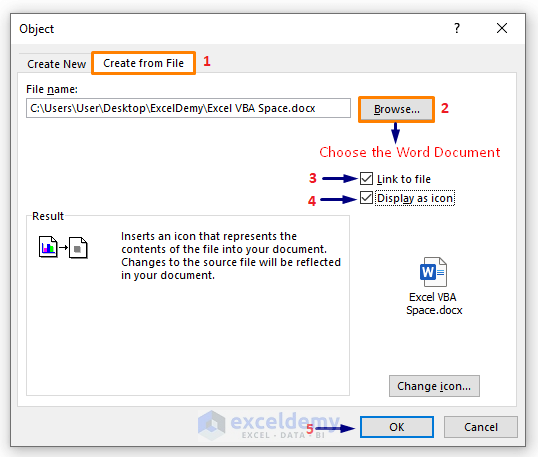
- The Object window will appear. Click on Create from File.
- Use the Browse option to select the Word document you want to link.
- Check the boxes for Link to file and Display as icon (as shown in the screenshot).
- Click OK.
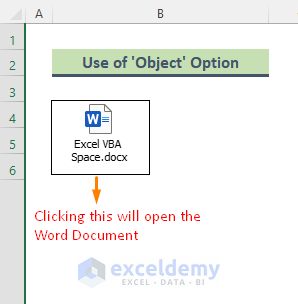
- The Word file is now placed in the Excel sheet and linked to the original Word document.
Method 2 – Use the Hyperlink Option
- First, choose the cell in your Excel worksheet where you want to create the link. For example, let’s say you’ve selected Cell B4.
- Press Ctrl + K on your keyboard to open the Insert Hyperlink dialog.

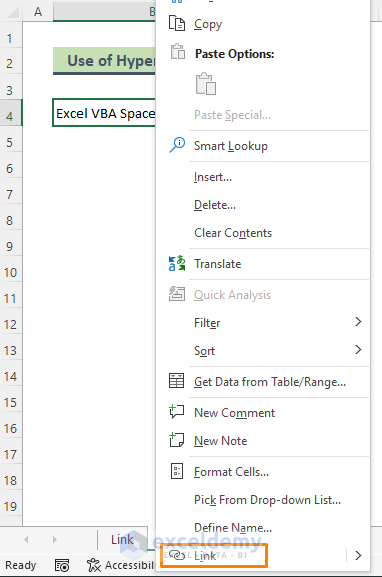
- Alternatively, you can right-click on the specified cell and choose Hyperlink.
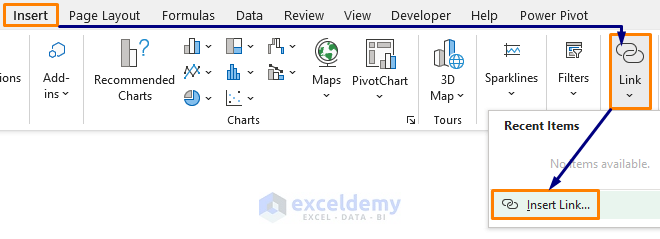
- Or select Insert, click on Link and choose Insert Link.
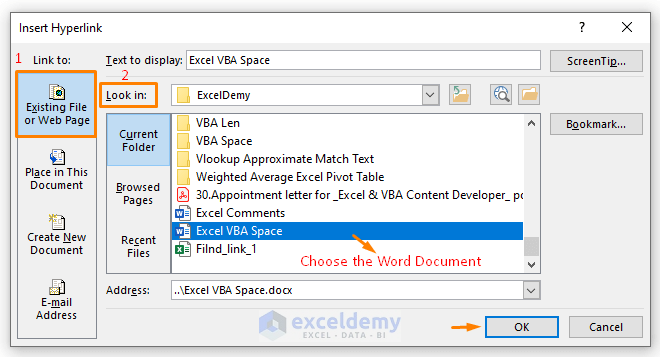
- In the Insert Hyperlink dialog, select the Existing File or Web Page option.
- Browse to the location of the Word document you want to link. Once you’ve found it, click OK.
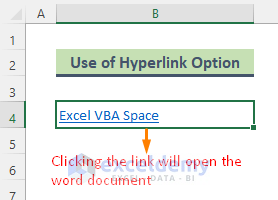
- Cell B4 is linked to the specific Word document. When you click the hyperlink, it will take you directly to the corresponding MS Word file.
Read More: How to Import Data from Word to Excel
Apply the Object Option to Embed a Word Document in Excel
- First, navigate to the Excel sheet where you want to embed the Word document.
- Go to the Insert tab in the Excel Ribbon. In the Text group, click on Object.
- The Object window will appear. Select the Create from File tab.
- Click the Browse button to locate the Word document you want to embed. Make sure the Link to file option is unchecked.
- You can choose to display the embedded document as an icon or show the first page of the document directly. To display it as an icon, check the Display as icon option (see the screenshot). If you decide to display the icon, you can also click the Change Icon button to select a different icon and provide a meaningful caption.
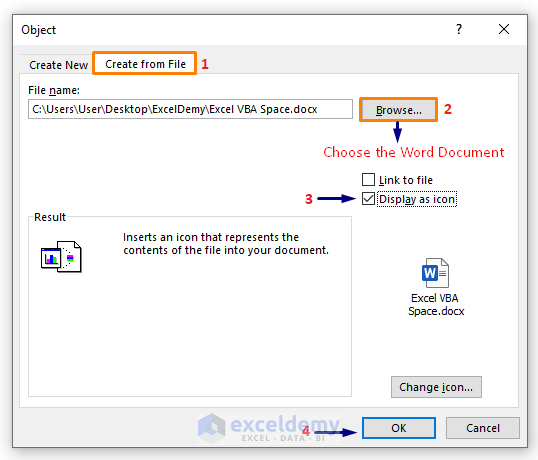
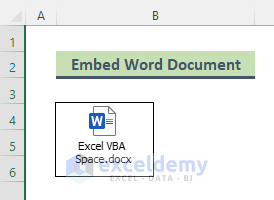
- Click OK. The Word document will now be embedded within the Excel file.
Remember that embedding Word documents can be useful for adding detailed text below an Excel table or providing documentation about a process.
Pros and Cons of Linking Word Document to Excel
Pros:
- Reduced Excel File Size: When you link a Word document to an Excel worksheet, the information remains stored in the Word file, and Excel only displays it. As a result, your Excel file size remains smaller compared to embedding the entire Word document.
- Time-Saving Updates: If you need to make changes to the content within the Word document, linking allows you to update it directly. Any modifications made in the original Word file will automatically reflect in the linked Word file within Excel.
Cons:
- Fixed File Path: The main disadvantage of linking Word files to Excel is that the file path must always remain the same. In other words, the original Word document needs to be in the same location. If you share the Excel file with others who don’t have access to the linked location, the linking won’t be useful for them. Remember that embedding a Word document in Excel breaks the connection between the files, but it increases the size of the Excel file.
Download Practice Workbook
You can download the practice workbook from here:
Related Articles
- How to Convert Word to Excel but Keep Formatting
- Copy from Word to Excel into Multiple Cells
- How to Convert Word to Excel with Columns
- How to Convert Word Table to Excel Spreadsheet
<< Go Back to Import Word to Excel | Importing Data in Excel | Learn Excel
Get FREE Advanced Excel Exercises with Solutions!


Dear Hosne,
This disadvantage is killing me and it took me forever to finally figure out this is the problem I was having.
“Unfortunately, there is a disadvantage of linking word files to excel.”
“The file path must be always the same which means the original word file requires to be in the same location. If you send the excel file to people who do not have the access to the linked location, then linking won’t be useful.”
This sort of defeats the purpose of using the same linked cell format for numerous analogous projects.
I think I have a workaround for my own use as a real estate appraiser. I set up spreadsheets for different projects that are identically formatted to my linked spreadsheet. For example “Year Built” is in cell B1, “Square Footage, in cell B2, “Date of Appraisal” is in cell B3 on the linked spreadsheet and on every property spreadsheet. When I am ready to do my final linking, I simply copy the cells over whatever data is already existing in my linked spreadsheet. They key is I am copying data, not copying files. I still have my original data properly formatted in its appropriate job folder, I can work on other projects, within their own folders, and not lose the data for a prior project that I might still be working.
I also did see that someone wrote a macro that changes the file path within the link codes so that the paired Word and Excel files are properly linked if
moved or copied to a new folder. The macros changes the coding to become relative rather than the links continually referring back to the original source file.