We prepared a sample dataset here with the First Names, Last Names, and Ages of six people.
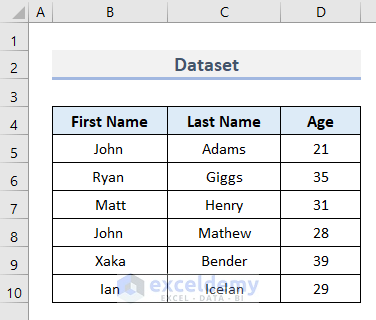
We want to copy a single cell from the dataset with this code.
Sub Copy_Range()
    Range(Selection, Selection.End(xlDown)).Select
    Selection.Copy
    ActiveCell.Offset(0, 4).Range("A1").Select
    ActiveSheet.Paste
End Sub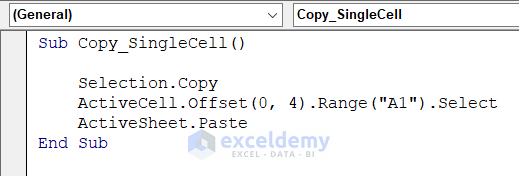
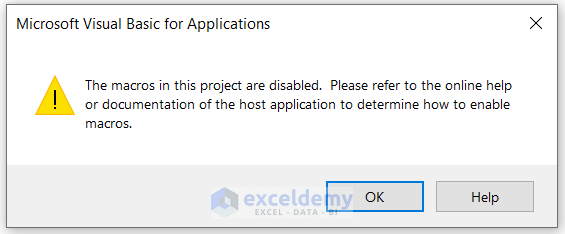
When we press F5 on the keyboard to run it, an error message pops up that states that the code is not enabled for the Excel file. Let’s see how to fix the issue.
Fix 1 – Enable Macros for a Single Workbook in Excel
Case 1.1. Access via Security Warning
- When you open the workbook, you will notice a Security Warning on the top of the Formula Bar.
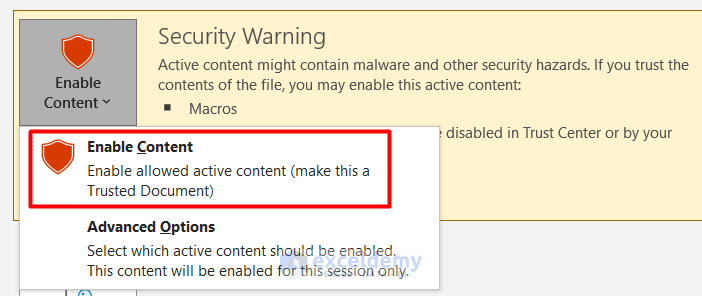
- Click on Enable Content to enable macros.

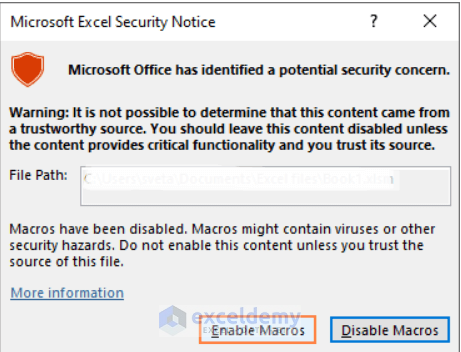
- You will get the following Microsoft Excel Security Notice if the Visual Basic Editor window is opened while opening the file.
- Click on Enable Macros to access it.
Case 1.2 – Turn Macros On with Backstage View
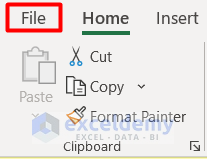
- Go to the File tab.
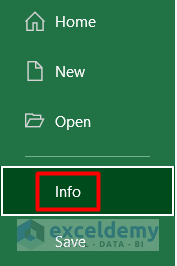
- Click on Info.
- Select Enable Content under the Security Warning.
Case 1.3 – Change the Settings in the Trust Center
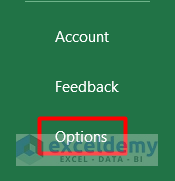
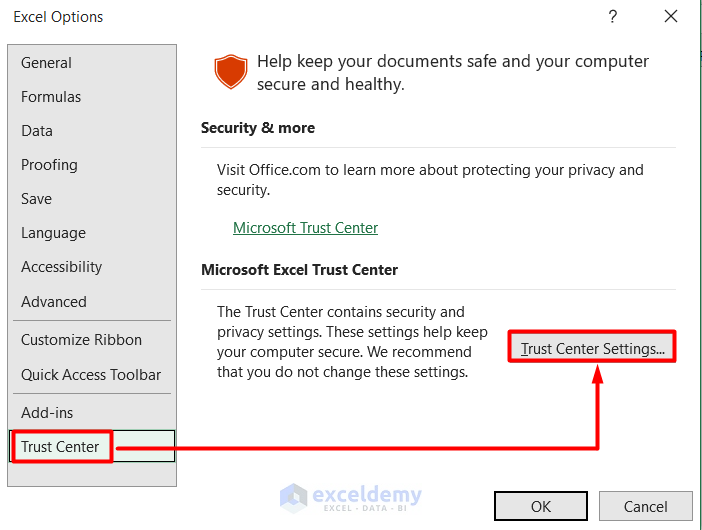
- Go to the File tab and select Options.
- Select Trust Center in the Excel Options dialog box.
- Click on Trust Center Settings.
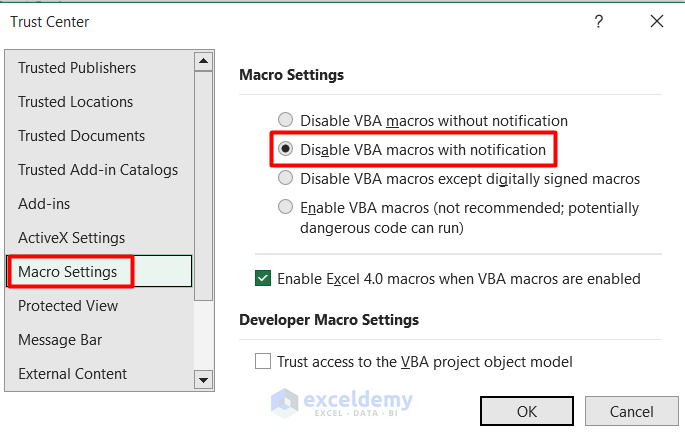
- Go to the Macro Settings in the Trust Center dialog box.
- Check Disable VBA macros with notification.
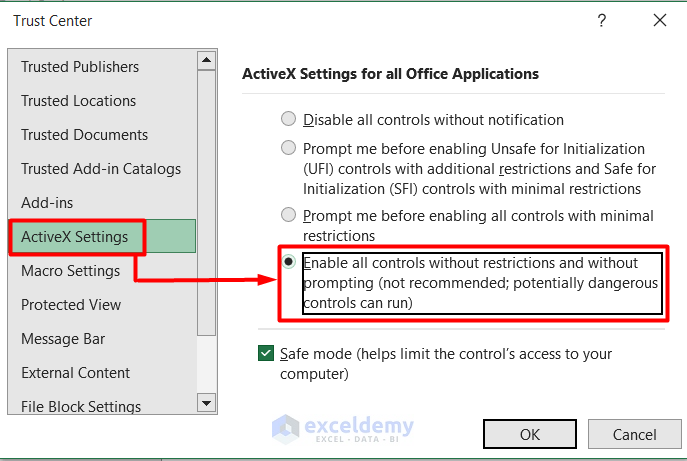
- Go to ActiveX Settings and select the option shown in the image below.
- Press OK twice to close all the dialog boxes.
Case 1.4 – Establish Trusted Documents
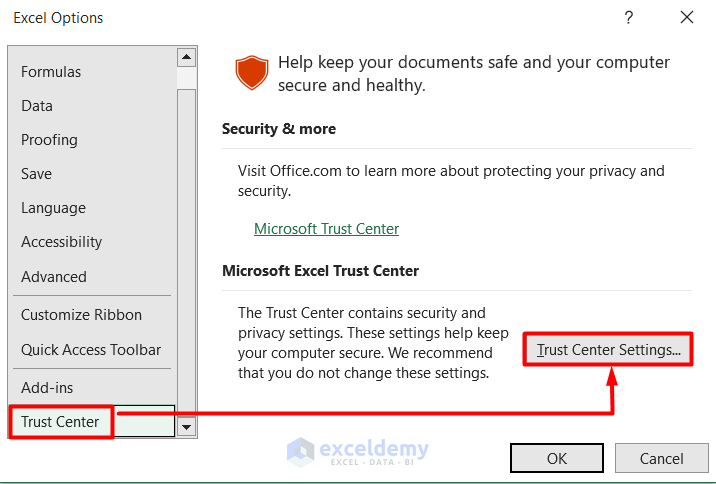
- Go to the File tab and select Options.
- Select Trust Center Settings from the Trust Center tab in the Excel Options window.
- Mark the Allow documents on a network to be trusted option in the Trusted Documents section.
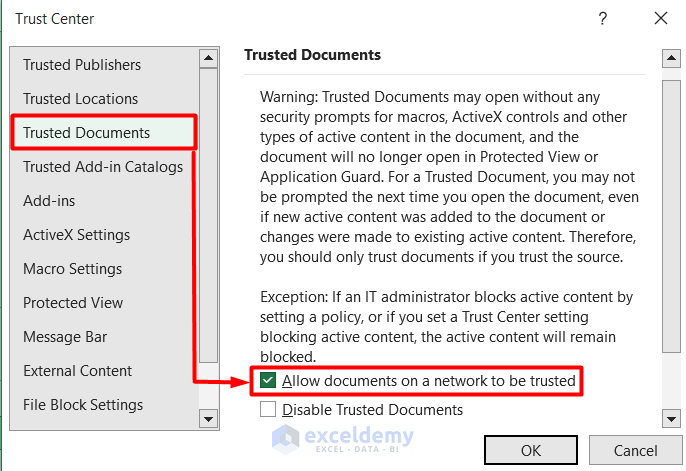
- Press OK twice.
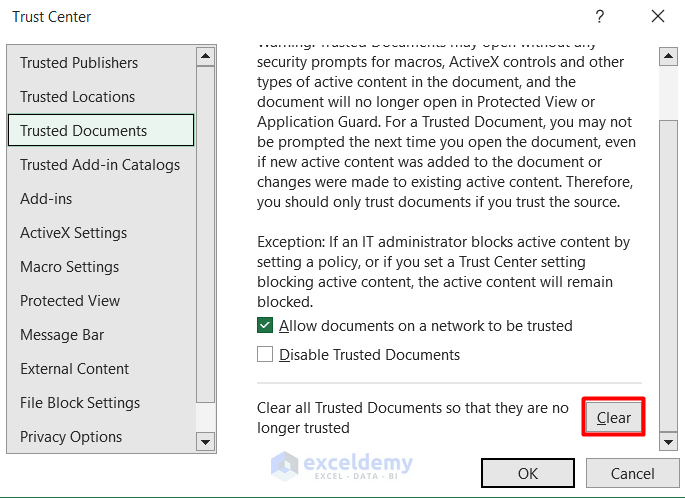
- If you need to roll back this feature, click on Clear in the Trusted Documents tab and close the window.
Fix 2 – Allow Macros Permanently in Excel for All Workbooks
Case 2.1 – Apply Changes in the Trust Center
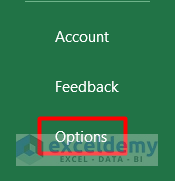
- Select File and choose Options.
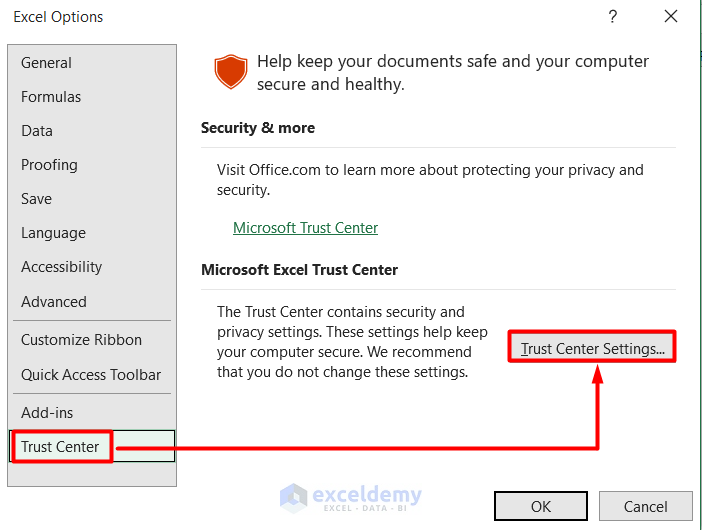
- Select Trust Center and go to Trust Center Settings.
- Go to the Macros Settings tab.
- Check the Enable VBA macros option.
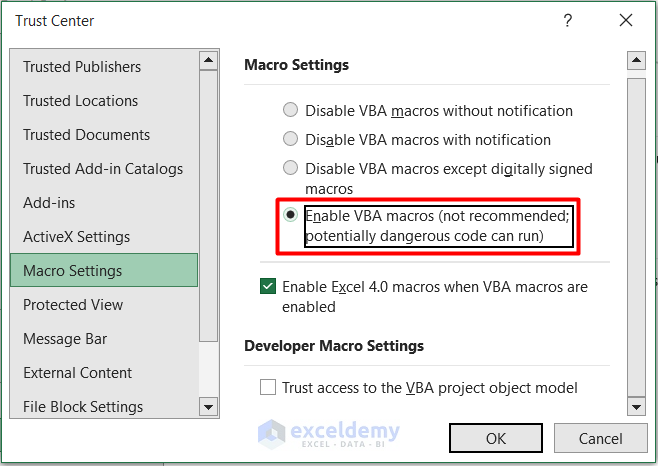
- Press OK twice to close all the windows.
Read More: [Solved]: Macro Settings Greyed out in Excel
Case 2.2 – Create a Trusted Location
- Select File and choose Options.
- Go to Trust Center Settings from the Excel Options window.
- Go to the Trusted Location section in the Trust Center window.
- Click on Add new location.
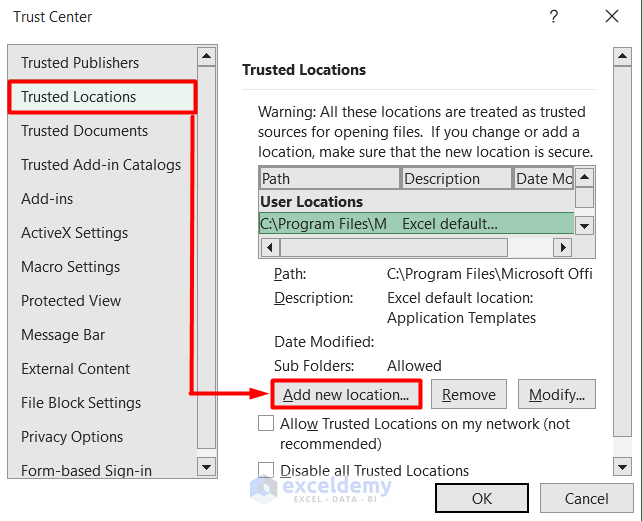
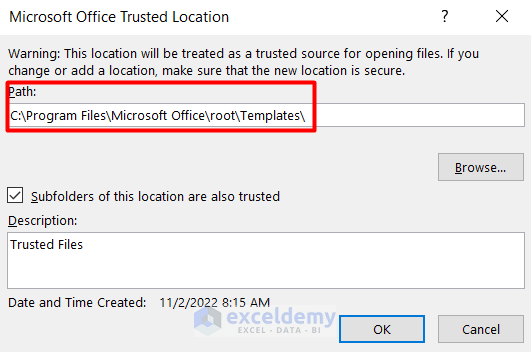
- Insert a folder in the Path section.
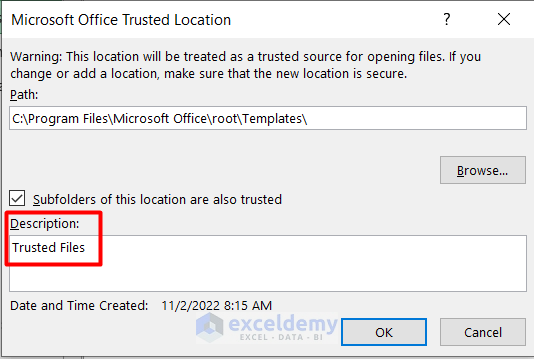
- Type a description in the Description box to determine the trusted files easily.
- Check the Subfolders of this location are also trusted option if you have any.
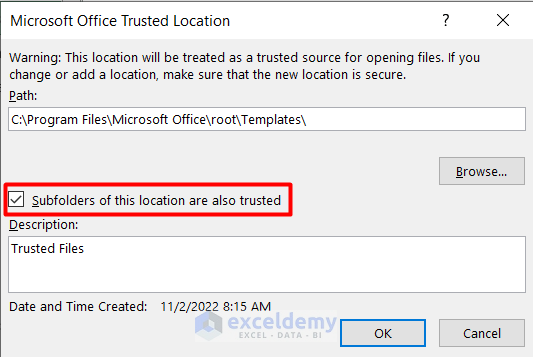
- Press OK twice to close all the windows.
- Repeat to add as many files as you want. Excel files in these folders will have Macros enabled.
Fix 3 – Turn on Macros for One Session
- Go to the File tab.
- Go to the Info section.
- Select Advanced Options in the Security Warning.
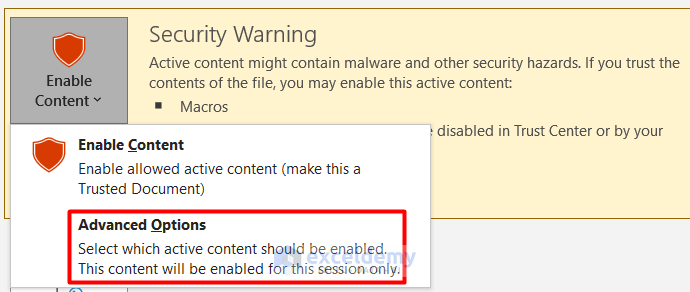
- Select the option Enable content for this session.
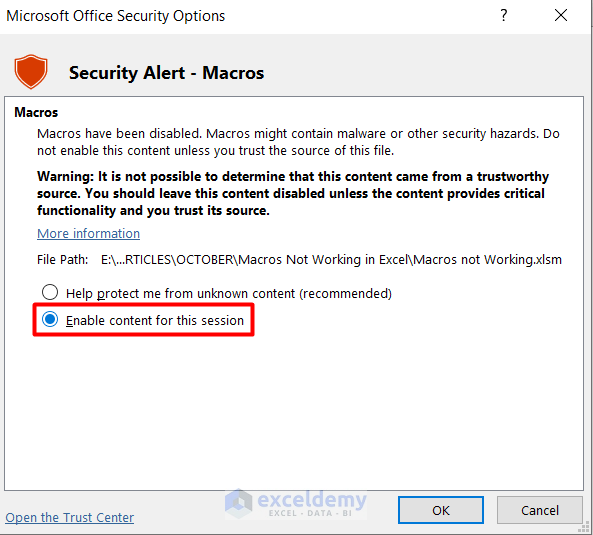
- Press OK and you will be able to run the macro only for as long as Excel is open.
How to Disable Macros in Excel
- Select File and go to Options.
- Select Trust Center and go to Trust Center Settings.
- Go to Macro Settings.
- Select the option Disable VBA macros without notification.
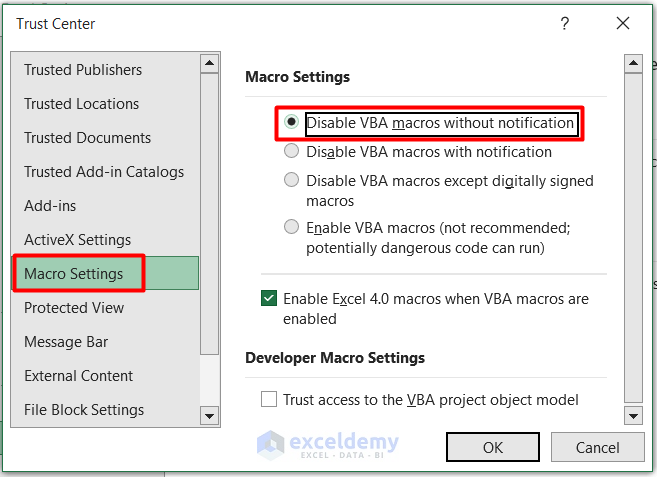
- Press OK.
Things to Remember
- You must save your Excel file as a Macro-Enabled Workbook to use VBA code in it.
- Avoid giving consent to Enable all macros in the Trust Center window unless you’re sure of what you’re downloading. You might enable malware code.
Download the Practice Workbook
Related Articles
- [Fixed] Excel Macros Enabled But Not Working
- [Fixed!]: Unable to Enable Macros in Excel
- [Solve:] Cannot Edit a Macro on a Hidden Workbook
- Excel Macro Security


Hi Sanjida,
Thank you for the community help. I also want to include that on intra networks in iternet options the root of the server has to be added as a trusted site location file. Eaxample: file://192.168.0.# and check Require server verification if configured.
Thanks
Hello Andy,
Thank you for your valuable input! Including the root of the server in the “Trusted Sites” section of Internet Options is an important step when working in intranet environments.
By adding the server path using file://192.168.0.#, you ensure that macros and other features dependent on file access work smoothly across the network.
Additionally, checking the “Require server verification” option adds an extra layer of security by verifying the server’s authenticity. This is particularly useful in enhancing both functionality and security when dealing with macros on internal networks.
Regards
ExcelDemy