Step 1 – Prepare the Excel Workbook
- Open a blank Excel workbook.
- Give a clear heading of what it’s about.
- Type the Month names in a row and end with the Year cell.
- Save the file.

Step 2 – Set up the Income Section
- Input the income sources. We will place the Salary, using a fixed monthly salary in this example.
- You can input any other sources of income.

Step 3 – Insert the Excel SUM Function to Compute Annual Income
- Select cell O6.
- Insert the formula:
=SUM(C6:N6)- Press Enter.

Step 4 – Make the Monthly Expenses Segment
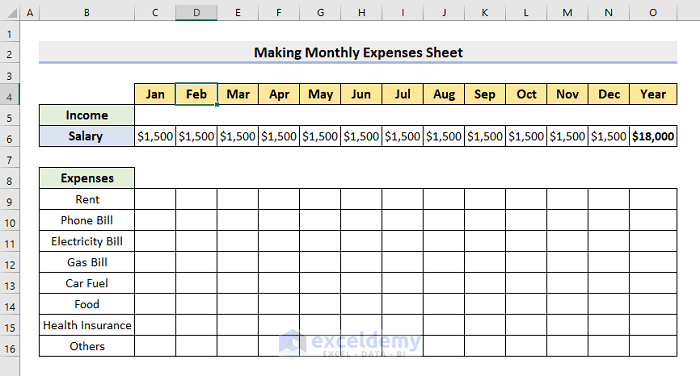
- Create headers for different types of Expenses. Here’s an example:
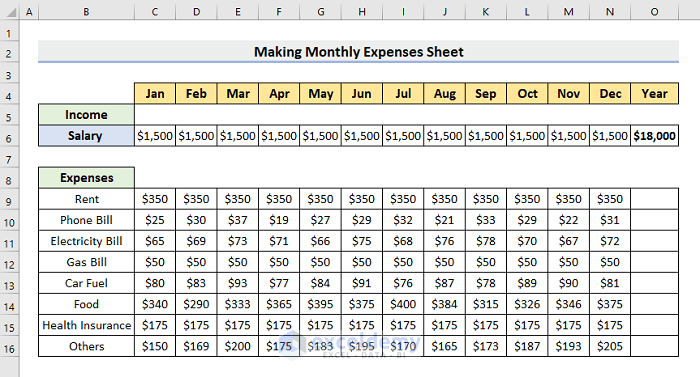
- Input the precise Expense amounts. You need to type the amounts in the proper categories and months.
Step 5 – Create an Excel Formula to Automate the Expenses Sheet
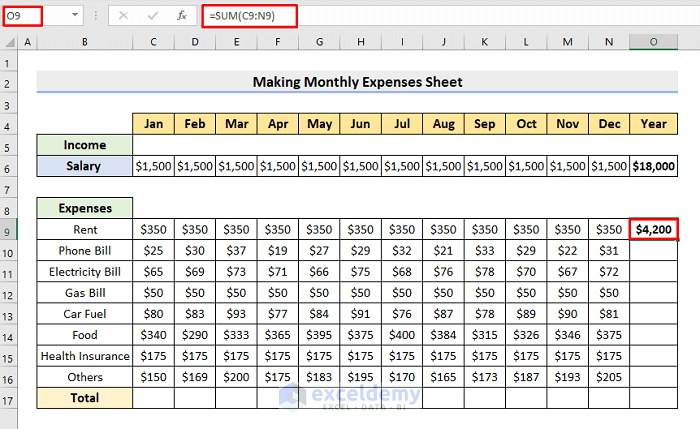
- Choose cell O9.
- Insert the below formula:
=SUM(C9:N9)- Press Enter. You’ll get the annual Rent fee for our sample.
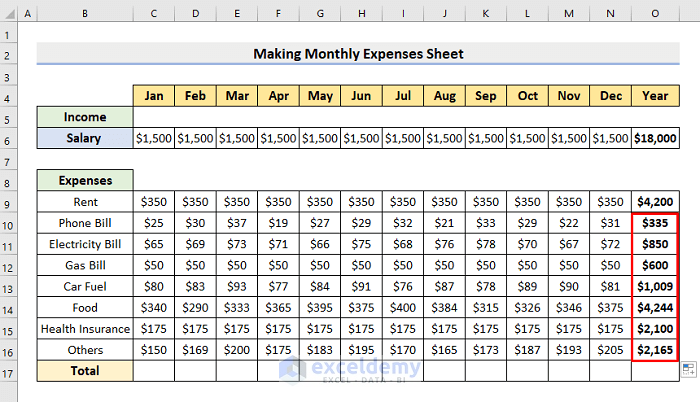
- Use the AutoFill tool to get the annual total of other expenses.
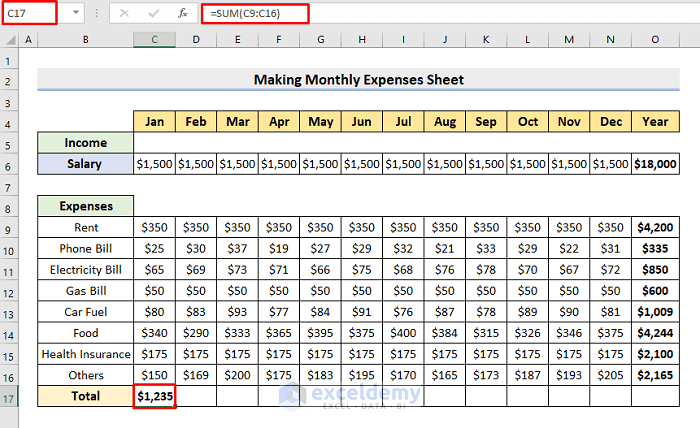
- In cell C17 (or wherever your expenses end) insert the following formula. You can modify the range to include all the cells from the expenses above it.
=SUM(C9:C16)- Press Enter.
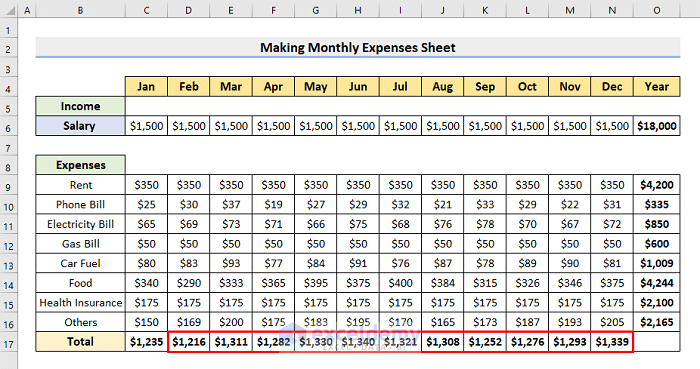
- Apply AutoFill to complete the series.
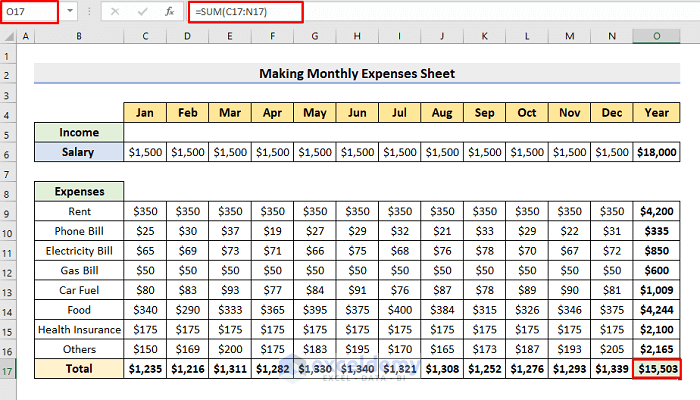
- Select cell O17.
- Insert the formula:
=SUM(C17:N17)- Press Enter.
- You’ll get the sum of all the expenses in a year.
Step 6 – Calculate the Net Balance
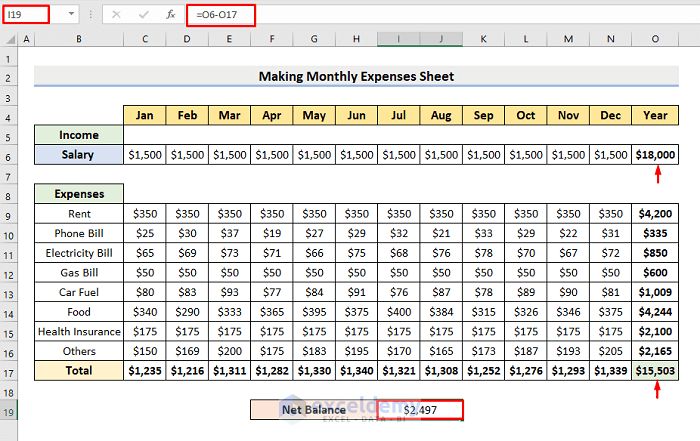
- Select cell I19.
- Insert the following formula:
=O6-O17- Press Enter.
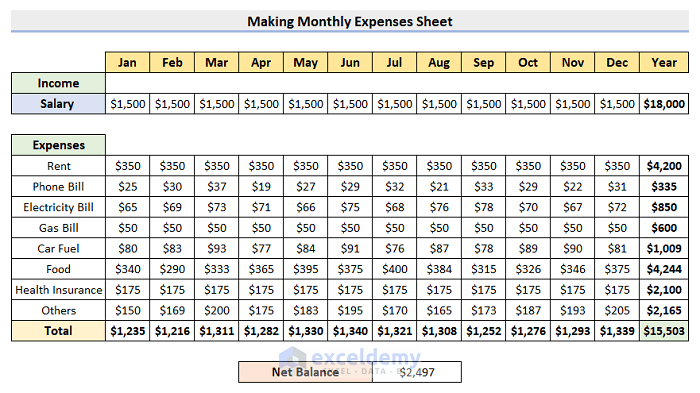
Final Output of Monthly Expenses Sheet
The following picture demonstrates our designed expense tracker.
Download the Free Template
Download this template and you can modify it however you want.
Related Articles
<< Go Back To Excel For Finance | Learn Excel
Get FREE Advanced Excel Exercises with Solutions!

