We have a text file where the values are delimited (separated) by dashes or hyphens and want to open the file in Excel for further processing.
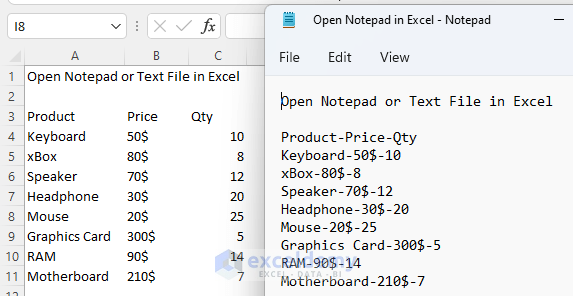
How to Open a Notepad or Text File in Excel with Columns: 3 Easy Ways
Method 1 – Opening the Notepad or Text File Directly in Excel with Columns by Delimiter
Steps:
- Open Excel and go to the File Tab.

- Select the option Open from the green bar.
- Click on Browse. You will see the Open window appear.
- Select the Notepad or Text File from its location and click on Open.
- Make sure you select All Files for the file type.
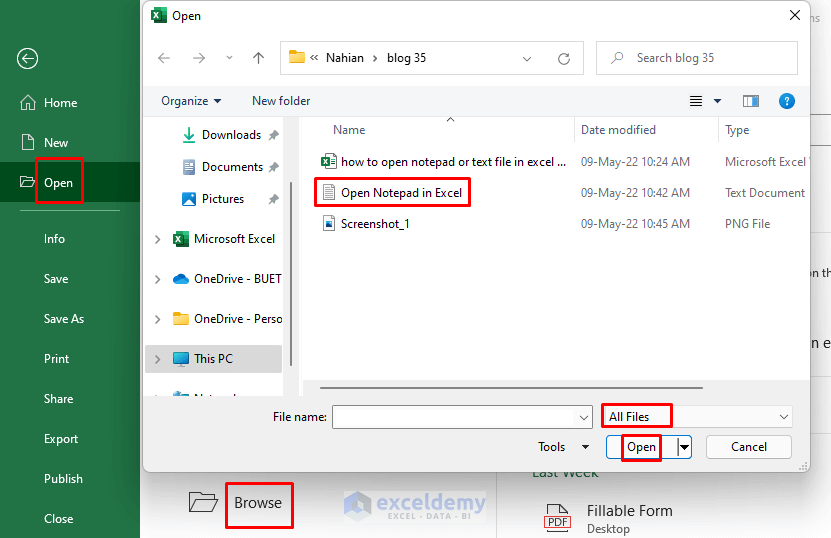
- The Text Import Wizard will pop up.
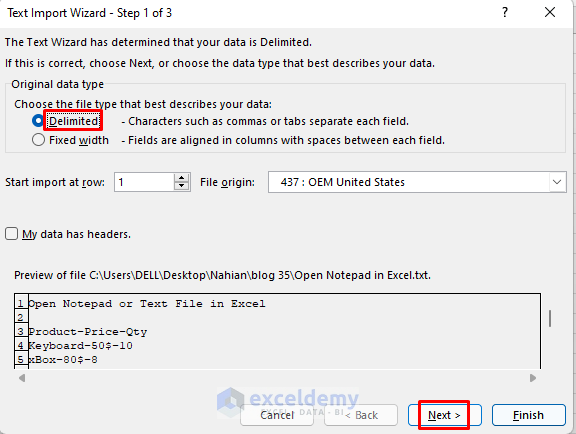
- Since the columns are separated by a Delimiter (hyphen (–)), select Delimiter and go Next.
- Select Other and insert a Hyphen (–) in the box.
- Go to Next.
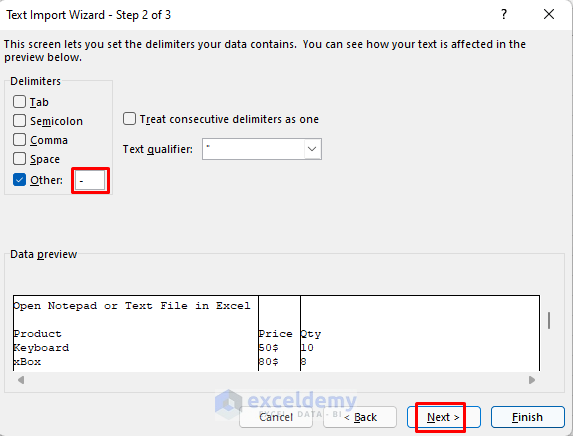
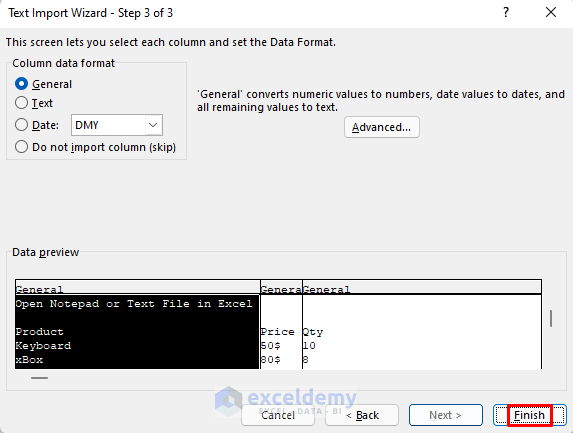
- Click on Finish.
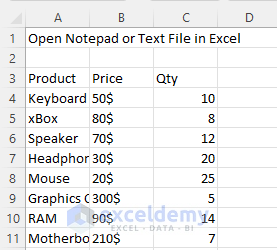
- You will see the data from the Notepad or Text File appear in the current Excel File.
- The Import Wizard has created different columns.
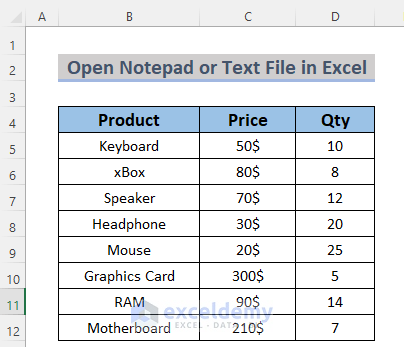
- We formatted the text a bit to make it more viewable.
Read More: How to Convert CSV to Excel with Columns
Method 2 – Using the Text Import Wizard to Open a Notepad or Text File in Excel with Columns
Steps:
- Select the Data tab and choose From Text/CSV

- The Import Data window will show up.
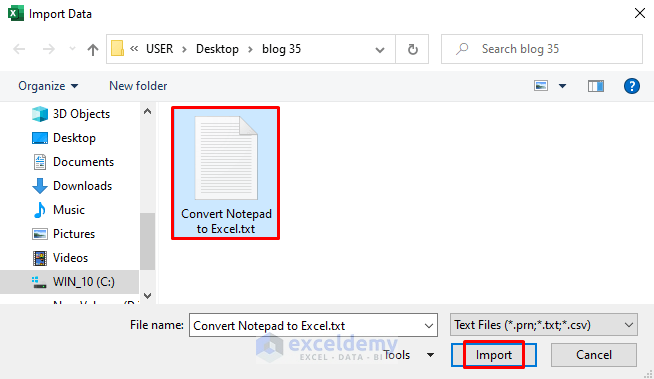
- Select the Text File you want to open and click on Import. In the sample, it is Convert Notepad to Excel.
- You will see a Preview Box that will show you how this data will appear in the Power Query Editor.
- Since the columns are separated by a delimiter, click on Transform.
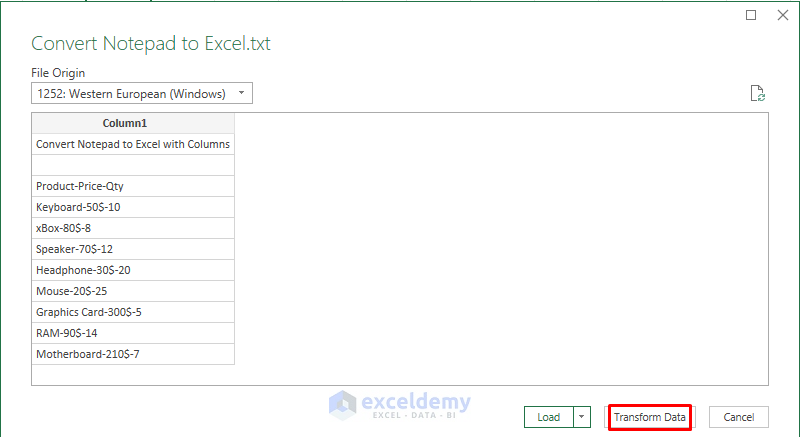
- You will see the data of the Notepad or Text File in a Power Query Editor.
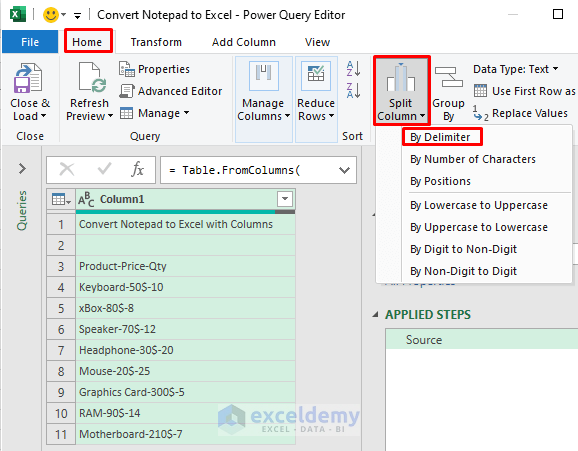
- Select Home and select Split Column, then choose By Delimiter
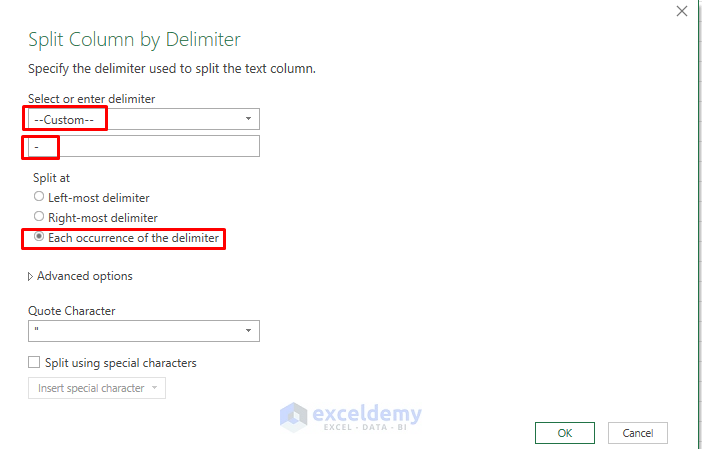
- In the following window, select the Delimiter. In our case, it’s a hyphen (–).
- Select Each occurrence of the delimiter and click OK.
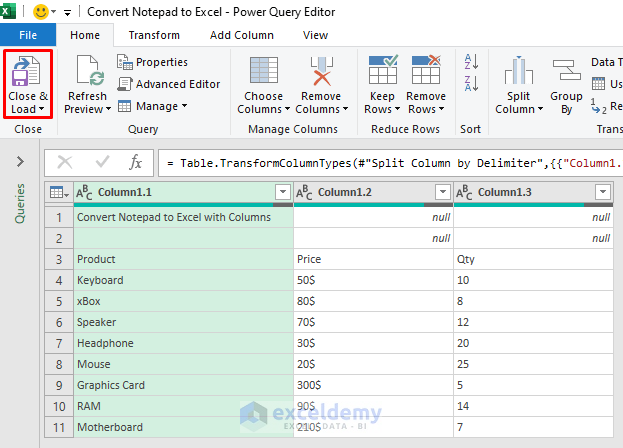
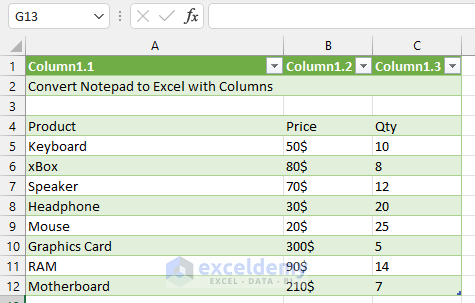
- You will see the data of your Text File split into different columns.
- To load this table in an Excel sheet, click on Close & Load.
- The information from the Notepad or Text File will be imported as a table in a new Excel sheet. You can format the table as you wish or change it back to a data range.
Read More: How to Import Text File to Excel Automatically
Method 3 – Applying the Get Data Wizard to Convert a Notepad or Text File to an Excel Table
Steps:
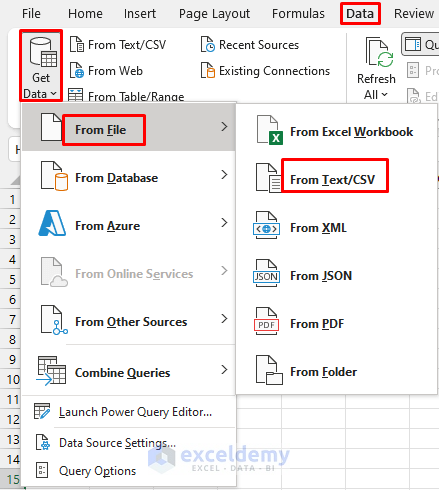
- Select Data and choose Get Data.
- Go to From File and pick From Text/CSV.
- The Import Data window will show up.
- Select the Notepad or Text File you want to open and click on Import.

- You will see a Preview Box that will show you how this data will appear in the Power Query Editor. Click on Transform Data.

- You will see the data of the Notepad file in a Power Query Editor.
- Select Home then go to Split Column and choose By Delimiter

- Select the Delimiter used in the file. In our case, it’s a hyphen (–).
- Select Each occurrence of the delimiter and click OK.

- You will see the data of your Notepad or Text File split into different columns.
- Click on Close & Load.

- Here’s the resulting table, which you can then format or change to a data range.

Read More: Difference Between CSV and Excel Files
Practice Section
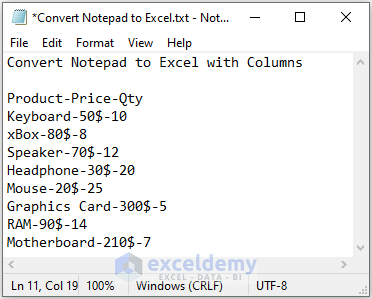
We’ve provided a sample text file that you can use to convert to a table.
Download the Practice Workbook
Related Articles
- How to Convert CSV to XLSX
- How to Import CSV into Existing Sheet in Excel
- How to Convert CSV to XLSX without Opening
- Convert CSV to Excel Automatically
- How to Convert CSV to XLSX Command Line
- How to Compare 2 CSV Files in Excel
- How to Import CSV Data into Excel
<< Go Back to How to Convert CSV to Excel | Import CSV to Excel | Importing Data in Excel | Learn Excel
Get FREE Advanced Excel Exercises with Solutions!

