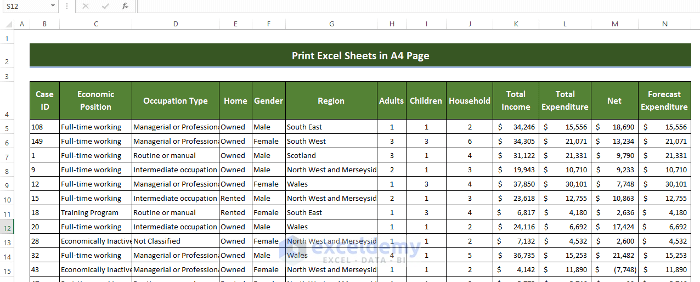
The following sample dataset has a large column width.
Method 1 – Printing an Excel Sheet in A4 Size Using the Page Layout Tab
Steps
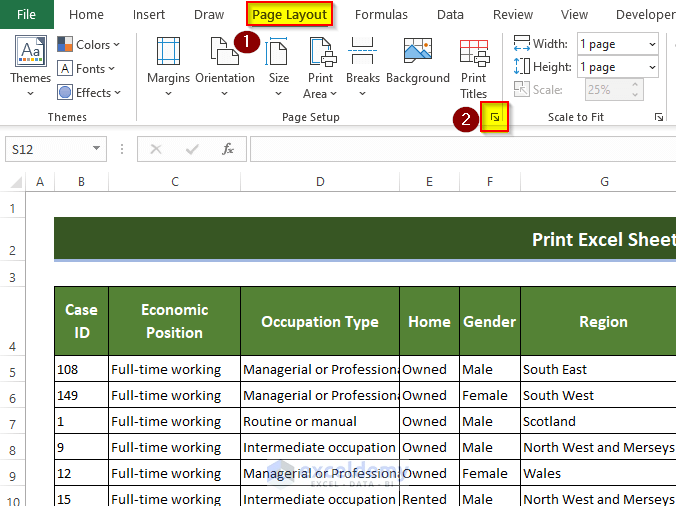
- Go to Page Layout, click the small arrow sign at the corner of Page Setup.
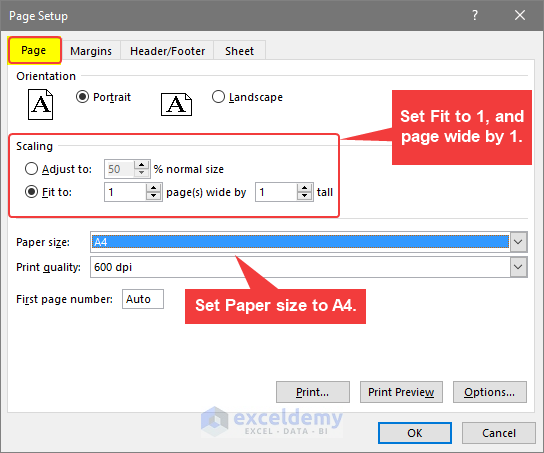
- In the new window go to Page.
- In Scaling, choose Fit to and enter 1. In page wide by enter 1.
- Select A4 in Paper size and click OK.
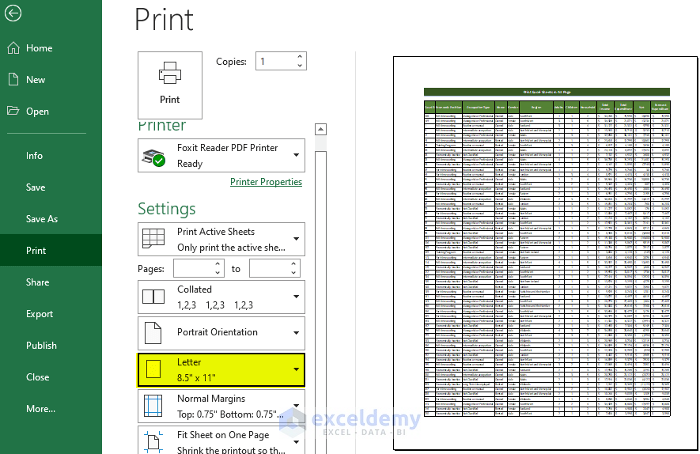
- Press Ctrl+P to open the print preview. Click Print to print the sheet in A4 format.
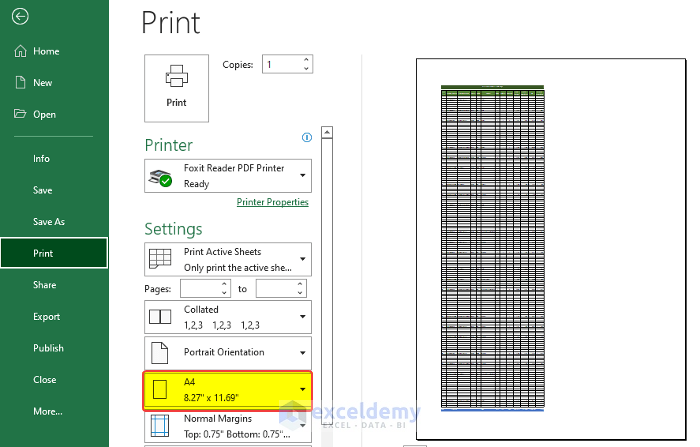
Read More: How to Print Excel Sheet in Full Page
Method 2 – Defining Size to Print an Excel Sheet in A4 Size
Steps
- Go to the Page Layout tab. In Page Setup, click Size.
- Select A4 from the dropdown menu.
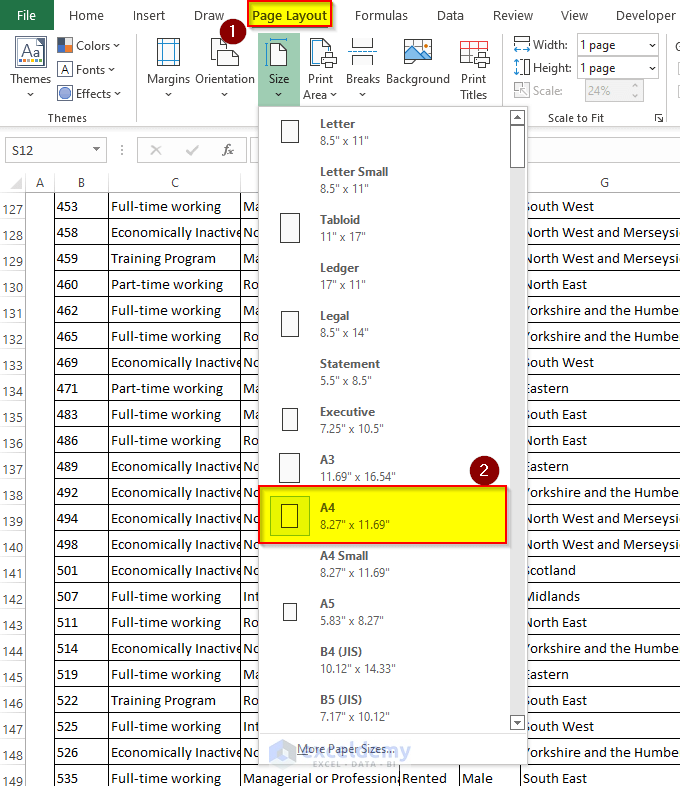
- Press Ctrl+P to open print preview. Click Print.
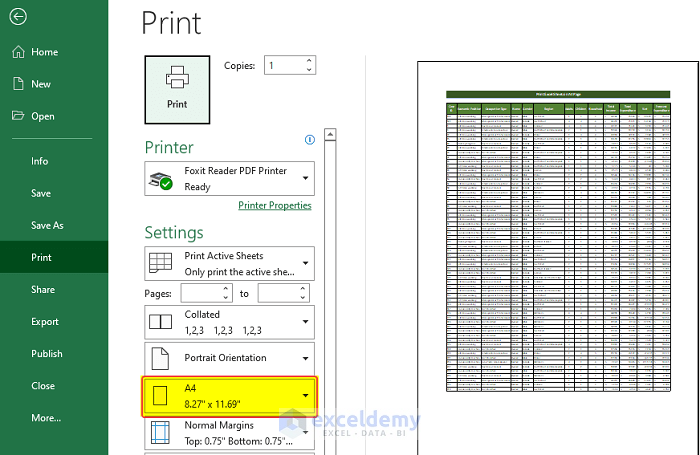
Read More: How to Print Sheet on One Page in Excel
Method 3 – Defining the Page Size in the Print Preview Window
Steps
- Open the Print Preview by pressing Ctrl+P.
- Click paper size.
- Select A4.
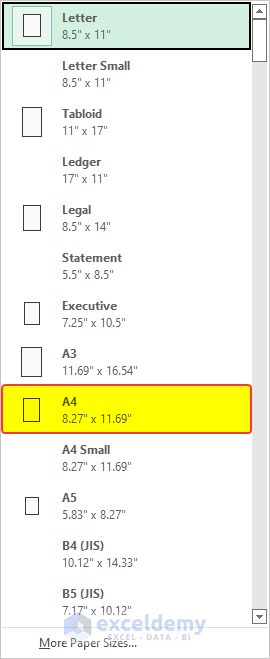
- This will set page settings to A4. Check the margins and the scaling to keep all columns and rows on one page.
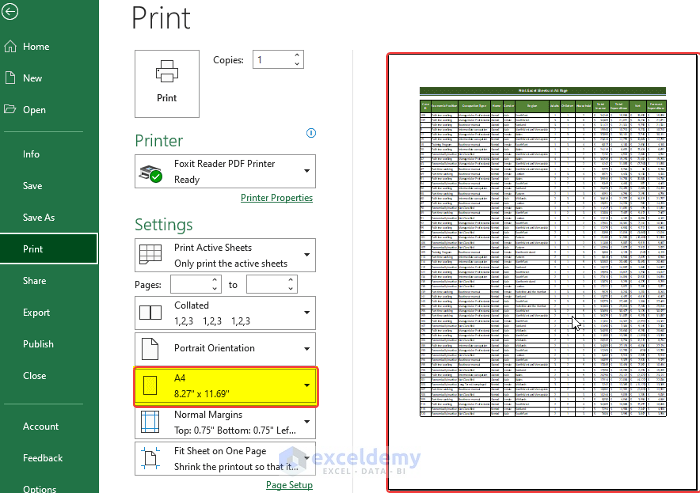
- Click Print.
Read More: How to Print Multiple Sheets in Excel
Method 4 – Scaling Data and Printing a Sheet in A4 Size
Steps
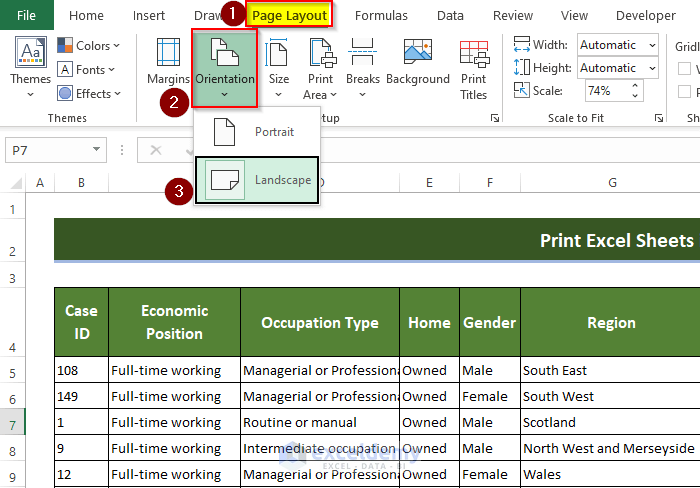
- Go to Page Layout > Orientation > Landscape.
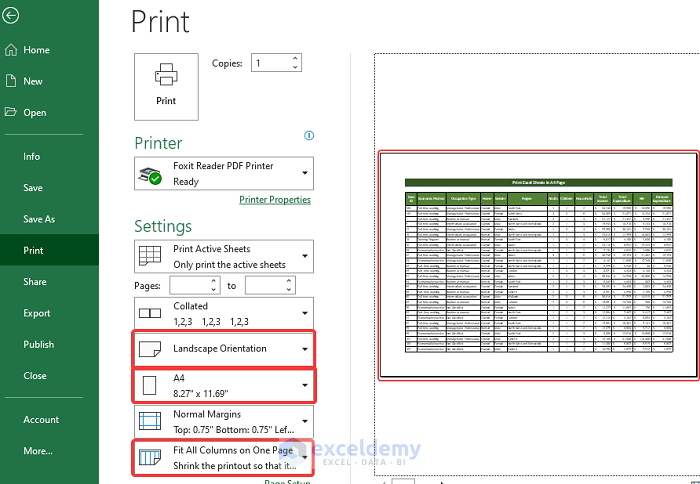
- Go to the print preview select A4.
- Select Fit all columns in One Page or Fit Sheet for One Page.
Read More: How to Print Excel Spreadsheet on Multiple Pages
Download Practice Workbook
Download this practice workbook.
Related Articles
- How to Make Excel Spreadsheet Bigger When Printing
- [Fixed!] Cutting Off Text When Printing in Excel
- [Fixed!] Excel Cutting Off Columns When Printing
<< Go Back to Print in Excel | Learn Excel
Get FREE Advanced Excel Exercises with Solutions!
