In this article, we present 9 different techniques and tricks to print an Excel sheet on one page.
Method 1 – Adjusting the Column Width or Row Height
We can reduce the column width or row height to shrink data on the worksheet so that it fits on one page by using the Page Layout option from the View tab.
Steps:
- Go to the View tab and select Page Layout.

The scales at the top and the left side of the spreadsheet will now be visible.
- Place the cursor at the edge of the column whose size you want to reduce.
- Click and drag the cursor to reduce the size of the column.
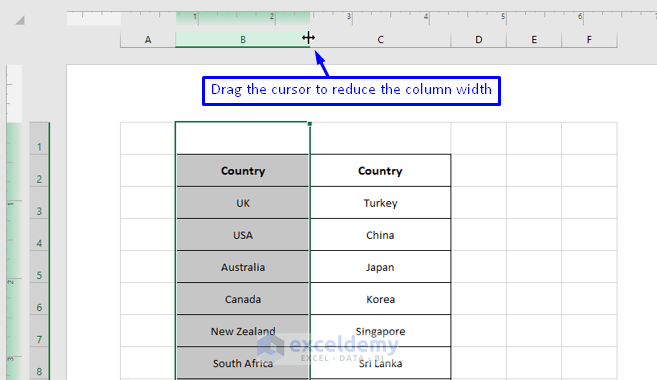
- Similarly, reduce the row height by placing the cursor at the edge of the row number whose size you want to reduce, then click and drag.
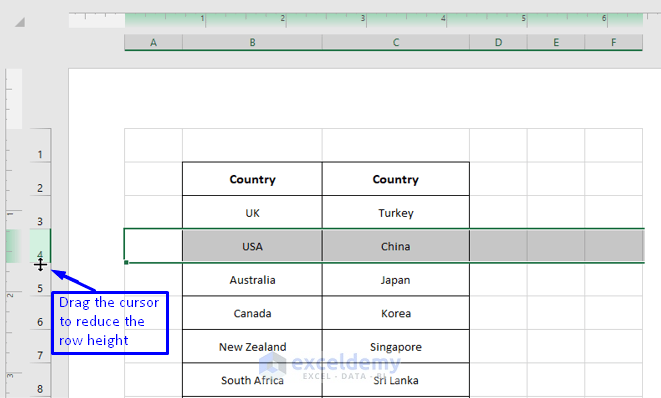
Read More: How to Print Excel Sheet in Full Page
Method 2 – Changing the Scaling to Fit All Rows or Columns of a Sheet on One Page
Excel has a built-in option to rescale the worksheet to fit more rows or columns on one page.
Steps:
- Click on the File tab.
- Select the Print option, or press Ctrl + P from the keyboard.
- From the Print window, select the No Scaling option.
- From the list of options, select the option you need.
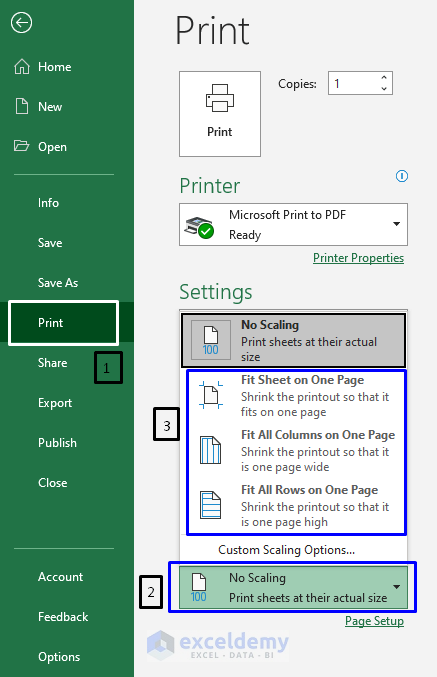
The sheet will be scaled according to your selection. A preview is available on the right side of the Print window.
Read More: How to Print Excel Spreadsheet on Multiple Pages
Method 3 – Hiding or Deleting Unnecessary Rows or Columns
Hide or delete unnecessary rows or columns from the worksheet to shrink the data to fit on one page.
- To hide a row or column, simply select it, then right-click and select Hide from the context menu.
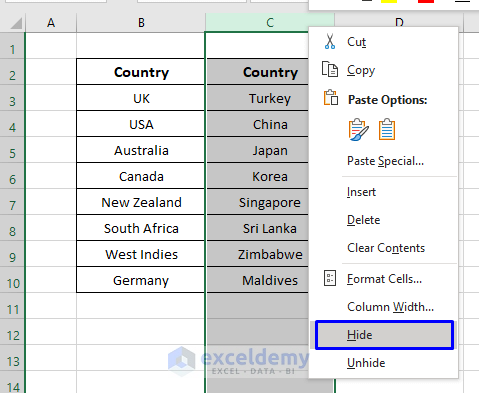
- To delete an unnecessary row or column, simply select it, then right-click and select Delete from the context menu.
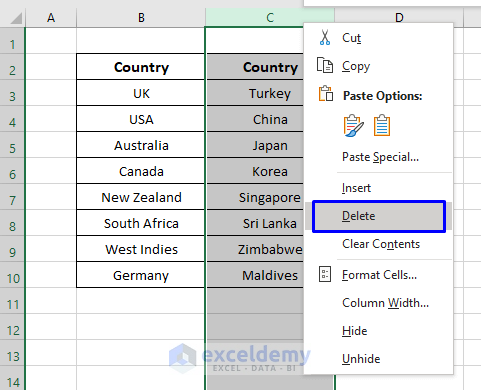
This will optimize the space and use fewer pages when printing.
Read More: How to Print Multiple Sheets in Excel
Method 4 – Changing the Page Orientation
If the data you want to print is much too wide or long to fit on one page, changing the page orientation can help to make it fit better.
There are two orientation options available in Excel:
- Portrait Orientation (Default): can print more rows than columns.
- Landscape Orientation: can print more columns than rows.
Here’s how to change the page orientation in Excel:
Steps:
- Go to the Page Layout tab.
- From the Page Setup group, click on the little arrow sign on the right bottom corner of the ribbon.

The Page Setup dialog box will open. There are Portrait and Landscape Orientation options on the Page tab.
- Change the orientation and click OK.
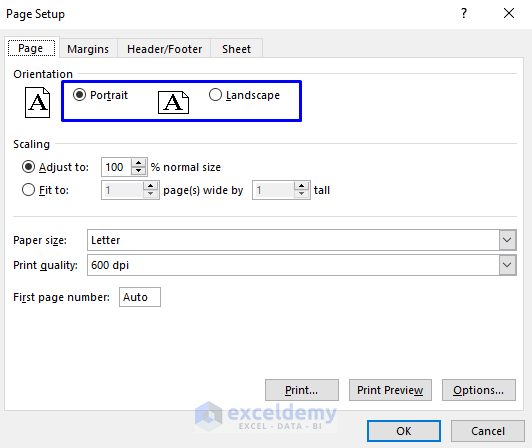
- If necessary, scale the page further by checking the Fit to option and setting the option as required.
- Click OK.
- Go to the Print Preview window to check what your page will look like after printing.
Read More: How to Print Excel Sheet in A4 Size
Method 5 – Changing the Page Margins
For better readability, every printed page has some whitespaces at the edges called Page Margins. Sometimes, a small reduction in the Page Margins is all that’s needed to fit the data to be printed on one page.
Steps:
- Go to the Page Layout tab.
- From the Page Setup group, click on Margins.
- Select Narrow.
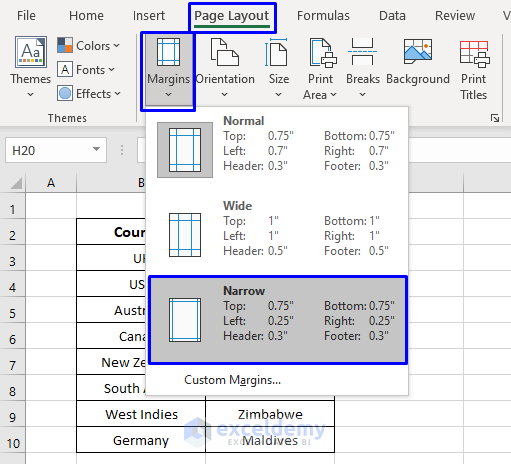
This will reduce the page margins, and some extra rows or columns might be squeezed onto the page as a result.
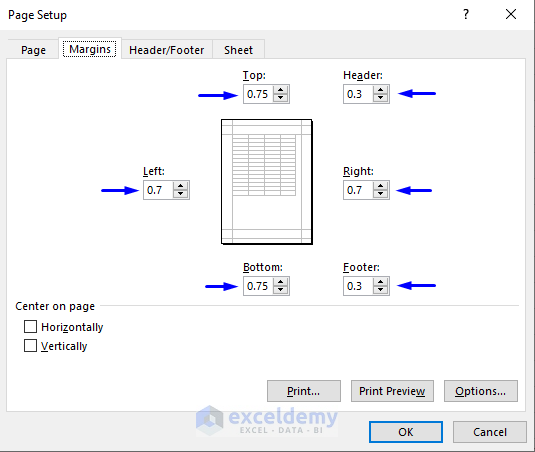
- To reduce the margins further, click on Custom Margins.
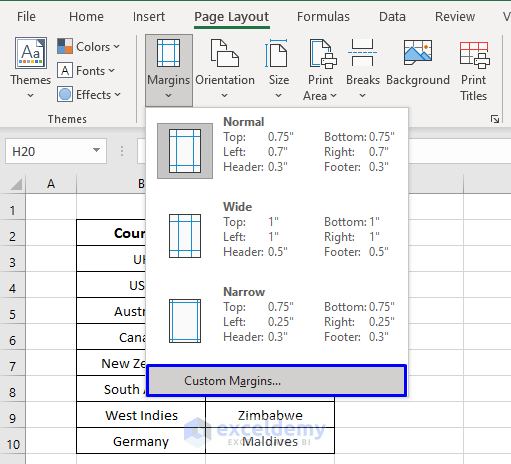
This will open the Page Setup window where you can further modify the margins.
Read More: [Fixed!] Cutting Off Text When Printing in Excel
Method 6 – Reducing the Font Size
Another way to fit more data on one page is by reducing the font size.
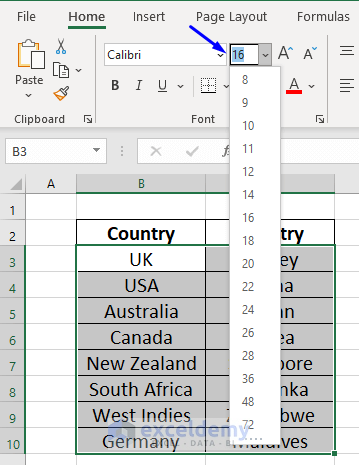
This will create extra space in columns, whose width can then be reduced to fit more data on one page while printing.
Method 7 – Wrapping Text and Resizing Columns
Suppose you have a dataset where the text in your cells is so long that it stretches out your worksheet, making it difficult to fit on one page while printing.

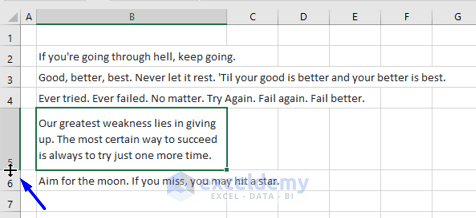
To reduce the width of the spreadsheet, you can use the Wrap Text feature, and then reduce the width or height of your columns or rows. Wrapping text before reducing column width will ensure that no data is hidden in the process.
Steps:
- Select the cells in which the text will be wrapped.
- In the Home tab, select Wrap Text from the Alignment group.
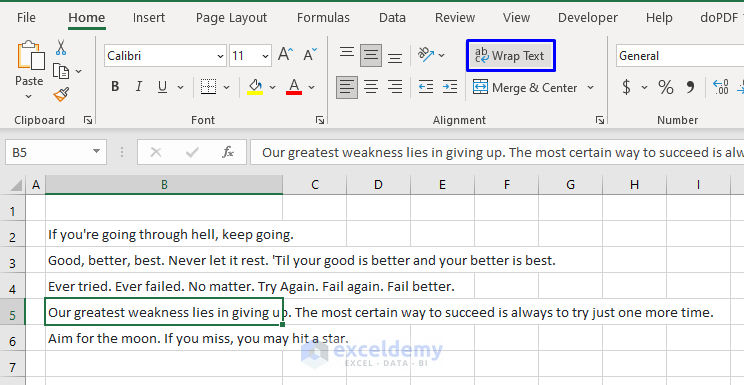
Now, when text in a cell is wider than the column width, it will wrap down to the next line in the same cell. You can then adjust the size of the row or column and the text will re-wrap onto more or less lines accordingly.
Read More: [Fixed!] Cutting Off Columns when Printing
Method 8 – Selecting Only the Necessary Data to Print
We often only need to print some specific data from a larger dataset in a worksheet on one page.
Steps:
- Select the data that you want to print on one page.
- Click on the File tab.
- Click on the Print option.
- Under the Settings group, click the arrow sign beside Print Active Sheets.
- From the option list that appears, select Print Selection.
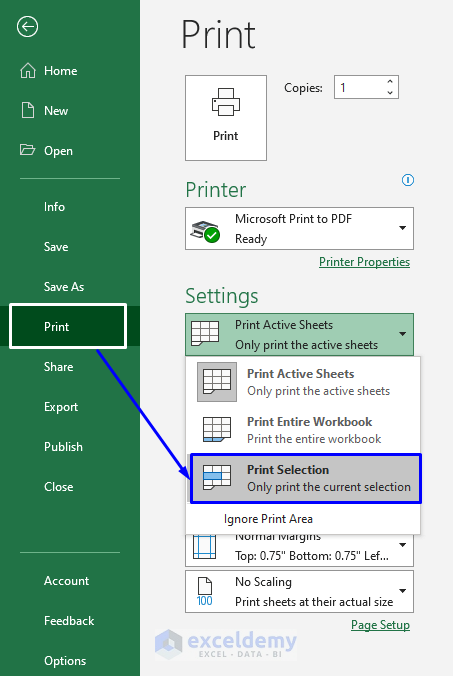
The preview on the right side of the window changes based on the selection. When you are satisfied with how the output will look, print only the selected area.
Read More: How to Make Excel Spreadsheet Bigger When Printing
Method 9 – Inserting Page Breaks
When dealing with a large dataset, it’s obvious that it will take multiple pages to print the whole thing. In this case, we can insert Page Breaks to control where to stop printing the current page and start printing the next.
Steps:
- Select the cell where you want to divide the sheet.
- In the Page Layout tab, under the Page Setup group, click the Breaks option.
- Select Insert Page Break.
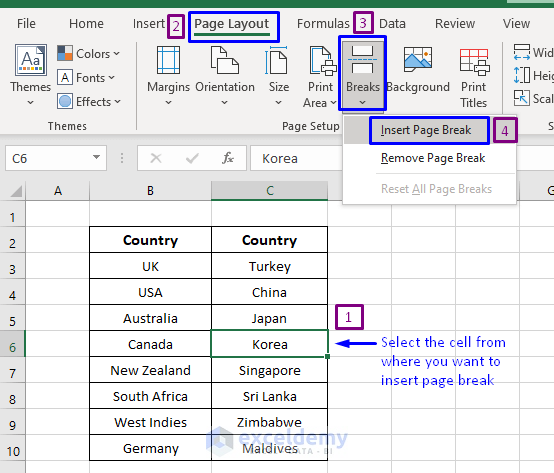
This will apply a four-directional line from the cell selected.
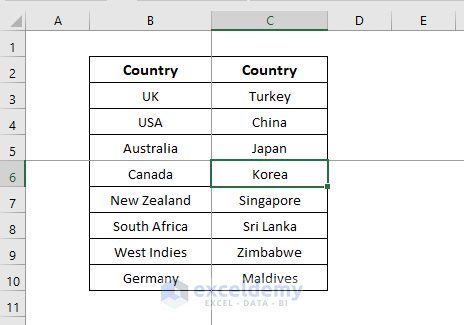
The data above the line will be printed on one page, and the rest on consecutive pages.
Download Workbook
<< Go Back to Print in Excel | Learn Excel
Get FREE Advanced Excel Exercises with Solutions!

