Method 1 – Using ‘Sheet Options’
- Navigate to the Page Layout tab on the ribbon.
- Look for Sheet Options under the Page Layout tab.

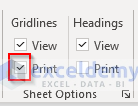
- Within the Sheet Options group, you’ll find two options: Gridlines and Headings.
- To display gridlines in your printout, ensure that the Print checkbox is selected under Gridlines. If it’s not already checked, mark it (✔) to include gridlines in your printouts.
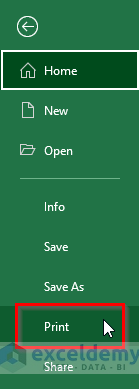
- Go to the File tab on the ribbon or press Ctrl + P to access the main menu.

- Click on Print to proceed.
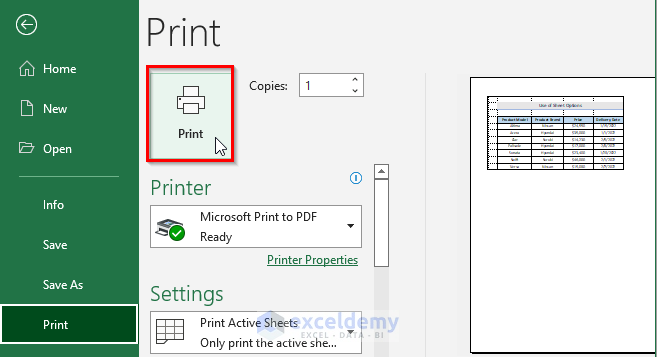
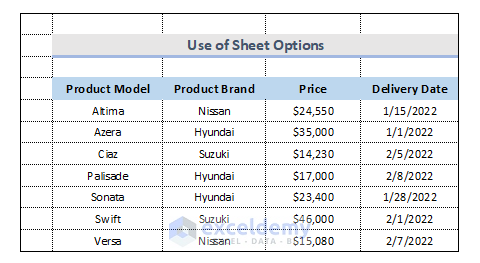
Output
Method 2 – Using the Page Setup Tool
- Similar to the previous method, go to the File tab on the ribbon.
- Under the Page Setup group, locate a small icon (usually shown below the group). Click on this icon.
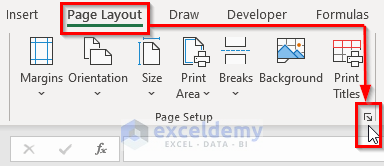
- The Page Setup dialog box will appear.
- In the Sheet section, checkmark Gridlines under the print options.
- Click on Print Preview to review the print settings.
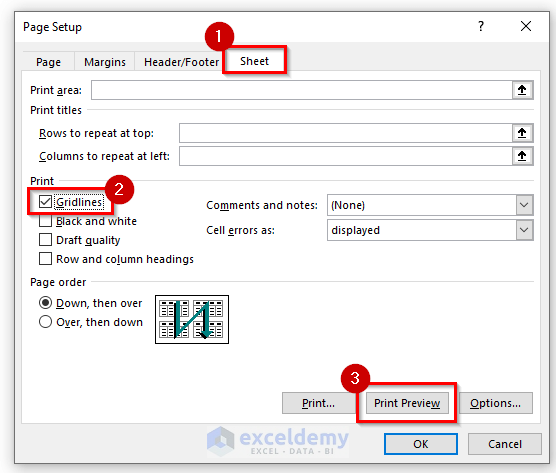
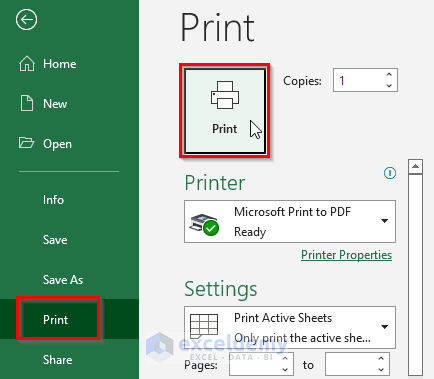
- Select Print to proceed.
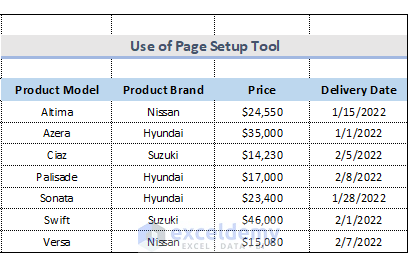
Output
Read More: How to Print Excel with Lines on One Page
Method 3 – Using Excel’s Print Preview Mode
- Go to the File tab from the ribbon.

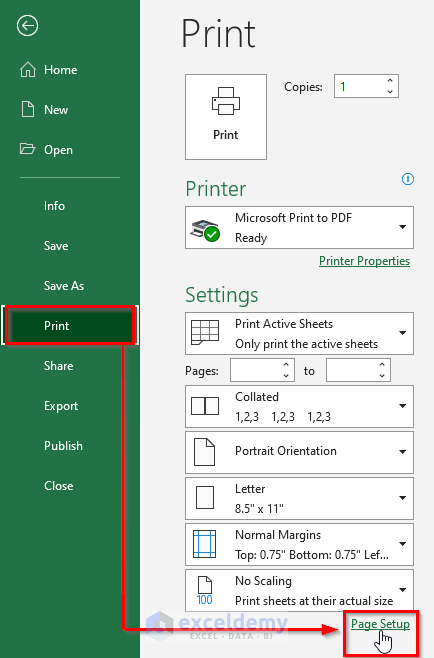
- This will take you to the main menu bar. Alternatively, press Ctrl + P to access the print preview.
- Choose Print.
- In the print preview, select Page Setup as indicated in the picture below.
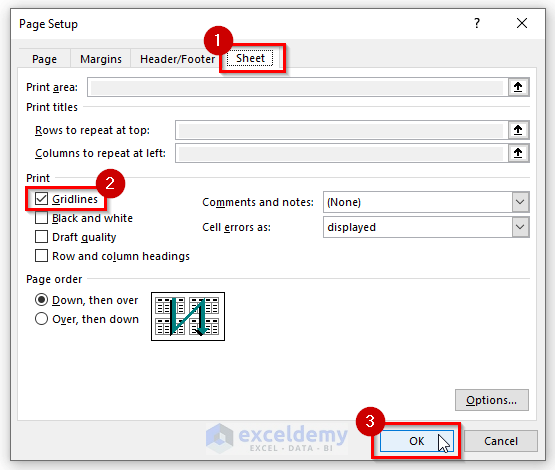
- The Page Setup dialog box will open.
- Under the Sheet section, mark (✔) the checkbox for Gridlines.
- Click the OK button to close the dialog box.
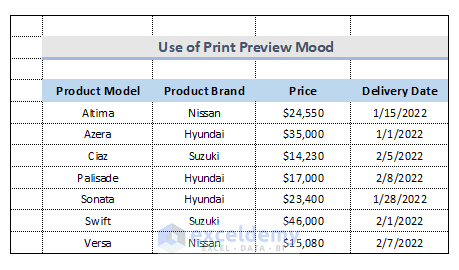
Output
Change the Color of Printed Gridlines
By default, Excel’s gridlines are light gray. If you’re using a color printer and want to customize the gridline color, follow these steps:
- As with the earlier methods, go to the File tab or press Ctrl + P.

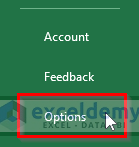
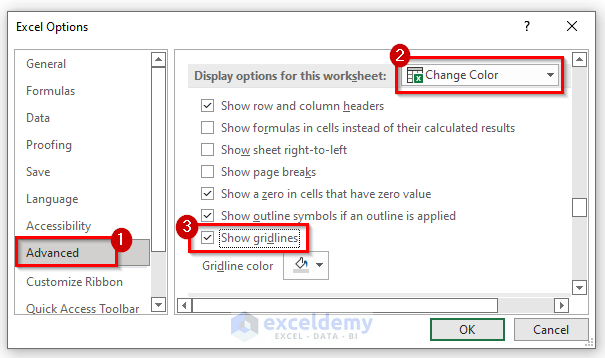
- Choose Options from the File tab menu.
- The Excel Options dialog box will appear.
- Select the Advanced category.
- On the right side, under Display options for this worksheet, choose the sheet you want to color.
- Mark (✔) the checkbox for Show gridlines.
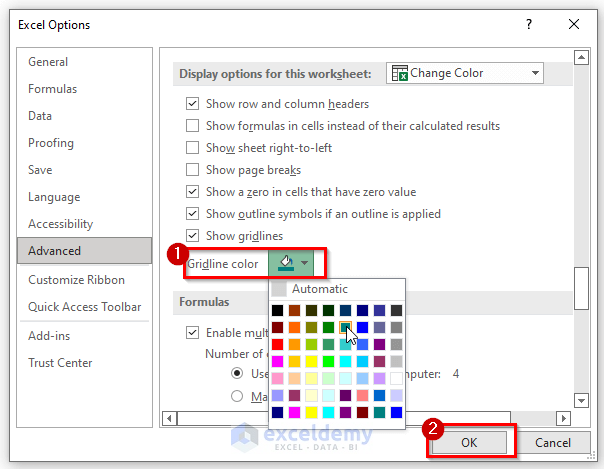
- Select a color for the gridlines (e.g., Teal) and click OK.
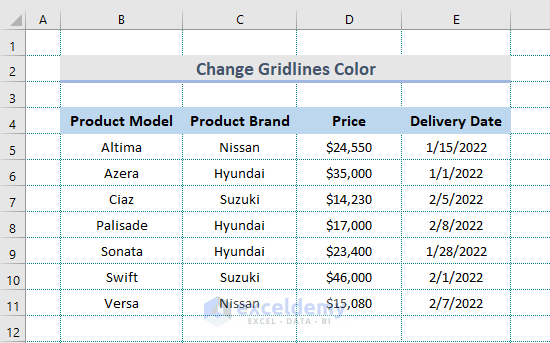
Output
Troubleshooting Printing Issues in Excel
When printing Excel sheets, gridlines are typically visible only around the data. However, if you want gridlines to appear around empty cells as well, ensure that the print area includes those cells. If you’re still encountering problems after trying the methods mentioned earlier in the article, follow these additional steps to resolve the issue:
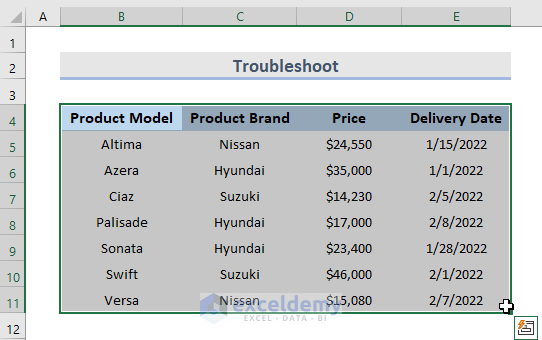
- Select the Entire Data Range:
- Highlight the entire data range for which you want to display gridlines.
- Access Page Setup:
- Go to the File tab on the ribbon (similar to the previous procedure).
- Look for a small icon in the Page Setup group (as shown below) and select it.
- The Page Setup dialog box will appear.
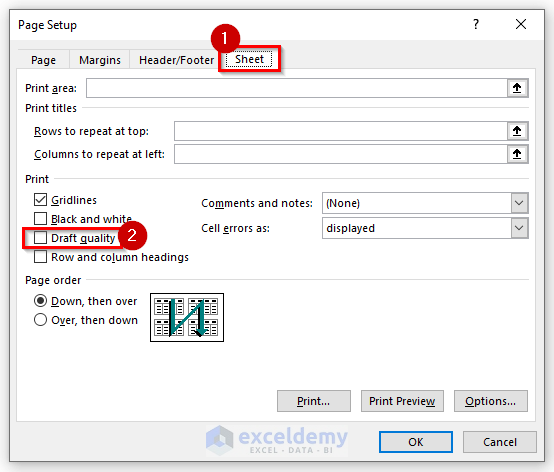
- Check Draft Quality:
- Within the Page Setup dialog box, navigate to the Print option.
- Ensure that the Draft quality checkbox is unchecked.
- Click the OK button to confirm.
- Using Borders to Define Cell Boundaries:
- If the issue persists, consider using borders to create gridlines around your data:
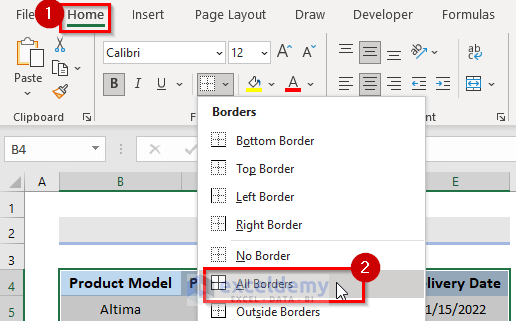
- Choose the range of cells where you want the boundaries to be drawn.
- Go to the Home tab on the ribbon.
- From the Font group’s dropdown menu, select the Border tool.
- Choose All Borders to apply borders to all sides of the selected cells.
- If the issue persists, consider using borders to create gridlines around your data:
- Check Printer Driver Compatibility:
- If none of the above solutions work, verify whether the printer driver is causing any issues.
- Visit the printer manufacturer’s website to download and install the most recent driver.
Read More: [Fixed!] Missing Gridlines in Excel When Printing
Download Practice Workbook
You can download the practice workbook from here:
Related Article
<< Go Back to Print Gridlines | Print in Excel | Learn Excel
Get FREE Advanced Excel Exercises with Solutions!

