Method 1 – Use the ‘Protect Sheet’ Button to Protect an Excel Sheet with Password
STEPS:
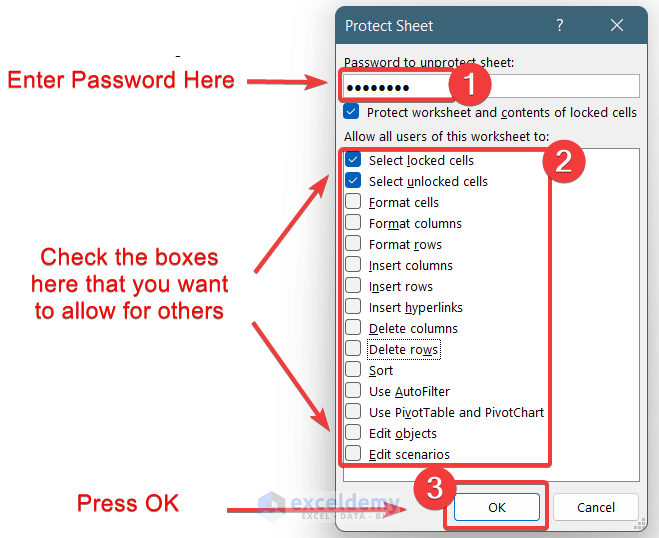
- Select Review and choose Protect Sheet.

- A window will open named ‘Protect Sheet’.
- Enter the password in the text box.
- Check the boxes for actions you want to allow for users that don’t enter the password.
- Press OK.
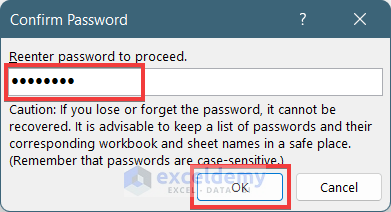
- Re-enter the password and press OK.
Note:
You can also select ‘Protect Workbook’ to protect the full workbook.
- Go to Review and select Unprotect Sheet.

- Enter a password and set the restrictions.
Read More: Excel VBA to Protect Sheet but Allow to Select Locked Cells
Method 2 – Encrypt an Excel Sheet with a Password to Protect It from Opening
STEPS:
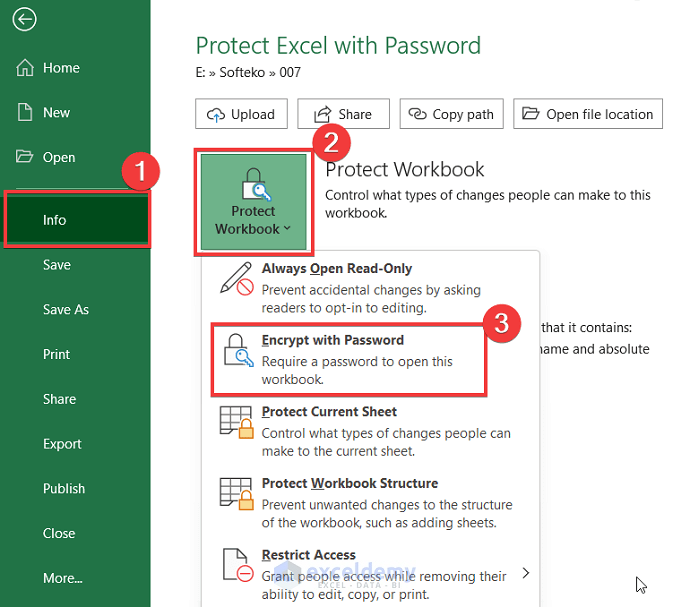
- Go to File and select Info.
- Press on the ‘Project Workbook’ option.
- Press the ‘Encrypt with Password’ option.
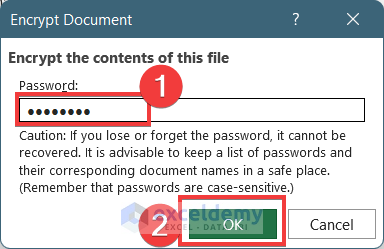
- A new window will appear to ask for a password. Write the password in the box and press OK.
- Another box will appear which will ask you to write the password again.
- Re-enter the password and press OK.
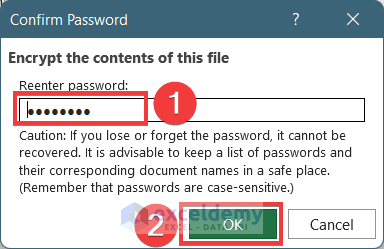
Notes:
- With this method, you have to write the password each time opening of this file.
- You can also select ‘Protect Current Sheet’ and ‘Protect Workbook Structure’ from the options under the ‘Protect Workbook’ option. This is the same as the way of protecting the Excel sheet with the password mentioned before.
Read More: How to Password-Protect Hidden Sheets in Excel
Method 3 – Set a Password While Saving an Excel File
STEPS:
- Go to File and select Save as, and then go to the location or folder where you want to save. Give the file a name.
- Select ‘Tools’.
- Select ‘General Options’. A new window will appear.
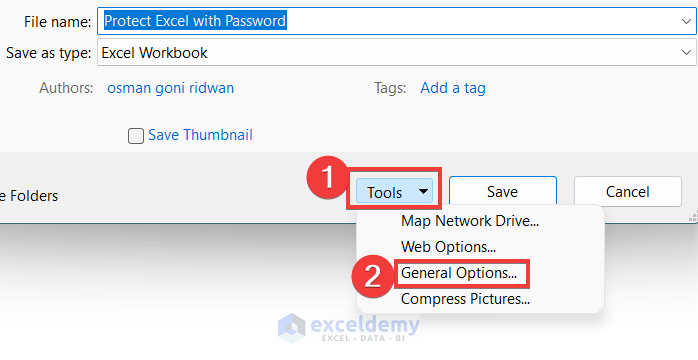
In the ‘General Options’ window, you will find 2 options:
-
- Password to open: You should select this option if you want to restrict the opening of this file by any unauthorized person. Only the people who know the password can open the file.
- Password to modify: If you have no problem with the privacy of the data of this Excel file but don’t want any changes made by others then you can select this option. So only the authorized persons who have passwords can edit this file. And the other people will open the file in ‘Read only’ mode.
To Set a Password Restricting the Opening of the Excel Sheet:
- Press on the box named ‘Password to Open’ and input the password here.
- You may or may not check the box named ‘Read-only recommended’ as you can’t open this file with read-only mode.
- Press OK.
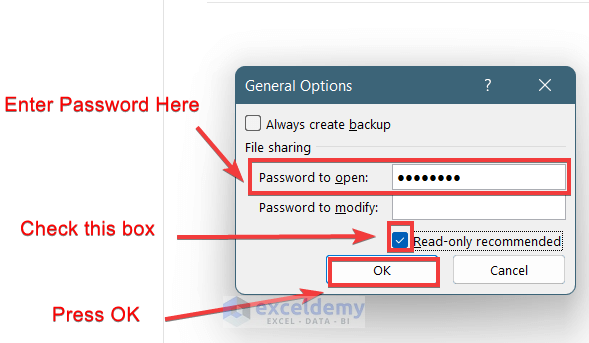
To Set a Password Restricting the Modification of the Excel Sheet:
- Check the box named ‘Password to Modify’ and input the password here.
- Check the box named ‘Read-only recommended’ to open the file in read-only mode.
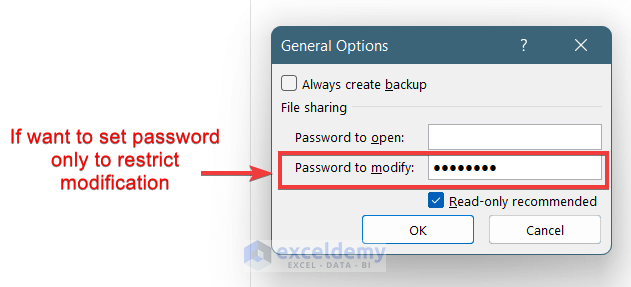
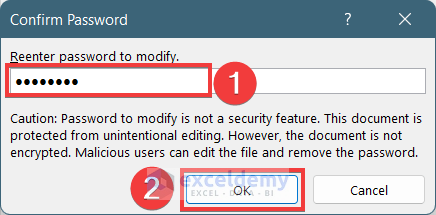
- Another box will appear and ask you to re-type the password. Re-enter the password and press OK.
Read-only mode: Opening an Excel file in this mode won’t allow you to add or edit any data. You can only view the data. You can use the copy and paste method to create a new file to use this data.

Things to Remember
- Using the ‘Protect Sheet’ option will protect only that sheet. If you want to protect all sheets of a workbook then select the ‘Protect Workbook’ option.
- You can set passwords of any length, characters, or number, but keep in mind passwords are case-sensitive.
- To unprotect the sheet, you have to enter the password.
Download the Practice Workbook
Here is a sample workbook containing password-protected worksheet(s). You can open it with the password 12345678.
Related Articles
- How to Protect an Excel Sheet Except for Certain Cells
- How to Protect Excel Sheet from Viewing Using Password
<< Go Back to Protect Excel Sheet | Excel Protect | Learn Excel
Get FREE Advanced Excel Exercises with Solutions!

