This is an overview.
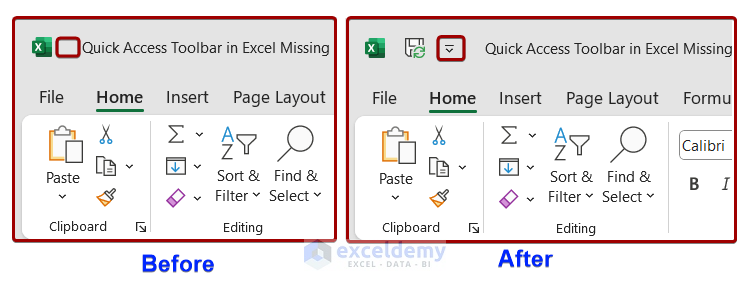
Why is the Quick Access Toolbar Missing?
Possible Reasons:
- It was Accidentally Removed.
- The Customized Quick Access Toolbar was not Saved for all documents.
- The Software is not updated.
- The Workbook or Application is corrupted.
Solution 1 – Show the Quick Access Toolbar Using Built-in Features
- Right-click any tab on the Ribbon.
- Choose Show Quick Access Toolbar.
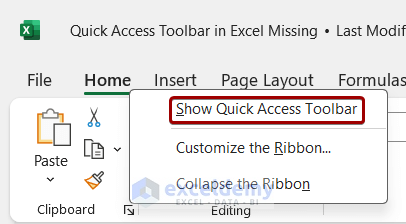
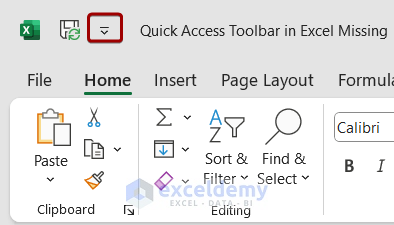
The Quick Access Toolbar is visible.
Solution 2 – Reset the Quick Access Toolbar
- Click the File tab.
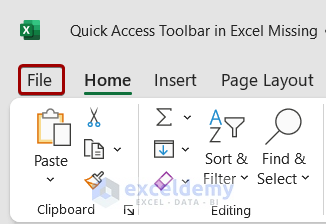
- Select Options to display the Excel Options window or press Alt + F + T.

In the Excel Options window:
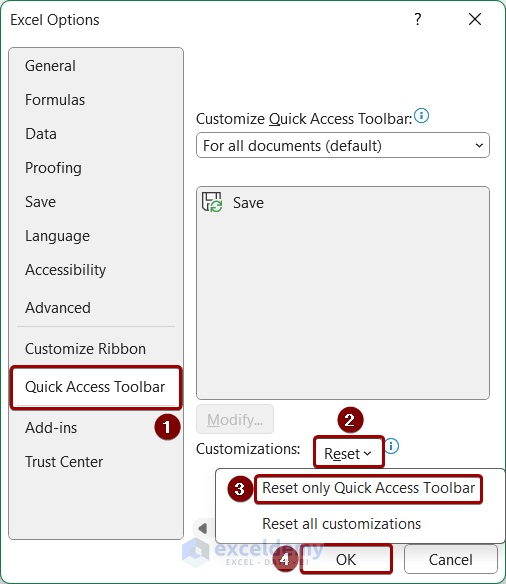
- Select Quick Access Toolbar.
- Go to Customizations > Reset > Reset only Quick Access Toolbar.
- Click OK.
Solution 3 – Show the Customized Quick Access Toolbar for All Documents
- Follow the first 2 steps of the previous solution to open the Excel Options window.
- Click Quick Access Toolbar.
- Click Customize Quick Access Toolbar.
- Select For all documents (default) and click OK.
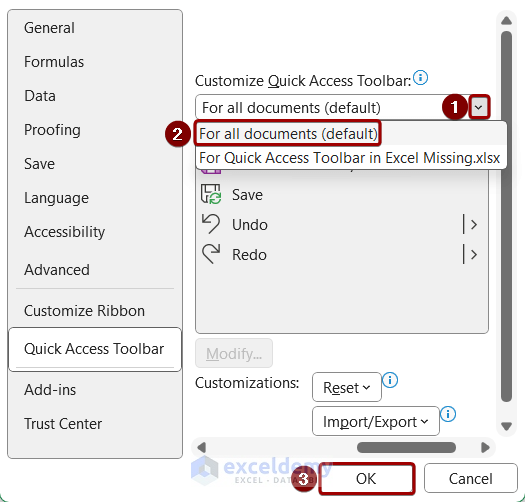
The Quick Access Toolbar will be available in all Excel files.
Solution 4 – Update the Microsoft Office Application
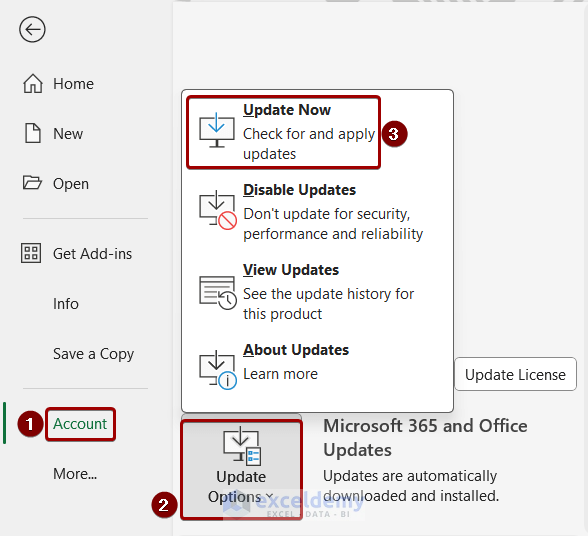
- Go to File tab > Account > Update Options > Update Now.
Solution 5 – Repair the Corrupted Workbook
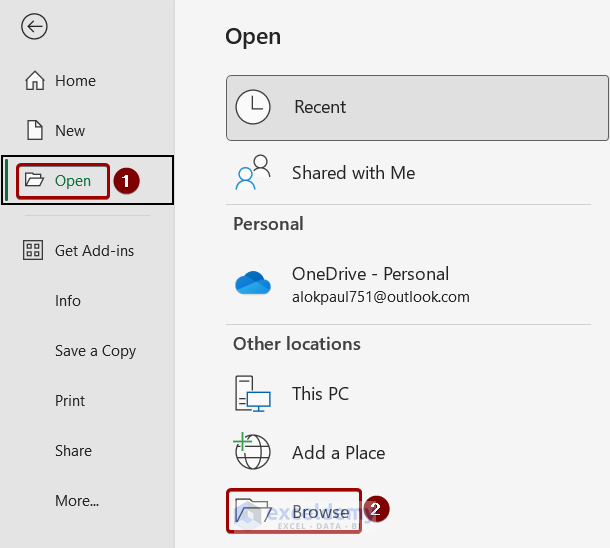
- Go to File tab > Open > Browse.
- Select the corrupted file in File Explorer.
- Click Open > Open and Repair.
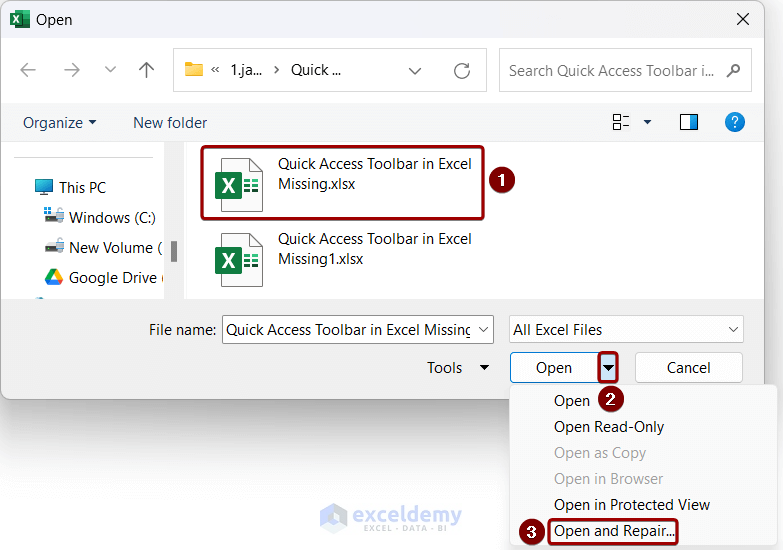
- Click Repair in the warning box.

Solution 6 – Repair the Microsoft Office Application
- Right-click the Start icon.
- Select Installed Apps.
You will see the Settings window with the installed apps.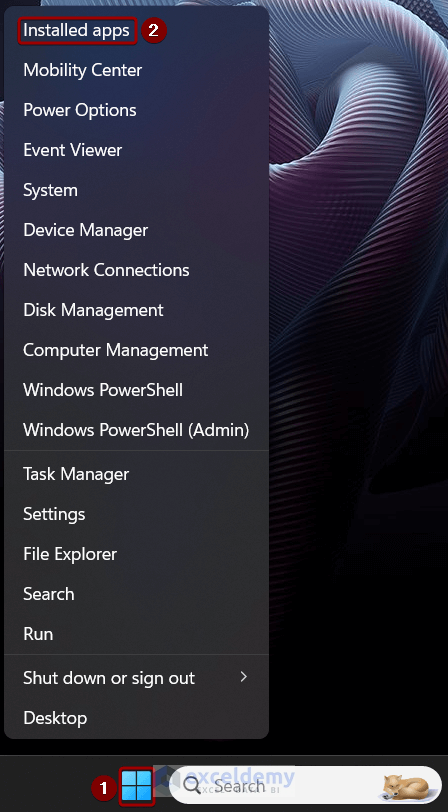
- Find Microsoft 365 and click the triple dot (…).
- Click Modify.
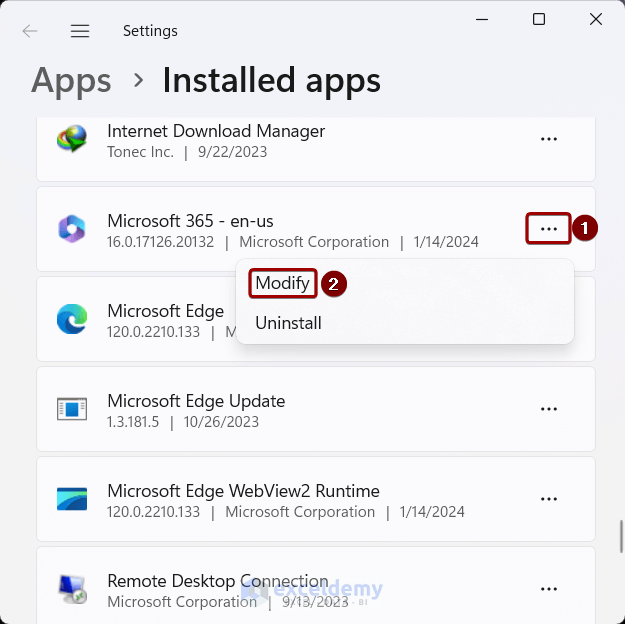
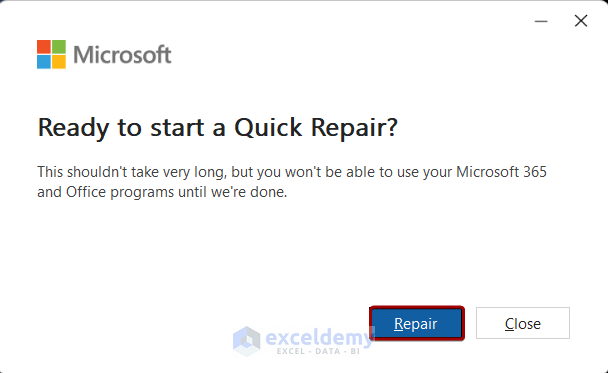
- Select Quick Repair > Repair.
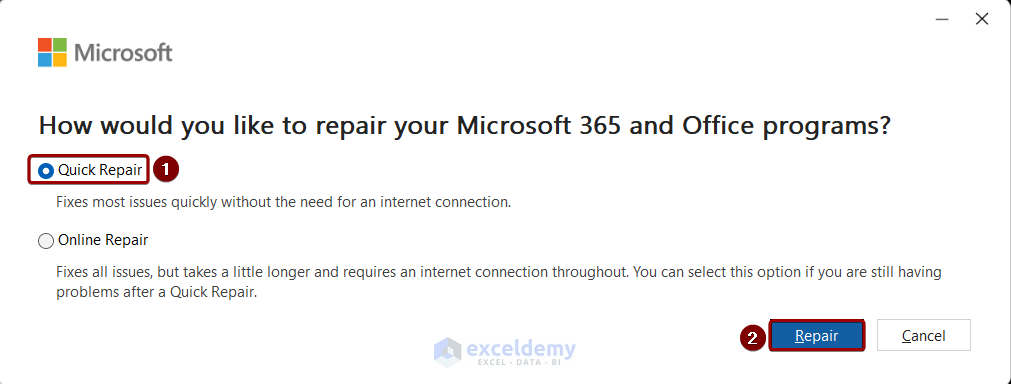
- Click Repair.
Frequently Asked Questions
How to export or save the Quick Access Toolbar settings for backup?
- Go to File > Options.
- In the Excel Options window, click Quick Access Toolbar > Customizations > Import/Export.
- Select Export All Customizations, save the file as Export Office UI file.
<< Go Back to Quick Access Toolbar in Excel | Excel Parts | Learn Excel
Get FREE Advanced Excel Exercises with Solutions!

