Method 1 – Activate Developer Tab
To remove an XML mapping, activate the Developer tab first. You can only open the XML Map dialog box from the Developer tab.
To activate the Developer tab,
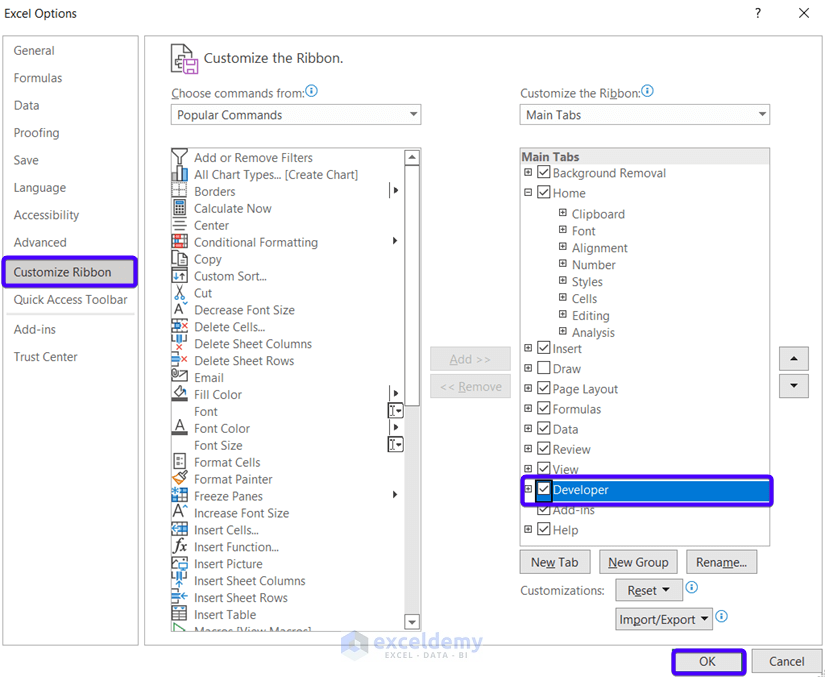
❶ Go to the File menu.

❷ Select Options.

Excel Options dialog box will appear.
❸ Select Customize Ribbon command in the left-most column.
❹ Select Developer in the Main Tabs section.
❺ Hit the OK button.
Check out your Excel ribbon, you will find the Developer tab this time.

Method 2 – Open XML Source Dialog Box
To avail of the XML MAP dialog box, open the XML Source dialog box first.
❶ Select any cell in the Table you created using the XML mapping feature.
❷ Go to the Developer tab.
❸ Click the XML drop-down.
❹ Select the Source command in the XML group.
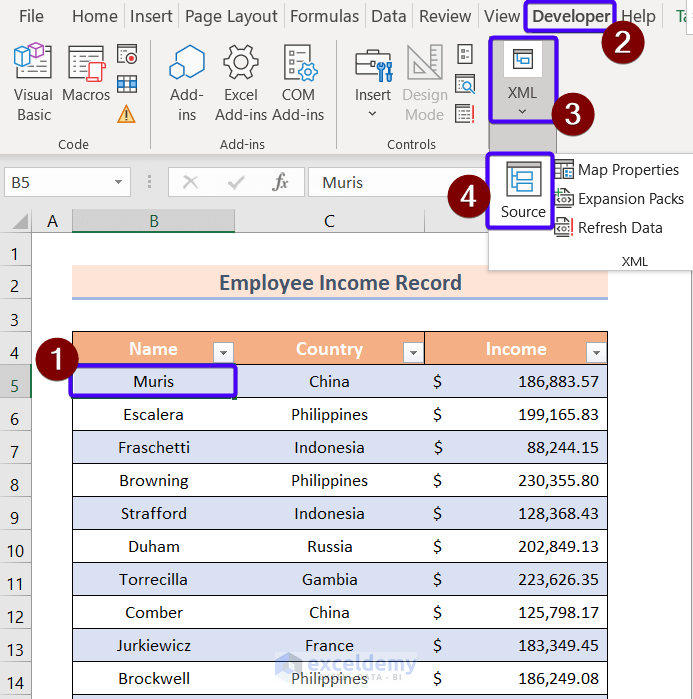
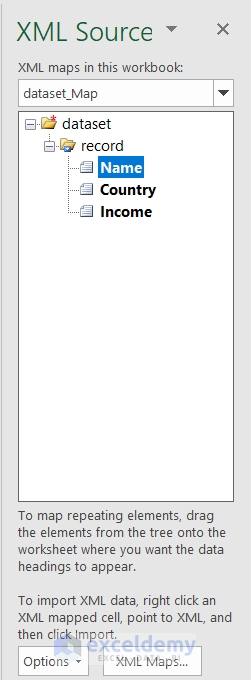
The XML Source dialog box will appear.
Method 3 – Remove XML Mapping in XML Map Dialog Box
After you open the XML Source dialog, follow the steps below to remove the XML mapping in Excel.
❶ Click on the XML Maps command at the bottom of the XML Source dialog box.
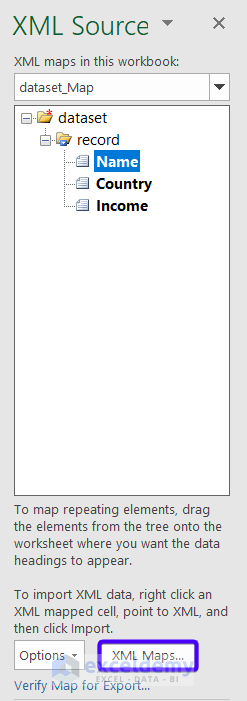
The XML Maps dialog box will appear.
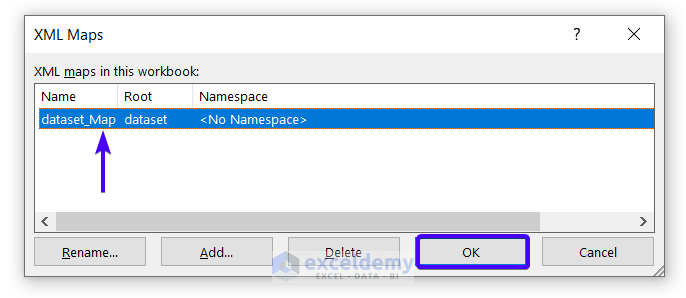
❷ Select your preferred XML map in the ‘XML maps in this workbook’ section.
❸ Click on the OK button to remove the map.
A warning dialog box will appear that says, ‘If you delete this XML map, you will no longer be able to import or export XML data using this XML map.’
❹ Click OK to delete the XML map permanently.

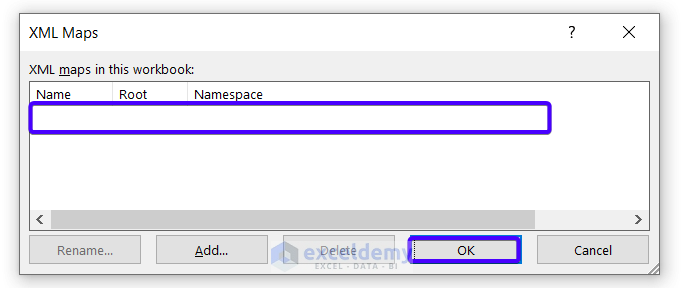
Check the XML Maps dialog box. Your selected XML map has been removed successfully.
❺ Click on the OK button to go back to your Excel worksheet.
Download Practice Workbook
You can download the Excel file from the following link and practice along with it.
Related Article
<< Go Back to XML Mapping in Excel | Export Excel to XML | Export Data from Excel | Learn Excel
Get FREE Advanced Excel Exercises with Solutions!

